Following Video 1
Note that I'm not really doing anything smart here, just blogging my thoughts as I copy and transcribe the C# from Sebastion's video series into typescript and try to translate from Unity to Cocos for the sake of learning a little bit more about Cocos. For your own good, it might help if you watch Sebastion's video first. You can do so here.
The finished code for this little project can be found here on Github. The blog post is not a tutorial, but just noting the few places I got tripped up and where I discovered something I didn't know.
Setup
First things first, I made a new project, selected 3D since I knew that one day if I manage to follow all the steps in the youtube tutorial, I'd be doing something 3d-ish, and I didn't want to have to figure out how to change from 2d to 3d later... assuming there is one. Next, I ran into the obvious issue of following a C# unity tutorial and trying to convert it into a CocosCreator typescript program. Considering that I don't program regularly in either of these languages, I figured this would be a good learning experience, and it didn't take too long before I was running into my first issue.
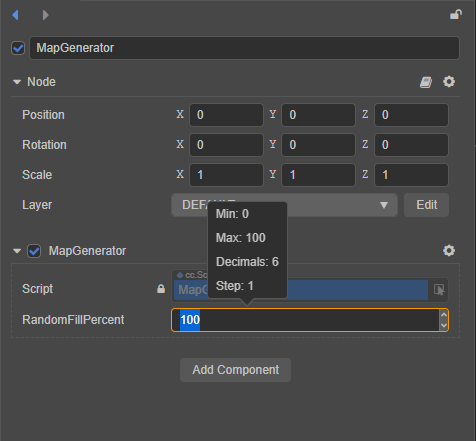
About 2 minutes into the first video I saw Sebastian's use of the range type. I looked in cocos creator's documentation, and tried to google a little bit but didn't find anything similar in cocos. So, I settled in on a plain number, but out of curiousity, I tried playing around with the property annotation, and to my surprise this worked:
@property({type: CCInteger, min: 0, max: 100})
public randomFillPercent: number = 40;

It took about 10 minutes of searching the net to actually find the documentation about this by the way. I thought that cocos, since it appeared in windows visual studio as a possible game engine on the project start page I saw before, was more mature, but eh... I'm starting to rethink that. But not rethinking it enough to back out of my hope to follow Sebastian's tutorial in this engine. So, with a decent reference to the API documents for coco, and google as my ally for learning more typescript, I continued on. After a little more reading I found out that there was an actual range property and that I could make the component in the Cocos UI become an actual slider like this
@property({type: CCInteger, range: [0, 100, 1], slide: true})
public randomFillPercent: number = 40;
Pretty neat. Moving on, I watched the video as Sebastian started making his representation of the world.
Random Numbers
Nothing special about the array used to keep track of the color of the map pieces besides its syntax being >very Java-y:
map: Array<Array<number>> = [[0,0]];
however when I wanted to fill the map with a random 1 or 0 based on a seed value I ran into a problem. Javascript, and therefore Typescript, doesn't let you seed a random number generator. There's no built ins for this like you'd find in JVM based languages. Luckily, StackoverFlow appears to have me covered so after staring a little bit and deciding that I didn't care to understand the math, I tossed the pieces together into a simple class
class PseudoRandom {
    private seed: string;
    private rand: Function;

    constructor(seed: string) {
        this.seed = seed;
        let x = this.xmur3(seed);
        this.rand = this.sfc32(x(), x(), x(), x())

    }
    next (min: number, max: number): number {
        return this.rand() * (max - min) + min;
    }

    nextRand (): number {
        return this.rand();
    }

    xmur3(str: string) {
        for(var i = 0, h = 1779033703 ^ str.length; i < str.length; i++)
            h = Math.imul(h ^ str.charCodeAt(i), 3432918353),
            h = h << 13 | h >>> 19;
        return function() {
            h = Math.imul(h ^ h >>> 16, 2246822507);
            h = Math.imul(h ^ h >>> 13, 3266489909);
            return (h ^= h >>> 16) >>> 0;
        }
    }

    sfc32(a: number, b: number, c: number, d: number) {
        return function() {
          a >>>= 0; b >>>= 0; c >>>= 0; d >>>= 0;
          var t = (a + b) | 0;
          a = b ^ b >>> 9;
          b = c + (c << 3) | 0;
          c = (c << 21 | c >>> 11);
          d = d + 1 | 0;
          t = t + d | 0;
          c = c + t | 0;
          return (t >>> 0) / 4294967296;
        }
    }
}
Then I was able to populate my array data like so
randomFillMap() {
    if (this.useRandomSeed) {
        this.seed = new Date().toString()
    }

    let pseudoRandom = new PseudoRandom(this.seed);

    /* Random seeding */
    for (let x = 0; x < this.width; x++) {
        for (let y = 0; y < this.height; y++) {
            this.map[x][y] = (pseudoRandom.next(0, 100) < this.randomFillPercent) ? 1 : 0;
        }
    }
}
Feeling pretty good now, I watched the next few seconds of the video and ran into a new problem. The heck is a Gizmo? Reading the first paragraph of the docs, I found out it's just a debugging tool. So, ignoring that, I continued watching the video and implemented the wallcount function and the smoothing function. At that point, I was done besides needing to take the youtube comments about smoothing into consideration, but before that, I really needed to deal with the fact that Cocos doesn't _have_ a Gizmo at all. So, instead, my thought was to use what I learned in the basic game tutorial and make a prefab to generate cubes and then pray that I'd be able to set their color in some way.
Luckily, the prefab cube is a 1x1x1 thing which means that it pretty much corresponds to the map we were making. So, this became surprisingly easy:
/* Debugging code */
@property({type: Prefab})
public cubePrefab: Prefab = null;

generateCubes() {
    /* When we generate, remove anything existing */
    if (!this.cubePrefab) {
        console.log('No cube prefab set.');
        return;
    }

    this.node.removeAllChildren();

    for (let x = 0; x < this.width; x++) {
        for (let y = 0; y < this.height; y++) {
            if (this.map[x][y] == 1) {
                let block = instantiate(this.cubePrefab);
                this.node.addChild(block);
                block.setPosition(new Vec3(x, y, 0));
            }
        }
    }
}
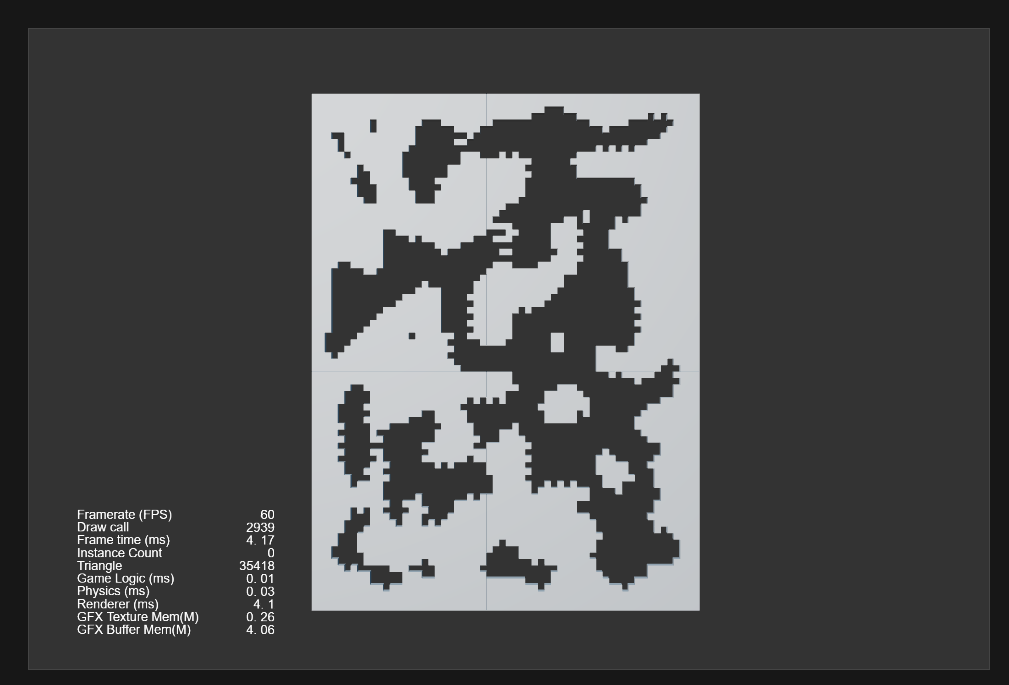
Filling in the world with cubes.
While easy, finally getting to see my little world of cubes had an unexpected bonus. It also revealed a bug in my code. Specifically, all my map piece were set to 1. This took a long time to figure out. But the basic issue was
new Array<Array<number>>(this.width).fill(new Array(this.height).fill(0));
isn't apparently the way to create an array. Rather, I needed to do this:
    let mapCopy = []
    for (let x = 0; x < this.width; x++) {
        mapCopy.push([]);
        for (let y = 0; y < this.height; y++) {
            mapCopy[x][y] = 1;
        }
    }
what's the difference? I have no idea, but all the MDN documentation I was reading implied that they were the same, so imagine my surprise when this worked and I finally got what I wanted to see:

Wonderful. I was happy this worked out, but unhappy that troubleshooting the weird array initalization problem held me up for another 30 minutes or so and that it was now past 1am. Still, another good hour programming session with Cocos, so it felt like I had done alright considering how foreign typescript, C#, and all of this stuff generally was to me.