What's up?
So I like Match3 games, personally I think Huniepop is one of the best match3 games on the planet, and if you disagree, you're wrong or just too much of a prude to look past a silly dating game to its really really well polished match mechanics. Or, maybe, you've just been playing Huniepop 2 recently and been enjoying the double date mechanics. Which were admittedly pretty neat even if the characters and writing jumped off the deep end of the beach.
But we're not here today to talk about the improvements in gameplay of HP versus the classics like Bejeweled or Candy Crush. We're here to talk about how to make your own match3 game. I had a ton of fun streaming the development progress of this project, and this post is here to summarize and act as a tutorial for you to get some ideas of your own.
What tools are we using?
- LibGDX 1.12.1
- JUnit 5.10.0
- Piskel & good ol MS Paint
- Itch.io assets
- Our brain.
Table of Contents
If you're returning here and want to jump down to a particular part, or just want to skip to something that sounds interesting, use the links below. Each section has a ↩ anchor if you want to come back up here.
- Project setup
- Let's talk tiles
- Setting up cameras and viewports
- The game area
- Generating tokens
- Input handling
- Valid moves only
- Move speculation
- Processing matches
- Scoring
- An edge case we need to fix
- Using a non-default font
- Loading in a background
- Loading real assets for token graphics
- Adding in sound effects
- Adding in background music
- Using more than one screen
- A configuration page
- The end game
- One last bug
- Adding instructions and persisting settings
- Deploying the game as an executable
Project Setup ↩
As per usual with LibGDX, we'll create our project using the initializer script mentioned on the wiki. We'll target the Desktop platform and not bother with any of the extensions+ since this isn't a controller game, it's a drag with the mouse game. Press the generate button then follow the instructions to get your environment ready for coding.

Once the project has been generated and you've loaded it in your IDE of choice (Vim, Intelliji, Netbeans, whatever floats your boat), go ahead and run the gradle
task for desktop:run just to confirm that everything is working as expected. You should see the usual badlogic splash image like so:
Go ahead and update the Match3Game to remove the default splash image, we won't be using it so you won't need that Textureblock
either.
public class Match3Game extends ApplicationAdapter {
    SpriteBatch batch;

    @Override
    public void create () {
        batch = new SpriteBatch();
    }

    @Override
    public void render () {
        ScreenUtils.clear(Color.LIGHT_GRAY);
        batch.begin();
        batch.end();
    }

    @Override
    public void dispose () {
        batch.dispose();
    }
}
With that, we've got our blank slate to draw on! Every journey begins with a first step, so let's make the basic building block we'll be using for everything. A tile.
Let's talk tiles ↩
Or tokens as they're sometimes called. These are the pieces that users will be dragging and trying to make matches with. Putting aside what sort of effect matching different types of tokens do, let's talk about some simple properties of these things to understand how we should go about building them.
First off, since we'll be drawing them on the screen they'll have to have a position. We can use Vector2 from the engine
for this and it will give us some other useful functions. Besides this, we'll need to know the type of tile it is, which we'll track with a
TileType enumeration, and lastly a texture to actually draw onto the screen. For textures, we could draw a simple square in paint,
or for the time being, simply draw it with LibGDX's PixMap types until we've got some basic logic in place. While we're going to use
real assets and the AssetManager I do find not having to think about loading external files
to be useful, so let me show you what making our own texture and rendering it would look like.
private Texture makeTexture(Color color) {
    Pixmap pixmap = new Pixmap(width, height, Pixmap.Format.RGBA8888);
    pixmap.setColor(color);
    pixmap.fill();
    Texture texture = new Texture(pixmap);
    pixmap.dispose();
    return texture;
}
Setting the width and height to a reasonable number, say 70, we can make a maroon square texture that we can render to the screen. In order to use the
texture, we'll need to pass it to our game's SpriteBatch's draw function. But of course, we're talking about the context of a tile right?
So, let's put together the first part of our graphical code for displaying the tile itself. We'll creatively call this TileGraphic because
this is going to be the class that handles the graphics for a tile.
public class TileGraphic {
    public static int TILESIZE = 70;
    private final TileType tileType;
    private Vector2 position;
    Texture texture;

    public TileGraphic(Vector2 position, TileType tileType) {
        this.position = position;
        this.tileType = tileType;
        this.texture = makeTexture(TileType.colorFor(tileType));
    }

    private Texture makeTexture() {
        Pixmap pixmap = new Pixmap(TILESIZE, TILESIZE, Pixmap.Format.RGBA8888);
        // emitting the code we had above that was the same
    }

    public void render(float delta, SpriteBatch batch) {
        batch.draw(texture, position.x, position.y);
    }
}
There's nothing of note here besides we're using RGBA8888 which supports transparency. And if you're following along
you'll be getting an error about the TileType enum not being defined yet. So, let's define that enumeration:
public enum TileType {
   LowValue, MidValue, HighValue,
   Multiplier,
   Negative;
}
And if we make a tile in our game class and pass it the sprite batch and a time. Then we'll see something like this:
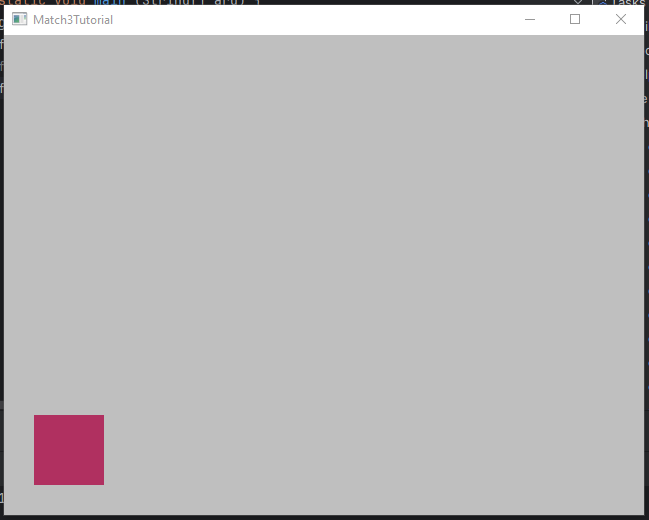
Great! But, you may already be thinking: Okay but if everything is the same color, how will the user tell the tiles apart. And that would be a great question to ask, and something very easy for us to tweak. First off, we need a way to translate the type of tile into a color.
static public Color colorFor(TileType tileType) {
    switch (tileType) {
        case LowValue:
            return Color.GREEN;
        case MidValue:
            return Color.BLUE;
        case HighValue:
            return  Color.RED;
        case Multiplier:
            return Color.YELLOW;
        case Negative:
            return Color.BROWN;
    }
    return Color.CHARTREUSE;
}
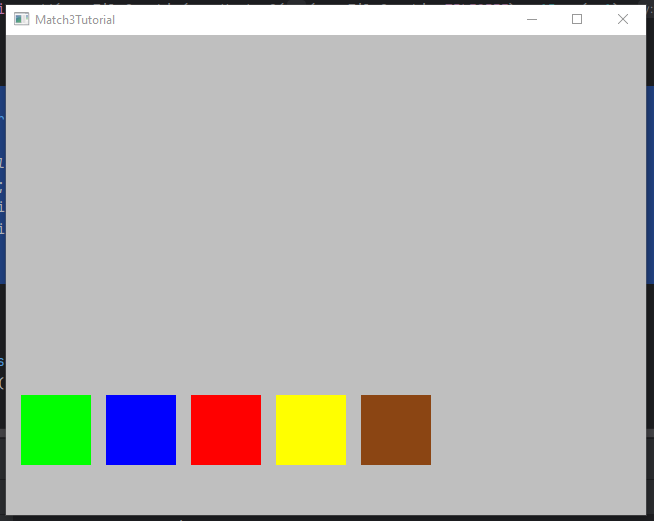
A simple switch statement works well for this, and since the compiler for Java isn't as smart as Scala's compiler, it requires us to have a return after the body of the switch. Since I personally know it will never hit that case unless I forget to do something on this code that won't last long, I'm just returning a horrid color so it catches my attention if I mess this up before we move onto the next section of this tutorial. Remember, this is just throwaway code because I think it's helpful for me to tell you how to get started quickly without having to become an artist.
Anyway, to look at our lovely tiles, we can loop over the enumeration values and position the tiles on the screen from our Match3Game class like so:
@Override
public void create () {
    batch = new SpriteBatch();
    tileGraphics = new LinkedList<>();
    for (int c = 0; c < TileType.values().length; c++) {
        TileType tileType = TileType.values()[c];
        tileGraphics.add(
            new TileGraphic(
                new Vector2(
                    (c * TileGraphic.TILESIZE) + 15 * (c+1), 50),
                    tileType
                )
        );
    }
}

@Override
public void render () {
    float delta = Gdx.graphics.getDeltaTime();
    ScreenUtils.clear(Color.LIGHT_GRAY);
    batch.begin();
    for(TileGraphic tileGraphic : tileGraphics) {
        tileGraphic.render(delta, batch);
    }
    batch.end();
}
The funny math on the position we're setting for the tile graphic is to add in a little space and you don't need to think too hard about this. Again, we're writing some throw away code so we can make something and feel good about making progress. Trust me, if we started with the grid code, then we'd be in the weeds right away and you might lose motivation. Baby steps! And now we have some tiles displayed on our screen:
Great, now, at this point we can decide to either fix the texture loading to use the asset manager and actually make some sprites and things, or we can think about what each of these tiles is going to have to do eventually, and talk about how to handle that. One of these is more fun that the other, so let's get down to thinking about state. We'll deal with our assets after we've got some basics down.
Tile State
If we think about your average match game, there's basically three states: Selected, not selected, and part of a match. We could add more1, but for the time being this is enough. When a user clicks on an idle tile it's going to become selected so they can drag it around within its row and column. If, while moving this tile, we end up with a sequence of 3 or more of the same types of tiles in a row, these tiles will enter their matching state.
The interesting thing of course is that the tile states aren't really exclusive. There's no rule that says only a selected tile can become a matched tile, or anything like that. Any state can transition to any other state. So, we could use a simple enumeration and a switch statement to manage what state the tile is in, but let's consider for a moment that when it comes to animation, LibGDX uses the amount of time that has passed to determine which keyframe to show. So, keeping track of how long we've been inside of any given state is useful. Considering that all three states are the same in this regard, we can define a base class like so:
public abstract class TileGraphicState {

    protected float timeInState;

    public void update(float delta) {
        timeInState += delta;
    }
    public float getTimeInState() {
        return timeInState;
    }
    ...
}
Then, to implement this abstract class we'll make three singletons Matching, NotSelected, and Selected. I'll include one below
because all of them look nearly the same:
public class Matching extends TileGraphicState {

    private final static Matching instance = new Matching();

    public static Matching getInstance() {
        return instance;
    }

    private Matching() {
    }
}
You might be asking why we're using a singleton for this. It's a good question! You could have a public constructor and make
these whenever you'd like. But once you start animating the code, sliding tiles around, and each tile can go between states independently
from each other, you'll find that any sort of looping animation is going to start drifting. If you had a pulsating glow around a token for
example, it will look a bit odd to the user if all the selected tiles of a row are pulsing brightly at different times. This was a bug I ran
into when I did some prototyping and it's an ugly one to solve. But a singleton does the trick just fine because then every animation frame
we request for each of these states using getTimeInState will be the same.
Of course, what good is a state if we don't use it? So let's compose this state object with the TileGraphic class
and create an update function to call in the game loop. Adding in our class level fields for state looks like this:
...
TileGraphicState state;

public TileGraphic(Vector2 position, TileType tileType) {
    ...
    this.state = NotSelected.getInstance();
}

public void render(float delta, SpriteBatch batch) {
    update(delta);
    batch.draw(texture, position.x, position.y);
}

public void update(float delta) {
    state.update(delta);
}
You can see we now call the update method from the render method.
2 This in turn calls the state object which increases the
amount of time we've been in which will eventually impact the frame of animation we show to the player. That's all
well and good, but how do we actually change which state we're in? To do that, we're going to use the
Command pattern.
If you're unfamiliar with the command pattern I recommend you read the link above; it's a great pattern and very useful when it comes to things like allowing users to rebind controls, undo, or replay actions. It also makes our reasoning about what is happening within any given part of the code easier. When you're writing out a prototype, you can throw everything into a single method with boolean flags, if statements or switches, and some elbow grease. That's all well and good, but the bigger that pile of code grows, the harder it's going to be to think about. If we keep our actions limited to just what we need to think about to get them done (and not the 5 other possible actions we might also handle) then we'll be able to move a bit quicker when it comes time to adding in a new feature that marketing has tossed onto our plate at 4:59PM on a Friday evening.
Here's the basic interface
public interface Command {
    void execute();
}
Simple right? Next, take a look at our SelectTile command.
public class SelectTile implements Command {

    private final TileGraphic tileGraphic;

    public SelectTile(TileGraphic tileGraphic) {
        this.tileGraphic = tileGraphic;
    }

    @Override
    public void execute() {
        tileGraphic.useSelectedTexture();
        tileGraphic.setState(Selected.getInstance());
    }
}
Also pretty small. When we construct the command we'll provide it with the TileGraphic that should be
selected, and then later whenever the game is ready for it, we'll execute this operation. Executing this code calls
to the TileGraphic itself:
public void useSelectedTexture() {
    Color color = TileType.colorFor(tileType);
    texture.dispose();
    texture = makeTexture(color.cpy().mul(1, 1, 1, 0.8f));
}
...
public void setState(TileGraphicState newState) {
    if (newState != null) {
        state = newState;
    }
}
These bite sized chunks are easy to understand and have a clear purpose. The unix philosophy works well for unix, and it works well for our code too. Each state that our game can be in has a parallel class hierachy on the command side. This won't always happen, but it does make things very easy to reason about right now. Each of the other states and commands can do pretty much the same thing, just with a different color for our tests and with the appropriate state passed along.
Within the TileGraphic these helpers will set up the texture to be displayed:
...
public void useNotSelectedTexture() {
    Color color = TileType.colorFor(tileType);
    texture.dispose();
    texture = makeTexture(color);
}

public void useMatchedTexture() {
    Color color = TileType.colorFor(tileType);
    texture.dispose();
    texture = makeTexture(color.cpy().mul(1, 1, 1, 0.5f));
}
...
I'll leave it to you to implement the commands DeselectTile and IncludeInMatch
because you should be able to by following along with the SelectTile code above. After you're
done, we can move along to how to actually handle these commands and execute them.
Let's first return to the TileGraphicState abstract class. I left out a small piece of code before. Here it is:
public Command handleCommand(Command command) {
    if (command instanceof SelectTile) {
        return command;
    } else if (command instanceof DeselectTile) {
        return command;
    } else if (command instanceof IncludeInMatch) {
        return command;
    }
    return null;
}
Now, if we were using Java 17 in preview mode, or Java 19+, we could do a match statement to avoid the instanceof
and the code might feel a bit cleaner. But, this gets the job done. As you can tell from the function signature
we're both taking in and returning a Command. This is because the handleCommand method determines if
the given command can actually be processed by us or not. If it can be, then we'll return or modify it.
If we can't handle this particular command, then we'll return null. This is useful behavior because it allows us
to take in any Command at all and not choke on it. The fact that we can modify the command allows us
to interpret and change the command for our caller if need be, something we'll see soon.
Unsurprisingly, since the function is inside of the TileGraphicState you can imagine that its the TileGraphic
that calls this function. And you'd be right:
    public void handleCommand(Command command) {
        Command command = state.handleCommand(command);
        if (null != command) {
            command.execute();
        }
    }
It's turtles all the way down here. The TileGraphic method itself has a handleCommand function
which the game will call. And for now, we'll generate commands for the system from the game class directly to illustrate
that things are working. Remember, we're working in baby steps here and seeing progress at each step is critical to keep
us happy. Let's define a couple new fields on the Match3Game class and update the render method:
String lastKeyPressed = "";
private BitmapFont font;

@Override
public void create () {
    ...
    font = new BitmapFont();
    ...
}
public void render () {
    ...
    if (Gdx.input.isKeyJustPressed(Input.Keys.S)) {
        for (TileGraphic tileGraphic: tileGraphics) {
            tileGraphic.handleCommand(new SelectTile(tileGraphic));
        }
        lastKeyPressed = "S";
    }
    if (Gdx.input.isKeyJustPressed(Input.Keys.D)) {
        for (TileGraphic tileGraphic: tileGraphics) {
            tileGraphic.handleCommand(new DeselectTile(tileGraphic));
        }
        lastKeyPressed = "D";
    }
    if (Gdx.input.isKeyJustPressed(Input.Keys.M)) {
        for (TileGraphic tileGraphic: tileGraphics) {
            tileGraphic.handleCommand(new IncludeInMatch(tileGraphic));
        }
        lastKeyPressed = "M";
    }
    float fps = Gdx.graphics.getFramesPerSecond();
    int h = Gdx.graphics.getHeight() - 20;
    font.draw(batch, "FPS: " + fps, Gdx.graphics.getWidth() - 200, h);
    font.draw(batch, lastKeyPressed, Gdx.graphics.getWidth() - 60, h);
    ...
This is a good amount of code to digest, but it's all very very simple. Whenever we press the appropriate key, we'll send along one of our newly created commands to all the tiles. Here's what it looks like:
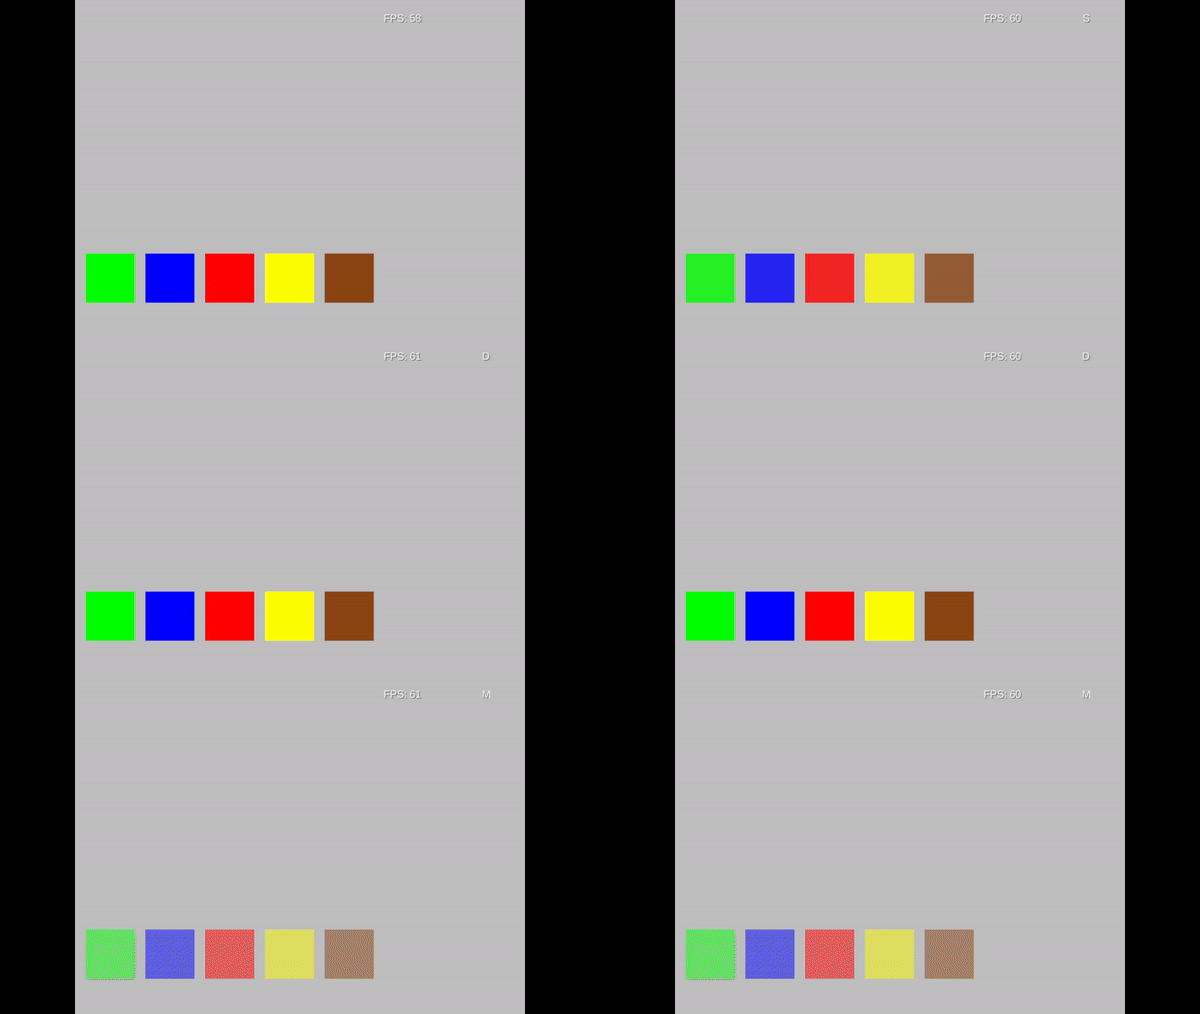
So that's great. While this is just our testing code, you can easily begin to imagine how we
might have input handlers start generating commands and cause interesting things to happen.
In fact, let's return to our TileGraphic to talk about how we're going to update its
position.
Moving the tiles involves changing the position vector over time. There are a lot of ways
to do this, but let's continue the trend of having useful atomic building blocks by creating
a State that can be used by anything in our game that needs to animate from one point to another. In order
to represent anything, not just a TileGraphic lets define an interface:
public interface Movable {
    public Vector2 getPosition();
    public void setPosition(Vector2 position);
    public Vector2 getDestination();
    public void setDestination(Vector2 destination);
}
Now, lets use it to build up our first movement pattern, the LinearMovementBehavior
public class LinearMovementBehavior {
    protected Movable movable;
    protected float secondsToSpendMoving = 1f;
    protected float elapsedTime = 0;

    public LinearMovementBehavior(Movable movable) {
        this.movable = movable;
    }

    public void update(float delta) {
        if (!movable.getPosition().equals(movable.getDestination()) && movable.getDestination() != null) {
            elapsedTime += delta;
            float alpha = MathUtils.clamp(elapsedTime / secondsToSpendMoving, 0, 1);
            movable.getPosition().interpolate(movable.getDestination(), alpha, Interpolation.linear);

            if(movable.getPosition().equals(movable.getDestination())) {
                elapsedTime = 0;
            }
        }
    }

    public Command handleCommand(Command command) {
        if (command instanceof MoveTowards) {
            ((MoveTowards) command).setMovable(movable);
            return command;
        }
        return null;
    }

}
The handleCommand method won't make sense until we look at what MoveTowards does,
but let's focus on the update function first.
This is pretty simple. If the current position isn't equal to where we want to go, we'll move towards it.
Rather than do some kind of v = d/t calculation and use the basic physics knowledge we all
learned in intro college courses, we can use LibGDX's interpolation helpers to tween from one place to the
next. This provides us a way to smoothly move the graphic around. If we wanted to make it move differently,
then we can refer to the LibGDX wiki for more
options to choose from.
The only other thing worth mentioning here is that reset for the elapsedTime variable. The reason
we need to reset that is because if we didn't, it would keep incrementing forever. If it did that, the clamp
call would always return 1. This in turn would result in our tiles instantly moving to their destination and never
actually tweening. Since we want to show the user some movement, we reset it to 0 whenever we reach our destination.
Similar to how we looked at the state objects for selecting, matching, and deselecting. We can understand this code
at a glance, its name makes sense, and we understand that we're going to get to where we need to go. Provided we tell
it to via a command. So, let's look at that handleCommand again.
What should be grabbing your attentation is ((MoveTowards) command).setMovable(movable) since this is different
from our previous command handling code. Remember when I said that our handleCommand function could let us
modify a command? That's exactly what we're doing here. Why? Consider for a moment what input handlers have in scope.
Will we have a tile? No. Probably not. Will we have some screen coordinates? Definitely. So we'll be able to generate a
command to move to a given x,y coordinate. But how will we get that translate into an action for our tiles?
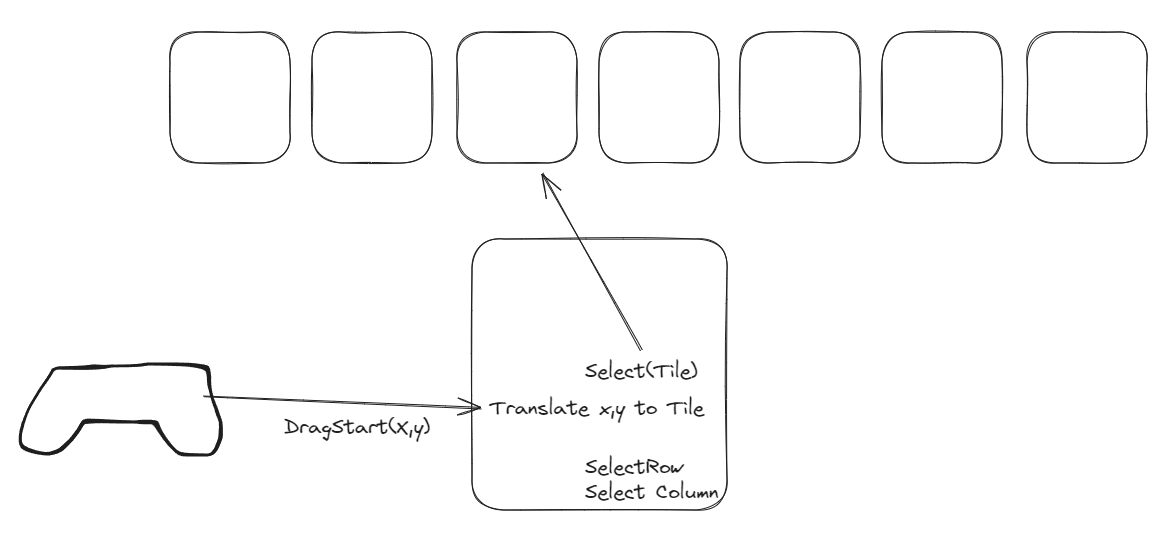
Well, probably something like this. That box where our inputs are going? That's going to be our game grid, or grid manager if you want to call it that. However, since we haven't programmed that yet, we're going to modify the command rather than return a new one. This feels a bit leaky, but we'll return to this later and clean it up. Promise. So, what does the MoveTowards command do?
public class MoveTowards implements Command {

    private final Vector2 destination;
    private Movable movable;

    public MoveTowards(Vector2 destination) {
        this.destination = destination;
    }

    public void setMovable(Movable movable) {
        this.movable = movable;
    }

    @Override
    public void execute() {
        if (null != movable) {
            movable.setDestination(destination);
        }
    }
}
Unsurprisingly, it sets the destination of a given movable to the destination that was setup with the command itself.
This doesn't instantly move the object obviously, but we wouldn't want to snap something to a point anyway. After all,
remember that our LinearMovementBehavior is going to smoothly walk from a start position towards an end
position. All we've done is setup a way to define where that end point is.
It probably shouldn't come as a surprise where we're going to call the handleCommand for LinearMovementBehavior.
The same place as our other call to state, in the TileGraphic:
public class TileGraphic {
    LinearMovementBehavior positionState;
    MovablePoint movablePoint;
    ...
    public TileGraphic(Vector2 position, TileType tileType) {
        ...
        this.movablePoint = new MovablePoint(position);
        this.positionState = new LinearMovementBehavior(this.movablePoint);
    }
    ...
    public void update(float delta) {
        positionState.update(delta);
        state.update(delta);
    }
    ...
    public void handleCommand(Command command) {
        Command handledCommand = state.handleCommand(command);
        Command positionCommand = positionState.handleCommand(command);
        if (null != handledCommand) {
            command.execute();
        }
        if (null != positionCommand) {
            positionCommand.execute();
        }
    }
    ...
}
I've omitted the MovablePoint class because it's just a basic implement of the interface Movable
that keeps track of two Vector2 values for position and destination.
With all of that code ready to go, we can now pass MoveTowards commands to the each tile. Adding some simple
input handling to our Match3Game class like we did before will allow us to play around with our new feature:
if (Gdx.input.isTouched()) {
    int x = Gdx.input.getX();
    int y = Gdx.input.getY();
    for (TileGraphic tileGraphic: tileGraphics) {
        Vector2 destination = new Vector2(x, y);
        tileGraphic.handleCommand(new MoveTowards(destination));
    }
    lastKeyPressed = "CLICK " + x + "," + y;
}
if (Gdx.input.isKeyJustPressed(Input.Keys.ENTER)) {
    for (TileGraphic tileGraphic: tileGraphics) {
        Vector2 destination = new Vector2(MathUtils.random(0, 300), MathUtils.random(0, 300));
        tileGraphic.handleCommand(new MoveTowards(destination));
    }
    lastKeyPressed = "ENTER";
}
Run the program and press enter or click somewhere on the screen. You'll be treated to this:
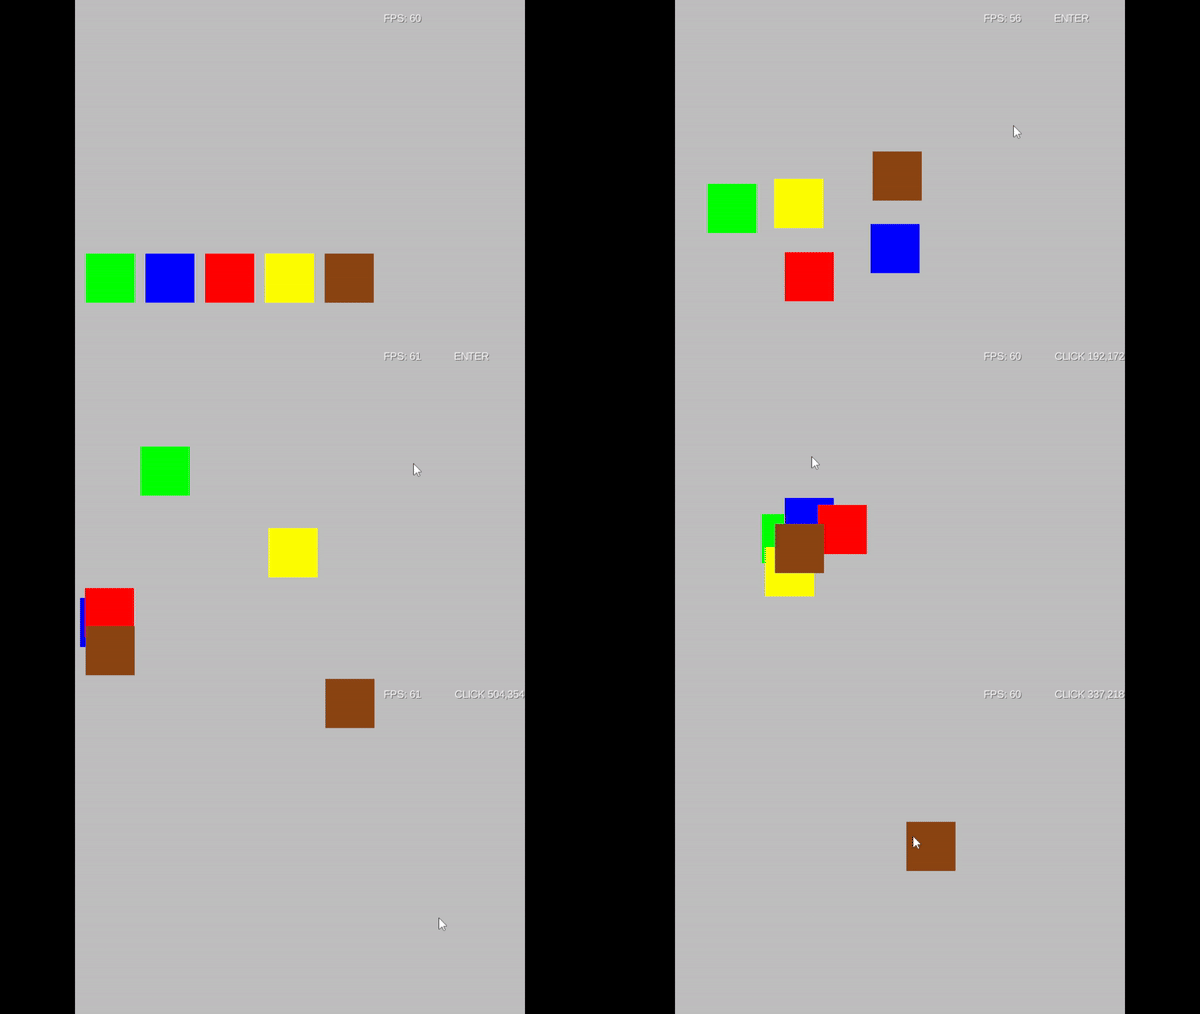
If you're watching the mouse, you'll notice something kind of funny. If you didn't notice it, look at the gif again.
Do you see it? The y axis is flipped. This is because LibGDX uses OpenGL to draw to the screen, and OpenGL uses a cartesian coordinate system where the lower left is the origin point 0,0 while the window uses a top left origin point. This discrepency results in our mouse Y value sending the tiles to the opposite side. So, how do we fix it?
Setting up our Viewport and Camera ↩
We need a way to translate from screen coordinates into what's known as world coordinates. Luckily, the LibGDX wiki
has us covered. A camera will allow us to
"unproject" a point from the screens coordinate system to the camera's. We'll also use a FitViewport
because I don't mind some gutters if a desktop user wants to resize the window. If you read through viewport wiki page
and watch the video that explains the different kinds, you might wonder why we wouldn't use a ScreenViewport. Look
at the example
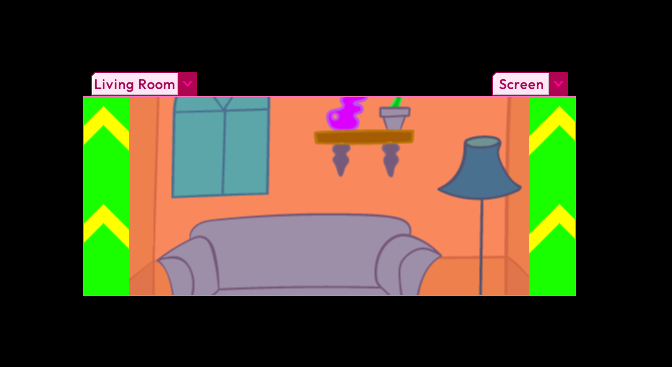
See how it's cut off? I don't want that. So, let's decide how big our game screen is going to be. Up until this point we've been doing everything in pixels. You can see how that's led our code to some funny magical looking numbers when we were lining up some tiles for display:
tileGraphics = new LinkedList<>();
for (int c = 0; c < TileType.values().length; c++) {
    TileType tileType = TileType.values()[c];
    tileGraphics.add(
        new TileGraphic(
            new Vector2(
                (c * TileGraphic.TILESIZE) + 15 * (c+1), 50),
                tileType
            )
    );
}
What if instead of having to take the pixel size of the tiles into account, we could just say that the size of our tokens is actually going to be the unit of measurement for our world? This would be a lot more convenient don't you think? If so then we could write code like this for setting up a 7 x 8 grid:
float gutter = 0.20f;
for (int c = 0; c < 7; c++) {
    for (int y = 0; y < 8; y++) {
        TileType tileType = TileType.values()[c % TileType.values().length];
        float tx = c * (1 + gutter) + gutter;
        float ty = y * (1 + gutter) + gutter;
        Vector2 position = new Vector2(tx, ty);
        tileGraphics.add(new TileGraphic(position, tileType));
    }
}
The above code would setup our grid using small numbers that are easy to reason about, and then add in a 20% gutter as spacing between each tile. Being able to express things in percentages is pretty handy. But if you just plug in the above code you'll end up with all your tiles sitting on top of each other. There's two things we have to do to work with world coordinates like this.
Getting world coordinates working step 1. Make a Viewport
Since this is a 2d game, we'll use an OrthographicCamera3,
this will be defined within our Match3Game class at the field level:
public class Match3Game extends ApplicationAdapter {
    ...
    private OrthographicCamera camera;
    private FitViewport viewport;
    ...
}
And initialized in the create hook.
public void create () {
    ...
    camera = new OrthographicCamera();
    viewport = new FitViewport(GAME_WIDTH, GAME_HEIGHT, camera);
    camera.setToOrtho(false);
    camera.update();
    ...
}
The two constants you see for width and height of the overall game we'll set to 16 and 10 so that we have at least 1 tile's worth of gutter on the top and bottom, and have plenty of space to include a grid for the player to play on, but also some space for displaying things like scores or moves left.
The one thing that isn't self-explanatory from looking at the code is what the heck camera.setToOrtho(false)
means. The documentation for the function states the following:
Sets this camera to an orthographic projection using a viewport fitting the screen resolution, centered at (Gdx.graphics.getWidth()/2, Gdx.graphics.getHeight()/2), with the y-axis pointing up or down.
Since we're passing in false, our y axis will be pointing up. In other words, 0,0 will be in our bottom
left corner of the screen once the camera has been positioned there. Besides setting up the camera, we also need to make sure
we respond to when a user resizes the screen itself. Thankfully, there's a hook for that we can add to our game class:
@Override
public void resize(int width, int height) {
    super.resize(width, height);
    viewport.update(width, height);
    viewport.apply(true);
}
Lastly, it's time to fix the issue we saw that started this quest. Converting the screen coordinates into world coordinates. We'll do this as part of our render function where we're handling the mouse input:
if (Gdx.input.isTouched()) {
    int x = Gdx.input.getX();
    int y = Gdx.input.getY();
    Vector3 worldPoint = camera.unproject(new Vector3(x, y, 0));
    Vector2 destination = new Vector2(worldPoint.x, worldPoint.y);
    for (TileGraphic tileGraphic: tileGraphics) {
        tileGraphic.handleCommand(new MoveTowards(destination));
    }
    lastKeyPressed = "CLICK " + x + "," + y;
}
The core thing to care about here is the unproject function call. This method and its cohort
project are mirrors of each other. One converts from screen coordinates into world coordinates,
the other from world coordinates to screen coordinates. Most of the time we're not going to be thinking about
projecting because we'll add in two lines of code to our render method that take of all of that for us.
camera.update();
batch.setProjectionMatrix(camera.combined);
These two lines will go before our call to batch.begin() so that when we queue up all the
things we want to draw they're using a projection based on our camera. This in effect translates all the x, y, and
z coordinates we might pass to the draw method from world coordinates to their appropriate screen coordinates.
So, are we fixed yet? No. No we're not. If you run the code now you'll get something that will throw you for a loop:
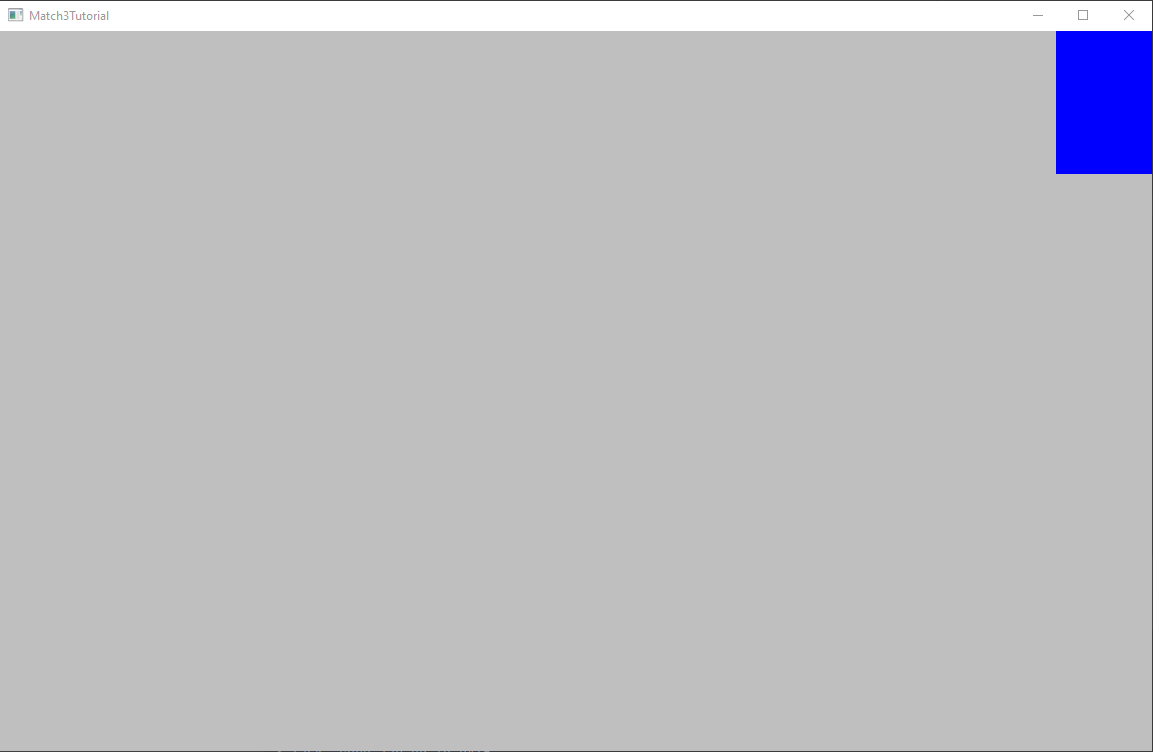
In your confusion, you might set the window size larger, resize it, anything to try to figure out what's going on. And this leads to the second important step we need to do to use this new coordinate system.
Geting world coordinates working step 2. Define texture widths correctly
Remember how above I said it'd be real cool if a tile was our unit of measurement? So one tile is one unit?
Well, our code as is doesn't do that. Setting up a viewport isn't enough if we don't change our calls to actually
drawing our textures. Consider what we have inside of TileGraphic right now:
public void render(float delta, SpriteBatch batch) {
    update(delta);
    batch.draw(texture, movablePoint.getPosition().x, movablePoint.getPosition().y);
}
So what's the big deal? Have a gander at the documentation for this method:
Draws a rectangle with the bottom left corner at x,y having the width and height of the texture.
Emphasis mine here. What is the size of our Texture? If you recall, we create our texture from a pixmap, and
that pixmap was set to be a square with TILESIZE length. Needless to say this constant being a
lovely 70 doesn't really fit right with us defining our world coordinates to be 16 and 10.
So, how do we fix this? Easy. The Batch interface has plenty of other overloads for the draw method,
and luckily for us a number of them let us define the width and height ourselves. In fact, batch.draw(x, y, w, h)
has the following documentation:
Draws a rectangle with the bottom left corner at x,y and stretching the region to cover the given width and height
Now we can do what we said we wanted to do! Let's say that a single tile is 1 unit long for both its width and height:
public void render(float delta, SpriteBatch batch) {
    update(delta);
    batch.draw(texture, movablePoint.getPosition().x, movablePoint.getPosition().y, 1, 1);
}
And now, if I draw a grid of tiles out to the screen?
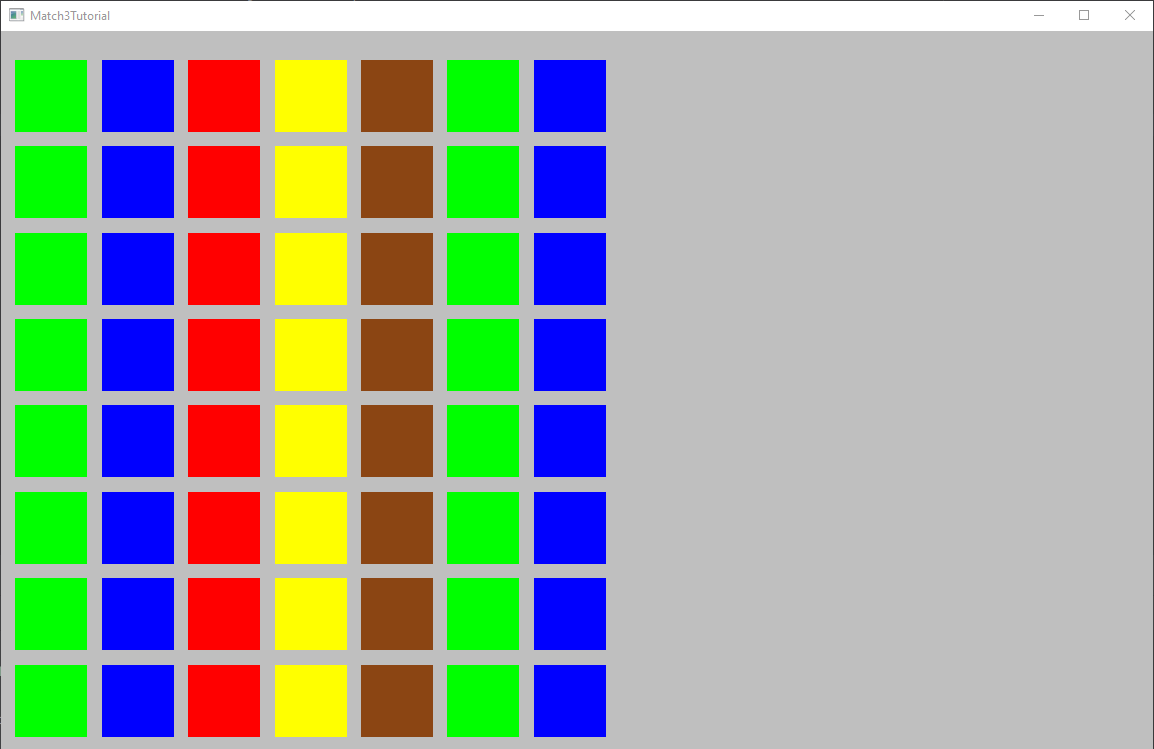
Beautiful. You'll notice we lost our FPS counter and the text that tells us the last button we pressed. Also if you press enter, there's a good chance half your tiles will fly off the screen into no-man's land. We can fix that by updating the x and y coordinates we asked to draw them on. But we'll run into another weird issue: The font is huge for some reason if we can manage to get it into the frame! There is is a way to scale the font down, but watch what happens when we apply these changes:
    font.getData().setScale(0.1f);
    font.draw(batch, "FPS: " + Gdx.graphics.getFramesPerSecond(), 10, 6);
    font.draw(batch, lastKeyPressed, 10, 4);
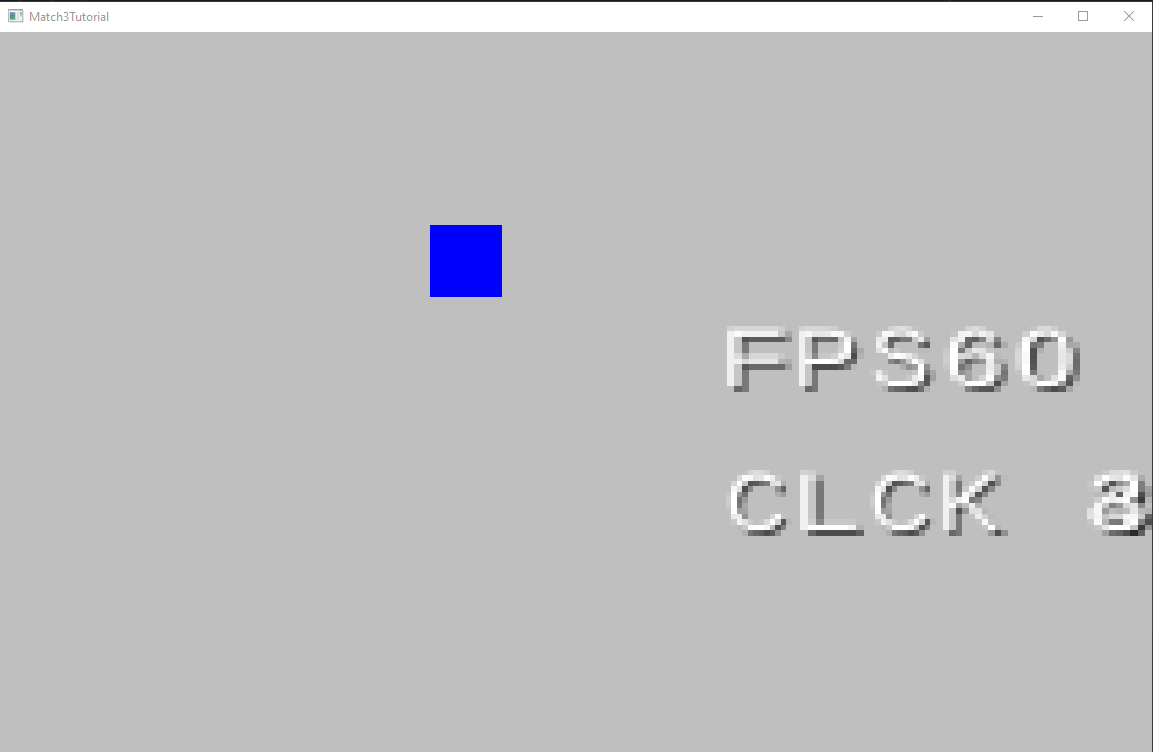
We're missing letters! And it just looks bad. So, how can we fix this and use world coordiantes while still using the bitmap
font? The trick is with the sense of scale, as well as the default for whether a font uses "integer positions" or not. While
I'm not an expert on fonts, the weird missing characters and pixelated nature of the characters sure reminds me of JPG artifacts.
And if you look at the documentation for the setUseIntegerPositions method you'll see a note about filtering. If
you explore further, we can see that the constructor has this note:
If true, rendering positions will be at integer values to avoid filtering artifacts
Now think back to our world coordinate system. X can go from 0 to 16 comfortably. If a font is trying to snap itself to one of those boundaries it's probably not going to like it very much no matter how far down we scale it. So, let's tell the font to not do that anymore and use floats. Additionally, let's assume the size of a 16 point font is relative to the size of our window and set the scale using that, rather than guessing a random small number:
    font.setUseIntegerPositions(false);
    font.getData().setScale(16f / Gdx.graphics.getWidth(), 16f / Gdx.graphics.getHeight());
Doing these two results in the font actually showing up in a readable way!

Does it look great? No. Is it good enough for basic debugging until we get around to loading a real font asset? Definitely. Being able to line up font according to our world space is a really nice thing when it comes to positioning UI elements for things like a scoreboard and we don't even need to make a second camera to do it! So, we're done with defining our cameras and viewports. From here, we can either look into making "real" assets and loading them in, or, we could stay focused on building out our core mechanics and move to the grid. You can probably guess which I think is more fun.
The game area ↩
Right now we're drawing our 56 tiles with a quick loop to debug things, but really we want them to be handled on a grid of some kind. While we'll save implementing the grid code for just a bit later, we also know that visually we want to define some sort of separation between where the tiles exist and where any sort of background imagery or other UI elements might exist.
So, let's start by defining how big this area is going to be. If we have 7 tiles, then we need 8 gutters total. One gutter before the first tile, one after the last, and one inbetween each tile. Some quick math will tell you that if we've got 0.2 units for each gutter, then we'll need 1.6 units of space in addition to the 7 units from being able to fit the tiles. Similar, for our 8 tiles going vertically, we'll need 1.8 units of space.
So our class to display a graphic for the Board background could look like this:
public class BoardGraphic {
    private MovablePoint movablePoint;
    Texture texture;

    public BoardGraphic(final Vector2 position) {
        this.movablePoint = new MovablePoint(position);
        this.texture = TestTexture.makeTexture(new Color(1, 1, 1, 0.5f)); 4
    }

    public void render(float delta, SpriteBatch batch) {
        Vector2 position = movablePoint.getPosition();
        batch.draw(texture, position.x, position.y, 8.6f, 9.8f);
    }
}
This is pretty straightforward, we have a board. We can position it somewhere, and we're drawing a simple rectangle texture that's 8.6 by 9.8 units large. If I position it in the right place, and then tweak the code drawing the debug tiles to align it properly, we can get this:
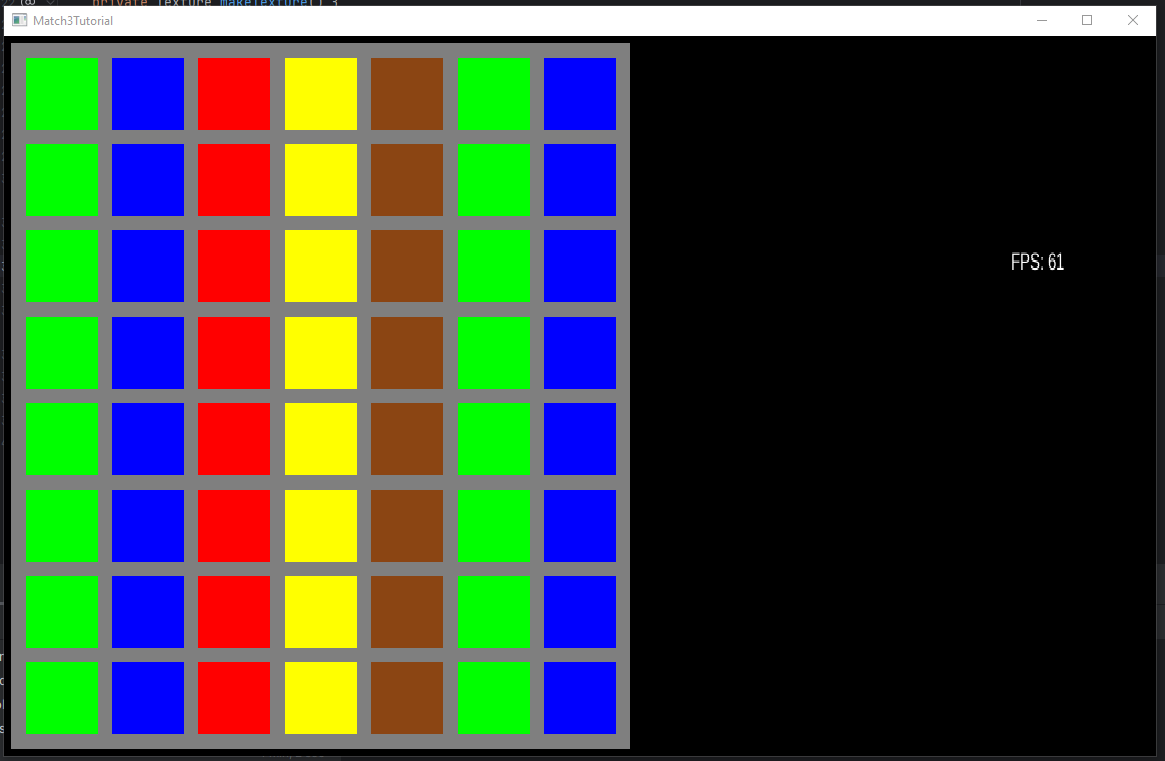
I've changed the rendering code for the Match3Game to clear the screen to black, and made sure
to draw the BoardGraphic before we draw the tiles, so they appear on top of each other.
Additionally, we offset each of the original tile positions by where the grid is.
public void create () {
    Vector2 boardPosition = new Vector2(.1f,.1f);
    boardGraphic = new BoardGraphic(boardPosition);
    ...
    for (...) {
        for (...) {
            ...
            Vector2 position = new Vector2(tx, ty).add(boardPosition);
            tileGraphics.add(new TileGraphic(position, tileType));
        }
    }
}

public void render () {
    ...
    ScreenUtils.clear(Color.BLACK);
    batch.begin();
    boardGraphic.render(delta, batch);
    for(TileGraphic tileGraphic : tileGraphics) {
        tileGraphic.render(delta, batch);
    }
    ...
}
If you could swap some tiles around then you'd practically have the core mechanic done! But in order to take a step towards that, we need to talk about our data structure for the board. The grid. And before we talk about the grid, we need to talk about what makes up a grid. A space. Every space can either be filled or empty and it exists at some row and column coordinate. In code, this translates simply to:
public class GridSpace<T> {
    private int row;
    private int column;
    private T value;

    public GridSpace(int row, int column, T value) {
        this.row = row;
        this.column = column;
        this.value = value;
    }

    public boolean isFilled() {
       return value != null;
    }

    @Override
    public boolean equals(Object o) {
        if (this == o) return true;
        if (o == null || getClass() != o.getClass()) return false;
        GridSpace<T> filled = (GridSpace<T>) o;
        if (value == null || filled.value == null) return false;
        return Objects.equals(value, filled.value);
    }
}
I've omitted the getter and setters for the values but included two important helpers here. isFilled
is just a handy way for us to be more descriptive from the caller side of the code and avoid needing others to be
aware that a null value means we're not filled. I actually originally implemented this as two subclasses, one for
empty and one for filled which removed the null checks but also led to a million of instanceof checks, so for this
tutorial, I'd recommend doing it this way.
The other helper, equals, is almost your usual implementation. But one important thing to note here is that
we're Overriding equals to check, not if a space overlaps, but if the value is the same. This is important and you'll see
why in a little bit when we get to the grid itself.
Lastly, this is a container object. It contains some value of type T but we don't care what.
You could definitely write this code without that, but when I conceptionally think about a space on a grid, I don't
think of a token being on there. I think of anything being in that slot. And that's a useful abstraction to have
because it means we can make a grid of our tile enumerations, or we can make a grid of the tile graphics we've
made and all of the same code will work. I find this useful for testing purposes and I hope you will too.
A grid space can't live in isolation, so let's get to work on the grid it's in. Before we start, let's get something straight with a little visual:
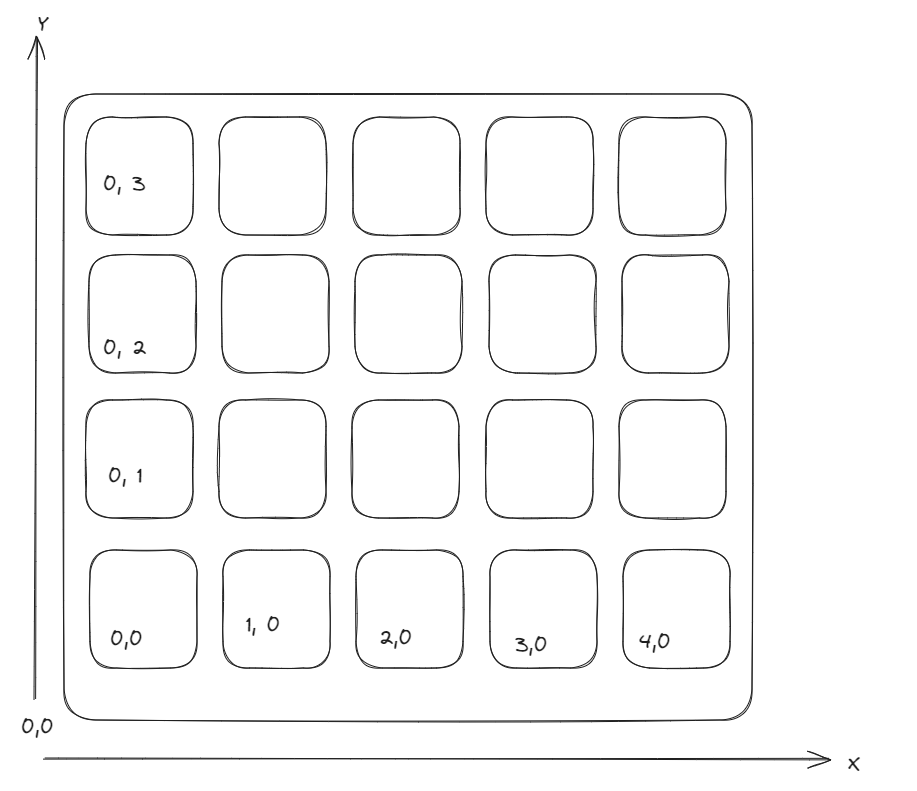
As you can see x is horizontal and y is up. That's pretty sane. Now, when we construct a list of items for our grid in Java, our code is going to look something like this:
this.spaces = new ArrayList<>();
for (int r = 0; r < height; r++) {
    this.spaces.add(new ArrayList<GridSpace<T>>());
    for (int c = 0; c < width; c++) {
        this.spaces.get(r).add(new GridSpace<T>(r, c, null));
   }
}
While I used x and y when drawing the diagram, because that's generally the way people think about visual things like
this, when I'm talking about the game grid I think in rows and columns. After all, when we say there's a match in
the 3rd row we're talking about a y coordinate here even though it's pretty natural to state the row first, column
second when you're rubber ducky debugging. You might notice though that that means we're a bit backwards when it comes
to indexing into our spaces. If this were an array you'd probably be thinking: [x][y] and that's probably
how we'd program it with an array. But we're using lists so, we're going to say row column from now on. To make this easier
we'll abstract things a bit with helper functions like:
public List<GridSpace<T>> getRow(int row) {
    if (row > height || row < 0) {
        throw new IllegalArgumentException("Row index out of bound");
    }
    return this.spaces.get(row);
}

public List<GridSpace<T>> getColumn(int column) {
    if (column < 0 || column > width) {
        throw new IllegalArgumentException("Column index out of bound");
    }
    List<GridSpace<T> columnSpaces = new ArrayList<>();
    for (int r = 0; r < height; r++) {
        columnSpaces.add(this.spaces.get(r).get(column));
    }
    return columnSpaces;
}
I'm not sure if other people have the same mental hangup as I do around column = x and row = y, but it's something that tripped me up pretty much the entire time I was working on this project so I thought I'd point it out and be clear about it for you. Moving along, let's define our constructor for the game grid. We'll initialize the entire grid to null to start.
public class GameGrid<T> {
    protected final List<List<GridSpace<T>>> spaces;
    protected final int width;
    protected final int height;

    public GameGrid(int width, int height) {
        this.width = width;
        this.height = height;
        this.spaces = new ArrayList<>();
        for (int r = 0; r < height; r++) {
            this.spaces.add(new ArrayList<GridSpace<T>>());
            for (int c = 0; c < width; c++) {
                this.spaces.get(r).add(new GridSpace<T>(r, c));
            }
        }
    }
    ...
}
I've made an overload of the constructor that takes only two arguments. This is the same as new GridSpace<T>(r, c, null)
With this in place, we can make a very useless grid of nothingness. So, let's go ahead and tweak our BoardGraphic class to take
in a GameGrid so that we can draw our tiles in the right place.
Initializing the game board
The hard part here is that we don't want to draw a tile graphic at 0,0. We want to offset its position so its within our boardspace. This is strictly a visual issue and has nothing to do with the position of a tile within a grid. This is something I spun my wheels on for a while and did one way the first time I implemented this, and then a second time the next time. Confused? Let me repeat it for you like I repeated it to myself:
Row 0 and column 0 does not mean screen coordinate 0,0
This is obvious when you think about how a tile, visually, will be dragged and could be at some decimal screen position but from the grid's
perspective, we haven't moved it out of the slot it was in. Heck, until a user stops dragging a tile, we don't even want to truly update
and commit a change to a grid do we? So, this seperation between the visual and core game logic is something we can replicate in the code
itself. Since the BoardGraphic handles graphics, it will keep a copy of its own grid that contains TileGraphic
instances. But our main token grid we use to keep track of what the board is before a move is completed? That'll just be a grid of TileType.
So, in the Match3Game code, let's change how we construct BoardGraphic:
Vector2 boardPosition = new Vector2(.1f,.1f);
this.tokenGrid = new GameGrid<>(8,7);
for (GridSpace<TileType> gridSpace : tokenGrid) {
    gridSpace.setValue(TileType.values()[(MathUtils.random(TileType.values().length - 1))]);
}
boardGraphic = new BoardGraphic(boardPosition, tokenGrid);
We'll generate the tokens for the grid better later (and even allow the difficulty to change when we do) but for now,
random tokens are ok for us to just get everything up and running. Moving on we need to update the BoardGraphic constructor.
protected final GameGrid<TileGraphic> gameGrid;

public BoardGraphic(final Vector2 position, GameGrid<TileType> sourceOfTruth) {
    this.movablePoint = new MovablePoint(position);
    this.texture = TestTexture.makeTexture(new Color(1, 1, 1, 0.5f));
    this.gameGrid = new GameGrid<>(sourceOfTruth.getWidth(), sourceOfTruth.getHeight());
    initializeGrid(sourceOfTruth);
}
We're now taking in our "source of truth" grid which contains all the tokens we need to build up
a visual representation of them. That build up is done by the initializeGrid method:
protected void initializeGrid(GameGrid<TileType> sourceOfTruth) {
    float gutter = 0.2f;
    for (GridSpace<TileGraphic> tileGraphicGameGrid : gameGrid) {
        int row = tileGraphicGameGrid.getRow();
        int column = tileGraphicGameGrid.getColumn();
        GridSpace<TileType> tokenSpace = sourceOfTruth.getTile(row, column);

        float ty = tileGraphicGameGrid.getRow() * (1 + gutter) + gutter;
        float tx = tileGraphicGameGrid.getColumn() * (1 + gutter) + gutter;
        Vector2 offsetPosition = this.movablePoint.getPosition().cpy().add(tx, ty);

        TileGraphic tileGraphic = new TileGraphic(offsetPosition, tokenSpace.getValue());
        tileGraphicGameGrid.setValue(tileGraphic);
    }
}
As we did in the code before, the tile x and y coordinates are computed to have a gutter of 20% of a tile on each side and to the top and bottom. This is then added to a copy of the overall board position so we end up with the values inside of our grid box.
Remember that the 8.6 and 9.8 are just computed constants based on how many tiles there are per row and column.
We can avoid this magic number usage by pulling these and a couple other constant values out to their own
static class for safe keeping. But that's a decision for you to make. If we ever want to change our unit size from
a single tile to something else, it'll probably be easier if we keep all these hardcoded values in one place. All that
aside, we've got one more thing to do with these tiles. Render them by updating the BoardGraphic render method:
public void render(float delta, SpriteBatch batch) {
    update(delta);
    Vector2 position = movablePoint.getPosition();
    batch.draw(texture, position.x, position.y, 8.6f, 9.8f);
    for (GridSpace<TileGraphic> tileGraphicGridSpace : gameGrid) {
        if (tileGraphicGridSpace.isFilled()) {
            TileGraphic tileGraphic = tileGraphicGridSpace.getValue();
            tileGraphic.update(delta);
            tileGraphic.render(delta, batch);
        }
    }
}
If you're following along, then you'll get some form of error message from the for each expression no the grid.
To get that working, we're going to extend Grid to implement Iterable.
Why? Because then no one has to write a for (int r = 0; r < grid.getHeight(); r++) anywhere
unless we actually need an independent row or column index that isn't the same as the actual space we're working with.
It also just fits into the way you probably speak about what the code is doing. After all, we don't say
"for each row, for each column, render the filled tiles to the screen". We say:
"for each filled tile in the grid, render it to the screen". The more closely
aligned to your way of speaking about the problem being solved, the less confused you'll be if you look at the code in 6 months.
Anyway, the Iterable interface is very simple:
public class GameGrid<T> implements Iterable<GridSpace<T>>{
    ...
    @Override
    public Iterator<GridSpace<T>> iterator() {
        return new GridIterator<T>(this);
    }
And then our Iterator class just tracks the cursor state and returns data whenever we ask it to:
import java.util.Iterator;

public class GridIterator<T> implements Iterator<GridSpace<T>> {

    private final GameGrid<T> gameGrid;
    private int r;
    private int c;

    public GridIterator(GameGrid<T> gameGrid) {
        this.gameGrid = gameGrid;
        this.r = 0;
        this.c = 0;
    }

    @Override
    public boolean hasNext() {
        return this.r < gameGrid.getHeight() && this.c < gameGrid.getWidth();
    }

    @Override
    public GridSpace<T> next() {
        GridSpace<T> gridSpace = gameGrid.getTile(r, c);
        c++;
        if (c >= gameGrid.getWidth()) {
            r++;
            c = 0;
        }
        return gridSpace;
    }

    @Override
    public void remove() {
        GridSpace<T> gridSpace = gameGrid.getTile(r, c);
        gridSpace.setValue(null);
    }
}
The only thing really worth mentioning is that order is pretty important here. We get the tile first,
then increment the row and column counter variables. If we didn't, we'd skip over 0,0.
Also, I suppose, the hasNext function checks both row and column although technically we only really
need to check the row. I still prefer having both since it feels more natural to me even if it is one
extra little check.
Now, one last piece of code to change before we're good to pat ourselves on the back. The debugging code
we had in Match3Game? Let's remove all that so that we're not rendering an extra site of
tiles and we're just letting the board handle it all.
public void render () {
    if (Gdx.input.isKeyJustPressed(Input.Keys.ESCAPE)) {
        Gdx.app.exit();
    }

    float delta = Gdx.graphics.getDeltaTime();
    camera.update();
    batch.setProjectionMatrix(camera.combined);
    font.setUseIntegerPositions(false);
    font.getData().setScale(16f / Gdx.graphics.getWidth(), 16f / Gdx.graphics.getHeight());
    ScreenUtils.clear(Color.BLACK);
    batch.begin();
    boardGraphic.render(delta, batch);

    font.draw(batch, "FPS: " + Gdx.graphics.getFramesPerSecond(), 14, 7);
    batch.end();
}
We'll keep the FPS counter for now, and when we run this code we can see:
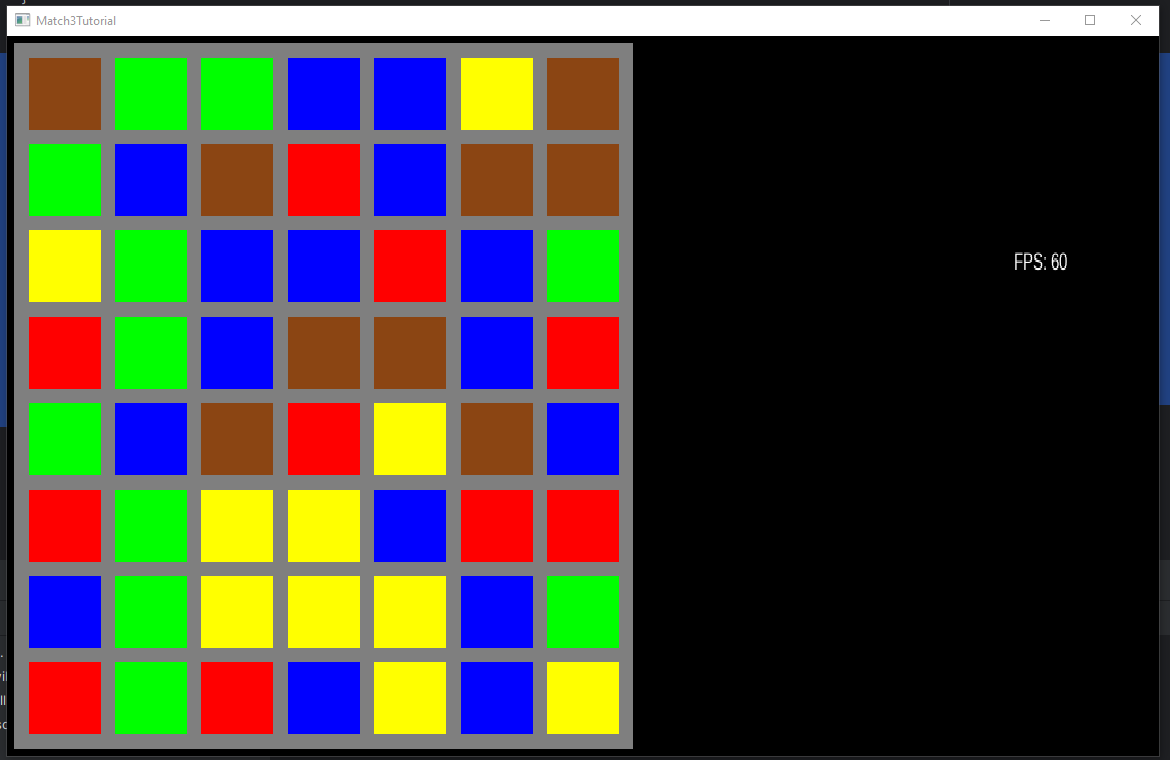
Nearly the same as before, but now all of our tiles are going to be random each time. Let's fix that next.
Generating Tokens ↩
It's easy to generate all the tiles randomly, but if you think about your player, they're not going to feel very satisfied if they start a game and wait for a bunch of matches to give them free points. Where's the sense of accomplishment in that? No, they want to be given a board with no matches on it to start and then get to work.
So let's define an extensible framework that we'll be able to use to satisfy the casual and hardcore match3 enthusiast with! This will be fun.
Our first consideration of course is that random tiles take nothing into account. So the question then becomes what should we take into account?. At the very least, we should try not to make a match right away. Or should we? Consider for a moment that if we're going to make something better than your average match 3 game, a player could have special items they use that generates specific tokens for a set period of time, or get some sort of bonus like after a 5 match happens it's more likely for a match to be generated. There's a ton of variety we could introduce into the game so let's define our generator in an abstract way first:
public interface TokenGeneratorAlgorithm<T> {
    abstract public T next(int row, int column);
}
This is your basic and simple generator interface. I initially programmed this as an abstract class that took in the possible values and game grid as constructor arguments and class level fields, but then I realized that that you could describe a bunch of game ideas without being constrained by the game grid itself, so I took that out. That said, the first implementation of our non-matching token generator for any given type's setup does include those elements:
public class NextTokenWillNotMatchAlgorithm<T> {

    protected final Set<T> possibleValues;
    protected final GameGrid<T> constraintGrid;

    public TokenGeneratorAlgorithm(Set<T> possibleValues, GameGrid<T> grid) {
        this.possibleValues = possibleValues;
        this.constraintGrid = grid;
    }

    abstract public T next(int row, int column) {
        // We'll implement this in a moment!
    }
}
Since our grid contains any type T, we use possibleValues to provide
our algorithm for the options that can possibly be returned. Our next function will use these
and perform lookups against the grid in order to select which of those possible values will be
returned. Our next function's implementation to get a non matching token is:
Set<T> possibleTypes = new TreeSet<T>(possibleValues);
Set<T> surroundingValues = new TreeSet<T>();

if (column - 1 >= 0) {
    GridSpace<T> tile = this.constraintGrid.getTile(row, column - 1);
    if (tile.isFilled()) {
        surroundingValues.add(tile.getValue());
    }
}
if (column < constraintGrid.getWidth() - 1) {
    GridSpace<T> tile = this.constraintGrid.getTile(row, column + 1);
    if (tile.isFilled()) {
        surroundingValues.add(tile.getValue());
    }
}
if (row - 1 >= 0) {
    GridSpace<T> tile = this.constraintGrid.getTile(row - 1, column);
    if (tile.isFilled()) {
        surroundingValues.add(tile.getValue());
    }
}
if (row < constraintGrid.getHeight() - 1) {
    GridSpace<T> tile = this.constraintGrid.getTile(row + 1, column);
    if (tile.isFilled()) {
        surroundingValues.add(tile.getValue());
    }
}

for (T t : surroundingValues) {
    possibleTypes.remove(t);
}

// Select a tile type from the remaining possible values;
int tileIndex = MathUtils.random(possibleTypes.size() - 1);
T nextTile = (T) possibleTypes.toArray()[tileIndex];
return nextTile;
While somewhat vertically verbose, this basically just looks at the top, right, bottom, and left of where we want a tile to be, and then removes whatever is in those spaces from the possible options. Doing this actually introduces an implicit requirement on our TileType enumerations. We must always have at least 5 types of tokens or else this will result in 0 possible values being returned. If we wanted to work with only 4, or less, then we'd need to add in a condition that would check if our possible values are empty, and then choose some tile based on another criteria. We can't, logically, say that anything less 5 options guarantees us the ability to not match though. So if you're making a game with less than 5 types of tokens, be ready to handle that corner case!
The above approach is what I think of as a subtractive algorithm for determining which value to
provide next since we remove possibilities and bless the player via RNG with the leftovers. Let's
implement another algorithm, but this time one which doesn't try to avoid matches and actually tries
to help the player do so! Since the constructor arguments are the same, let me just provide the
next function implementation of NextTokenLikelyToMatchAlgorithm:
@Override
public T next(int row, int column) {
    Set surroundingValues = new TreeSet<>();
    List> colSpaces = this.constraintGrid.getColumn(column);
    List> rowSpaces = this.constraintGrid.getRow(row);

    for (GridSpace space : colSpaces) {
        if (space.isFilled()) {
            surroundingValues.add(space.getValue());
        }
    }
    for (GridSpace space : rowSpaces) {
        if (space.isFilled()) {
            surroundingValues.add(space.getValue());
        }
    }
    // Edge case for a board with a lot of empty spaces.
    if (surroundingValues.isEmpty() || surroundingValues.size() < possibleValues.size()) {
        surroundingValues.addAll(possibleValues);
    }
return (T) surroundingValues.toArray()[MathUtils.random(0, surroundingValues.size() - 1)];
This algorithm is pretty simple, but has a very different behavior. On an empty grid, whatever value we get is random until there's at least as many tiles filled as there are possible values. After that, we then consider only the same type of tiles as those in the same row or column as us. This effectively behaviors similar to the random token generator, but bias's the results towards tiles we're already using, which then leads to more matches.
Lastly, we can keep these algorithms in their own files and that's fine. Or, we can encapsulate the
fact that we want to apply these to a specific type into a single container class. I like the way this
reads when it comes to actually calling the code, so I've made a NextTileAlgorithms class
to hold these:
public class NextTileAlgorithms {

    public static class WillNotMatch extends NextTokenWillNotMatchAlgorithm<TileType> {
        public WillNotMatch(GameGrid<TileType> grid) {
            super(getTreeSet(), grid);
        }
    }

    public static class LikelyToMatch extends NextTokenLikelyToMatchAlgorithm<TileType> {
        public LikelyToMatch(GameGrid<TileType> grid) {
            super(getTreeSet(), grid);
        }
    }

    private static TreeSet<TileType> getTreeSet() {
        TreeSet<TileType> set = new TreeSet<>();
        for (TileType tileType : TileType.values()) {
            set.add(tileType);
        }
        return set;
    }
}
Now, a generator is all good, but seeing is believing. So let's whip up a way to generate the tokens
in our grid and copy them them onto the screen. Within the BoardGraphic let's create a
new function called replaceTile
public void replaceTile(int row, int column, TileType tileType) {
   GridSpace<TileGraphic> space = this.gameGrid.getTile(row, column);
   Vector2 position = space.getValue().getMovablePoint();
   space.setValue(new TileGraphic(position, tileType));
}
And then, in our Match3Game class let's change the random tile generation to use an algorithm
that we scope to the class level. In the create method where we constructed an instance of the
GameGrid let's update the function to use our algorithm:
this.tokenGrid = new GameGrid<>(8,7);
this.tokenAlgorithm = new NextTileAlgorithms.WillNotMatch(tokenGrid);
for (GridSpace<TileType> gridSpace : tokenGrid) {
    gridSpace.setValue(tokenAlgorithm.next(gridSpace.getRow(), gridSpace.getColumn()));
}
Then, to see the difference between the two, we'll take in a keyboard key and replace the tiles on the board. We'll remove this code later, but it's always nice to toss in these kind of debug steps so you can see your progress as you go to keep your motivation up:
if (Gdx.input.isKeyJustPressed(Input.Keys.N)) {
        tokenAlgorithm = new NextTileAlgorithms.WillNotMatch(tokenGrid);
        for (GridSpace space : tokenGrid) {
            TileType next = tokenAlgorithm.next(space.getRow(), space.getColumn());
            space.setValue(next);
            boardGraphic.replaceTile(space.getRow(), space.getColumn(), next);
        }
    }
    if (Gdx.input.isKeyJustPressed(Input.Keys.M)) {
        tokenAlgorithm = new NextTileAlgorithms.LikelyToMatch(tokenGrid);
        for (GridSpace space : tokenGrid) {
            TileType next = tokenAlgorithm.next(space.getRow(), space.getColumn());
            space.setValue(next);
            boardGraphic.replaceTile(space.getRow(), space.getColumn(), next);
        }
    }
}
Pressing the M and N keys let's us see the difference in behavior between the two algorithms pretty easily:
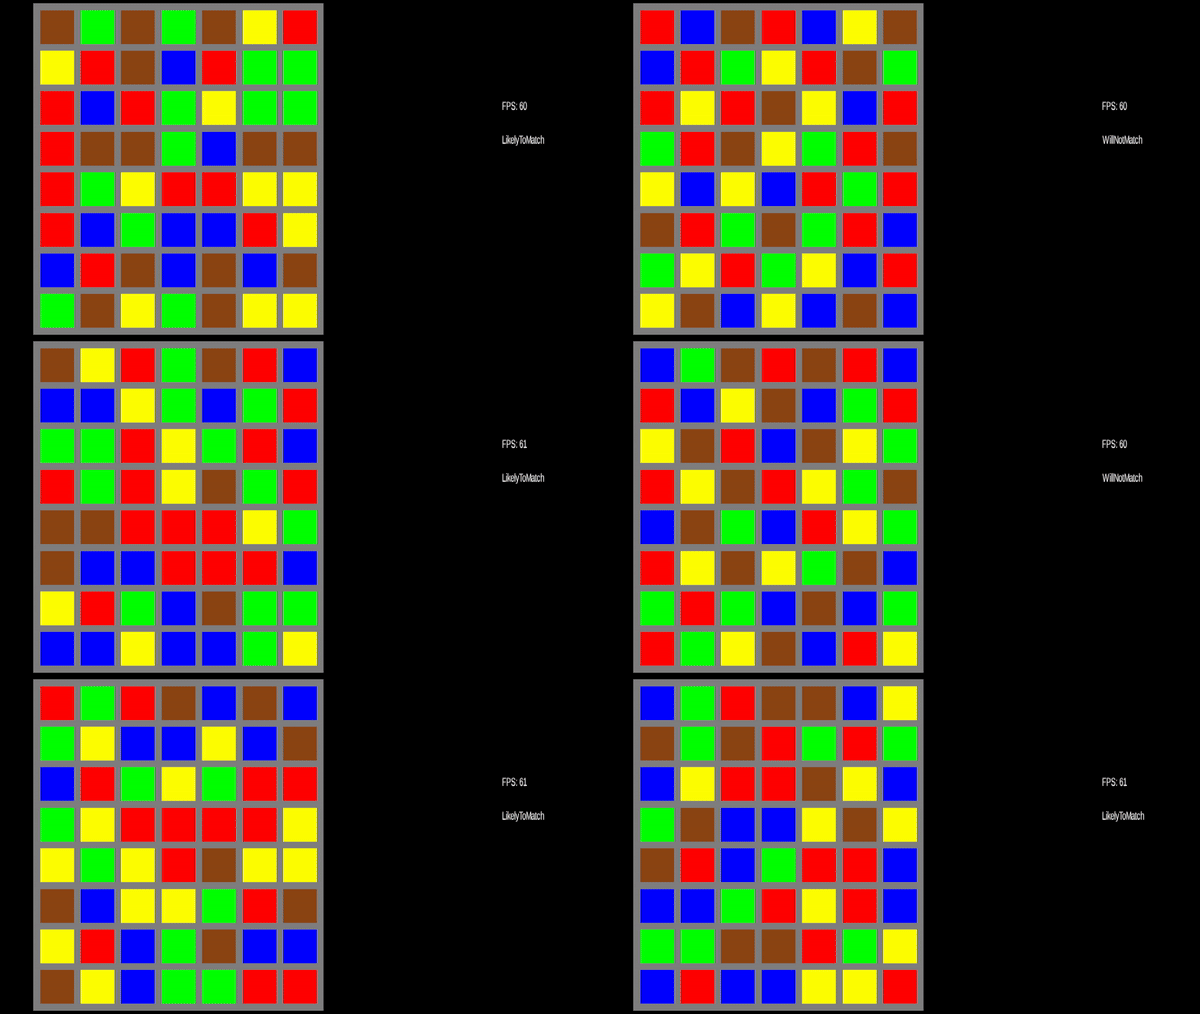
Neat huh? It's a bit quick, but at the end of the gif there is a board generated by the LikelyToMatch
algorithm where there are no matches made, but there's plenty of possible ones and that's kind of the point.
The algorithm gives the player stuff to use, but there's no guarantee it would make them a match right away.
We could spend a bunch of time making new generators, and it would probably be real fun.5 But, we should probably move along so we don't hyperfixate for too long. We've got a grid showing tiles, but how do interact with it?
Input Handling ↩
When it comes to LibGDX input handling, you can poll or you can hook into the events that your system makes
which libgdx captures for you.
Up until this point we've done everything with polling via the handy Gdx.input methods, but for us to handle
someone clicking and dragging we're going to have to store information across more than one frame. Rather than
make a bunch of class level fields in the Match3Game, let's encapsulate this state inside of an
InputAdapter!
We need to respond to three different things for our game.
- Did the user click the mouse to start a drag?
- Is the user currently dragging their mouse?
- Did the user stop their drag?
In order for these actions to translate into useful commands for our system, we also need to keep track of some very simple state. We'll need to know, much like cotton-eye-Joe, where we came from and where did we go. So we'll keep track of a start position vector, and an end position vector. These sets of coordinates can be translated from screen coordinates into game unit coordinates via the viewport and then we can pass along information that the rest of the system understand. In code, our constructor and field level variables can be expressed like this:
public class DragInputAdapter extends InputAdapter {
    protected Viewport viewport;
    protected Vector2 dragStart;
    protected Vector2 dragEnd;
    protected boolean isDragging;
    protected boolean wasDragged;

    public DragInputAdapter(Viewport viewport) {
        this.viewport = viewport;
        this.isDragging = false;
        this.wasDragged = false;
    }
    ...
}
Now let's consider each case I listed above, starting with when someone clicks. The InputAdapter
allows us to override the touchDown method to do something when someone clicks.
@Override
public boolean touchDown(int screenX, int screenY, int pointer, int button) {
    if (isLeftMouseClick(pointer, button)) {
        dragStart = viewport.unproject(new Vector2(screenX, screenY));
        this.isDragging = false;
        return true;
    }
    return super.touchDown(screenX, screenY, pointer, button);
}
Let me explain the incoming arguments by going over each parameter here. First off, screenX and screenY are straightforwardly
named, and as you can see, we convert these screen coordinates into our game's units by unprojecting with our viewport. This is stored in our
dragStart field for future use. We set isDragging to false because we don't know if this is a regular click, or a drag yet.
We'll only know that if we the handler for touchDragged fires:
@Override
public boolean touchDragged(int screenX, int screenY, int pointer) {
    if (isLeftMouseClick(pointer, Input.Buttons.LEFT)) {
        dragEnd = viewport.unproject(new Vector2(screenX, screenY));
        this.isDragging = true;
        return true;
    }
    return super.touchDragged(screenX, screenY, pointer);
}
Similar to the other handler, we're returning true if we recognize this as a command we care about, and then setting the class fields to be based
on the event that came in. I skipped over the isLeftMouseClick method before, it checks if the pointer argument is a
0 and that the button is a LEFT. This is so we don't try handle a second drag if someone clicks both the left and right mouse buttons.
We don't want to let someone click and drag two sets of tiles around after all. We use this check in all three of our functions so I simply moved
it into a simple helper to DRY up the code. Our last usage of it is in the touchUp code:
@Override
public boolean touchUp(int screenX, int screenY, int pointer, int button) {
    if (isLeftMouseClick(pointer, button)) {
        dragEnd = viewport.unproject(new Vector2(screenX, screenY));
        if (this.isDragging) {
            this.wasDragged = true;
        } else {
            this.wasDragged = false;
        }
        this.isDragging = false;
        return true;
    }
    return super.touchUp(screenX, screenY, pointer, button);
}
The code above does the same as the other two, checks for the click, and then sets the fields as needed. The only thing worth calling out here
is that we use whether the touch drag method was called or not (which we can tell by the value of isDragging) to determine the
final state of our wasDragged field. So, you can probably see how this code can be used by the rest of the game in a useful way
at this point. We can wire things up in the Match3Game to tell LibGDX to send events to our adapter, and then display them on the
screen by adding some debug logic into our render method:
public void create () {
    ...
    this.dragInputAdapter = new DragInputAdapter(viewport);
    Gdx.input.setInputProcessor(dragInputAdapter);
    ...
}

public void render () {
    ...
    font.draw(batch,
       dragInputAdapter.dragStart + " " +
       dragInputAdapter.dragEnd + " " +
       dragInputAdapter.getIsDragging() + " " +
       dragInputAdapter.getWasDragged(),
       9, 5
    );
    ...
}
Running the program, clicking, and moving your mouse around will show you that the events are coming through as we expect:
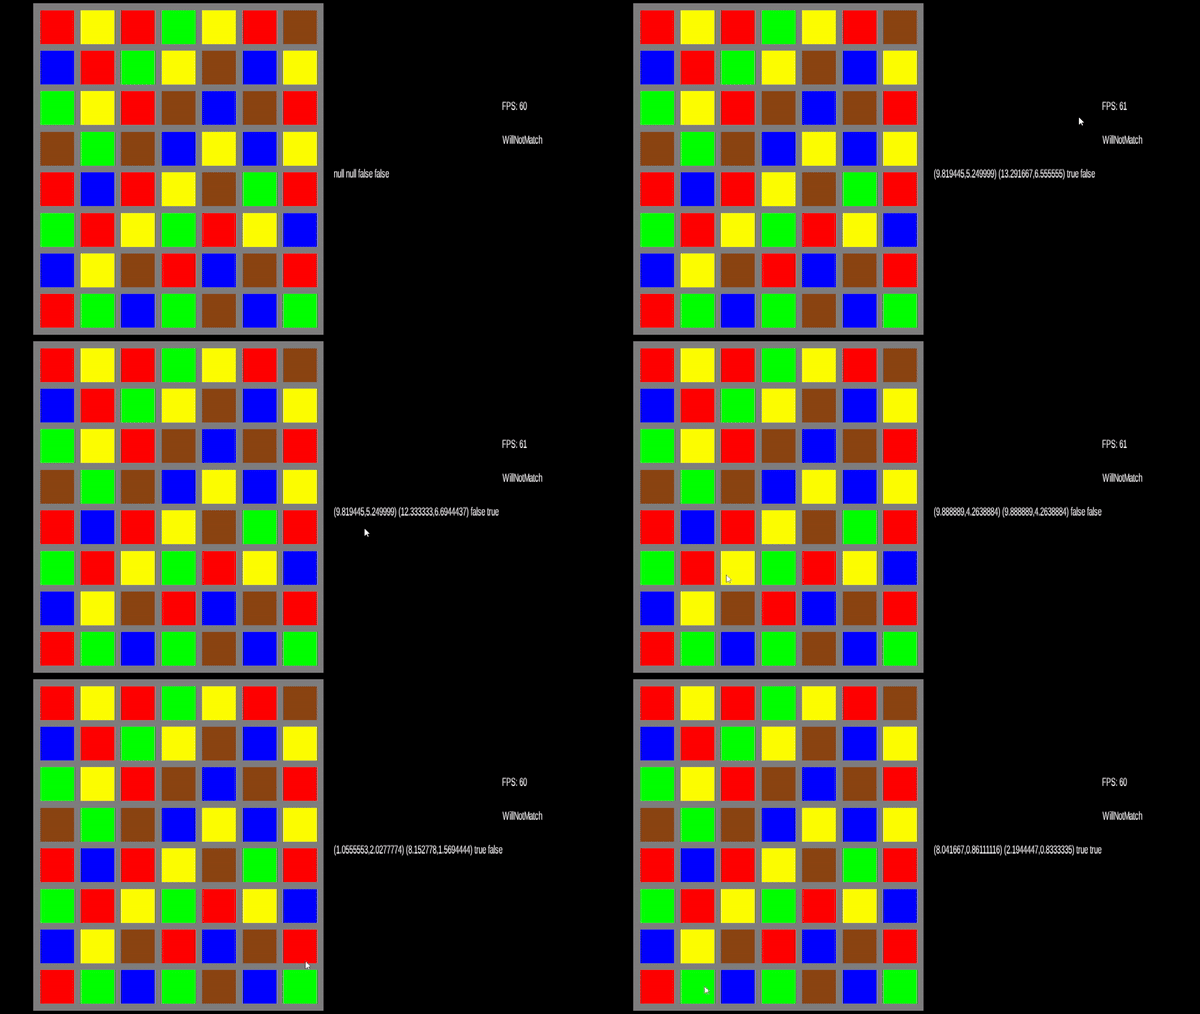
You might notice near the end that wasDragged's boolean was true even when we had started a new drag. We can fix that by changing
the touchDown handler if we'd like. But before we expand more on this, let's think about how we want to use this
event data. When I made a prototype before starting to write up this blog I left the input handler in the adapter. The state inside
of it was referred to by the overall match3 game. So, I ended up with a determineSelected function that slowly but surely
grew complex and was littered with conditional checks against nulls, the boolean flags of the input, and everything else. All in all,
it worked, but it also felt clunky and everytime I had to dive into the code to tweak or fix something it didn't bring me much joy.
So this time, let's extend the Observer pattern that the InputAdapter is already using and mimic it in our own game. Here's my terrible diagram about what we're about to do with our code:

Essentially, I want to adapt the information coming to us from the InputAdapter into a form the game understands, and then hand it off
to the game to deal with on its own without ending up with a huge uber function to handle any all combinations of the drag events. In
fact, by doing this, similar to how we had state for the tile movement, we can define the way we respond to the events as a state machine
that will help us avoid getting confused or needing to handle the state of a flag unrelated to what we're doing (Like how wasDragged
stayed true even during a new drag).
To make this simple, let's define a way for other code to hook into our input adapter itself. Rather than Observer and Subject nomenclature, let's go with the word subscriber
public interface DragEventSubscriber {
    public void onDragStart(float gameX, float gameY);

    public void onDrag(float gameX, float gameY);

    public void onDragEnd(float gameX, float gameY);
}
Now, let's implement the interface. What parts of our code care about these events? Well, going by our diagram the Match3 game itself could do this and then delegate commands out based on what's happening. We could also make both the GameGrid and the BoardGraphic's be subscribers and skip the middle man. Both of these are valid options for us, but I'm going to go with the middle man of the Match3Game containing a state object that can act as a router for these events because I think it will keep the scope of what we need to care about in each step narrow.
Since we haven't implemented the methods for the game grid to actually move tiles around yet, let's focus in on how the tile
a user has selected should behave. Once a user clicks on a tile within the board, we'll want to make that tile follow their
mouse until they drop it off somewhere. In order to do this, we'll need to add code to the BoardGraphic so it
can translate game coordinates into a row and column, and also tell us if those coordinates are within its boundaries or not:
public boolean pointInBounds(float gameX, float gameY) {
    Vector2 origin = movablePoint.getPosition();
    boolean inXRange = origin.x + BOARD_UNIT_GUTTER <= gameX && gameX <= origin.x + BOARD_UNIT_WIDTH - BOARD_UNIT_GUTTER;
    boolean inYRange = origin.y + BOARD_UNIT_GUTTER <= gameY && gameY <= origin.y + BOARD_UNIT_HEIGHT - BOARD_UNIT_GUTTER;
    return inXRange && inYRange;
}

public int gameXToColumn(float gameX) {
    float zero = movablePoint.getPosition().x + BOARD_UNIT_GUTTER;
    int tileDistance = (int) (gameX - zero);
    int columnAdjustedForGutters = (int) (gameX - zero - tileDistance * BOARD_UNIT_GUTTER);
    return MathUtils.clamp(columnAdjustedForGutters, 0, gameGrid.getWidth() - 1);
}

public int gameYToRow(float gameY) {
    float zero = movablePoint.getPosition().y + BOARD_UNIT_GUTTER;
    int tileDistance = (int) (gameY - zero);
    int columnAdjustedForGutters = (int) (gameY - zero - tileDistance * BOARD_UNIT_GUTTER);
    return MathUtils.clamp(columnAdjustedForGutters, 0, gameGrid.getHeight() - 1);
}
If you haven't already, go ahead and move the magic numbers like 0.2, 8.6, and 9.8
into constants so you don't have to worry about changing a million places if you want to rescale things. I've chosen to
use BOARD_UNIT_GUTTER, BOARD_UNIT_WIDTH, and BOARD_UNIT_HEIGHT for these. The
pointInBounds method isn't surprising and is pretty easy since we only really care about the boundaries
of the board and avoiding counting the gutter around the edge as part of "inside". The two conversion methods are a
little more tricky though.
Let's use a drawing to make this easier to visualize:

The bottom corner is the true 0,0 in the game coordinate system, but if we want 0 to mean the 0th space in our grid, then we need
to define it as such. To define our new zero we start at the origin position of the BoardGraphic and then
adjust for the gutter up until the first tile by adding in one gutter. So you can see, that B0,0 plus BG
in our diagram lands us at the start of the tile at T0,0.
Now, consider that each tile is one unit wide. If we want to arrive at the second tile from T0,0 we need to add one and the gutter
between it and the previous tile. What about the third tile? Well, One tile, one gutter, one tile, one gutter. Notice something? For each
tile we want to get to, we have to offset by the same number of gutters. So, if we take the whole number part of the distance and multiply
it by the gutter size, then we'll have the correct adjustment we need to convert the location to a grid space coordinate. So, let's call
this gutter offset tileDistance and adjust the gameX by that amount after taking our new zero into account.
This logic, unsurprisingly, applies to the Y coordinate as well. If we go from the T0,0 point upwards, we have to move one tile size and one
gutter size to get to the next tile. I've tried to visualize the need to account for the gutter with the red tiles so you can see what would
happen if we tried to use just tileDistance as the index to our grid and how it wouldn't work. If this is still confusing, remember
that we're trying to get an index into our integer coordinate space. So things like gutters don't exist there, so they must be removed from the
equation via subtraction first. 6
Now that we have a way to get a tile from the grid, let's make the tile we click on follow our cursor! First off, let's define our
subscriber Match3GameState
public class Match3GameState implements DragEventSubscriber {
    private final BoardGraphic boardGraphic;
    Queue<Command> commands;
    TileGraphic selected;

    public Match3GameState(BoardGraphic boardGraphic) {
        this.boardGraphic = boardGraphic;
        this.commands = new LinkedList<>();
        this.selected = null;
    }

    public void update(float delta) {
        while (!commands.isEmpty()) {
            Command command = commands.remove();
            command.execute();
        }
    }
}
Besides the typical setup, you can see that we've got a very simple queue ready to go. Every frame, when our update method is called, we'll check to see if anything has added commands for us to run and if so, execute them. The commands themselves will be added by the methods that get events from our input adapter. So, implementing the first method of our interface will give us:
public void onDragStart(float gameX, float gameY) {
    if (!this.boardGraphic.pointInBounds(gameX, gameY)) {
        return;
    }
    int row = this.boardGraphic.gameYToRow(gameY);
    int column = this.boardGraphic.gameXToColumn(gameX);
    this.selected = this.boardGraphic.getTile(row, column);
    commands.add(new IncludeInMatch(selected));
}
This will change the texture of the tile we clicked on, but nothing else. To make the tile
follow us we'll add in onDrag:
public void onDrag(float gameX, float gameY) {
    if (!this.boardGraphic.pointInBounds(gameX, gameY)) {
        return;
    }

    float offsetByHalfX = gameX - Constants.TILE_UNIT_WIDTH / 2;
    float offsetByHalfY = gameY - Constants.TILE_UNIT_HEIGHT / 2;
    commands.add(new MoveTowards(
        new Vector2(offsetByHalfX, offsetByHalfY),
        selected.getMovablePoint()
    ));
}
This uses the command we made earlier when we were debugging, MoveTowards to
move whatever the selected tile is to where we clicked. Sort of. You can see the two
offsets happening. If you don't include these you'll notice that the tile follows your
cursor, but its the bottom left corner that follows your mouse. Normally, when someone grabs
something like a token, they expect the centerpoint of the texture to line up with their
cursor. Offsetting by half a tile for both x and y tells the tile to move its bottom left corner
half a tile away from where you actually clicked, which results in it looking like the tile's
center is following the cursor.
Last, when a user stops dragging, we want to return the tile to its normal color. As you might
expect, onDragEnd handles this:
public void onDragEnd(float gameX, float gameY) {
    if (!this.boardGraphic.pointInBounds(gameX, gameY)) {
        return;
    }
    this.commands.add(new DeselectTile(selected));
}
To see this in action, we just need to wire up our subscriber! So, in the Match3Game's
create method:
public void create () {
    ...
    this.dragInputAdapter = new DragInputAdapter(viewport);
    this.match3GameState = new Match3GameState(boardGraphic);
    this.dragInputAdapter.addSubscriber(match3GameState);
    ...
}
And don't forget to update the render method to call the state's update method:
public void render () {
    ...
    match3GameState.update(delta);
    ScreenUtils.clear(Color.BLACK);
    ...
}
Running the code will let you see your tile follow you around as expected:
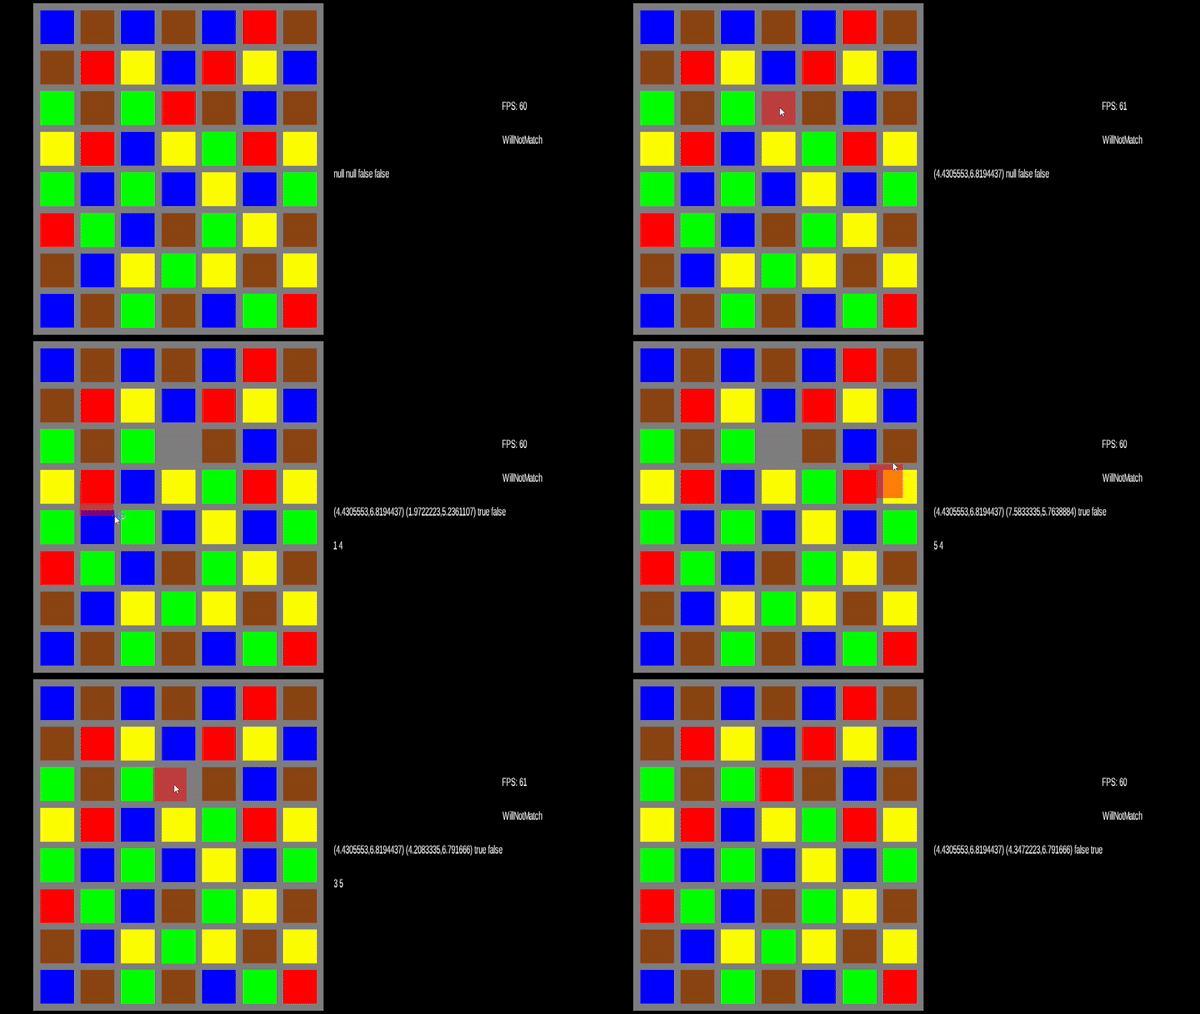
This is great, but how does a user know which tiles they can swap the one they just picked up with?
The user can swap their selected tile with any tile in the same row and same column. So let's define a
simple way for the board to change the state of each of those tiles to a selected state.
Inside of the BoardGraphic file let's add in:
public void selectCrossSection(int row, int column) {
    List<GridSpace<TileGraphic>> spacesInRow = gameGrid.getRow(row);
    List<GridSpace<TileGraphic>> spacesInColumn = gameGrid.getColumn(column);
    for (GridSpace<TileGraphic> space : spacesInRow) {
        space.getValue().handleCommand(new SelectTile(space.getValue()));
    }
    for (GridSpace<TileGraphic> space : spacesInColumn) {
        space.getValue().handleCommand(new SelectTile(space.getValue()));
    }
}
Since we need out event subscriber to be the one to trigger this, let's reify this into a command:
public class SelectCrossSection implements Command {
    private final BoardGraphic boardGraphic;
    private final int row;
    private final int column;

    public SelectCrossSection(BoardGraphic boardGraphic, int row, int column) {
        this.boardGraphic = boardGraphic;
        this.row = row;
        this.column = column;
    }

    @Override
    public void execute() {
        this.boardGraphic.selectCrossSection(row, column);
    }
}
Then, since we only need to select tiles when we start a drag, we can create an instance of this
command within our onDragStart method:
public void onDragStart(float gameX, float gameY) {
    if (!this.boardGraphic.pointInBounds(gameX, gameY)) {
        return;
    }
    int row = this.boardGraphic.gameYToRow(gameY);
    int column = this.boardGraphic.gameXToColumn(gameX);
    this.crossSection = new SelectCrossSection(boardGraphic, row, column);
    this.selected = this.boardGraphic.getTile(row, column);
    commands.add(crossSection);
    commands.add(new IncludeInMatch(selected));
}
Notice we're using this.crossSection here. Add this to your class level fields
because we need to keep track of it. Why? Well, imagine that the user clicks a tile, drags it around outside
of the row and column it's in because they're amusing themselves, but then finishes their drag outside of the
original row they started in. If we try to get the row and column from the gameX
or gameY of the onDragEnd method, we'll be left with the board showing a cross section
selection. That's no good. For the selection to stop being selected when the user finishes their drag, we
need to implement a deselection method and command. Easy enough! In BoardGraphic:
public void deselectCrossSection(int row, int column) {
    List<GridSpace<TileGraphic>> spacesInRow = gameGrid.getRow(row);
    List<GridSpace<TileGraphic>> spacesInColumn = gameGrid.getColumn(column);
    for (GridSpace<TileGraphic> space : spacesInRow) {
        space.getValue().handleCommand(new DeselectTile(space.getValue()));
    }
    for (GridSpace<TileGraphic> space : spacesInColumn) {
        space.getValue().handleCommand(new DeselectTile(space.getValue()));
    }
}
Reify it like we did before:
public class DeselectCrossSection implements Command {
    private final BoardGraphic boardGraphic;
    private final int row;
    private final int column;

    public DeselectCrossSection(BoardGraphic boardGraphic, int row, int column) {
        this.boardGraphic = boardGraphic;
        this.row = row;
        this.column = column;
    }

    @Override
    public void execute() {
        this.boardGraphic.deselectCrossSection(row, column);
    }
}
And lastly, let's make it easy to get a deselect from the selection we made already by adding in
an undo method to our other command. Inside of SelectCrossSection:
public class SelectCrossSection implements Command {
    ...
    public Command undoCommand() {
        return new DeselectCrossSection(boardGraphic, row, column);
    }
    ...
}
Now, we can easily undo the selection of whatever started the drag in the onDragEnd of the
Match3GameState class like so:
public void onDragEnd(float gameX, float gameY) {
    if (!this.boardGraphic.pointInBounds(gameX, gameY)) {
        return;
    }
    this.commands.add(new DeselectTile(selected));
    commands.add(crossSection.undoCommand());
}
Running the code will show that it's all working as expected:
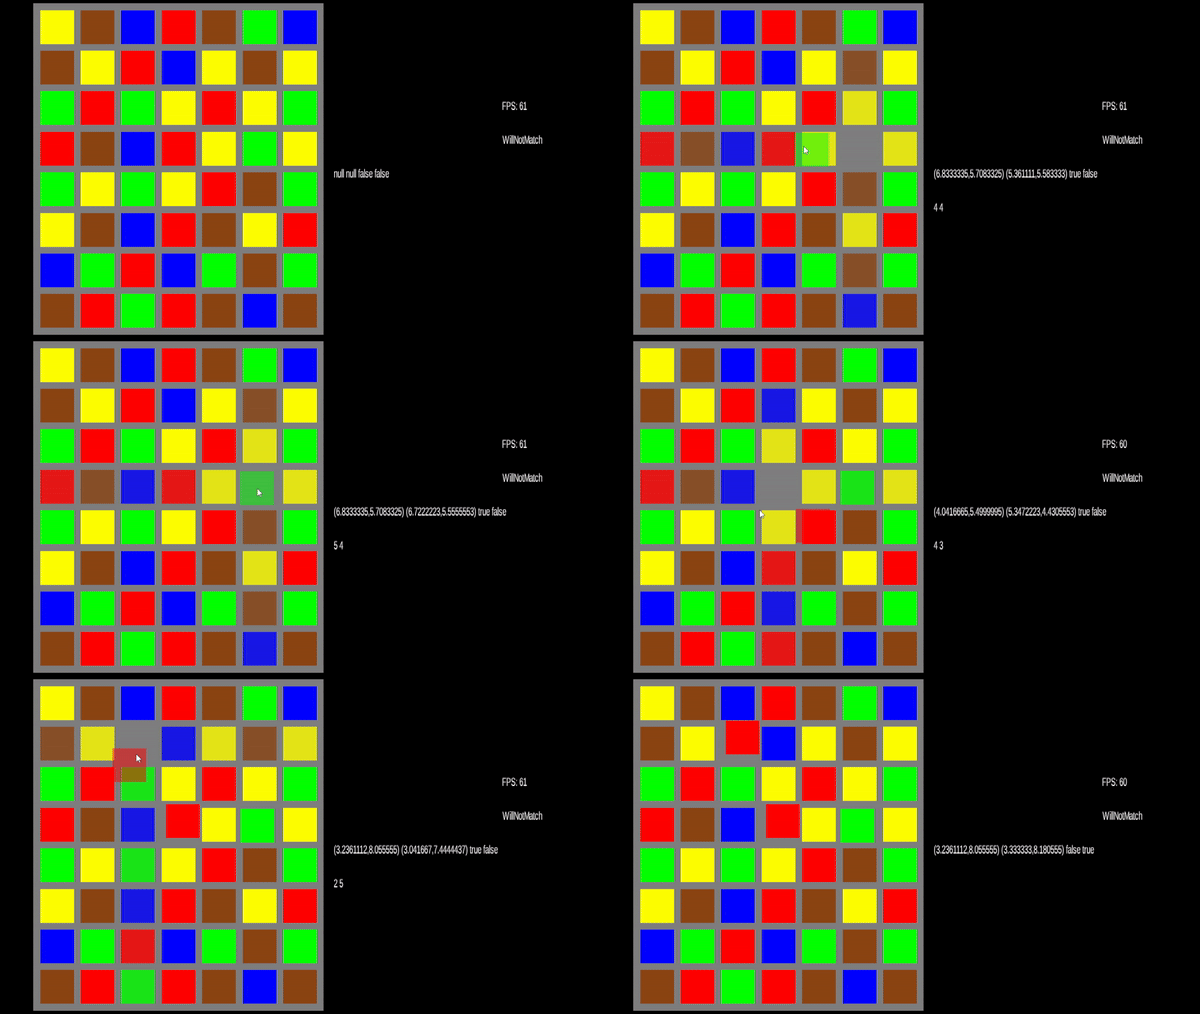
Great! If you refer back to the diagram of all the things we want to do based on the incoming inputs you'll see there's a lot more to do. But before we can do that, we need to actually get the core of our game logic in place. Specifically? We need to know if a move for our selected tile is valid or not, let's turn to our good friend JUnit to help us along with that.
Valid moves only ↩
Now that the user can drag a tile around, we need to make sure they only perform valid moves. In order to help keep the trickiest bit of logic we'll have in working order, we'll be adding in JUnit to run unit tests. First thing first, we'll update our build.gradle file at the root of the project.
project(":core") {
    apply plugin: "java-library"


    dependencies {
        api "com.badlogicgames.gdx:gdx:$gdxVersion"
        testImplementation "org.junit.jupiter:junit-jupiter-api:5.10.0"
        testRuntimeOnly "org.junit.jupiter:junit-jupiter-engine:5.10.0"
    }

    test {
        useJUnitPlatform()
        testLogging {
            events "passed", "skipped", "failed"
        }
    }
}
Next, inside of the build.gradle file for the core project we'll add in where the test directories are:
sourceSets.test.java.srcDirs = [ "test/" ]
After you create this folder at core/test you may need to mark the directory as a test directory in your IDE if it doesn't pick up on any of the changes. But, with this in place we should have a test task now available for us in the core project. So now, let's move onto defining the interface and command classes we'll need to write one of those tests up.
We'll start with a simple ShiftToken command. In my original protoyping I called this a
Move command, but since we have a MoveTowards command for graphical state,
I'm going to try to name these with a little more specificity. What does a ShiftToken do?
It moves a token in a specific direction, swapping the tile in the place it's going to with the one
that's moving. If you had a row of tiles 1, 2, and 3 and shifted 1 to the right twice, then you'd have
a row of tiles of 2, 3, and 1. Simple enough right? So let's define the class but leave the implementation
alone for now:
public class ShiftToken implements Command {
    public static enum Direction {
        UP, RIGHT, DOWN, LEFT
    }
    public int startRow;
    public int startColumn;
    protected GameGrid gameGrid;
    public Direction direction;


    public ShiftToken(int startRow, int startColumn, Direction direction, GameGrid gameGrid) {
        this.startRow = startRow;
        this.startColumn = startColumn;
        this.direction = direction;
        this.gameGrid = gameGrid;

        try {
            gameGrid.getTile(startRow, startColumn);
        } catch (SpaceOutOfBoundsException tileOutOfBoundsException) {
            throw new InvalidShiftingException(this, tileOutOfBoundsException);
        }
    }
    public void execute() {}
}
At this point, you may have realized that I left it up to you to make a getTile method inside of the
GameGrid class. The most basic implementation is just something like
return this.spaces.get(row).get(column);but I've included bounds checking in mine which is why it throws a
SpaceOutOfBoundsException if we try to get a
tile that doesn't exist within the grid. Since this isn't as useful for context if we see this happen while running the code,
I've wrapped that possibility with a shifting specific exception so it makes things easy for us to debug. If you're not doing
this, then you'll probably run into a IndexOutOfBoundsException exception from the grid's underlying list implementation
if something bad happens.
Now, let's move along to defining our test cases, all of which will fail to start. We'll start with the setup code that will be common
for each test. We'll need a stable grid, so let's make a custom TokenGeneratorAlgorithm to supply a stable grid:
class ShiftTokenTest {
    GameGrid<TileType> grid;

    TokenGeneratorAlgorithm<TileType> fixedTokenAlgo = new TokenGeneratorAlgorithm<TileType>() {
        final TileType[] tokens = {
            TileType.LowValue, TileType.Multiplier, TileType.HighValue, TileType.MidValue,
            TileType.HighValue, TileType.Negative, TileType.MidValue, TileType.HighValue,
            TileType.LowValue, TileType.Multiplier, TileType.HighValue, TileType.MidValue,
            TileType.HighValue, TileType.Negative, TileType.MidValue, TileType.HighValue
        };
        int i = 0;
        @Override
        public TileType next(int row, int column) {
            TileType tileType = tokens[i];
            i = (i + 1) % (tokens.length);
            return tileType;
        }
    };

    @BeforeEach
    void setUp() {
        grid = new GameGrid<>(4, 4);
        for (GridSpace<TileType> space : grid) {
            space.setValue(fixedTokenAlgo.next(0, 0));
        }
    }
    ...
Next, our first, very very simple test:
@Test
void movingLeftSwapsATokenWithItsLeftNeighbor() {
    Command command = new ShiftToken(0,1, ShiftToken.Direction.LEFT, grid);
    TileType willBeDisplaced = grid.getTile(0,0 ).getValue();
    TileType willReplaceDisplaced = grid.getTile(0, 1).getValue();
    command.execute();
    Assertions.assertEquals(willBeDisplaced, grid.getTile(0, 1).getValue());
    Assertions.assertEquals(willReplaceDisplaced, grid.getTile(0, 0).getValue());
}
Running this test will give you the expected failure:
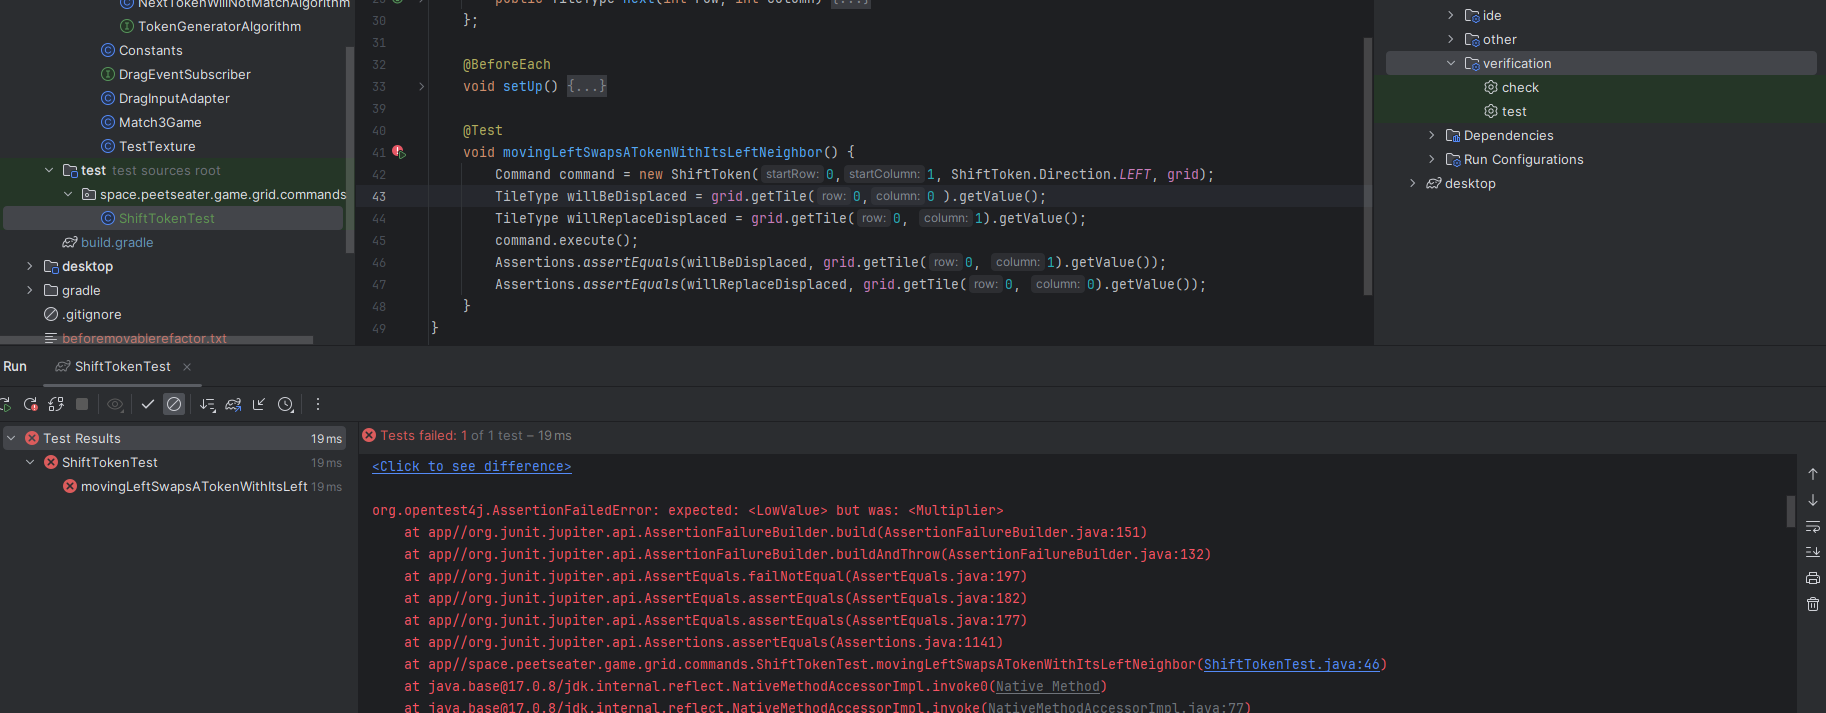
So let's get it passing! First off, we need to use the direction we're shifting to determine which space we're swapping with. This is pretty easy, if not slightly verbose:
int endRow;
int endColumn;
switch (moveDirection) {
    case UP:
        endRow = startRow + 1;
        endColumn = startColumn;
        break;
    case DOWN:
        endRow = startRow - 1;
        endColumn = startColumn;
        break;
    case LEFT:
        endRow = startRow;
        endColumn = startColumn - 1;
        break;
    case RIGHT:
    default:
        endRow = startRow;
        endColumn = startColumn + 1;
        break;
}
Is there some more clever way to write this? Oh probably, but this is clear enough. Let's consider a possible way to do the swap of the values in the tiles at the start and end coordinates.
try {
    GridSpace start = gameGrid.getTile(startRow, startColumn);
    GridSpace end = gameGrid.getTile(endRow, endColumn);
    Object startValue = start.getValue();
    Object endValue = end.getValue();
    start.setValue(endValue);
    end.setValue(startValue);
} catch (SpaceOutOfBoundsException tileOutOfBoundsException) {
    throw new InvalidShiftingException(this, tileOutOfBoundsException);
}
If you use this code and run our test you'll see it does in fact work:
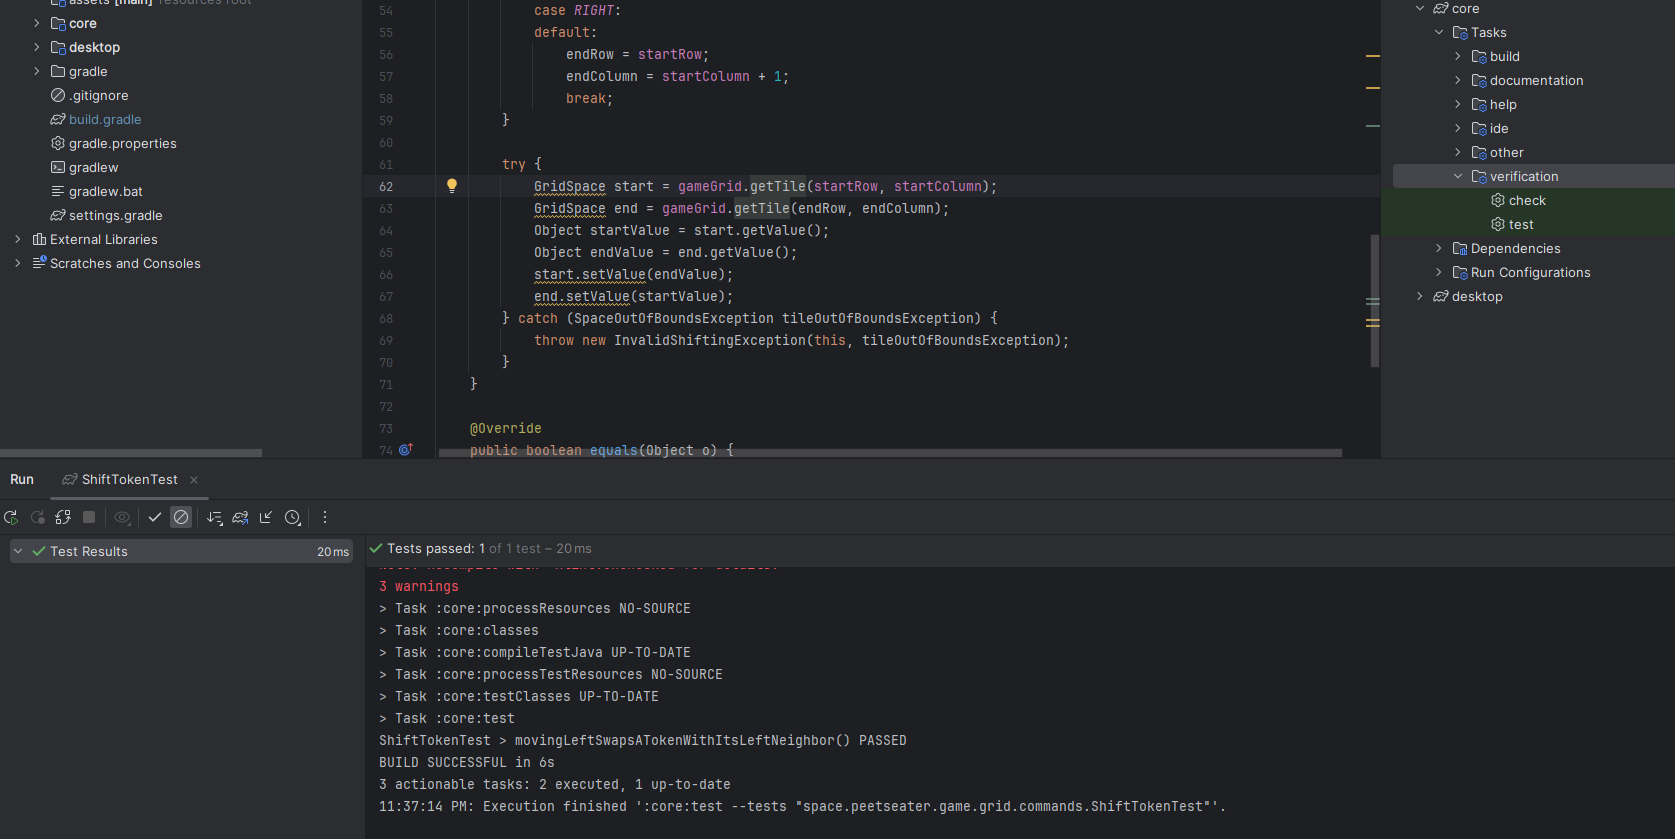
But, isn't it kind of gross that we use Object here? We know that two values taken from
the same grid will be the same type, so warnings about "raw use of parameterized types" and unchecked
cast exceptions warnings can be safely ignored. But think about it, if instead of the command doing
this, we pushed this logic into the game grid or the tile itself, then we could avoid any of the
compiler's warnings and write something that looked more like this:
try {
    gameGrid.swapValuesAt(startRow, startColumn, endRow, startRow);
} catch (SpaceOutOfBoundsException tileOutOfBoundsException) {
    throw new InvalidShiftingException(this, tileOutOfBoundsException);
}
At the risk of existential crisis, what does it mean to swap a value in the grid anyway? I mean, obviously
what we're doing is going to swap the reference, but what about the visual position? If you remember, the grid
position does factor into where we set the position of the tile graphic, but besides the initial setup
we don't do anything to relate the row and column a value is in with its position on the board. In order to
swap, we'll need to handle that too, but not yet. We'll have the board graphic handle that for us after we
get some more tests on the books and implementing that swapValuesAt method inside of the GameGrid
public void setTileValue(int row, int column, T value) {
    getTile(row, column).setValue(value);
}

public void swapValuesAt(int aRow, int aColumn, int bRow, int bColumn) {
    T a = getTile(aRow, aColumn).getValue();
    T b = getTile(bRow, bColumn).getValue();
    setTileValue(aRow, aColumn, b);
    setTileValue(bRow, bColumn, a);
}
There, now our code can be written in that simple way without ever losing our T type goodness. Turning back to our
test cases, we can add in the shift tests for the other directions. They're all pretty similar:
@Test
void movingUpSwapsATokenWithItsNeighborAbove() {
    Command command = new ShiftToken(0,0, ShiftToken.Direction.UP, grid);
    TileType willBeDisplaced = grid.getTile(0,0).getValue();
    TileType willReplaceDisplaced = grid.getTile(1, 0).getValue();
    command.execute();
    Assertions.assertEquals(willBeDisplaced, grid.getTile(1, 0).getValue());
    Assertions.assertEquals(willReplaceDisplaced, grid.getTile(0, 0).getValue());
}

@Test
void movingRightSwapsATokenWithItsRightNeighbor() {
    Command command = new ShiftToken(0,0, ShiftToken.Direction.RIGHT, grid);
    TileType willBeDisplaced = grid.getTile(0,1).getValue();
    TileType willReplaceDisplaced = grid.getTile(0, 0).getValue();
    command.execute();
    Assertions.assertEquals(willBeDisplaced, grid.getTile(0, 0).getValue());
    Assertions.assertEquals(willReplaceDisplaced, grid.getTile(0, 1).getValue());
}

@Test
void movingDownSwapsATokenWithItsNeighborBelow() {
    Command command = new ShiftToken(1,0, ShiftToken.Direction.DOWN, grid);
    TileType willBeDisplaced = grid.getTile(1,0).getValue();
    TileType willReplaceDisplaced = grid.getTile(0, 0).getValue();
    command.execute();
    Assertions.assertEquals(willBeDisplaced, grid.getTile(0, 0).getValue());
    Assertions.assertEquals(willReplaceDisplaced, grid.getTile(1, 0).getValue());
}
So that covers positive cases, but what about negative cases like trying to move a token out of bounds?
@Test
void throwsExceptionIfMoveIsOffTheGrid() {
    Assertions.assertThrows(InvalidShiftingException.class, new Executable() {
        @Override
        public void execute() {
            ShiftToken move = new ShiftToken(
                    grid.getHeight() - 1,
                    grid.getWidth() - 1,
                    ShiftToken.Direction.RIGHT,
                    grid
            );
            move.execute();
        }
    });
}
Assuming you implemented your getTile method to throw SpaceOutOfBoundsException then your test
will pass. If you didn't add any guards or used a built in exception. You'll probably be looking for IndexOutOfBoundsException
rather than my specific ones.
We now have a basic command to move tiles around on the board, while a user can drag a tile from column 1 to 4 and we'll make that happen,
we don't need any sort of command like "shift this token over 4 spaces", instead we'll just generate 4 shift commands and add them onto
our queue. This is pretty handy because we can use these as building blocks for other aspects of the game. For example, when we drag a tile
around the board we can take our starting coordinate and then construct the correct shift commands based on a simple difference of position.
Nice right? Let's define our stub in the GameGrid
public List<ShiftToken> getShiftsToMoveFromStartToEnd(int sr, int sc, int er, int ec) {
    return new LinkedList<>();
}
Next let's setup a new GameGridTest junit test case to define what we want to have happen. We'll
setup a game grid in the same way as we did before, but this time I won't bother defining the whole grid in the
tokens array. Since we're mod-ing the list we'll end up alternating rows between our two options.
Which is good, because this time we're going to generate a grid 5 rows high so that we'll be able to make 3 of
the same tiles in a row by shifting.
class GameGridTest {
    GameGrid grid;

    TokenGeneratorAlgorithm fixedTokenAlgo = new TokenGeneratorAlgorithm() {
        final TileType[] tokens = {
                TileType.LowValue, TileType.Multiplier, TileType.HighValue, TileType.MidValue,
                TileType.HighValue, TileType.Negative, TileType.MidValue, TileType.HighValue,
        };
        int i = 0;
        @Override
        public TileType next(int row, int column) {
            TileType tileType = tokens[i];
            i = (i + 1) % (tokens.length);
            return tileType;
        }
    };

    @BeforeEach
    void setUp() {
        grid = new GameGrid<>(4, 5);
        for (GridSpace space : grid) {
            space.setValue(fixedTokenAlgo.next(0, 0));
        }
    }
}
For shifting, we'll check the following positive cases.
- We can shift the token at 0,0 all the way to rightmost side of the grid
- We can shift the token at 0,0 all the way to the top of the grid
- We can shift the token at 0,3 all the way to leftmost side of the grid
- We can shift the token at 4,0 all the way to the bottom of the grid
We could probably content ourselves with two of these, but it doesn't hurt to make sure our code handles all four directions similar to our movement tests did.
@Test
void getShiftsToMoveFromStartToEnd00To03() {
    int sr = 0;
    int sc = 0;
    int er = 0;
    int ec = grid.width - 1;
    List<ShiftToken> moves = grid.getShiftsToMoveFromStartToEnd(sr, sc, er, ec);
    Assertions.assertNotEquals(0, moves.size());
    Assertions.assertEquals(grid.width - 1, moves.size());
    for (int i = 0; i < moves.size(); i++) {
        ShiftToken move = moves.get(i);
        Assertions.assertEquals(ShiftToken.Direction.RIGHT, move.moveDirection);
        Assertions.assertEquals(i, move.startColumn);
    }
}
@Test
void getShiftsToMoveFromStartToEnd00To40() {
    int sr = 0;
    int sc = 0;
    int er = grid.getHeight() - 1;
    int ec = 0;
    List<ShiftToken> moves = grid.getShiftsToMoveFromStartToEnd(sr, sc, er, ec);
    Assertions.assertNotEquals(0, moves.size());
    Assertions.assertEquals(grid.height - 1, moves.size());
    for (int i = 0; i < moves.size(); i++) {
        ShiftToken move = moves.get(i);
        Assertions.assertEquals(ShiftToken.Direction.UP, move.moveDirection);
        Assertions.assertEquals(i, move.startRow);
    }
}
@Test
void getShiftsToMoveFromStartToEnd03To00() {
    int sr = 0;
    int sc = grid.width - 1;
    int ec = 0;
    int er = 0;
    List<ShiftToken> moves = grid.getShiftsToMoveFromStartToEnd(sr, sc, er, ec);
    Assertions.assertNotEquals(0, moves.size());
    Assertions.assertEquals(grid.width - 1, moves.size());
    for (int i = sc; i > 0; i--) {
        ShiftToken move = moves.get(sc - i);
        Assertions.assertEquals(ShiftToken.Direction.LEFT, move.moveDirection);
        Assertions.assertEquals(i, move.startColumn);
    }
}
@Test
void getShiftsToMoveFromStartToEnd40To00() {
    int sc = 0;
    int sr = grid.getHeight() - 1;
    int ec = 0;
    int er = 0;
    List<ShiftToken> moves = grid.getShiftsToMoveFromStartToEnd(sr, sc, er, ec);
    Assertions.assertNotEquals(0, moves.size());
    Assertions.assertEquals(grid.height - 1, moves.size());
    for (int i = 0; i < moves.size(); i++) {
        ShiftToken move = moves.get(i);
        Assertions.assertEquals(ShiftToken.Direction.DOWN, move.moveDirection);
        Assertions.assertEquals(sr - i, move.startRow);
    }
}
You can take a moment here and try to implement the logic for the method if you want. The tests are your guide to whether or not your code is doing the right thing. Remember that we're not actually changing the grid at all yet, we're returning a list of how we intend to change to the grid. Big difference there. Once you're ready, you can check out my implementation below:
boolean isHorizontal = startRow == endRow; boolean isVertical = startColumn == endColumn; Direction moveDirectionH = startColumn < endColumn ? Direction.RIGHT : Direction.LEFT; Direction moveDirectionV = startRow < endRow ? Direction.UP : Direction.DOWN; Listmoves = new LinkedList<>(); if (isHorizontal) { for (int c = 0; c < Math.abs(startColumn - endColumn); c++) { int direction = Integer.signum(endColumn - startColumn); moves.add(new ShiftToken(startRow, startColumn + c * direction, moveDirectionH, this)); } } else if (isVertical) { for (int r = 0; r < Math.abs(startRow - endRow); r++) { int direction = Integer.signum(endRow - startRow); moves.add(new ShiftToken(startRow + r * direction, startColumn, moveDirectionV, this)); } } return moves;
An astute reader here might look at the boolean flags for whether this is horizontal or vertical movement and then also realize that if the start and end row (or column) are the same, we'll end up with 0 iterations of that particular loop. So you could drop those checks. But, if you do, do you think this negative test case would pass:
@Test
void getShiftsToMoveFromStartToEnd0011() {
    int sc = 0;
    int sr = 0;
    int ec = 1;
    int er = 1;
    List moves = grid.getShiftsToMoveFromStartToEnd(sc, sr, ec, er);
    Assertions.assertEquals(0, moves.size());
}
A quick run will show you that if we want to enforce that a token can only move in one direction at a time, and can't be dragged horizontally, than we want to keep our horizontal and vertical checks. If you want to perhaps have some sort of piece that has different drag rules than the rest (think about horse piece in chess for example) then maybe we'd drop that. But for now our tokens can only be moved within their own row and column, so our shifting logic respects that.
Now that we can get the commands that will shift our board around, we need to be able to check if those sets of actions are valid or not. So, it's finally time to start about a core piece of logic for our code. A Match! Assuming we're not going to have any sort of item that allows you to make matches of less than 3 we could hardcode how far we have to look, or make a static variable. But now that I've said "assuming we're not", it makes me want to remain open to an item that could temporarily allow for matches of 2 or something that could be pretty fun. So, let's program this in a way that allows for that, but gives us a sensible default as well.
public class Match<T> {
    public static int DEFAULT_MIN_MATCH_LENGTH = 3;
    private final LinkedList<GridSpace<T>> spaces;
    private final LinkedList<T> values;
    private final int minMatchLength;

    public Match(GridSpace<T> seed, int minimumMatchLength) {
        this.spaces = new LinkedList<>();
        this.spaces.add(seed);
        this.values = new LinkedList<>();
        this.values.add(seed.getValue());
        this.minMatchLength = minimumMatchLength;
    }

    public Match(GridSpace<T> seed) {
        this(seed, DEFAULT_MIN_MATCH_LENGTH);
    }
}
Before we add in some helpful functions to make this class able to do it's job. Let's go over algorithms to find the matches in the first place. There's 4 in total but let's consider the most basic example, how do I tell if there is a match at a coordinate on the grid of r,c? It's pretty easy to think of this visually, so here's a picture of what we'd have to check:

But Ethan, you say, you said there's 4 ways we can do this? Yup! Because we can we be clever depending on the context we're matching in. In the case of a single tile, we have to check however many tiles away from us to get a minimum length match. But, what if we're checking not a single tile, but a single row?

If we're checking our tiles from left to right, then you can take advantage of the fact that we've already checked if the tiles to the left of us had a match in the rightward direction, and so we can avoid doing duplicate checks and only check in the non-left directions like in the above picture. If you rotate this, you have a single column match check, bringing our total algorithms up to 3. You can probably guess what the 4th algorithm we can use is. What if we're checking the entire grid at once?

If we're starting at the bottom left, and iterate rightward and upwards as we check each row, then we know we don't need to bother checking what's beneath us or to the left. Simple right?
So which do we use, and when is the question we now have to answer ourselves. Given that when we slide a token with our mouse we're doing so to make a match, you might think we only need the first matching algorithm. You would be wrong. Remember that our shifting of tokens pushes everything else in that row into the hole left by the dragged token. So it's very possible, and encouraged for someone to try to slide a token so that they get a match not only with the one they held, but also with a token they've shifted over as a side affect. So at the very least, we need to check a whole row or column.
Do we ever need to check the whole grid? Consider if your game has an item that converts one token type into another. After you've applied this change to the grid, you might know which tiles were changed, so you could do the individual check on each and that might be efficient if it was a small amount of items changed. But if you had over half the grid change then you'd probably end up doing a lot of duplicate checks, so there probably is a threshold where a full grid traversal would be better. I bet you the more mathematically inclined readers might be able to figure it out! But, I'm lazy. So, I think if I implement any sort of power like that for the user of the game, I'd want to do a full traversal.
So, let's implement all three! And if we want to be able to swap easily between them. We should probably implement these as a sort of
strategy pattern in the same way we did the token generation. But first, let's finish off our Match class with some primitive
operations:
    public boolean matches(GridSpace<T> other) {
        assert this.spaces.peek() != null;
        return this.spaces.peek().equals(other);
    }

    public void addMatch(GridSpace<T> space) {
        if (matches(space)) {
            this.spaces.add(space);
            this.values.add(space.getValue());
        }
    }

    public boolean isLegal() {
        return this.spaces.size() >= this.minMatchLength;
    }

    public LinkedList<T> getValues() {
        return this.values;
    }

    public LinkedList<GridSpace<T>> getSpaces() {
        return this.spaces;
    }

    public int getMinMatchLength() {
        return this.minMatchLength;
    }
These are all straightforward so there's not much to explain besides we're going to keep track of the spaces that are
part of the match. This will allow us to get the row and columns which will be important when it comes to removing and
replacing the tokens on the board with fresh ones. This is also the reason why we track both the grid spaces AND the
values in their own lists. Once the grid spaces have been filled with a new token, a call to getValue would
return the new value and not the value that was originally matched.
Okay, so assuming we have some sort of Matcher class that will handle finding matches for us, our interface in
our GameGrid will likely end up looking like
public List<Match> findMatches(Matcher<T> matcher)and we'll choose the matcher based on our context from the code. When we drag a tile around for example, after we shift some values we'll want to run a matcher against the row or column we're in. As you can tell from the diagrams we drew before, we have some basic primitive operations like "check the tiles in direction X" so let's consider what those might look like:
abstract public class AbstractMatcher<T> {
    protected final GameGrid<T> grid;

    public AbstractMatcher(GameGrid<T> grid) {
        this.grid = grid;
    }

    public abstract List<Match<T>> findMatches();

    public void checkMatchesAbove(GridSpace<T> space, Match match) {
        int startC = space.getColumn();
        int startR = space.getRow();
        for (int i = 1; i < match.getMinMatchLength() && startR + i < grid.getHeight() - 1; i++) {
            int row = startR + i;
            GridSpace<T> other = grid.getTile(row, startC);
            match.addMatch(other);
            if (match.getSpaces().size() == i) {
                break; // no match
            }
        }
    }

    public void checkMatchesBelow(GridSpace<T> space, Match match) {
        int startC = space.getColumn();
        int startR = space.getRow();
        int otherRow = startR - 1;
        for (int i = 1; i < match.getMinMatchLength() && otherRow > -1; i++) {
            otherRow = startR - i;
            GridSpace<T> other = grid.getTile(otherRow, startC);
            if (match.matches(other)) {
                match.addMatch(other);
            } else {
                break;
            }
        }
    }

    public void checkMatchesLeft(GridSpace<T> space, Match match) {
        int startC = space.getColumn();
        int startR = space.getRow();
        int otherC = startC - 1;
        for (int i = 1; i < match.getMinMatchLength() && otherC > -1; i++) {
            otherC = startC - i;
            GridSpace<T> other = grid.getTile(startR, otherC);
            if (match.matches(other)) {
                match.addMatch(other);
            } else {
                break;
            }
        }
    }

    public void checkMatchesRight(GridSpace<T> space, Match match) {
        int startC = space.getColumn();
        int startR = space.getRow();
        int otherC = startC + 1;
        for (int i = 1; i < match.getMinMatchLength() && otherC < grid.getWidth() - 1; i++) {
            otherC = startC + i;
            GridSpace<T> other = grid.getTile(startR, otherC);
            if (match.matches(other)) {
                match.addMatch(other);
            } else {
                break;
            }
        }
    }
}
I've purposefully left in the first approach I started with that's more clever than it needs to be in the
checkMatchesAbove method. While the basic setup for the space and bounds checking is the same,
the way we break out of the loop differs. In checkMatchesBelow we call matches and
then if that returns false we break out of the loop since there's no point checking more tiles if we didn't
get a match to start. In checkMatchesAbove we take advantage of the fact that we know addMatch
calls matches for us, and then we compare the iteration variable i against the size
of the match so far. i starts at 1, so it will match a failed match on the first loop since the match's
values start with its first space. But, if we added a space to our Match that turn, it will have
gone up by 1 and will no longer match i. This works, and feels clever, but it's bad for two reasons
- It leaks details about the implementation of
addMatch, so if we change that we might break it -
Reading
size() == irequires the developer to think a lot more than the if else statement does. One reads like English, one requires mental overhead
For that reason, I'd advise you rewrite that function to be more like the other three. Or even try to come up with some helper functions to reduce all the same setup code being used. It's a fun exercise to do! But, before you jump onto the refactoring train, let's pump the breaks and realize that there's another case we didn't cover. When the match isn't formed from 2 tiles to one side, but actually from the two pieces on either side of you. We can refer to this as a match centered on a space and realize that we could walk out one step at a time in both directions and try to find the matches and we'd be good to go:

The code to do this could look like this:
public void checkMatchesHorizontallyCenteredAt(GridSpace<T> space, Match<T> match) {
    // Walk outward from our centerpoint while keeping the min match length in mind
    int centerC = space.getColumn();
    int centerR = space.getRow();

    boolean walkLeft = true;
    boolean walkRight = true;
    for (int i = 1; i < match.getMinMatchLength() && (walkLeft || walkRight); i++) {
        if (walkRight) {
            int column = centerC + i;
            if (column < grid.getWidth()) {
                GridSpace<T> other = grid.getTile(centerR, column);
                if (!match.matches(other)) {
                    walkRight = false;
                } else {
                    match.addMatch(other);
                }
            } else {
                walkRight = false;
            }
        }
        if (walkLeft) {
            int column = centerC - i;
            if (column > -1) {
                GridSpace<T> other = grid.getTile(centerR, column);
                if (!match.matches(other)) {
                    walkLeft = false;
                } else {
                    match.addMatch(other);
                }
            } else {
                walkLeft = false;
            }
        }
    }
}
Testing this method is as easy as it was to test the others, but instead of picking a space that's on the edge of the match we just choose the middle and then make sure we've got a legal match and the spaces are in the range we expect:
@Test
void checkMatchesHorizontallyCenteredAt() {
    GridSpace<TileType> space = grid.getTile(4, 2);
    Match<TileType> match = new Match<>(space, 3);
    matcher.checkMatchesHorizontallyCenteredAt(space, match);
    Assertions.assertTrue(match.isLegal());
    Assertions.assertEquals(3, match.getValues().size());
    for (GridSpace<TileType> found :match.getSpaces()) {
        int col = found.getColumn();
        Assertions.assertTrue(1 <= col && col <= 3);
        Assertions.assertEquals(4, found.getRow());
    }
}
Now that's great and all, but if you think about it, doesn't our "walking" step feel like it could cover all our other cases we
programmed before? Why have a checkMatchesAbove function when we could simply have a "search in that direction" method.
And if we have to be wary of a match being formed from both above and below in some cases, then we really always want to do both
directions for a vertical or a horizontal match. So, instead of the 5-6 methods we've talked about so far. Let's define two that
will do all the work for us:
protected int _searchDir(
    int row,
    int column,
    int depth,
    ShiftToken.Direction direction,
    Match<T> currentMatch
) {
    if (row < 0 || column < 0 || row > grid.getHeight() - 1 || column > grid.getWidth() - 1) {
        // We are out of bounds.
        return;
    }

    GridSpace space = grid.getTile(row, column);
    if (!currentMatch.matches(space)) {
        return;
    }

    if (depth >= currentMatch.getMinMatchLength() * 2) {
        return;
    }

    currentMatch.addMatch(space);

    switch (direction) {
        case UP:
            _searchDir(row + 1, column,  + 1, direction, currentMatch);
            break;
        case DOWN:
            _searchDir(row - 1, column,  + 1, direction, currentMatch);
            break;
        case LEFT:
             _searchDir(row, column - 1,  + 1, direction, currentMatch);
            break;
        case RIGHT:
            _searchDir(row, column + 1,  + 1, direction, currentMatch);
            break;
    }
}

public Match<T> search(int row, int column) {
    return search(row, column, Match.DEFAULT_MIN_MATCH_LENGTH);
}

public Match<T> search(int row, int column, int minimumMatchLength) {
    GridSpace<T> space = grid.getTile(row, column);
    Match<T> vMatch = new Match<>(space);
    Match<T> hMatch = new Match<>(space);
    _searchDir(row  + 1, column, 1, ShiftToken.Direction.UP, vMatch);
    _searchDir(row - 1, column, 1, ShiftToken.Direction.DOWN, vMatch);
    _searchDir(row, column - 1, 1, ShiftToken.Direction.LEFT, hMatch);
    _searchDir(row, column + 1, 1, ShiftToken.Direction.RIGHT, hMatch);
    Match<T> m = new Match<>(space);
    if (vMatch.isLegal()) {
        for (GridSpace<T> gs : vMatch.getSpaces()) {
            if (gs != space) {
                m.addMatch(gs);
            }
        }
    }
    if (hMatch.isLegal()) {
        for (GridSpace<T> gs : hMatch.getSpaces()) {
            if (gs != space) {
                m.addMatch(gs);
            }
        }
    }
    return m;
}
Now this might take you a moment to think about. Rather than setup for loops and walk across the grid by hand, we're now doing a recursive traversal instead. Let's go over our base cases:
- We're at the edge of the grid
- The space we've walked to doesn't match
- We've gone deeper than our expected maximum depth
The first two are simple to understand, that third one takes a bit of thought. Think about what having a minimum of 3 tokens to match means. Can you ever have 6 tokens lined up in a valid legal board? No. The most you can match is 5 because if you had 3 lined up to combine with another 3, they'd already be gone since they're a match. So we don't have to consider any more spaces to walk to if we've reached two times our limit. Technically speaking, we probably don't really need to consider this base case, it will happen naturally for us, but I thought it was an interesting property of the matches, so I tossed it in.
Now, we've got our super function to use for all the building blocks we could ever need. And so, let's write ourSingleTileMatcher. It reads pretty much exactly how you would think it would:
public class SingleTileMatcher<T> extends AbstractMatcher<T> {
    private final GridSpace<T> tile;

    public SingleTileMatcher(GameGrid<T> grid, GridSpace<T> tile) {
        super(grid);
        this.tile = tile;
    }

    @Override
    public List<Match<T>> findMatches() {
        List<Match<T>> matches = new ArrayList<>(2);
        Match<T> m = search(tile.getRow(), tile.getColumn());
        if (m.isLegal()) {
            matches.add(m);
        }
        return matches;
    }
}
Easy enough right? We can validate this code with a quick unit test of course though, and let's include a negative test as well since we didn't do that in our abstract tests (though you should totally try adding those in!) We'll use the same setup code as our other matcher test, so I'm going to omit it from the code below:
void findMatchesAt00() {
    SingleTileMatcher<TileType> matcher = new SingleTileMatcher<>(grid, grid.getTile(0,0));
    List<Match<TileType>> matches = matcher.findMatches();
    Assertions.assertEquals(1, matches.size());
    Match<TileType> match = matches.get(0);
    Assertions.assertTrue(match.isLegal());
    Assertions.assertEquals(3, match.getSpaces().size());
    for (GridSpace<TileType> space :match.getSpaces()) {
        int col = space.getColumn();
        Assertions.assertTrue(0 <= col && col <= 2);
        Assertions.assertEquals(0, space.getRow());
    }
}

@Test
void findNoMatchesAt22() {
    SingleTileMatcher<TileType> matcher = new SingleTileMatcher<>(grid, grid.getTile(2,2));
    List<Match<TileType>> matches = matcher.findMatches();
    Assertions.assertEquals(0, matches.size());
}

@Test
void findMatchesAt20() {
    SingleTileMatcher<TileType> matcher = new SingleTileMatcher<>(grid, grid.getTile(2,0));
    List<Match<TileType>> matches = matcher.findMatches();
    Assertions.assertEquals(1, matches.size());
    Match<TileType> match = matches.get(0);
    Assertions.assertTrue(match.isLegal());
    Assertions.assertEquals(3, match.getSpaces().size());
    for (GridSpace<TileType> space :match.getSpaces()) {
        int row = space.getRow();
        Assertions.assertTrue(1 <= row && row <= 3);
        Assertions.assertEquals(0, space.getColumn());
    }
}

@Test
void findMatchesAt42() {
    SingleTileMatcher<TileType> matcher = new SingleTileMatcher<>(grid, grid.getTile(4,2));
    List<Match<TileType>> matches = matcher.findMatches();
    Assertions.assertEquals(1, matches.size());
    Match<TileType> match = matches.get(0);
    Assertions.assertTrue(match.isLegal());
    Assertions.assertEquals(3, match.getSpaces().size());
    for (GridSpace<TileType> space :match.getSpaces()) {
        int col = space.getColumn();
        Assertions.assertTrue(1 <= col && col <= 3);
        Assertions.assertEquals(4, space.getRow());
    }
}
Great! So now when we implement any sort of feature that only changes a single tile, we can use our specialized
matcher and be sure it works. How about when we're sliding a tile around and considering the board? Well, let's
implement the RowTileMatcher. We'll take in the grid and the row to check as constructor parameters
like how the SingleTileMatcher took in its single tile. Then, we'll loop across those spaces and
search for matches. There's one little trick we can do to make this efficient:
public class RowTileMatcher<T> extends AbstractMatcher<T> {
    private final int rowToCheck;

    public RowTileMatcher(GameGrid<T> grid, int row) {
        super(grid);
        this.rowToCheck = row;
    }

    @Override
    public List<Match<T>> findMatches() {
        List<GridSpace<T>> rowSpaces = grid.getRow(rowToCheck);
        List<Match<T>> matches = new ArrayList<>();

        for (int c = 0; c < rowSpaces.size(); c++) {
            Match<T> m = search(rowToCheck, c);
            if (m.isLegal()) {
                matches.add(m);
                // Skip over any row already included in a match
                for (GridSpace<T> space : m.getSpaces()) {
                    c = Math.max(c, space.getColumn());
                }
            }
        }
        return matches;
    }
}
Since we know we've already walked as far as we could to the right in the row, if we have
a match, then we can jump past any remaining columns by modifying c to be equal to the
largest column number in our spaces for the match. When our loop cycles, the ++
will move c to the next space and we'll start fresh. Now, when you're doing
anything with recursion, it's a good idea to write some tests. So, here's a few:
class RowTileMatcherTest {
    GameGrid<TileType> grid;

    TokenGeneratorAlgorithm<TileType> fixedTokenAlgo = new TokenGeneratorAlgorithm<TileType>() {
        final TileType[] tokens = {
                LowValue, LowValue, LowValue, HighValue, HighValue, HighValue,
                HighValue, Negative, Negative, Negative, LowValue, LowValue,
                HighValue, Negative, HighValue, MidValue, HighValue, HighValue,
                HighValue, Negative, MidValue, HighValue, LowValue, LowValue,
                LowValue, HighValue, Negative, Negative, LowValue, HighValue
        };
        int i = 0;
        @Override
        public TileType next(int row, int column) {
            TileType tileType = tokens[i];
            i = (i + 1) % (tokens.length);
            return tileType;
        }
    };

    @BeforeEach
    void setUp() {
        grid = new GameGrid<>(6, 5);
        for (GridSpace<TileType> space : grid) {
            space.setValue(fixedTokenAlgo.next(0, 0));
        }
    }

    @Test
    void findMatchesAt00And30() {
        RowTileMatcher<TileType> matcher = new RowTileMatcher<>(grid, 0);
        List<Match<TileType>> matches = matcher.findMatches();
        Assertions.assertEquals(2, matches.size());

        Match<TileType> match = matches.get(0);
        Assertions.assertTrue(match.isLegal());
        Assertions.assertEquals(3, match.getSpaces().size());
        for (GridSpace<TileType> space :match.getSpaces()) {
            int col = space.getColumn();
            Assertions.assertTrue(0 <= col && col <= 2);
            Assertions.assertEquals(0, space.getRow());
        }

        Match<TileType> match2 = matches.get(1);
        Assertions.assertTrue(match2.isLegal());
        Assertions.assertEquals(3, match2.getSpaces().size());
        for (GridSpace<TileType> space :match2.getSpaces()) {
            int col = space.getColumn();
            Assertions.assertTrue(3 <= col && col <= 5);
            Assertions.assertEquals(0, space.getRow());
        }
    }

    @Test
    void findNoMatchesInRow4() {
        RowTileMatcher<TileType> matcher = new RowTileMatcher<>(grid, 4);
        List<Match<TileType>> matches = matcher.findMatches();
        Assertions.assertEquals(0, matches.size());
    }

    @Test
    void find2MatchesInRow1() {
        RowTileMatcher<TileType> matcher = new RowTileMatcher<>(grid, 1);
        List<Match<TileType>> matches = matcher.findMatches();
        Assertions.assertEquals(2, matches.size());
        Match<TileType> match = matches.get(0);
        Assertions.assertTrue(match.isLegal());
        Assertions.assertEquals(3, match.getSpaces().size());
        for (GridSpace<TileType> space :match.getSpaces()) {
            int row = space.getRow();
            Assertions.assertTrue(1 <= row && row <= 3);
            Assertions.assertEquals(0, space.getColumn());
        }

        Match<TileType> bigMatch = matches.get(1);
        Assertions.assertTrue(bigMatch.isLegal());
        Assertions.assertEquals(5, bigMatch.getSpaces().size());
    }
}
You can see we're using a 6 wide by 5 tall grid this time. That's so we confirm that two different kinds of matches in the same row are picked up correctly. There's also a really great match at 1,1 that has 5 whole spaces included in it. All these tests pass with our current code, so let's make a matcher for the column next!
public class ColumnTileMatcher<T> extends AbstractMatcher<T> {
    private final int columnToCheck;

    public ColumnTileMatcher(GameGrid<T> grid, int column) {
        super(grid);
        this.columnToCheck = column;
    }

    @Override
    public List<Match<T>> findMatches() {
        List<GridSpace<T>> colSpaces = grid.getColumn(columnToCheck);
        List<Match<T>> matches = new ArrayList<>();

        for (int r = 0; r < colSpaces.size(); r++) {
            Match<T> m = search(r, columnToCheck);
            if (m.isLegal()) {
                matches.add(m);
                // Skip over any row already included in a match
                for (GridSpace<T> space : m.getSpaces()) {
                    r = Math.max(r, space.getRow());
                }
            }
        }
        return matches;
    }
}
This probably feels very familiar. And it should, it's nearly identical. We could probably refactor this into a sort of "LineMatcher" if we wanted to, and let the user of the code pass in a flag to indicate if its horizontal or vertical. But at the moment, I'm okay without that abstraction. After all, we've still got one more matcher to implement before we move onto the whole reason why we started writing all this shifting and matching code in the first place!
Our last matcher is the FullGridTileMatcher this will iterate across the entire grid and find
all and any matches that exist. Here's the unit test first if you want to give this a shot on your own
before I show you my implementation.
class FullGridTileMatcherTest {
    GameGrid<TileType> grid;

    TokenGeneratorAlgorithm<TileType> fixedTokenAlgo = new TokenGeneratorAlgorithm() {
        final TileType[] tokens = {
                TileType.LowValue, TileType.LowValue, TileType.LowValue, TileType.MidValue,
                TileType.HighValue, TileType.Negative, TileType.MidValue, TileType.HighValue,
                TileType.HighValue, TileType.Negative, TileType.HighValue, TileType.MidValue,
                TileType.HighValue, TileType.Negative, TileType.MidValue, TileType.HighValue,
                TileType.LowValue, TileType.MidValue, TileType.MidValue, TileType.MidValue,
        };
        int i = 0;
        @Override
        public TileType next(int row, int column) {
            TileType tileType = tokens[i];
            i = (i + 1) % (tokens.length);
            return tileType;
        }
    };

    @BeforeEach
    void setUp() {
        grid = new GameGrid<>(4, 5);
        for (GridSpace<TileType> space : grid) {
            space.setValue(fixedTokenAlgo.next(0, 0));
        }
    }

    @Test
    void findMatches() {
        FullGridTileMatcher<TileType> matcher = new FullGridTileMatcher<>(grid);
        List<Match> matches = matcher.findMatches();
        Assertions.assertEquals(4, matches.size());

        // 0,0
        Match<TileType> lowValueMatch = matches.get(0);
        // 1,0
        Match<TileType> highValueMatch = matches.get(1);
        // 1,1
        Match<TileType> negativeMatch = matches.get(2);
        // 4,2
        Match<TileType> midValueMatch = matches.get(3);

        Assertions.assertTrue(lowValueMatch.isLegal());
        Assertions.assertTrue(highValueMatch.isLegal());
        Assertions.assertTrue(negativeMatch.isLegal());
        Assertions.assertTrue(midValueMatch.isLegal());

        for (GridSpace<TileType> space : lowValueMatch.getSpaces()) {
            int col = space.getColumn();
            Assertions.assertTrue(0 <= col && col <= 2);
            Assertions.assertEquals(0, space.getRow());
        }

        for (GridSpace<TileType> space : highValueMatch.getSpaces()) {
            int row = space.getRow();
            Assertions.assertTrue(1 <= row && row <= 3);
            Assertions.assertEquals(0, space.getColumn());
        }

        for (GridSpace<TileType> space : negativeMatch.getSpaces()) {
            int row = space.getRow();
            Assertions.assertTrue(1 <= row && row <= 3);
            Assertions.assertEquals(1, space.getColumn());
        }

        for (GridSpace<TileType> space : midValueMatch.getSpaces()) {
            int col = space.getColumn();
            Assertions.assertTrue(1 <= col && col <= 3);
            Assertions.assertEquals(4, space.getRow());
        }
    }
}
As is usually the case, there's more testing code than there is actual implementation:
public class FullGridTileMatcher<T> extends AbstractMatcher<T> {
    public FullGridTileMatcher(GameGrid<T> grid) {
        super(grid);
    }

    @Override
    public List<Match<T>> findMatches() {
        List<Match<T>> matches = new ArrayList<>();
        HashSet<GridSpace<T>> seen = new HashSet<>(grid.getWidth() * grid.getHeight());
        for (GridSpace<T> space : grid) {
            if (seen.contains(space)) {
                continue;
            }
            Match<T> m = search(space.getRow(), space.getColumn());
            if (m.isLegal()) {
                matches.add(m);
                for (GridSpace<T> s : m.getSpaces()) {
                    seen.add(s);
                }
            }
            seen.add(space);
        }
        return matches;
    }
}
Worth noting is that we're using a hashset here to keep track of which spaces we've already considered. There's no reason to check on a space that's already part of a match, in fact, if we did we'd end up with duplicative matches and would have to remove them before returning things to the caller. Besides that, we're really just looping over the grid and using our search function to find our matches like we did everywhere else.
The reason why we needed to implement matches is because a move done by shifting isn't valid unless it results in a match. So, we can now implement a valid move check for the grid. The way we'll do this is by taking advantage of a property of the Command pattern: it's undoable. So, all we have to do is take in a list of moves, apply them, and then check to see if we have any matches. If we do then great! The move is valid, we can then undo the changes we did to the grid, and return true.
This is almost trivially easier if you realize one of the most handy data structures for keeping track of something is the thing your CPU uses all the time. A stack!
public boolean testIfMovesValid(
    List<ShiftToken> moves,
    AbstractMatcher<T> matcher
) {
    Stack<ShiftToken> applied = new Stack<>();
    boolean canApply = false;
    try {
        // Apply moves to grid
        for (ShiftToken move : moves) {
            move.execute();
            applied.push(move);
        }
        // Check for matches
        canApply = !matcher.findMatches().isEmpty();

        while (!applied.isEmpty()) {
            applied.pop().execute();
        }

        return canApply;
    } catch (InvalidShiftingException InvalidShiftingException) {
        // Undo previously applied moves to revert grid to prior state
        while(!applied.isEmpty()) {
            applied.pop().execute();
        }
        return canApply;
    }
}
Fun bit of code don't you think? Though you might be scratching your head at the unwinding of our moves.
Specially, why can we call applied.pop().execute()? Shouldn't we have some kind of "unexecute"
call instead like your typical command pattern?
Well, yes, but also, no. Think about a row like A B C D. Let's say we applied shift right to the 2nd value.
We end up with A C B D right? Now, remember that our shift command looks like this:
public ShiftToken(int startRow, int startColumn, Direction moveDirection, GameGrid gameGrid) {
    this.startRow = startRow;
    this.startColumn = startColumn;
    this.moveDirection = moveDirection;
    this.gameGrid = gameGrid;
}
public void execute() {
    ... computer end row/column
    gameGrid.swapValuesAt(startRow, startColumn, endRow, endColumn);
}
Whenever we execute, we're moving the value from the start coordinates to the end coordinates. We never ever care about the actual value. We're just concerned with moving what's inside of the grid space.
So returning to our example: A C B D, told to shift right at the 2nd value gets us what?
A B C D again. So we've returned to the same state we were before. That's why applying what appears
to be the same set of commands in reverse order results in our grid returning to the state it was in before.
Pretty cool right?
Now of course, since this is core business logic of our game, we should add in a few tests. Simple enough!
Inside of our GameGridTest class we can add in the following test:
@Test
void testIfMovesInColumnValid() {
    grid.setTileValue(0, 0, TileType.HighValue);
    grid.setTileValue(1, 0, TileType.HighValue);
    grid.setTileValue(2, 0, TileType.LowValue);
    grid.setTileValue(3, 0, TileType.HighValue);

    LinkedList<ShiftToken> moves = new LinkedList<>();
    Assertions.assertFalse(
        grid.testIfMovesValid(moves, new ColumnTileMatcher<TileType>(grid, 0))
    );

    moves.add(new ShiftToken(2, 0, ShiftToken.Direction.UP, grid));
    Assertions.assertTrue(
        grid.testIfMovesValid(moves, new ColumnTileMatcher<TileType>(grid, 0))
    );
}

@Test
void testIfMovesInRowValid() {
    for (int i = 0; i < grid.getWidth(); i++) {
        grid.setTileValue(0, i, TileType.LowValue);
        grid.setTileValue(1, i, i % 2 == 0 ? TileType.MidValue : TileType.Negative);
    }
    grid.setTileValue(0, 1, TileType.HighValue);

    LinkedList<ShiftToken> moves = new LinkedList<>();
    Assertions.assertFalse(grid.testIfMovesValid(moves, new RowTileMatcher<TileType>(grid, 0)));

    moves.add(new ShiftToken(0, 0, ShiftToken.Direction.RIGHT, grid));
    Assertions.assertTrue(grid.testIfMovesValid(moves, new RowTileMatcher<TileType>(grid, 0)));
}
I've setup these tests in two different ways, you can take your pick since it actually takes more lines of
code to loop and set than it does to just call setTileValue 4 times. If you're wondering why
I alternated row 1 in the second test, it's because I know the order of the rows in each of the grid
spaces we're not setting here since we're using the fixedTokenAlgo to alternate two row
patterns and doing this will make sure we don't have an accident match besides the one we're checking for.
That's also why I'm using the Row and Column matchers and not the FullGridTileMatcher class for our checks.
If you remember, our BoardGraphic class likes to work with cross sections, so we can combine these
two match checkers if we wanted to create a check against a tile and expand out from that point in both directions.
The one thing you have to keep in mind is that if you start the cross section check on a tile that has a match in
both directions, then you're going to end up with a duplicate match that will need to be removed. Unless you want
to give a user double points for something that matched at the point where they started. Otherwise, we can look
to see which coordinate a start and end position's share, and then use the corresponding matcher we've made.
public class CrossSectionTileMatcher<T> extends AbstractMatcher<T> {
    private RowTileMatcher<T> rowTileMatcher;
    private ColumnTileMatcher<T> columnTileMatcher;

    public CrossSectionTileMatcher(int row, int column, GameGrid<T> gameGrid) {
        super(gameGrid);
        this.rowTileMatcher = new RowTileMatcher<>(gameGrid, row);
        this.columnTileMatcher = new ColumnTileMatcher<>(gameGrid, column);
    }

    @Override
    public List<Match<T>> findMatches() {
        List<Match<T>> rowMatches = rowTileMatcher.findMatches();
        List<Match<T>> columnMatches = columnTileMatcher.findMatches();

        // If we have matches from both, make sure they're not the same match
        List<Match<T>> matches = new ArrayList<>(rowMatches.size() + columnMatches.size());
        if (!rowMatches.isEmpty() && !columnMatches.isEmpty()) {
            Set<Match<T>> deduplicationSet = new HashSet<>();
            deduplicationSet.addAll(rowMatches);
            deduplicationSet.addAll(columnMatches);
            matches.addAll(deduplicationSet);
        } else {
            matches.addAll(rowMatches);
            matches.addAll(columnMatches);
        }
        return matches;
    }
}
When it comes to equality between matches it does matter that a match like [A B B B A] has
its initial seed node at the 1, 2, or 3rd index of the row. We still see a match as being the same if it
shares all the same spaces as another match. Put another way, in Match we can override equals
like so:
@Override
public boolean equals(Object obj) {
    if (obj instanceof Match) {
        Match<?> other = (Match<?>) obj;
        boolean eq = true;
        for (GridSpace<T> mySpace : this.spaces) {
            boolean matchInOther = other.spaces.contains(mySpace);
            eq = eq && matchInOther;
        }
        return eq;
    }
    return super.equals(obj);
}
HashSet uses both equals and hashCode though, so let's be good Java developers and override hashcode as well:
public int hashCode() {
    return Objects.hash(getSpaces());
}
As with our other matchers, we can construct a simple unit test to confirm that we're not accidentally getting duplicates
class CrossSectionTileMatcherTest {
    GameGrid<TileType> grid;

    TokenGeneratorAlgorithm<TileType> fixedTokenAlgo = new TokenGeneratorAlgorithm<TileType>() {
        final TileType[] tokens = {
                LowValue, LowValue, LowValue, HighValue, HighValue, HighValue,
                HighValue, Negative, Negative, Negative, LowValue, LowValue,
                HighValue, Negative, HighValue, MidValue, HighValue, HighValue,
                HighValue, Negative, MidValue, HighValue, LowValue, LowValue,
                LowValue, HighValue, Negative, Negative, LowValue, HighValue
        };
        int i = 0;
        @Override
        public TileType next(int row, int column) {
            TileType tileType = tokens[i];
            i = (i + 1) % (tokens.length);
            return tileType;
        }
    };

    @BeforeEach
    void setUp() {
        grid = new GameGrid<>(6, 5);
        for (GridSpace<TileType> space : grid) {
            space.setValue(fixedTokenAlgo.next(0, 0));
        }
    }


    @Test
    void findMatchesOverlappingWithTileType() {
        CrossSectionTileMatcher<TileType> matcher = new CrossSectionTileMatcher<TileType>(
            1, 1, grid
        );
        List<Match<TileType>> matches = matcher.findMatches();
        Assertions.assertEquals(3, matches.size());
    }
}
Great! With that test passing we know we can find matches. If we can find matches then we can use the testIfMovesValid
function to determine if a move from point a to point b for a tile is a legal move. All that's left is to actually make this move
happen. So let's return to our Match3GameState's onDragEnd method and add in two things. If you want to
try this before seeing the code, here's the breakdown:
- Get the moves the user wants to do
- Check if those moves make a match
- Reposition the tiles according to the new board state
First up, we implemented the gameXToColumn and gameYToRow method already, so it's trivially easy to
check to get the moves using our getShiftsToMoveFromStartToEnd method. Since this provides us a list of moves,
we can then use that and a matcher based on our start position to see if the move is valid:
int row = this.boardGraphic.gameYToRow(gameY);
int column = this.boardGraphic.gameXToColumn(gameX);
int startRow = crossSection.getRow();
int startCol = crossSection.getColumn();
List<ShiftToken> moves = this.gameGrid.getShiftsToMoveFromStartToEnd(startRow, startCol, row, column);
if (gameGrid.testIfMovesValid(moves, new CrossSectionTileMatcher<TileType>(startRow, startCol, gameGrid))) {
    this.commands.addAll(moves);
    for (ShiftToken shiftToken : moves) {
        this.commands.add(
            new ShiftToken(
                shiftToken.startRow, shiftToken.startColumn, shiftToken.moveDirection, boardGraphic.gameGrid
            )
        );
    }
}
Remember that we're tracking both the GameGrid of TileType which is our source of truth
and a game grid of TileGraphics which are the actual displayed values to the user. So to keep them in
sync we apply the moves to both places. I've done this by making a new shift token with the other grid, but you
could also just repeat the call to getShiftsToMoveFromStartToEnd. Either way, the underlying data will
be in the "right place".
Do you know why I put air quotes there? If you run the code now you can drag the
tile to a place that results in a match, but nothing changes visually. So, let's make it possible to reposition the
TileGraphics based on their grid position. Inside of BoardGraphic let's add a new method:
public void repositionCrossSection(int row, int column) {
    List<GridSpace<TileGraphic>> spacesInRow = gameGrid.getRow(row);
    List<GridSpace<TileGraphic>> spacesInColumn = gameGrid.getColumn(column);
    for (GridSpace<TileGraphic> space : spacesInRow) {
        Vector2 destination = new Vector2(
            screenXFromGridColumn(space.getColumn()),
            screenYFromGridRow(space.getRow()
        )
        );
        space.getValue().handleCommand(
            new MoveTowards(destination, space.getValue().getMovablePoint()));
    }
    for (GridSpace<TileGraphic> space : spacesInColumn) {
        Vector2 destination = new Vector2(
            screenXFromGridColumn(space.getColumn()),
            screenYFromGridRow(space.getRow())
        );
        space.getValue().handleCommand(
            new MoveTowards(destination, space.getValue().getMovablePoint())
        );
    }
}
Trying to compile this will get you an error about screenXFromGridColumn and its counterpart
being undefined. So go ahead and implement those by refactoring the code within initializeGrid
and pulling out the part that translates the row and column into an xy coordinates. 7
Once you're done, let's reify this into a command like usual:
public class RepositionCrossSection implements Command {
    private final BoardGraphic boardGraphic;
    private final int row;
    private final int column;

    public RepositionCrossSection(BoardGraphic boardGraphic, int row, int column) {
        this.boardGraphic = boardGraphic;
        this.row = row;
        this.column = column;
    }

    @Override
    public void execute() {
        this.boardGraphic.repositionCrossSection(row, column);
    }
}
Lastly, we'll use this new command within onDragEnd after we've queued up the commands
to update the board state:
commands.add(new RepositionCrossSection(boardGraphic, startRow, startColumn));
Our final result? Invalid moves result in the selected tile snapping back to where it started, and valid moves shift the board tiles around to let the selected one snuggly fit into place:
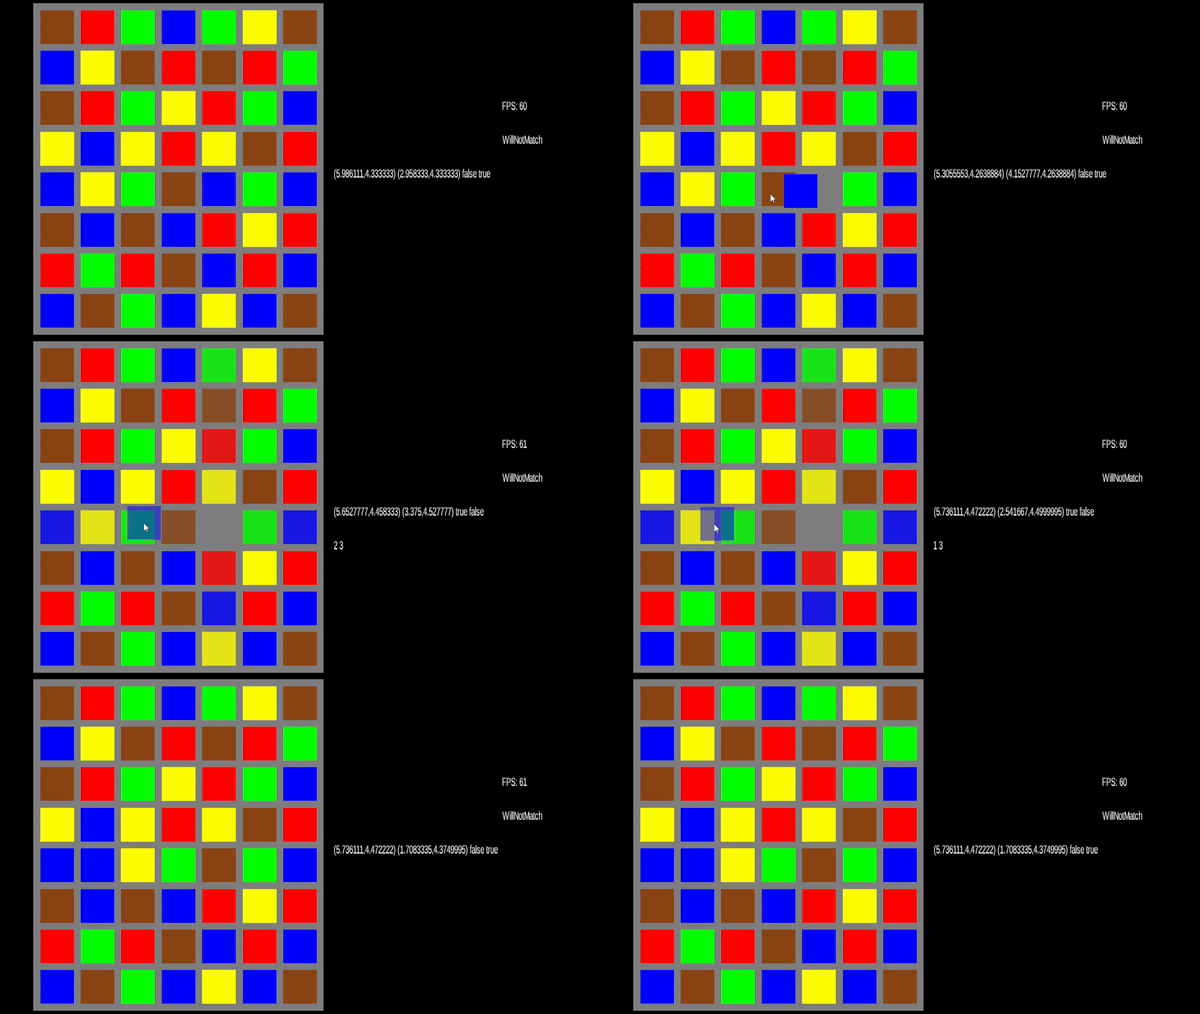
Not bad right? It's missing something we'll get to in the next section, but before that, let's look at something odd we should fix. If you click and drag everything's fine. What if you click on a tile without dragging?
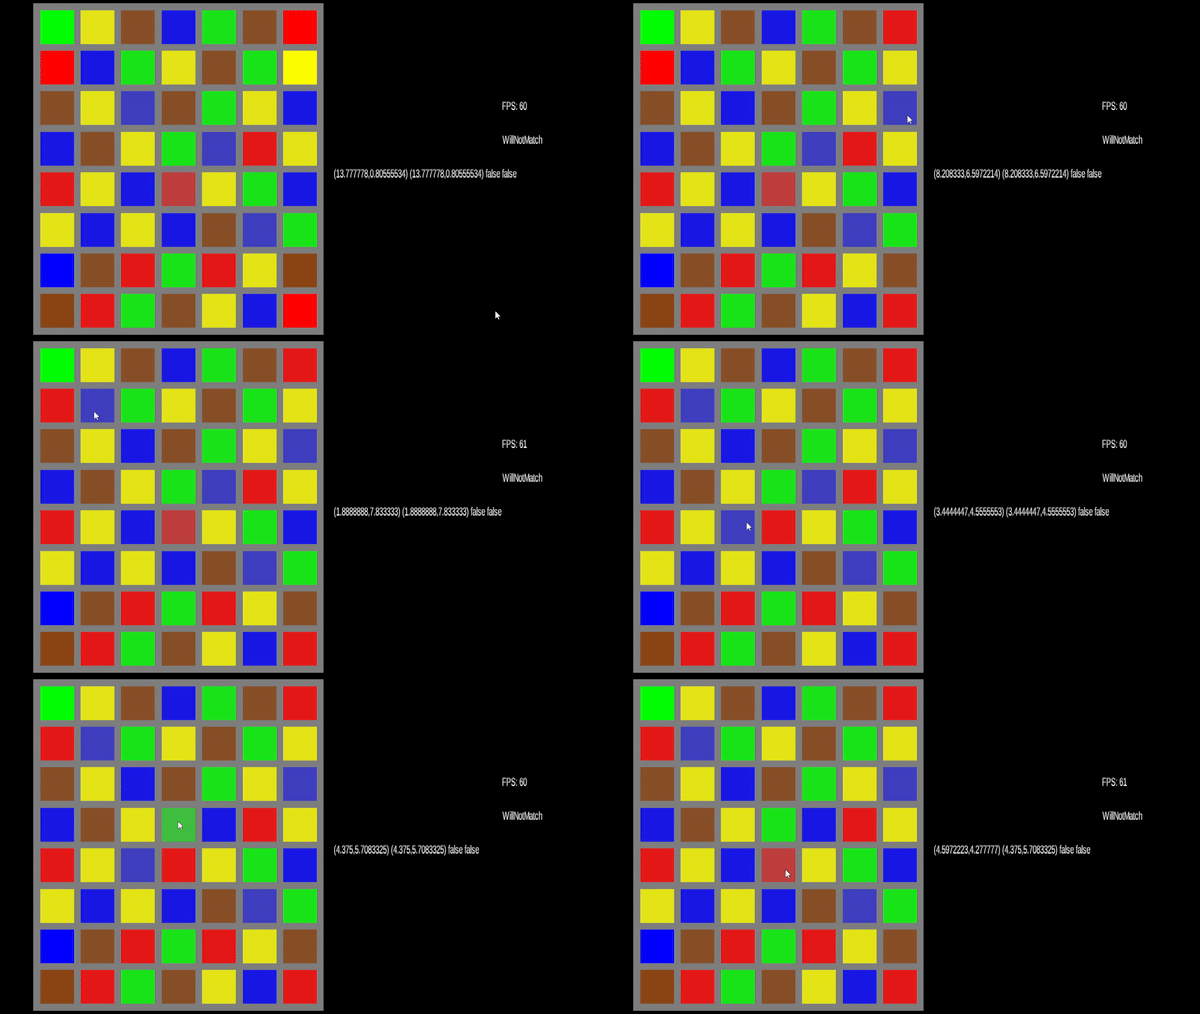
Well that's awkward. It's like the click is sticky or something. Clicking results in the onDragStart
code being called, but not the onDragEnd. We could move the start of the drag code into the
drag handler to work around the fact that when we get a click we don't know if it's going to be a drag or not, but
let's just update our left click handler to clear our the cross sections and make sure anything that was moved goes
back to its original state:
@Override
public void onLeftClick(float gameX, float gameY) {
    if (crossSection == null) {
        return;
    }

    this.commands.add(crossSection.undoCommand());
    this.commands.add(new DeselectTile(selected));
    this.commands.add(new RepositionCrossSection(
      boardGraphic, crossSection.getRow(), crossSection.getColumn())
    );
    this.selected = null;
    this.crossSection = null;
}
And now?
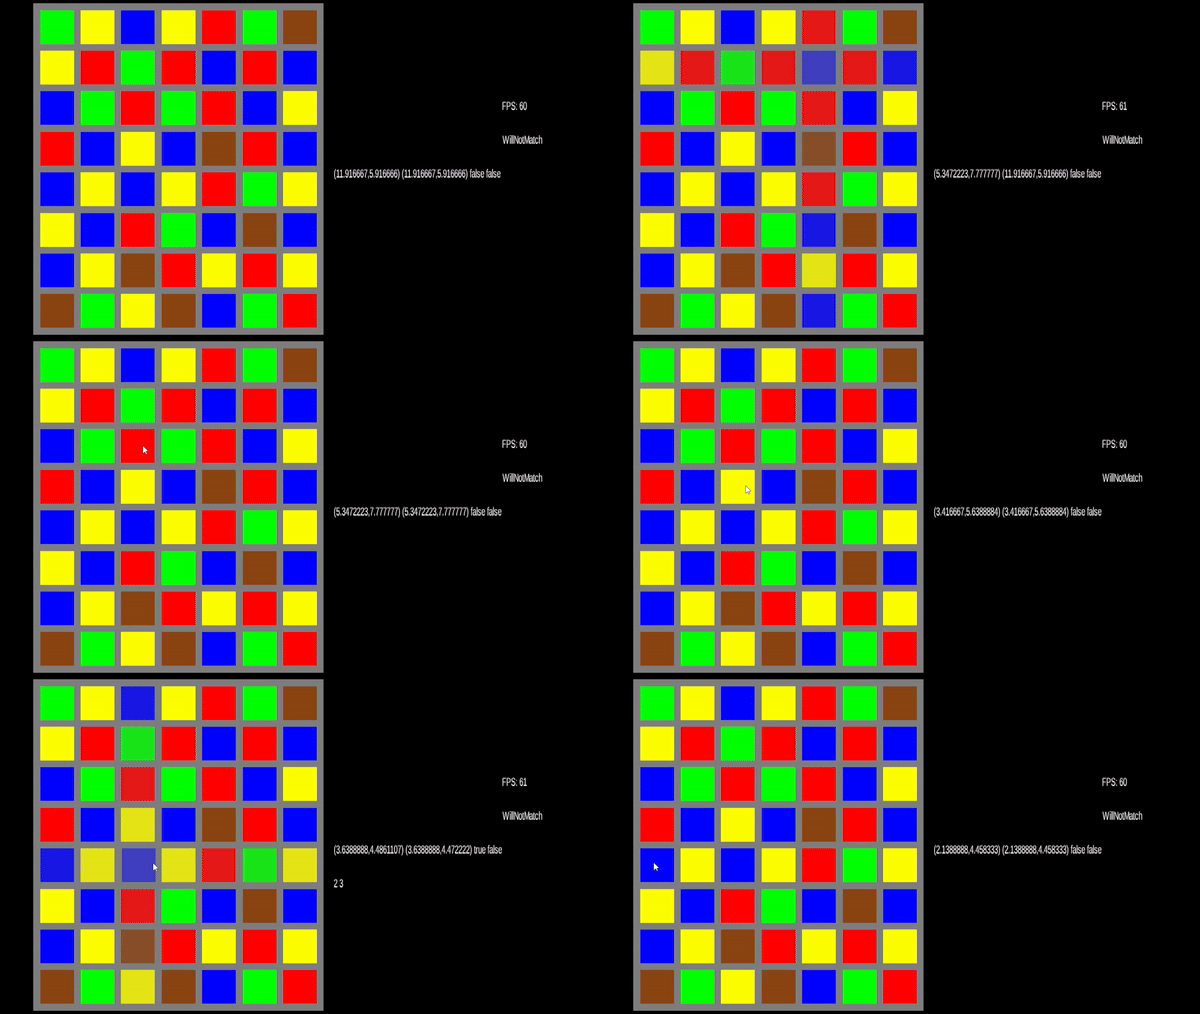
Much better!
We've accomplished our goal for this section, so let's move on to making the game feel better during the process of finding a match. Right now, the only thing moving when a user drags a tile is the one they're holding. It'd be much much better if the tiles they're moving the piece over shifted as if they were already applying that possible move. If we do that, we could show the users matches as they happen so they can make a better decision and not have to visualize it themselves. So, let's move on to what I'd consider one of the harder parts of this project.
Move Speculation ↩
The user can now drag a tile to a location on the board and if it's valid the move is made. That's great, but the visual process leaves a bit to be desired 8.

What we'd like to do is something more like this:
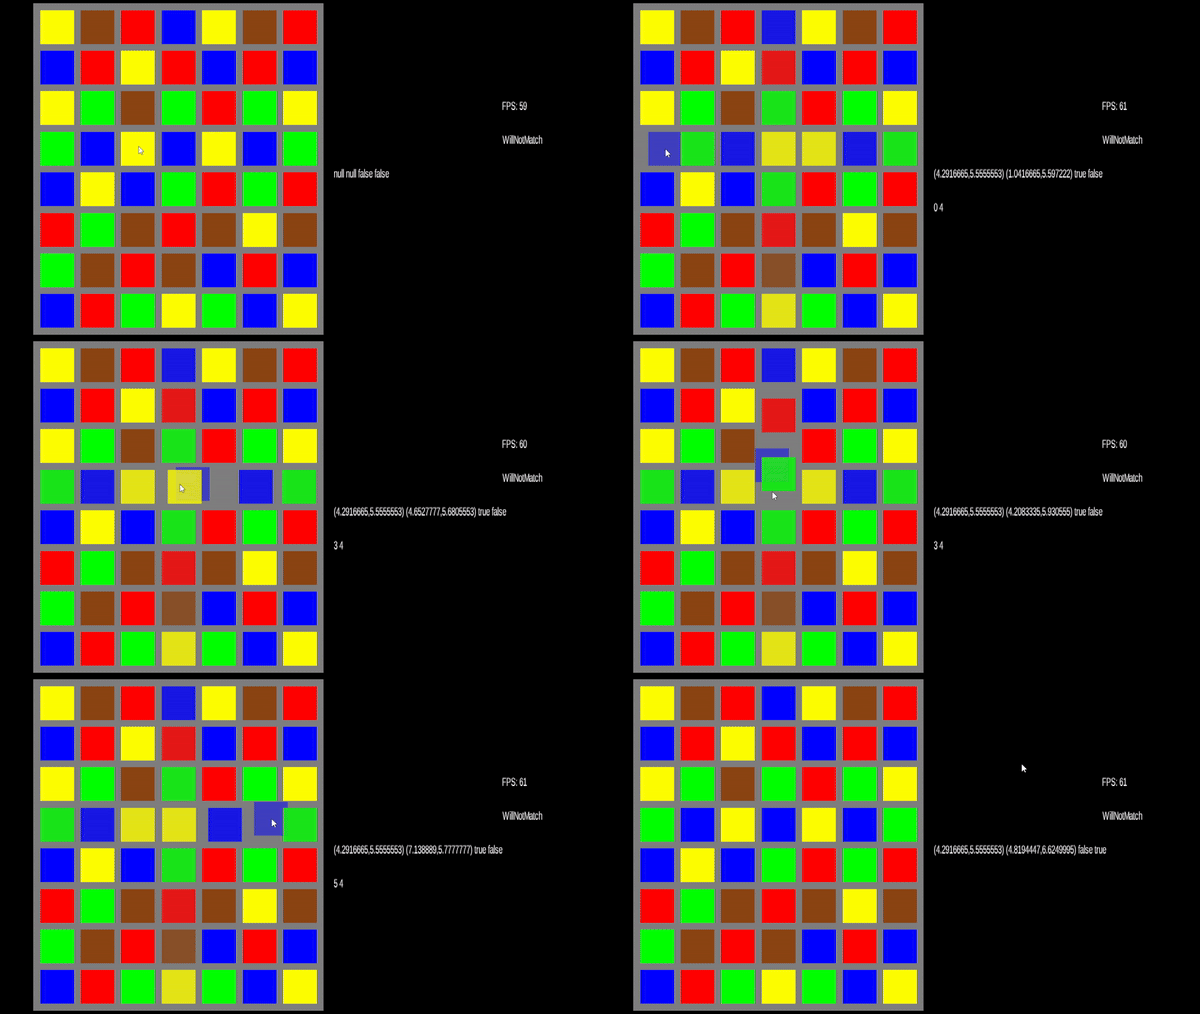
So how do we accomplish this? Given that the animation of the tiles is occuring while we're dragging, the natural
place to start is in onDrag. Your first instinct might be to write this code:
int startRow = crossSection.getRow();
int startCol = crossSection.getColumn();
commands.addAll(
    boardGraphic.gameGrid.getShiftsToMoveFromStartToEnd(startRow, startCol, row, column)
);
this.commands.add(new RepositionCrossSection(
    boardGraphic, startRow, startCol)
);
You'll quickly notice a problem though. The tiles keep cycling trying to shift the same set of tiles around over
and over. The reason for this is that LibGDX is calling onDrag everytime you drag the mouse. Multiple
times every frame, we're telling the system to shuffle those graphics around and change their position.
Ok, so what's a simple way to fix it? Well, we happen to have a source of truth hanging around. So, a simple
way to fix this would be to reset the state of the TileGraphic game grid to match the TileType game
grid before we try to compute any moves. This works, and it's what I did in my initial prototype because it involved a lot less
thinking. But it leaves me feeling gross because I know that we're doing extra work that we could avoid.
Instead, let's think about this instead: every time we call onDrag we want to get the moves to shift a selected
tile from point a to point b. The points we can shift to are limited, they must be within the same row or column as
where we start. When we drag our mouse it's going to stay within the same square for a while, and really, we only want to
cause a move to happen the first time we enter a particular space. So let's track the last space we were in and use that as
the starting point for where we should calculate our moves from:
public class Match3GameState implements DragEventSubscriber {
    ...
    private GridSpace<TileGraphic> lastMove;
    ...
    public void onDrag(float gameX, float gameY) {
        ...
        int row = this.boardGraphic.gameYToRow(gameY);
        int column = this.boardGraphic.gameXToColumn(gameX);
        int startRow = crossSection.getRow();
        int startColumn = crossSection.getColumn();

        if (row == startRow || column == startColumn) {
            // The user is hovering their mouse inside of the cross section
            int startMovesFromR = startRow;
            int startMovesFromC = startColumn;
            if (lastMove != null) {
                startMovesFromR = lastMove.getRow();
                startMovesFromC = lastMove.getColumn();
            }
            List<ShiftToken> newMoves = boardGraphic.gameGrid.getShiftsToMoveFromStartToEnd(
                startMovesFromR, startMovesFromC, row, column
            );
            commands.addAll(newMoves);
            lastMove = boardGraphic.gameGrid.getTile(row, column);
        }
        commands.add(new RepositionCrossSection(boardGraphic, startRow, startColumn));
        ...
    }
This will behave a lot better than the last attempt, but try starting a drag and then moving outside the legal move area and then back in at another spot.
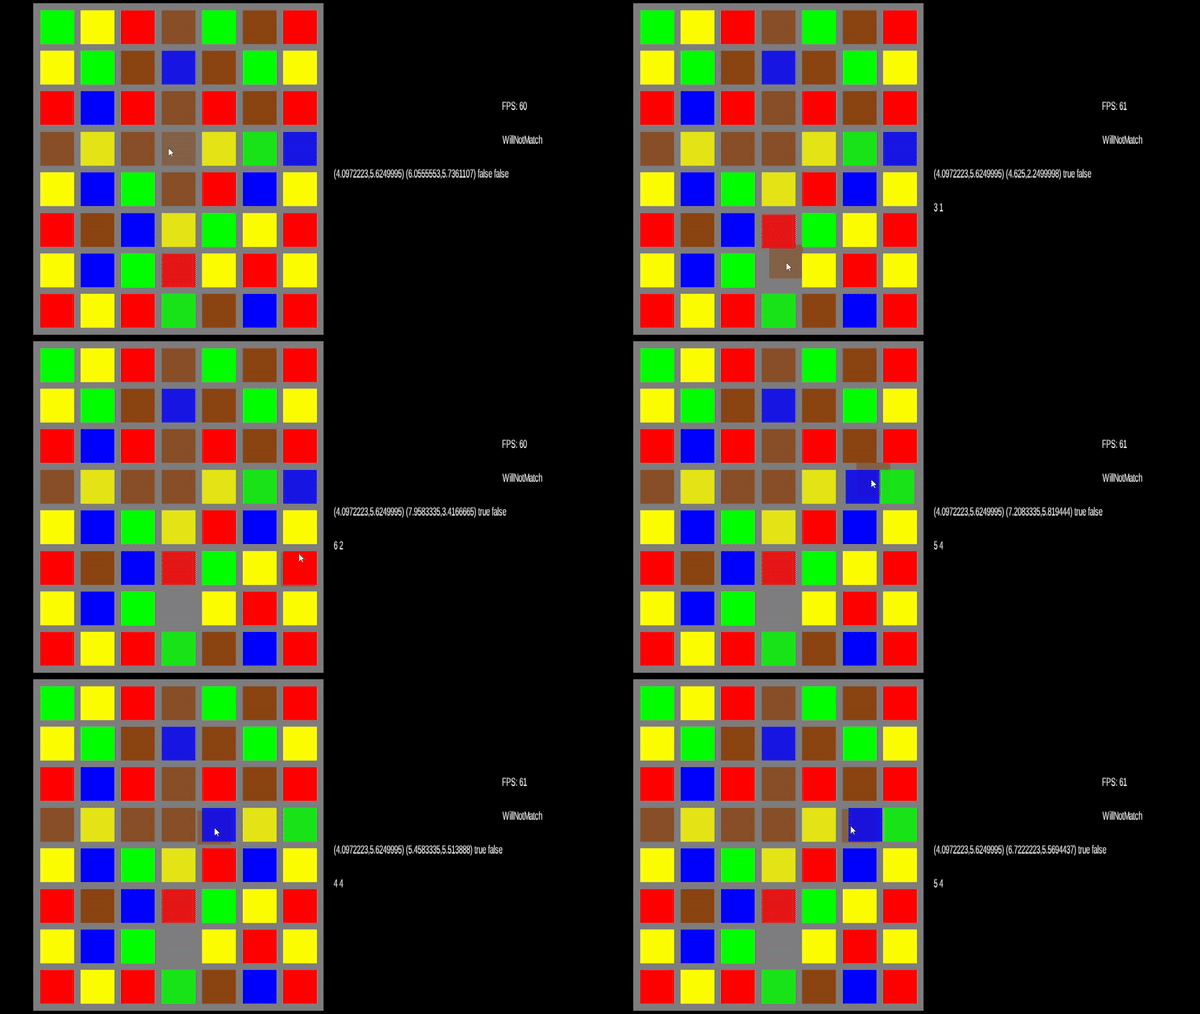
A bit screwy right? We've got a condition for checking if we're in the bounds of the legal cross section. So we could add some code into the else statement to handle going outside, but what should we do exactly?
Let's keep it simple. If a user moves outside of the allowable moves, then let's undo them. In order to undo them
we need only replay the moves we've already done in reverse order. Sound familiar? If not, go read the section
where we implemented the testIfMovesValid function. In order to undo something we need to track it
accross calls to onDrag so let's add a dragMove list:
public class Match3GameState implements DragEventSubscriber {
    ...
    private final LinkedList<ShiftToken> dragMoves;
    ...
    public Match3GameState(BoardGraphic boardGraphic, GameGrid<TileType> gameGrid) {
        ...
        this.dragMoves = new LinkedList<>();
    }
    ...
    public void onDrag(float gameX, float gameY) {
        ...
        if (row == startRow || column == startColumn) {
            // The user is hovering their mouse inside of the cross section
            int startMovesFromR = startRow;
            int startMovesFromC = startColumn;
            if (lastMove != null) {
                startMovesFromR = lastMove.getRow();
                startMovesFromC = lastMove.getColumn();
            }
            List<ShiftToken> newMoves = boardGraphic.gameGrid.getShiftsToMoveFromStartToEnd(
                startMovesFromR, startMovesFromC, row, column
            );
            commands.addAll(newMoves);
            dragMoves.addAll(newMoves);
            lastMove = boardGraphic.gameGrid.getTile(row, column);
        } else {
            // The user is hovering their mouse outside of the allowed move locations
            while (!dragMoves.isEmpty()) {
                commands.add(dragMoves.removeLast());
            }
            lastMove = null;
        }
        commands.add(new RepositionCrossSection(boardGraphic, startRow, startColumn));
        ...
    }
We're almost there. We're changing the placement of the BoardGraphic quite a bit, if we decide
to cancel the move then we still need to undo what we've done in order to return to the state that matches our
source of truth. So, in both onDragEnd and onLeftClick let's add in this snippet to the
very top:
while(!dragMoves.isEmpty()) {
    commands.add(dragMoves.removeLast());
}
This will make sure that we've returned to the same state we started when we began our drag, and then the code we wrote before will handle applying the moves from our start position to our final position. At this point, we've given the user the ability to speculate about what sort of move they should do by actually showing them what will happen when they put a tile into an allowed position.

Pretty nice right? We've got one more visual tweak to do before we're done, let's make it obvious to the player that
their move will produce a match by updating the state of the TileGraphic if the move we're currently showing to the
user will produce a match. The easy part of course is finding the match, we already know how to do that in our end drag
handler, and the only complication is that we have to reify it in order to make sure the board is in the right state
before we do the check. That's as easy as wrapping what we need to do into a Command:
public class HighlightMatchesOnBoard implements Command {
    private final CrossSectionTileMatcher<TileGraphic> matcher;

    public HighlightMatchesOnBoard(int row, int column, GameGrid<TileGraphic> gameGrid) {
        this.matcher = new CrossSectionTileMatcher<>(row, column, gameGrid);
    }

    @Override
    public void execute() {
        List<Match> matches = matcher.findMatches();
        for (Match<TileGraphic> match : matches) {
            for (TileGraphic t:  match.getValues()) {
                (new IncludeInMatch(t)).execute();
            }
        }
    }
}
Then, we need to use it within onDrag if we're about to process a new move:
if (row == startRow || column == startColumn) {
    ...
    if (!newMoves.isEmpty()) {
        // DeSelect any matches from the last update so we have a fresh slate
        List<Match> matches = (
            new CrossSectionTileMatcher<>(startRow, startColumn, boardGraphic.gameGrid)
        ).findMatches();
        for (Match<TileGraphic> match : matches) {
            for (TileGraphic tileGraphic : match.getValues()) {
                commands.add(new DeselectTile(tileGraphic));
            }
        }
        // Re-select the cross section so we don't lose our allowed moves
        commands.add(crossSection);
        commands.add(new HighlightMatchesOnBoard(boardGraphic.gameGrid, startRow, startColumn));
    }

    lastMove = boardGraphic.gameGrid.getTile(row, column);
    ...
And we'll need to deal with it in the onDragEnd as well.
...
List<ShiftToken> moves = this.gameGrid.getShiftsToMoveFromStartToEnd(startRow, startCol, row, column);
if (gameGrid.testIfMovesValid(moves, new CrossSectionTileMatcher<TileType>(startRow, startCol, gameGrid))) {
    this.commands.addAll(moves);
    for (ShiftToken shiftToken : moves) {
        this.commands.add(
            new ShiftToken(shiftToken.startRow, shiftToken.startColumn, shiftToken.moveDirection, boardGraphic.gameGrid)
        );
    }
    // The line below is new.
    this.commands.add(new HighlightMatchesOnBoard(boardGraphic.gameGrid, crossSection.getRow(), crossSection.getColumn()));
}
Within onDrag we add new moves into the queue based on the grids current state which was updated in a prior frame.
We need to do this now and not within a command since once the various shifts have taken place we won't be able to easily detect
which spaces were updated to the "included in match" state without scanning the whole board. Besides that, we're queueing up the commands
to highlight the board after we've inserted the commands into our state objects todo list.
Assuming your equals method for TileGraphic is right, this will work. If the matches aren't registering,
then double check and override the equals method so that it compares the tileType inside, and doesn't use things like
the position or state in its calculation. Once you've got that working, you should be rewarded with matching tiles changing colors
slightly:
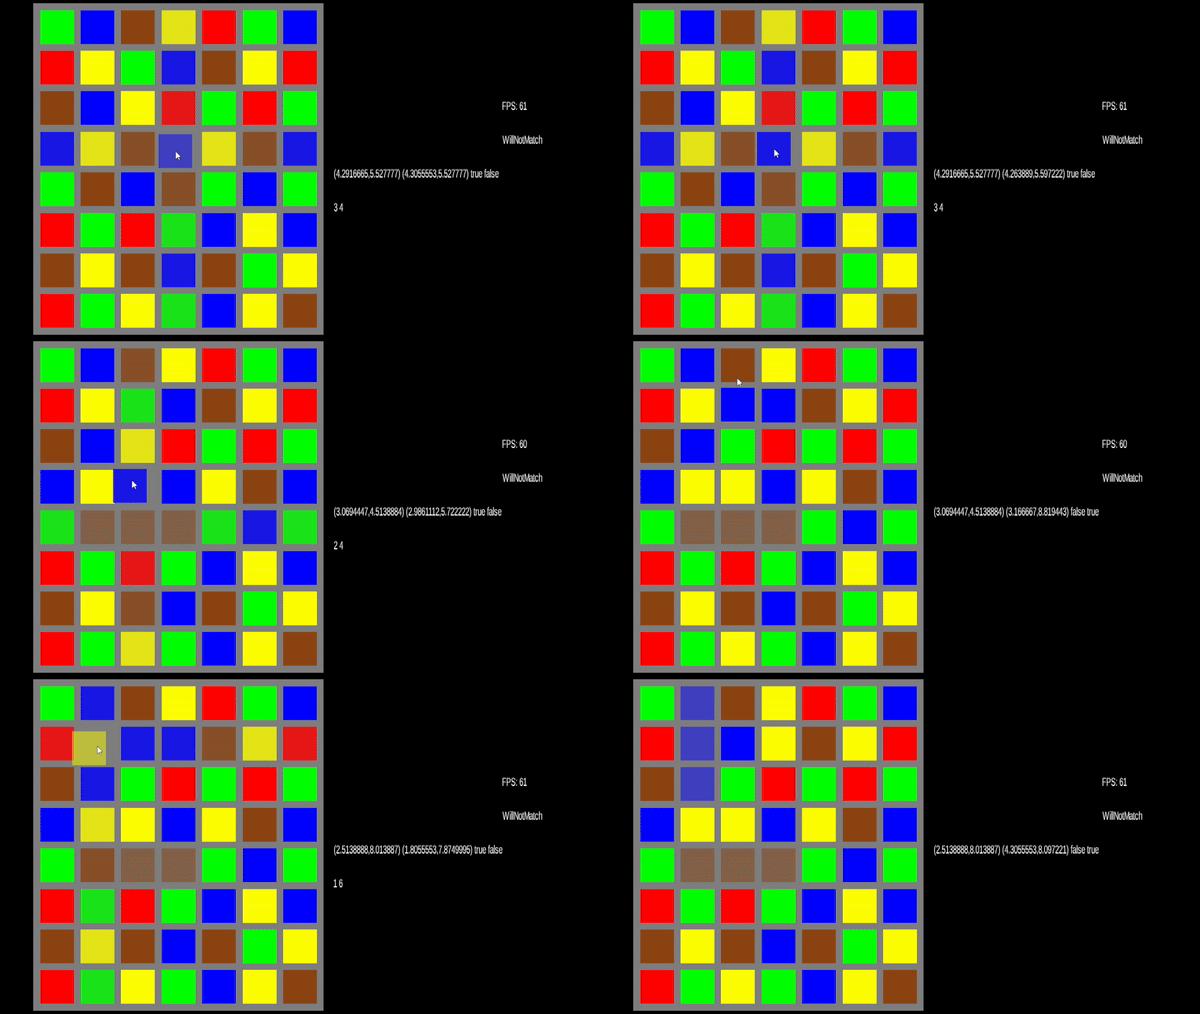
Isn't that lovely? We've almost got a working game at this point. We just need to clear off those matches and replace them with new tiles. That's going to be a little complicated, but in order to facilitate keeping what we've done separated from what we're going to do (so we can reason about it without thinking about if we're screwing something else up) let's talk about how the state pattern can help us out.
We've called the class we've been working on Match3GameState but we've only defined one possible state when there's actually
at least a couple to consider. Thinking about the board and what it can be doing we can list the following:
- It's doing "nothing"
- It's showing an in progress move
- A move has been made and we've got matches to clear off the board
- Some other state where the user is interacting with it, think game item usage or selection
We've got the two first ones covered already by the current state, but not the 3rd, and supporting the last one implies we want to be able to easily extend what we consider a state. This fourth option would be similar to how we handled the TileGraphic's before: different instances of specific classes for each state so that they could all be unique and special as needed. The tricky part is how we're interfacing from the Match3GameState to these state classes and how we're swapping between them.
Let's define out interface for all states to use:
public interface BoardState extends DragEventSubscriber {
    void onEnterState();
    void onExitState();
    BoardState update(float delta);
}
One thing that should stand out here is that we're extending one of our other interfaces. Unsurprisingly it's the one we currently have
Match3GameState does. This is because the only options I can think of for handling the different events is to do this, or to
encapsulate each event type into its own command to send over. We could make a message type class that just passes data over, but why do
that when we have a perfectly good interface already?
Anyway, the our implementation of this to do what we've already programmed into the Match3GameState is pretty straightforward,
here's the constructor and fields of the class in case you want to give it a go before I show you all the code:
public class BoardAcceptingMoves implements BoardState {
    private final BoardGraphic boardGraphic;
    private final GameGrid<TileType> gameGrid;
    private final LinkedList<ShiftToken> dragMoves;
    private GridSpace<TileGraphic> lastMove;
    Queue<Command> commands;

    TileGraphic selected;

    SelectCrossSection crossSection;

    public BoardAcceptingMoves(BoardGraphic boardGraphic, GameGrid<TileType> gameGrid) {
        this.boardGraphic = boardGraphic;
        this.gameGrid = gameGrid;
        this.commands = new LinkedList<>();
        this.selected = null;
        this.crossSection = null;
        this.dragMoves = new LinkedList<>();
        this.lastMove = null;
    }
Now we just have to implement the interface methods for onDragStart, onDrag, onDragEnd using the
existing code, then we'll implement the BoardState specific methods.
@Override
public void onDragStart(float gameX, float gameY) {
    int row = this.boardGraphic.gameYToRow(gameY);
    int column = this.boardGraphic.gameXToColumn(gameX);
    this.selected = this.boardGraphic.getTile(row, column);
    this.crossSection = new SelectCrossSection(boardGraphic, row, column);
    this.commands.add(crossSection);
    this.commands.add(new IncludeInMatch(selected));
}
If you're getting deja vu, then don't worry. This should feel familiar since we're copying over functionality before we replace it. The drag end is just as similar if not a little bit longer
@Override
public void onDragEnd(float gameX, float gameY) {
    while (!dragMoves.isEmpty()) {
        this.commands.add(dragMoves.removeLast());
    }

    if (crossSection == null) {
        return;
    }

    this.commands.add(crossSection.undoCommand());
    this.commands.add(new DeselectTile(selected));

    if (!this.boardGraphic.pointInBounds(gameX, gameY)) {
        this.commands.add(new RepositionCrossSection(boardGraphic, crossSection.getRow(), crossSection.getColumn()));
        this.selected = null;
        this.crossSection = null;
        return;
    }

    int row = this.boardGraphic.gameYToRow(gameY);
    int column = this.boardGraphic.gameXToColumn(gameX);

    List<ShiftToken> moves = this.gameGrid.getShiftsToMoveFromStartToEnd(crossSection.getRow(), crossSection.getColumn(), row, column);
    if (gameGrid.testIfMovesValid(moves, new CrossSectionTileMatcher<TileType>(crossSection.getRow(), crossSection.getColumn(), gameGrid))) {
        this.commands.addAll(moves);
        for (ShiftToken shiftToken : moves) {
            this.commands.add(
                    new ShiftToken(shiftToken.startRow, shiftToken.startColumn, shiftToken.moveDirection, boardGraphic.gameGrid)
            );
        }
        this.commands.add(new HighlightMatchesOnBoard(boardGraphic.gameGrid, crossSection.getRow(), crossSection.getColumn()));
    }

    this.commands.add(new RepositionCrossSection(boardGraphic, crossSection.getRow(), crossSection.getColumn()));

    this.selected = null;
    this.crossSection = null;
    this.lastMove = null;
}
As you can see, this really hasn't changed much from the one currently in our existing code. Same can be said about the drag handler:
@Override
public void onDrag(float gameX, float gameY) {
    int row = this.boardGraphic.gameYToRow(gameY);
    int column = this.boardGraphic.gameXToColumn(gameX);
    if (crossSection == null) {
        return;
    }
    int startRow = crossSection.getRow();
    int startColumn = crossSection.getColumn();
    if (row == startRow || column == startColumn) {
        // The user is hovering their mouse inside of the cross section
        int startMovesFromR = startRow;
        int startMovesFromC = startColumn;
        if (lastMove != null) {
            startMovesFromR = lastMove.getRow();
            startMovesFromC = lastMove.getColumn();
        }
        List<ShiftToken> newMoves = boardGraphic.gameGrid.getShiftsToMoveFromStartToEnd(startMovesFromR, startMovesFromC, row, column);
        commands.addAll(newMoves);
        dragMoves.addAll(newMoves);
        if (!newMoves.isEmpty()) {
            // DeSelect any matches from the last update so we have a fresh slate
            List<Match<TileGraphic>> matches = (new CrossSectionTileMatcher<>(startRow, startColumn, boardGraphic.gameGrid)).findMatches();
            for (Match<TileGraphic> match : matches) {
                for (TileGraphic tileGraphic : match.getValues()) {
                    commands.add(new DeselectTile(tileGraphic));
                }
            }
            // Re-select the cross section so we don't lose our allowed moves
            commands.add(crossSection);
            commands.add(new HighlightMatchesOnBoard(boardGraphic.gameGrid, startRow, startColumn));
        }
        lastMove = boardGraphic.gameGrid.getTile(row, column);
    } else {
        // The user is hovering their mouse outside of the allowed move locations
        while (!dragMoves.isEmpty()) {
            commands.add(dragMoves.removeLast());
        }
        lastMove = null;
    }
    commands.add(new RepositionCrossSection(boardGraphic, startRow, startColumn));
    // Move Selected tile towards mouse
    float offsetByHalfX = gameX - Constants.TILE_UNIT_WIDTH / 2;
    float offsetByHalfY = gameY - Constants.TILE_UNIT_HEIGHT / 2;
    commands.add(new MoveTowards(new Vector2(offsetByHalfX, offsetByHalfY), selected.getMovablePoint()));
}
And lastly, we've got the click handler:
@Override
public void onLeftClick(float gameX, float gameY) {
    while (!dragMoves.isEmpty()) {
        this.commands.add(dragMoves.removeLast());
    }

    if (crossSection == null) {
        return;
    }

    this.commands.add(crossSection.undoCommand());
    this.commands.add(new DeselectTile(selected));
    this.commands.add(new RepositionCrossSection(boardGraphic, crossSection.getRow(), crossSection.getColumn()));
    this.selected = null;
    this.crossSection = null;
    this.lastMove = null;
}
We still need to implement the BoardState specific methods though. Those are thankfully pretty small. All we really need to do when we enter or exit the current state is to clear our variables to their starting state so we don't do anything weird if we go back to the old state after. For the update method, we'll add a TODO we'll get to in a moment but it's as simple as executing whatever commands we've got queued up.
@Override
public void onEnterState() {
    this.selected = null;
    this.crossSection = null;
    this.lastMove = null;
}

@Override
public void onExitState() {
    while (!dragMoves.isEmpty()) {
        this.commands.add(dragMoves.removeLast());
    }
    this.selected = null;
    this.crossSection = null;
    this.lastMove = null;
}

@Override
public BoardState update(float delta) {
    while (!commands.isEmpty()) {
        Command command = commands.remove();
        command.execute();
    }
    // TODO: if matches exist on the board, return a matching state.
    return this;
}
Now, updating out Match3GameState class is as simple as replacing most of the logic with a delegated call to the
appropriate state:
public class Match3GameState implements DragEventSubscriber {

    private final BoardGraphic boardGraphic;
    private final GameGrid<TileType> gameGrid;
    private BoardState boardState;
    Queue<Command> commands;

    public Match3GameState(BoardGraphic boardGraphic, GameGrid<TileType> gameGrid) {
        this.boardGraphic = boardGraphic;
        this.gameGrid = gameGrid;
        this.commands = new LinkedList<>();
        this.boardState = new BoardAcceptingMoves(boardGraphic, gameGrid);
        this.boardState.onEnterState();
    }

    public void update(float delta) {
        while (!commands.isEmpty()) {
            Command command = commands.remove();
            command.execute();
        }
        BoardState newState = this.boardState.update(delta);
        if (newState != this.boardState) {
            changeState(newState);
        }
    }

    public void changeState(BoardState boardState) {
        this.boardState.onExitState();
        this.boardState = boardState;
        this.boardState.onEnterState();
    }

    @Override
    public void onDragStart(float gameX, float gameY) {
        if (pointNotInBoard(gameX, gameY)) {
            return;
        }
        boardState.onDragStart(gameX, gameY);
    }

    @Override
    public void onDrag(float gameX, float gameY) {
        if (pointNotInBoard(gameX, gameY)) {
            return;
        }
        boardState.onDrag(gameX, gameY);
    }

    @Override
    public void onDragEnd(float gameX, float gameY) {
        boardState.onDragEnd(gameX, gameY);
    }

    @Override
    public void onLeftClick(float gameX, float gameY) {
        boardState.onLeftClick(gameX, gameY);
    }
}
It probably feels like a lot of work to shift this around. But if it's not obvious how this is helpful, it will be in a minute. Let's move on to the most important part of a match 3 game, the matching!
Processing Matches ↩
Well, we've already actually gone over how we get matches. But in this section we're going to talk about clearing them
from our board and replacing the tiles we're removing. As you might have surmised from our refactor, we're going to
do this by introducing a new BoardState. I've got good news. The implementation for the DragEventSubscriber
methods is empty since this process requires 0 user input and we don't want users trying to sneak in moves while we're busy
modifying the board state anyway.
The bad news is that we really need to think hard about this one. You see, at the moment the only way we've replaced tiles on the
board has been in our debug command M and N that call the TokenGeneratorAlgorithm we've selected to replace every
tile on the board. We need a way to allow our TokenGeneratorAlgorithm implementation to change at runtime so we can
do all that cool stuff we talked about before but also use it to make new tiles that can replace the ones we'll be removing from
the board due to the match. Right now, our code classes kind of look like this:

And in case it wasn't obvious, we haven't passed anything down to the Match3GameState that exposes the token generator.
We're going to get to that, but for now, let's make some incremental process by talking about what needs to happen when we actually
make a match in the game.
- We need to let the rest of the game know a match has been made, for scoring purposes
- We need to remove the matched tiles from the board
- We need to apply "gravity" and let any tiles above the matched ones move down to fill the empty spaces
- We need to fill the empty spaces with new tiles
- Check for any new matches and repeat if neccesary until all matches are processed
Operations applied to the grid can be handled by the GameGrid in the same way we've handled the moves so far, so
let's go ahead and handle the easiest part first. Removing the matched tiles from the board will need a way for us to remove a
value from the board, and to follow our current pattern with changing the board, we need a command for that:
public class ClearGridSpace implements Command {
     private final GridSpace<?> gridSpace;
     public ClearGridSpace(GridSpace<?> gridSpace) {
        this.gridSpace = gridSpace;
    }

    @Override
    public void execute() {
        gridSpace.setValue(null);
    }
}
Using null like this doesn't feel great to me even though it works. I think I'd prefer a clearSpace method
that does the same thing, but it's up to you to decide if you want to do that or not. There's just something about actively using null
that always feels a little dirty to me. Anyway, to make instances of this command, we only need the GridSpace, luckily for
us, the Match class happens to track those! So, let's now make a method in the GameGrid that generates these
clear commands for us:
public List<ClearGridSpace> getClearCommandsForMatches(List<Match<T>> matches) {
    List<ClearGridSpace> commands = new LinkedList<>();
    for (Match<T> match : matches) {
        for (GridSpace<T> space : match.getSpaces()) {
            commands.add(new ClearGridSpace(space));
        }
    }
    return commands;
}
This is basically a map function, and we can use that as a building block for our match processing since clearing the maps for a regular
game grid is just applying our command. For the graphical grid in the BoardGraphic we'll want to do that as well as perhaps
apply some animation changes. We'll get to that polish later, but for now let's trying using this to see our state switching in action.
First we'll define our ProcessingMatches state. We're going to need to have the same constructor arguments as our other state
and we'll setup some empty lists to keep track of the commands to execute:
public class ProcessingMatches implements BoardState {

    private final BoardGraphic boardGraphic;
    private final GameGrid<TileType> gameGrid;
    private final LinkedList<Command> commands;

    private boolean isDoneProcessing;

    public ProcessingMatches(BoardGraphic boardGraphic, GameGrid<TileType> gameGrid) {
        this.boardGraphic = boardGraphic;
        this.gameGrid = gameGrid;
        this.commands = new LinkedList<>();
        this.isDoneProcessing = false;
    }

    @Override
    public BoardState update(float delta) {
        processMatches();
        while (!this.commands.isEmpty()) {
            Command command = this.commands.remove();
            command.execute();
        }
        if (matches.isEmpty() && isDoneProcessing) {
            return new BoardAcceptingMoves(boardGraphic, gameGrid);
        }
        return this;
    }

    protected void processMatches() {
        ...
You can see that in our update method we're going to transition back to our other state
once we've found all the matches and any animation that's happening on the board has finished. This
means that our user will sit tight while tiles fall down from the sky, pop into existence, or whatever
way we choose to insert them. Our clear commands will be generated by our processMatches
method, so let's implement that to convert our matches to clear commands:
protected void processMatches() {
    FullGridTileMatcher<TileType> tileMatcher = new FullGridTileMatcher<>(gameGrid);
    List<Match<TileType>> newMatches = tileMatcher.findMatches();
    this.isDoneProcessing = isDoneProcessing || newMatches.isEmpty();

    List<ClearGridSpace> clears = gameGrid.getClearCommandsForMatches(newMatches);
    this.commands.addAll(clears);

    FullGridTileMatcher<TileGraphic> tileMatcher2 = new FullGridTileMatcher<>(boardGraphic.gameGrid);
    List<Match<TileGraphic>> matches2 = tileMatcher2.findMatches();
    List<ClearGridSpace> graphicClears = boardGraphic.gameGrid.getClearCommandsForMatches(matches2);
    this.commands.addAll(graphicClears);

    Iterator<GridSpace<TileGraphic>> iter = boardGraphic.gameGrid.iterator();
    while(iter.hasNext()) {
        GridSpace<TileGraphic> tileGraphicGridSpace = iter.next();
        if (tileGraphicGridSpace.getValue() == null) {
            isDoneProcessing = false;
        } else {
            MovablePoint movablePoint = tileGraphicGridSpace.getValue().getMovablePoint();
            isDoneProcessing = isDoneProcessing && movablePoint.getPosition().equals(movablePoint.getDestination());
        }
    }
}
If you're thinking, man that's inefficient, you're not alone. But we're making baby steps here, we can
tweak this later to not have to do multiple match checks against the whole board later. For now, let's go back
to our BoardAcceptingMoves class and address our TODO comment from before about swapping states:
@Override
public BoardState update(float delta) {
    while (!commands.isEmpty()) {
        Command command = commands.remove();
        command.execute();
    }
    if(this.hasMatches) {
        return new ProcessingMatches(boardGraphic, gameGrid);
    }
    return this;
}
...
public void onEnterState() {
    this.selected = null;
    this.crossSection = null;
    this.lastMove = null;
    this.hasMatches = false;
}
We've introduced a new class level boolean hasMatches. We'll set this within the onDragEnd method
to be the result of the testIfMovesValid method and reset it when we enter the state so that we don't
immediately transition back into the other state. Let's run our game code again and see our progress:
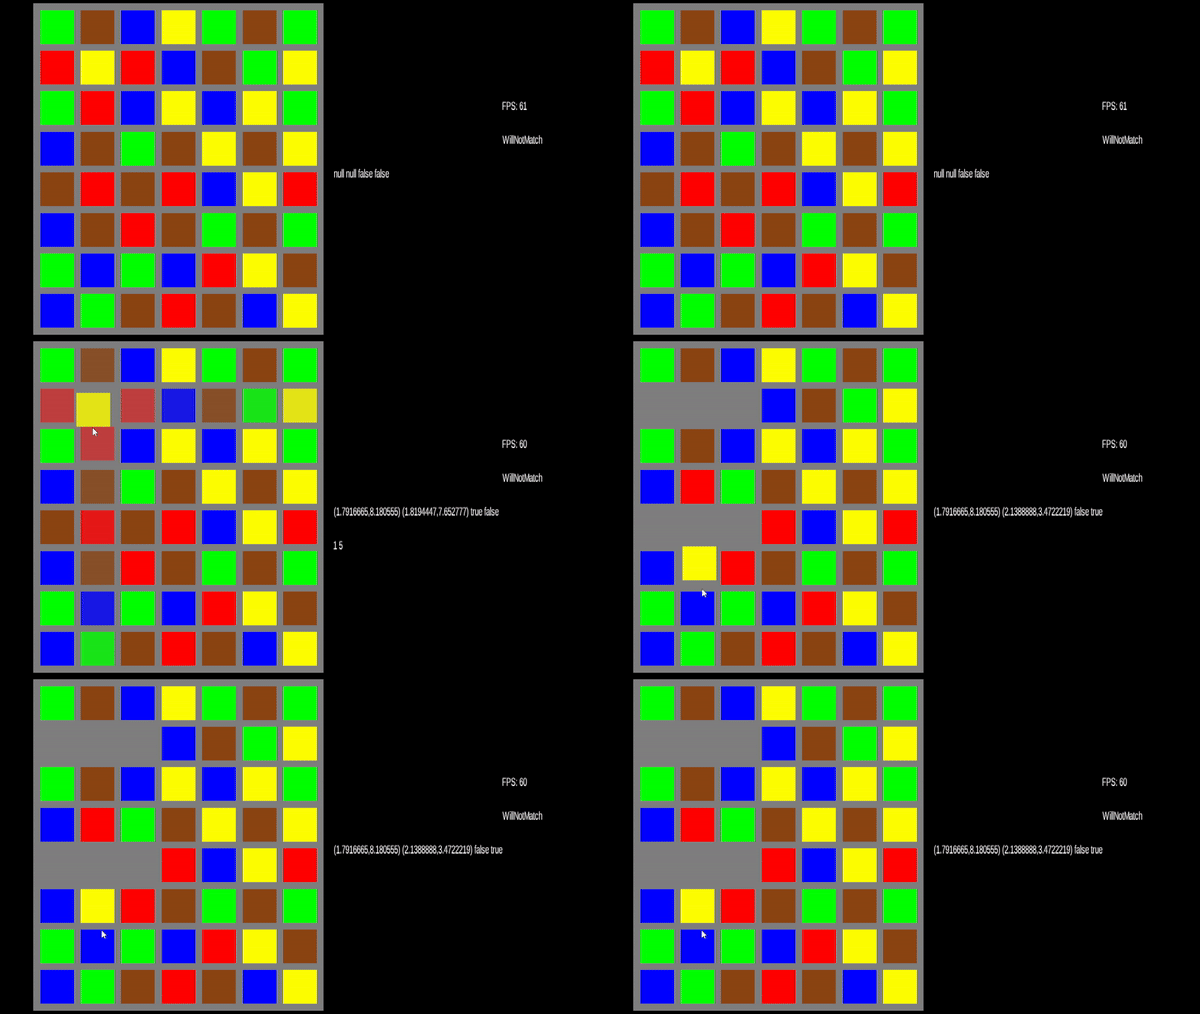
Wonderful, we make a match and the tiles are removed from the board. It's certainly a bit sudden how they just disappear and we don't have any gravity pulling the tiles above them down yet so we're not quite finished. But now feels like a good time to finally do something with those matches we've made. The first item on our todo list for this state was to let the rest of the world know about a match. So let's do that before we get back to clearing out the nulls on the board.
What needs to know? Well, if we're going to have a score board component of some kind then it needs to know, and if we're supposed to be getting some sort of total score threshold to beat a level or something similar we need to bubble this information up to our overall game. So let's turn to the observer pattern again to let everyone in on the event. Rather than calling every "Observer" and "Subject" let's use the terms Publisher and Listener so our naming patterns align with our drag inputer listeners from before. For brevity I'll define both interfaces below, but obviously they go into their own files:
public interface MatchEventPublisher<T> {
    public void addSubscriber(MatchSubscriber<T> matchSubscriber);
    public void removeSubscriber(MatchSubscriber<T> matchSubscriber);
}

public interface MatchSubscriber<T> {
    public void onMatches(List<Match<T>> matches);
}
Now let's follow the logical chain of events here to their conclusion. The thing that is going to publish that we've
got a match is the ProcessingMatches board state. So let's update that class:
public class ProcessingMatches implements BoardState, MatchEventPublisher<TileType> {
    private final HashSet<MatchSubscriber<TileType>> subscribers;
    ...
    protected void processMatches() {
        FullGridTileMatcher<TileType> tileMatcher = new FullGridTileMatcher<>(gameGrid);
        List<Match<TileType>> newMatches = tileMatcher.findMatches();
        this.isDoneProcessing = isDoneProcessing || newMatches.isEmpty();

        if (!newMatches.isEmpty()) {
            for (MatchSubscriber<TileType> matchSubscriber : subscribers) {
                matchSubscriber.onMatches(newMatches);
            }
        }
        ...
    }
    @Override
    public void addSubscriber(MatchSubscriber<TileType> matchSubscriber) {
        this.subscribers.add(matchSubscriber);
    }

    @Override
    public void removeSubscriber(MatchSubscriber<TileType> matchSubscriber) {
        this.subscribers.remove(matchSubscriber);
    }
}
The ProcessingMatches class will now tell any subscribers about the matches it sees. So, lets
update our Match3GameState to be a subscriber since we want to notify our overall game state
about the fact that we're making a match. For now, we can just log the match since we haven't made any sort
of score display yet. More importantly, since only one of the BoardState implementations is a
publisher, our changeState method needs to handle ensuring we keep our subscription alive during
state transitions. We can do this with an instanceof check like so:
public class Match3GameState implements DragEventSubscriber, MatchSubscriber<TileType> {
    ...
    public void onMatches(List<Match<TileType>> matches) {
        Gdx.app.log("On Match from Game", matches.toString());
    }
    ...
    public void changeState(BoardState boardState) {
        this.boardState.onExitState();
        if (this.boardState instanceof MatchEventPublisher<?>) {
            ((MatchEventPublisher<TileType>) this.boardState).removeSubscriber(this);
        }
        this.boardState = boardState;
        if (this.boardState instanceof MatchEventPublisher<?>) {
            ((MatchEventPublisher<TileType>) this.boardState).addSubscriber(this);
        }
        this.boardState.onEnterState();
    }
}
This feels a little awkward though. It would be a lot nicer if we could avoid this, so let's consider for a moment
that the only thing that's going to be using the BoardStates is the Match3GameState itself, if we modify the BoardState
interface so that onEnterState and onExitState take in the Match3GameState then
we can handle the subscription setup inside of the ProcessingMatches class instead. Our code would look like
this:
@Override
public void onEnterState(Match3GameState match3GameState) {
    addSubscriber(match3GameState);
}

@Override
public void onExitState(Match3GameState match3GameState) {
    removeSubscriber(match3GameState);
}
and then our change state code would look like this:
public void changeState(BoardState boardState) {
    this.boardState.onExitState(this);
    this.boardState = boardState;
    this.boardState.onEnterState(this);
}
as far as which one is better... it depends on your point of view on whose responsibility it is to handle linking up the subscriptions.
If you're a firm believer that the subscriber should subscribe explicitly, then you'd want to go with the first option here. If your
thinking is more along the lines of "the state should perform any neccesary setup to function onEnter and clean up onExit" then you
can make an argument that the ProcessingMatches state should handle setting up the subscription on behalf of the container
class.
There is a third option here of course. But it has its own drawbacks too. If we make the BoardState interface
implement the MatchEventPublisher interface, then every state becomes capable of publishing matches
and we can simply change the changeState code to:
public void changeState(BoardState boardState) {
    this.boardState.onExitState();
    this.boardState.removeSubscriber(this);
    this.boardState = boardState;
    this.boardState.addSubscriber(this);
    this.boardState.onEnterState();
}
The downside to this approach is that BoardAcceptingMoves now has to implement an empty method for the interface
it doesn't really need to know about. You can mitigate this with an abstract base class and a default implementation though.
All three of these options are fine I think, so it's really up to you which one strikes your fancy. There's more ways to deal
with this too, such as the the chain of responsibility
pattern, but we didn't setup our UI in a way that easily lends itself to passing an event up to a parent, so unless you feel
like refactoring for a bit, it might be trickier to do that.
Anyway, choose whichever one you like the best and then let's get back to handling another item on our todo list for
Match3GameState, applying "gravity". In a lot of match 3 games (not all), typically you can count on the
tiles around the ones you've removed to fall down into the new empty spaces. This gives us a nice way for users to do
fun things like setup chain reactions of matches if they're clever enough. This process looks something like this, with
the holes in the grid bubbling up to the top where they'll eventually get replaced with a new token:

There's a lot of ways to consider how to do this, and it's pretty fun to figure out a good way to handle
it. You can tackle this using the spaces from the matches, or you can tackle this wholistically across the
entire grid. My first implementation I used the spaces available in the matches and while I eventually landed
at about 30 lines of code to do it, this problem is quite a bit easier if you think about it on the full grid
level instead of trying to move from an arbitrary space from a match. Basically, you want to return a list of
ShiftTokencommands that result in the empty spaces being on top of the grid.
If you want to give it a go, then I suggest you do so now before I provide my algorithm. You can return here when you solve the issue or if you want to compare notes. To give you a hint as to what I'm about to do, heres my function signature:
public List<ShiftToken> getGravityShiftsForColumn(int columnNumber)
As you might surmise, I'm going to look at the grid one column at a time and handle shifting any empty spaces I happen to see up by how many filled spaces I've spotted already. These types of things work best when you unit test, so this is my test suite:
@Test
void testGravityShiftsNullsOnTop() {
    grid.setTileValue(grid.getHeight() - 1, 0, null);
    grid.setTileValue(grid.getHeight() - 2, 0, null);
    grid.setTileValue(grid.getHeight() - 3, 0, null);
    List<ShiftToken> moves = grid.getGravityShiftsForColumn(0);
    // All filled in tiles are already on the bottom, no shifts needed
    Assertions.assertTrue(moves.isEmpty());
}

@Test
void testGravityShiftsNullsOnBottom() {
    grid.setTileValue(0, 0, null);
    grid.setTileValue(1, 0, null);
    grid.setTileValue(2, 0, null);
    List<ShiftToken> moves = grid.getGravityShiftsForColumn(0);
    Assertions.assertEquals(6, moves.size());
    Assertions.assertEquals(new ShiftToken(2, 0, ShiftToken.Direction.UP, grid), moves.get(0));
    Assertions.assertEquals(new ShiftToken(3, 0, ShiftToken.Direction.UP, grid), moves.get(1));
    Assertions.assertEquals(new ShiftToken(1, 0, ShiftToken.Direction.UP, grid), moves.get(2));
    Assertions.assertEquals(new ShiftToken(2, 0, ShiftToken.Direction.UP, grid), moves.get(3));
    Assertions.assertEquals(new ShiftToken(0, 0, ShiftToken.Direction.UP, grid), moves.get(4));
    Assertions.assertEquals(new ShiftToken(1, 0, ShiftToken.Direction.UP, grid), moves.get(5));
}

@Test
void testGravityShiftsNullsInMiddle() {
    grid.setTileValue(1, 0, null);
    grid.setTileValue(2, 0, null);
    grid.setTileValue(3, 0, null);
    List<ShiftToken> moves = grid.getGravityShiftsForColumn(0);
    Assertions.assertEquals(3, moves.size());
    Assertions.assertEquals(new ShiftToken(3, 0, ShiftToken.Direction.UP, grid), moves.get(0));
    Assertions.assertEquals(new ShiftToken(2, 0, ShiftToken.Direction.UP, grid), moves.get(1));
    Assertions.assertEquals(new ShiftToken(1, 0, ShiftToken.Direction.UP, grid), moves.get(2));
}

@Test
void testGravityShiftsSpacedOutHoles() {
    grid.setTileValue(0, 0, null);
    grid.setTileValue(2, 0, null);
    grid.setTileValue(4, 0, null);
    List<ShiftToken> moves = grid.getGravityShiftsForColumn(0);
    Assertions.assertEquals(3, moves.size());
    Assertions.assertEquals(new ShiftToken(2, 0, ShiftToken.Direction.UP, grid), moves.get(0));
    Assertions.assertEquals(new ShiftToken(0, 0, ShiftToken.Direction.UP, grid), moves.get(1));
    Assertions.assertEquals(new ShiftToken(1, 0, ShiftToken.Direction.UP, grid), moves.get(2));
}

@Test
void testGravityShiftsSpacedOutHoles2() {
    grid.setTileValue(1, 0, null);
    grid.setTileValue(3, 0, null);
    List<ShiftToken> moves = grid.getGravityShiftsForColumn(0);
    Assertions.assertEquals(3, moves.size());
    Assertions.assertEquals(new ShiftToken(3, 0, ShiftToken.Direction.UP, grid), moves.get(0));
    Assertions.assertEquals(new ShiftToken(1, 0, ShiftToken.Direction.UP, grid), moves.get(1));
    Assertions.assertEquals(new ShiftToken(2, 0, ShiftToken.Direction.UP, grid), moves.get(2));
}
These tests are obviously somewhat reliant on my algorithm's execution order. So if that ever changed I'd have to rewrite the tests, which would be pretty annoying. The alternative approach that would last a bit longer would be to apply the moves to the grid and then confirm I've got 3 holes on top and the other tiles are in the right order. But that of course relies on executing the commands and that code also not having any bugs, so no matter what we do we're going to have some trade off. Here's my very simple algorithm to get all these tests passing:
public List<ShiftToken> getGravityShiftsForColumn(int columnNumber) {
    List<ShiftToken> moves = new LinkedList<>();
    List<GridSpace<T>> column = getColumn(columnNumber);
    int i = 0;
    for (int r = column.size() - 1; r > -1; r--) {
        GridSpace<T> space = column.get(r);
        if (space.getValue() != null) {
            i++;
        } else {
            moves.addAll(getShiftsToMoveFromStartToEnd(r, columnNumber, r + i, columnNumber));
        }
    }
    return moves;
}
Too good to be true? Yes, you really can do this for each column in 11 lines of code. We start from the
top of the column and begin walking downward. If we see a filled in value then we know we'll need to eventually
skip past it, so add onto our accumulated value. Once we hit a null, the accumulated values represents the
distance to the destination this empty spot has to travel. Re-using our getShiftsToMoveFromStartToEnd
method we can easily snag the shift moves to do that, then continue downward to repeat the process. Step by step
this looks like:

Hopefully this makes some degree of sense. You can see how we add to our accumulator when the tile at the r
index is a value, and then when we run into a hole that accumulated value represents how many shifts we need to generate.
We don't ever need to add to i when getting the moves because we don't want to try to shift past the
empty spots we've already moved to the top, there's simply no need. You could probably do this without
any accumulator by having getShiftsToMoveFromStartToEnd always move the emtpy spaces to the top
of the column, but it feels a bit wasteful since you'll do some extra shifting this way.
Anyway, in order to apply this algorithm to the grid we need the nulls to actually exist first. Because of this,
we can't just add this into the ProcessingMatches state as is. We need to wrap it up into its own
command, so let's go ahead and do that.
public class ApplyGravityToColumn implements Command {
    private final int column;
    private final GameGrid<?> gameGrid;

    public ApplyGravityToColumn(int column, GameGrid<?> gameGrid) {
        this.column = column;
        this.gameGrid = gameGrid;
    }

    @Override
    public void execute() {
        List<ShiftToken> moves = gameGrid.getGravityShiftsForColumn(column);
        for (ShiftToken move : moves) {
            move.execute();
        }
    }
}
This will let us apply the shifts at a later point in time, but once the shifts complete, we'll need to reposition
the graphics according to their new positions. This is like the other code, RepositionCrossSection
except we need to be careful of nulls this time. Inside of the BoardGraphic class we can add in a
new method:
public void repositionColumn(int column) {
    List<GridSpace<TileGraphic>> spacesInColumn = gameGrid.getColumn(column);
    for (GridSpace<TileGraphic> space : spacesInColumn) {
        Vector2 destination = new Vector2(
                screenXFromGridColumn(space.getColumn()),
                screenYFromGridRow(space.getRow())
        );
        if (space.getValue() != null) {
            space.getValue().handleCommand(new MoveTowards(destination, space.getValue().getMovablePoint()));
        }
    }
}
and then wrap it all up in a command so we can execute it after the other command we just made.
public class RepositionColumn implements Command {
    private final BoardGraphic boardGraphic;
    private final int column;

    public RepositionColumn(int column, BoardGraphic boardGraphic) {
        this.boardGraphic = boardGraphic;
        this.column = column;
    }

    @Override
    public void execute() {
        boardGraphic.repositionColumn(column);
    }
}
Simple enough, let's update the processMatches method to add these in after we've dealt with the
clearing.
protected void processMatches() {
    ...
    List<ClearGridSpace> graphicClears = boardGraphic.gameGrid.getClearCommandsForMatches(graphicalMatches);
    this.commands.addAll(graphicClears);
    for (Integer column : columnsToApplyGravityTo) {
        this.commands.add(new ApplyGravityToColumn(column, boardGraphic.gameGrid));
        this.commands.add(new RepositionColumn(column, boardGraphic));
    }
    ...
And the tiles fall as expected when we run the program and make a match:
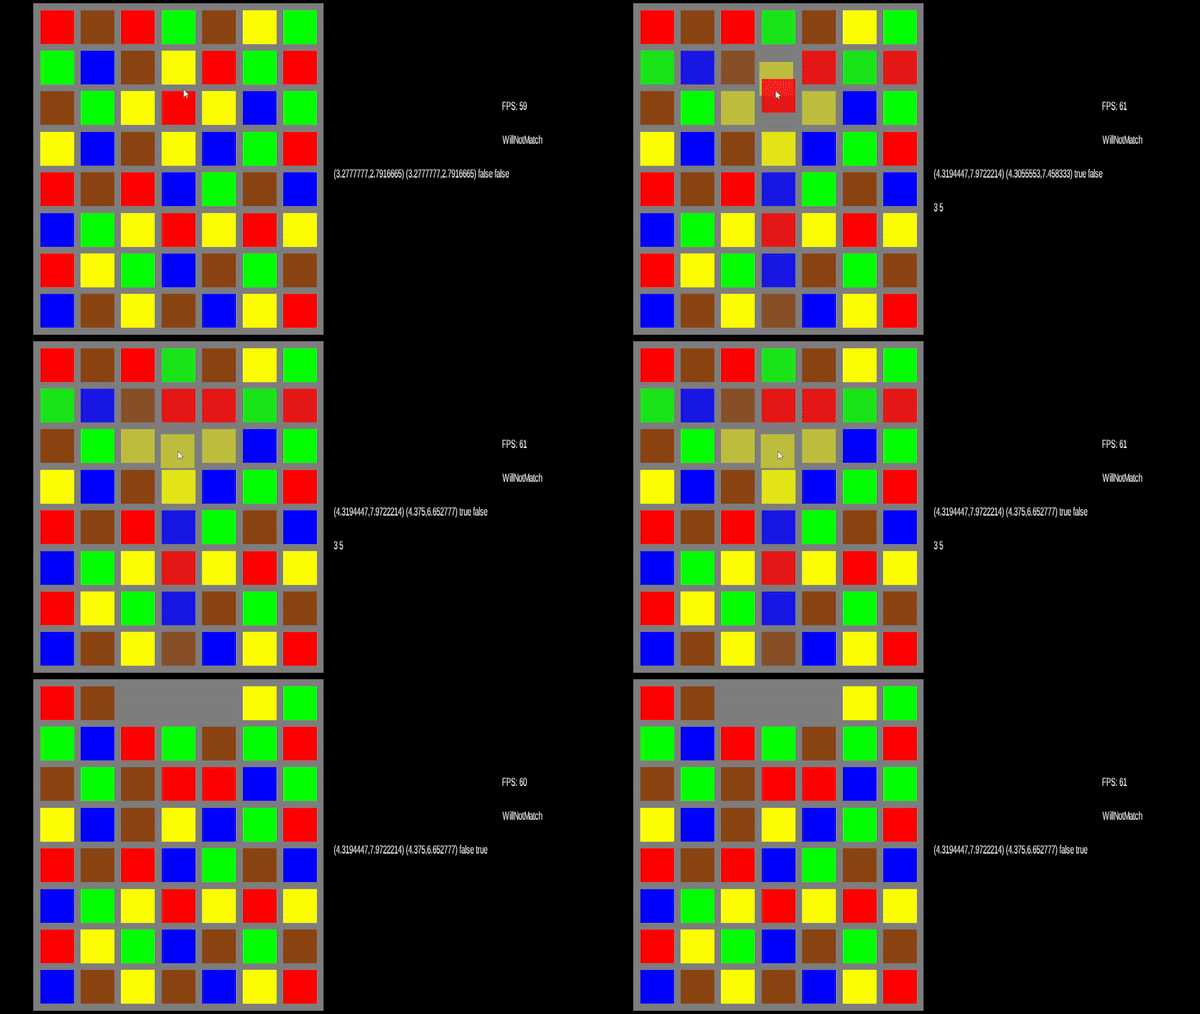
Now we just need to fill in the nulls and our state machine will swap back to letting us make matches.
For this part we need to revisit some code we haven't touched in quite a while. Remember how we setup
the token generator with some debug keys so we could see both algorithms with a press of the M or N
key? Let's take another look at Match3Game's code
@Override
public void create () {
    batch = new SpriteBatch();
    Vector2 boardPosition = new Vector2(.1f,.1f);
    this.tokenGrid = new GameGrid<>(Constants.TOKENS_PER_ROW,Constants.TOKENS_PER_COLUMN);
    tokenAlgorithm = new NextTileAlgorithms.WillNotMatch(tokenGrid);
    for (GridSpace<TileType> gridSpace : tokenGrid) {
        gridSpace.setValue(tokenAlgorithm.next(gridSpace.getRow(), gridSpace.getColumn()));
    }
    boardGraphic = new BoardGraphic(boardPosition, tokenGrid);
    font = new BitmapFont();
    camera = new OrthographicCamera();
    viewport = new FitViewport(GAME_WIDTH, GAME_HEIGHT, camera);
    camera.setToOrtho(false);
    camera.update();
    this.match3GameState = new Match3GameState(boardGraphic, tokenGrid);
    this.match3GameState.addSubscriber(this);
    this.dragInputAdapter = new DragInputAdapter(viewport);
    this.dragInputAdapter.addSubscriber(match3GameState);
    Gdx.input.setInputProcessor(dragInputAdapter);
}
Thinking about this a bit, the only reason we have the token algorithm here is because we were testing. Where does it
really belong? New tokens really only have meaning for the match 3 game, and specifically the board's state. So, let's
move the token generator into the Match3GameState class. Should it stop there, or should it be pushed down
into the BoardState classes?
Rather than changing the constructors for the board states to taken in 3 arguments, let's pass the Match3GameState
in so we don't have to keep modifying that. To do this, first we need to take in the token algorithm to the constructor:
public Match3GameState(
    BoardGraphic boardGraphic,
    GameGrid<TileType> gameGrid,
    TokenGeneratorAlgorithm<TileType> tokenAlgorithm
) {
    this.boardGraphic = boardGraphic;
    this.commands = new LinkedList<>();
    this.gameGrid = gameGrid;
    this.boardState = new BoardAcceptingMoves(this);
    this.boardState.onEnterState(this);
    this.subscribers = new HashSet<>(1);
    this.tokenAlgorithm = tokenAlgorithm;
}
...
public BoardGraphic getBoardGraphic() {
    return boardGraphic;
}

public GameGrid<TileType> getGameGrid() {
    return gameGrid;
}

public TokenGeneratorAlgorithm<TileType> getTokenAlgorithm() {
    return tokenAlgorithm;
}

public void setTokenAlgorithm(TokenGeneratorAlgorithm<TileType> tokenAlgorithm) {
    this.tokenAlgorithm = tokenAlgorithm;
}
Then we can update both of our BoardState classes to handle this new
arrangement:
public BoardAcceptingMoves(Match3GameState match3GameState) {
    this.match3GameState = match3GameState;
    this.boardGraphic = match3GameState.getBoardGraphic();
    this.gameGrid = match3GameState.getGameGrid();
    this.commands = new LinkedList<>();
    this.selected = null;
    this.crossSection = null;
    this.dragMoves = new LinkedList<>();
    this.lastMove = null;
    this.hasMatches = false;
}
...
public ProcessingMatches(Match3GameState match3GameState) {
    this.match3GameState = match3GameState;
    this.boardGraphic = match3GameState.getBoardGraphic();
    this.gameGrid = match3GameState.getGameGrid();
    this.commands = new LinkedList<>();
    this.isDoneProcessing = false;
    this.subscribers = new HashSet<>(1);
}
And in our state changes, we'll need to tweak the parameters as well.
@Override
public BoardState update(float delta) {
    processMatches();
    while (!this.commands.isEmpty()) {
        Command command = this.commands.remove();
        command.execute();
    }
    if (isDoneProcessing) {
        return new BoardAcceptingMoves(match3GameState);
    }
    return this;
}
Add in any class level fields you need to define for this to work, and then it's time to
send along the new constructor argument inside of the create method of the Match3Game class:
public void create () {
    ...
    this.match3GameState = new Match3GameState(boardGraphic, tokenGrid, tokenAlgorithm);
    ...
Not bad so far, but let's get to the reason we did this by defining a new commmand for the system to execute:
public class DropTileToSpace implements Command {
    private final Match3GameState match3GameState;
    private final int row;
    private final int column;

    public DropTileToSpace(
            Match3GameState match3GameState, int row, int column
    ) {
        this.match3GameState = match3GameState;
        this.row = row;
        this.column = column;
    }

    @Override
    public void execute() {
        TileType newTileType = match3GameState.getTokenAlgorithm().next(row, column);
        match3GameState.getGameGrid().setTileValue(row, column, newTileType);
        match3GameState.getBoardGraphic().replaceTile(row, column, newTileType);
    }
}
Since we have a token algorithm as part of the Match3GameState instance, we can
use it to get a new tile that can be passed to the replacement functions. If you run this though
you'll get a null pointer exception because our current replaceTile method was written
for that debugging step of our grid generators, not for dealing with holes in the grid. Let's fix that:
public void replaceTile(int row, int column, TileType tileType) {
    GridSpace<TileGraphic> space = this.gameGrid.getTile(row, column);
    Vector2 position;
    float aboveBoard = BOARD_UNIT_HEIGHT + 2f;
    float ty = screenYFromGridRow(space.getRow());
    float tx = screenXFromGridColumn(space.getColumn());

    if (space.isFilled()) {
         position = space.getValue().getMovablePointPosition();
    } else {
        position = new Vector2(tx, aboveBoard);
    }
    space.setValue(new TileGraphic(position, tileType));
    space.getValue().handleCommand(new MoveTowards(new Vector2(tx, ty)));
}
Rather than start our tile graphics off at exactly the position they should be, we're going to spawn them
2 tiles above the board itself, this will make it feel like they're falling down to the appropriate spot
that we've cleared for them. So, let's do the next step here and generate some commands in the
ProcessingMatches class:
List<ClearGridSpace> graphicClears = boardGraphic.gameGrid.getClearCommandsForMatches(graphicalMatches);
    this.commands.addAll(graphicClears);
    for (Integer column : columnsToApplyGravityTo) {
        this.commands.add(new ApplyGravityToColumn(column, boardGraphic.gameGrid));
        this.commands.add(new RepositionColumn(column, boardGraphic));
    }

    Iterator<GridSpace<TileGraphic>> iter = boardGraphic.gameGrid.iterator();
    while(iter.hasNext()) {
        GridSpace<TileGraphic> tileGraphicGridSpace = iter.next();
        if (tileGraphicGridSpace.getValue() == null) {
            isDoneProcessing = false;
            this.commands.add(
                new DropTileToSpace(
                    match3GameState,
                    tileGraphicGridSpace.getRow(),
                    tileGraphicGridSpace.getColumn()
                )
            );
        } else {
            MovablePoint movablePoint = tileGraphicGridSpace.getValue().getMovablePoint();
            isDoneProcessing = newMatches.isEmpty() && (
                movablePoint.getPosition().equals(movablePoint.getDestination()) || movablePoint.getDestination() == null
            );
        }
    }
The tweak to processMatches function is pretty simple, when we loop over the board to check
for null values, if we see one, we add in a command to put a tile there instead. That feels simple, but
we've introduced a bug with this naive approach that we'll get to in a minute. That aisde, we can run
our game and feel like a core part of our game is done now:
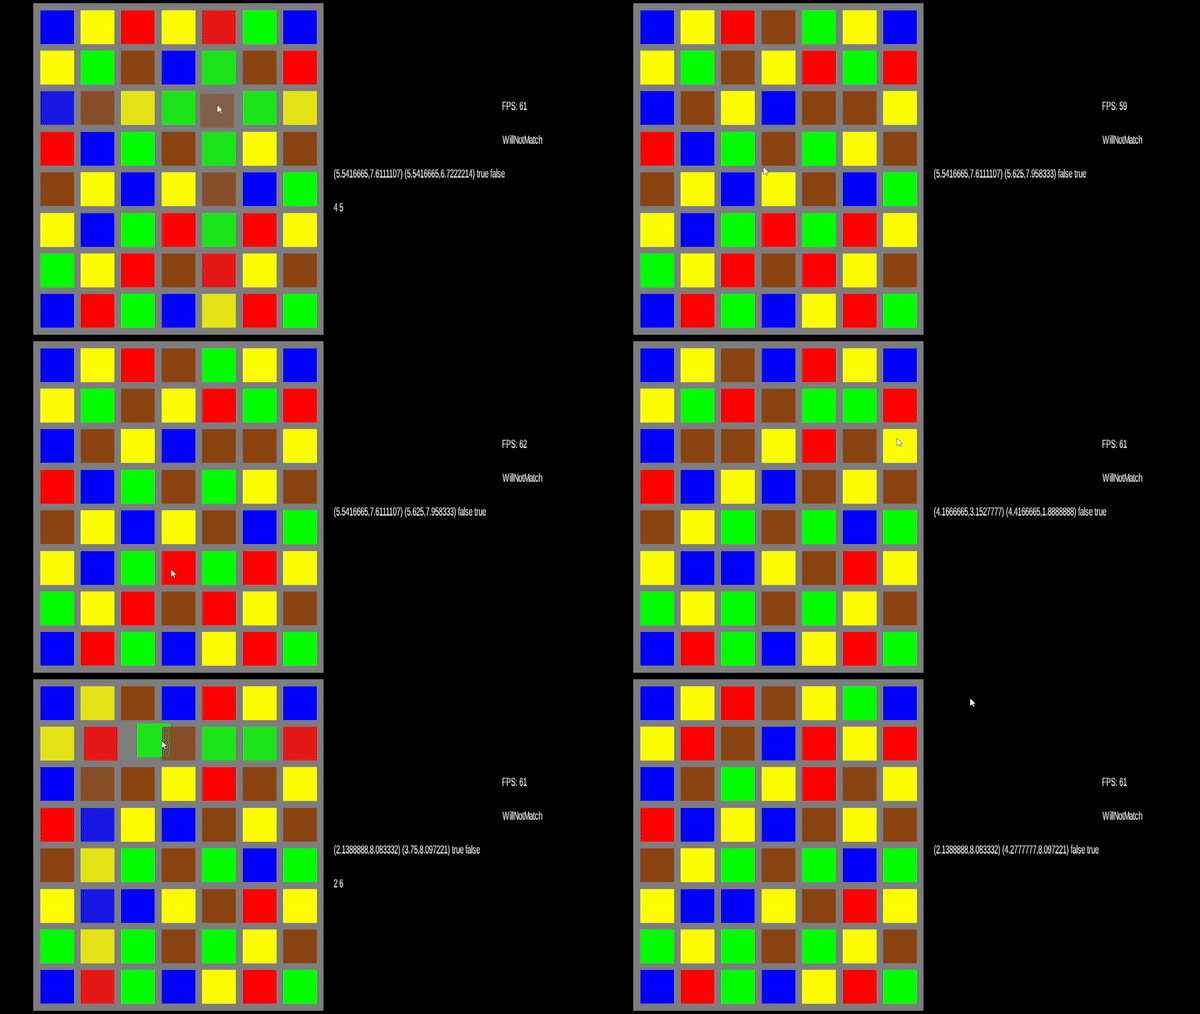
Not bad right? If you fiddle with this for a while you might notice that when we have a match, the tiles fall, and trigger another match, that secondary match is detected too quickly for our eyes to follow and so appears to look like some form of bug:
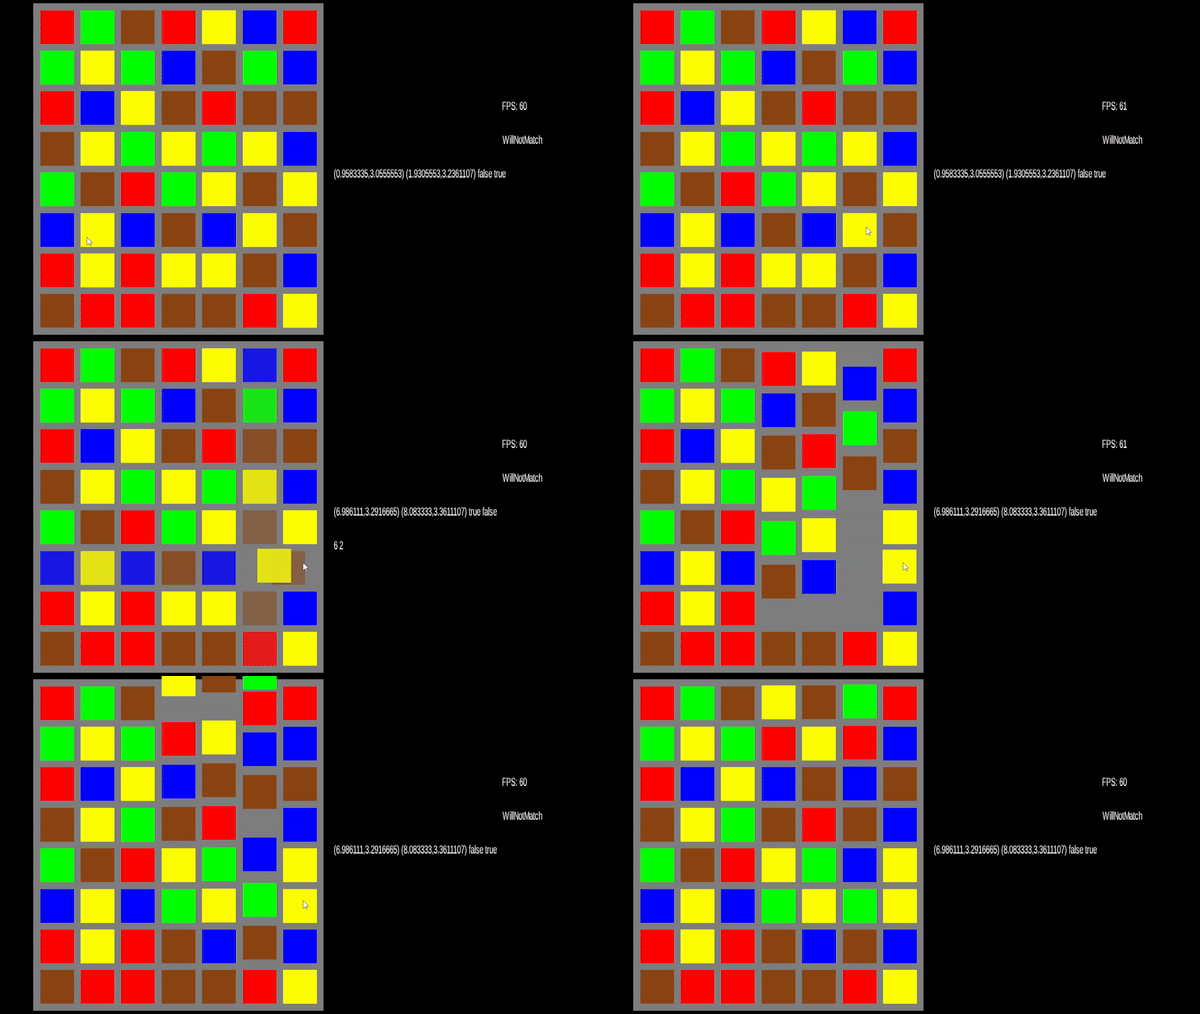
The reason for this of course is timing. We wrote the above code in processMatches because in our mind we think
clear, gravity, reposition, drop new tile. But the iteration across the board is happening right now and isn't
queued up like the other commands are. And so, we can fix this using the current code by moving that loop generating
the drop commands above this code instead. Since then it would be ran on the next frame.
Additionally, this can still cause another bug though:
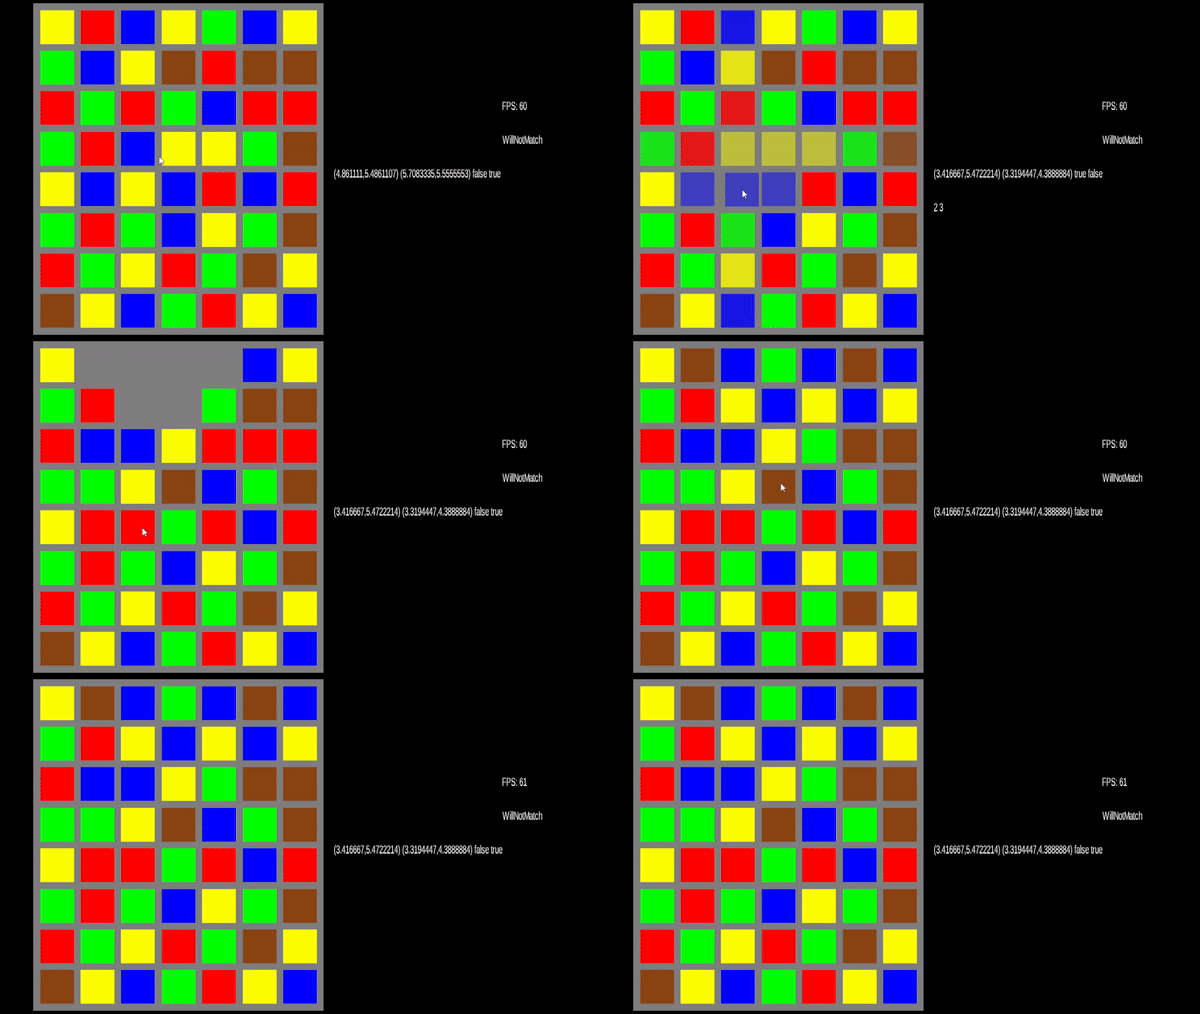
Which happens because we're finding new matches while all the other tiles are moving and so the timing gets off again.
We can prevent that by checking for moving tiles before we find the matches and stopping processMatches
from going any further:
// Prevent processing further matches until the board settles
boolean tilesMoving = false;
Iterator<GridSpace<TileGraphic>> iter2 = boardGraphic.gameGrid.iterator();
while(iter2.hasNext()) {
    GridSpace<TileGraphic> tileGraphicGridSpace = iter2.next();
    if (tileGraphicGridSpace.isFilled()) {
        Vector2 position = tileGraphicGridSpace.getValue().getMovablePoint().getPosition();
        Vector2 destination = tileGraphicGridSpace.getValue().getMovablePoint().getDestination();
        tilesMoving = !(position.equals(destination) || destination == null);
    }
    if (tilesMoving) {
        break;
    }
}
if (tilesMoving) {
    return;
}
This will result in everything working as expected. But it does feel a little confusing to be generating the drop commands above the clear commands. It would be nicer if we instead had a way for the tile graphics to let us know when their animation is completed and to respond to that instead. We could do this with an observer pattern, something like this would do:

One dropback of this though, is that every TileGraphic would need to register a watcher, which feels like it might complicate their setup a bit. But, let's pump the breaks on this because while this would be fun to do, it might add a bit more complexity than we need for now. Before we decide to do this optimization, let's think about the trade offs we'd make:
| Pro | Con |
|---|---|
| We don't have to loop the full grid | How do you deal with animations that aren't from dropping a tile in |
processMatches's overhead is lowered since we don't deal with two different time frames in the same function. |
Setup of tile graphics will be more complex |
| The sequencing of operations is easy to describe in human language | We're going to spend more time on this instead of other game features |
I sat for a while, and my shower thoughts were assaulted by this for a couple days while I was busy with other non-coding things. I think it would be really nice to not have to loop the grid, but it's not like our game is running poorly or dropping frames at all. The grid itself isn't that big, so we're not really gaining much by trying to optimize away the grid, so that pro doesn't hold much water right now.
The last con I've listed is going to dictate what we're going to do next though. Before we spend any more time on the (understandably complicated) matching step, let's move on to doing something with the matches we've made.
Scoring points ↩
Up until this point I haven't elaborated on our enumeration values at all. Let's chat about those now.
public enum TileType {
    LowValue,
    MidValue,
    HighValue,
    Multiplier,
    Negative;
}
Our enums are somewhat arbitrary and pretty obvious as to what each is supposed to do but let's toss some numbers onto them. The first three can increase your score by 2, 4, and 6. Then, for a multiplier, let's have it apply a multiplier to the next match. Our negative value will be a value that we want the user to avoid matching. This will be pretty fun to make, so let's stand up a basic score box to display a number to the user.
We're not going to spend much on the design, in case it hasn't been obvious, we're using placeholder graphics so that we can get the core down and we can always go and apply polish later. Let's define some constants for how big this score board is going to be:
public class Constants {
    ...
    static public float SCORE_UNIT_WIDTH = TILE_UNIT_WIDTH * 3 + BOARD_UNIT_GUTTER;
    static public float SCORE_UNIT_HEIGHT = TILE_UNIT_HEIGHT + BOARD_UNIT_GUTTER;
}
I've stored these in the same class I put the constant variables we used before like BOARD_UNIT_HEIGHT
so that everything is in one place, which will make it easy for any shinification of our game.
Next up, we can define a ScoreGraphic class that will be responsible for rendering the data to
the screen. Like the board graphic before, we'll use a placeholder texture for now and assign it a movable point
as a position to base any calculations of its children from:
public class ScoreGraphic implements MatchSubscriber<TileType> {
    private final MovablePoint movablePoint;
    private final BoardGraphic boardGraphic;
    private final Texture texture;

    private LinkedList<TileGraphic> inFlightMatches;

    // Note: we will refactor BoardGraphic away later, just sit tight.
    public ScoreGraphic(Vector2 position, BoardGraphic boardGraphic) {
        inFlightMatches = new LinkedList<>();
        this.movablePoint = new MovablePoint(position);
        this.boardGraphic = boardGraphic;
        this.texture = TestTexture.makeTexture(new Color(1, 1, 1, 0.5f));
    }
One thing that you should notice right away is that we're implementing the MatchSubscriber interface
we defined before, this will let us get notified of updates that we'll then use to calculate our
score. That calculation we'll get to in a moment, but first let's setup our render code:
void render(float delta, SpriteBatch spriteBatch, BitmapFont bitmapFont) {
    float cornerX = movablePoint.getPosition().x;
    float cornerY = movablePoint.getPosition().y;
    spriteBatch.draw(
            texture,
            cornerX,
            cornerY,
            Constants.SCORE_UNIT_WIDTH,
            Constants.SCORE_UNIT_HEIGHT
    );
    bitmapFont.draw(
            spriteBatch,
            "Score: 0\nMultiplier: x1",
            cornerX + Constants.BOARD_UNIT_GUTTER,
            cornerY + Constants.SCORE_UNIT_HEIGHT - Constants.BOARD_UNIT_GUTTER
    );
    for (TileGraphic tileGraphic : inFlightMatches) {
        tileGraphic.render(delta, spriteBatch);
    }
}
You'll notice we're hardcoding the score and multiplier for now, that's okay since we'll
circle back to this code very soon. Additionally, we're rendering any of the tile graphics
to the screen from our inFlightMatches list. This is a list of graphics that
will be coming from the board, where we just made a match, and flying over to the scoreboard
so there's a visual for the user to notice that the score is going up besides an instant text change.
For now, we'll re-use our tile graphic, but we'll change this when we do a bit of polishing in a bit.
As I mentioned before, it's nice to feel like we're making progress, so let's implement the last
method holding us back from being able to compile the code:
@Override
public void onMatches(List<Match<TileType>> matches) {
    for (Match<TileType> match : matches) {
        for (GridSpace<?> space : match.getSpaces()) {
            // Move the tile graphics to the score window
            float ty = boardGraphic.screenYFromGridRow(space.getRow());
            float tx = boardGraphic.screenXFromGridColumn(space.getColumn());
            TileGraphic tileGraphic = new TileGraphic(
                new Vector2(tx, ty),
                match.getValues().get(0)
            );
            tileGraphic.getMovablePoint().setDestination(movablePoint.getPosition());
            inFlightMatches.add(tileGraphic);
        }
    }
    // TODO: calculate update to score
}
This code is constructing a new tile graphic at the place the old one was (which was just removed during a match) and then telling it to head over to the score board's position itself. This will make a nice visual effect like this:
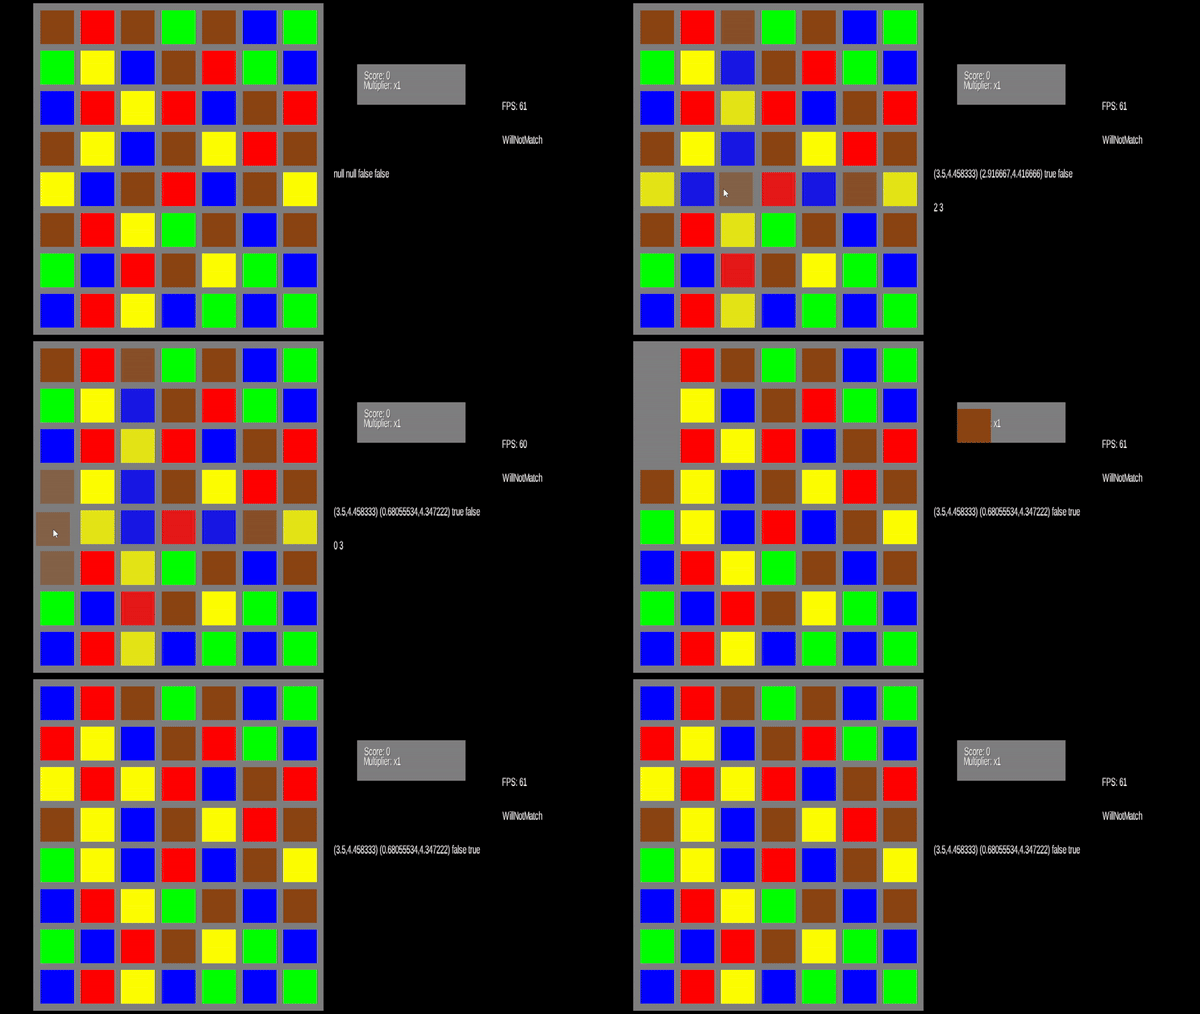
With that in place, the code should now compile, although if we were to run it nothing different would happen.
We certainly wouldn't get the above behavior yet at least,
For two reasons. First, we haven't called update on any of those in flight graphics, and two we need to
subscribe our score graphic to a publisher and call its various methods from our main game class. Let's add
the update method to ScoreGraphic first:
void update(float delta) {
    ListIterator<TileGraphic> iter = inFlightMatches.listIterator();
    while (iter.hasNext()) {
        TileGraphic tileGraphic = iter.next();
        if (tileGraphic.getMovablePoint().isAtDestination()) {
            iter.remove();
        }
        tileGraphic.update(delta);
    }
}
I've defined a convenience function inside of MovablePoint called isAtDestination
which isn't hard to implement, the main thing to remember is that it's okay for the destination to be null
and if it is, then it means we haven't moved and aren't going to, so we're at our destination semantically
speaking. The fun thing about this code is that we're using the
ListIterator
of the LinkedList. This lovely thing let's us efficiently remove something from the
middle of our list while we iterate over it in constant time which a lot better than having to juggle another
data structure where there could be holes in the list to deal with or similar.
Let's go ahead and move over to the Match3Game class now and create one of these bad boys:
ScoreGraphic scoreGraphic;
...
public void create () {
    ...
    boardGraphic = new BoardGraphic(boardPosition, tokenGrid);
    scoreGraphic = new ScoreGraphic(scorePosition, boardGraphic);
    ...
    this.match3GameState = new Match3GameState(boardGraphic, tokenGrid, tokenAlgorithm);
		                this.match3GameState.addSubscriber(scoreGraphic);
    ...
}
Not to hard, with that class level field defined, we can update the render method next:
...
boardGraphic.render(delta, batch);
scoreGraphic.render(delta, batch, font);
...
and lastly our update method:
public void update(float delta) {
    match3GameState.update(delta);
    scoreGraphic.update(delta);
}
Very straightforward and now if you make a match, you'll see the tile graphics move along like the
gif above. But of course, there's no point in it if we don't actually increment our score. If you read
the code closely, you know we left a TODO in the onMatches function to do
some calculations. Rather than do all of this inside of the graphic managing class, I'd prefer if we
do this in a way that lets it be tested better instead. Let's define our ScoreCalculator
public class ScoringCalculator {

    private int score;
    private int multiplier;
    public ScoringCalculator() {
        this.score = 0;
        this.multiplier = 1;
    }

    // Add your getters and setters here

    public void addToScore(List<Match<TileType>> matches) {
        ...
    }
}
This is a pretty simple container class for a score and a multiplier. Eliding the getters and setters for now, you can see we've got a function signature for handling a list of matches of tiles. With that in place, we can use JUnit to define some unit tests to confirm the type of behavior we mentioned at the beginning of this section. For reference, let's give more concrete definitions to what each tile should do:
| Tile Type | Effect |
|---|---|
| LowValue | +1 per tile in match |
| MidValue | +2 per tile in match |
| HighValue | +3 per tile in match |
| Multiplier |
+1 per match, +1 per additional tile beyond the minimum required match length
Consumed on the next match after this has been seen. |
| Negative | -2 per tile in match, can be affected by multiplier! |
The setup of our unit test is easy, and we can add a simple null case to start:
class ScoringCalculatorTest {
    ScoringCalculator calculator;
    @BeforeEach
    void beforeEach() {
         calculator = new ScoringCalculator();
    }

    Match<TileType> matchOfSize(int size, TileType tileType) {
        GridSpace<TileType> space = new GridSpace<>(0, 0, tileType);
        Match<TileType> match = new Match<>(space);
        for (int i = 1; i < size; i++) {
            match.addMatch(space);
        }
        return match;
    }

    @Test
    void onMatchesIncreasesScoreBy0OnNoMatches() {
        calculator.addToScore(new LinkedList<Match<TileType>>());
        Assertions.assertEquals(0, calculator.getScore());
    }
    ...
I've defined a helper matchOfSize so that we avoid having to write too much boilerplate
around creating a match. We can use that in our first "real" test:
@Test
void onLowTokenAdd1PerTileToScore() {
    Match<TileType> match = matchOfSize(4, TileType.LowValue);
    List<Match<TileType>> matches = new LinkedList<>();
    matches.add(match);
    calculator.addToScore(matches);
    Assertions.assertEquals(4, calculator.getScore());
}
We can repeat this procedure with the other two types of tiles to define confirmations for mid and high values, and then we can add in a test for the multiplier code. Which is a little bit more interesting because we have to make a match first:
@Test
void onMultiplierApplyToLastScore() {
    Match<TileType> multiplierMatch = matchOfSize(3, TileType.Multiplier);
    Match<TileType> pointMatch = matchOfSize(3, TileType.LowValue);

    List<Match<TileType>> firstMatch = new LinkedList<>();
    firstMatch.add(multiplierMatch);
    calculator.addToScore(firstMatch);
    Assertions.assertEquals(2, calculator.getMultiplier(), "did not add to multiplier");

    List<Match<TileType>> secondMatch = new LinkedList<>();
    secondMatch.add(pointMatch);
    calculator.addToScore(secondMatch);
    Assertions.assertEquals(6, calculator.getScore());
    Assertions.assertEquals(1, calculator.getMultiplier(), "reset the multipler after used");
}
As you can see, this simulates that a user made a match with a multiplier token, then a pointed match. This results in the pointed match's value increasing according to the multiplier match.
Now, what's our behavior if they make more than one match at a time and only ones a multiplier? Well, we're going to apply the multiplier first, and then drain it when we compute the score. Our test for that behavior will be:
@Test
void onCombinedMatchWithMultiplierAndScoreApplyIt() {
    // Should generate a multiplier + of 1 so we get x2
    Match<TileType> multiplierMatch = matchOfSize(3, TileType.Multiplier);
    Match<TileType> pointMatch = matchOfSize(3, TileType.LowValue);

    List<Match<TileType>> firstMatch = new LinkedList<>();
    firstMatch.add(pointMatch);
    firstMatch.add(multiplierMatch);

    calculator.addToScore(firstMatch);
    Assertions.assertEquals(6, calculator.getScore());
}
Easy enough right? Now the fun thing about the multiplier's of course is that we defined them to only be used up when a non-multipler is matched. Which means that a clever gamer could stack these for massive boosts in score.
@Test
void multipliersStackUntilUsed() {
    Match<TileType> multiplierMatch1 = matchOfSize(3, TileType.Multiplier);
    Match<TileType> multiplierMatch2 = matchOfSize(3, TileType.Multiplier);
    Match<TileType> pointMatch = matchOfSize(3, TileType.LowValue);

    List<Match<TileType>> firstMatch = new LinkedList<>();
    firstMatch.add(multiplierMatch1);
    firstMatch.add(multiplierMatch2);
    calculator.addToScore(firstMatch);
    Assertions.assertEquals(3, calculator.getMultiplier(), "didn't add multiplers right");

    List<Match<TileType>> secondMatch = new LinkedList<>();
    secondMatch.add(pointMatch);
    calculator.addToScore(secondMatch);
    Assertions.assertEquals(9, calculator.getScore());
    Assertions.assertEquals(1, calculator.getMultiplier(), "reset the multipler after used");
}
Cool right? Lastly, let's stop being nice to the player and throw in some tests for how the negative tokens will impact their score. They can lower the value of a combined match, be multiplied by the multiplier if the user isn't careful, but we're not cruel, so the score will never drop below 0. These three tests cases can be written as:
@Test
void negativesShouldNotReduceScorePast0() {
    Match<TileType> match = matchOfSize(20, TileType.Negative);
    List<Match<TileType>> firstMatch = new LinkedList<>();
    firstMatch.add(match);
    calculator.addToScore(firstMatch);
    Assertions.assertEquals(0, calculator.getScore());
}

@Test
void negativesWillReduceCombinedMatch() {
    List<Match<TileType>> firstMatch = new LinkedList<>();
    firstMatch.add(matchOfSize(3, TileType.Negative));
    firstMatch.add(matchOfSize(4, TileType.MidValue));
    calculator.addToScore(firstMatch);
    Assertions.assertEquals(2, calculator.getScore());
}

@Test
void negativesCanBeMultiplied() {
    List<Match<TileType>> matches = new LinkedList<>();
    matches.add(matchOfSize(20, TileType.LowValue));
    calculator.addToScore(matches);

    matches.clear();
    matches.add(matchOfSize(3, TileType.Negative));
    matches.add(matchOfSize(3, TileType.Multiplier));
    calculator.addToScore(matches);

    Assertions.assertEquals(8, calculator.getScore());
    Assertions.assertEquals(1, calculator.getMultiplier());
}
Now that we've got a decent test suite to guide us, we can implement the actual calculation method. If you want to give this a crack yourself first please do! But here's my implementation:
public void addToScore(List<Match<TileType>> matches) {
    if (matches.isEmpty()) {
        return;
    }

    int matchScore = 0;
    int negativeScore = 0;
    for (Match<TileType> match : matches) {
        if (match.getValues().peek().equals(TileType.Multiplier)) {
            multiplier += (match.getValues().size() - match.getMinMatchLength() + 1);
        }
        for (TileType tileType : match.getValues()) {
            switch (tileType) {
                case LowValue: matchScore += 1; break;
                case MidValue: matchScore += 2; break;
                case HighValue: matchScore += 3; break;
                case Negative:
                    negativeScore += 2;
                    break;
                case Multiplier:
                default:
                    // no op
            }
        }
    }
    score += (matchScore - negativeScore) * multiplier;
    setScore(MathUtils.clamp(score, 0, Integer.MAX_VALUE));
    // Reset multiplier if we just used it.
    if (multiplier != 1 && matchScore > 0 || negativeScore != 0) {
        multiplier = 1;
    }
}
And running our test suite shows us we're good to go:

The last thing we do before we have a decently complete game, is to actually show the
user their score. So let's return to the ScoreGraphic and add in an
instance of our new calculator.
public class ScoreGraphic implements MatchSubscriber<TileType> {
    ...
    private final ScoringCalculator scoringCalculator;

    public ScoreGraphic(Vector2 position, BoardGraphic boardGraphic) {
        this.scoringCalculator = new ScoringCalculator();
        ...
    }

    void render(float delta, SpriteBatch spriteBatch, BitmapFont bitmapFont) {
        ...
        bitmapFont.draw(
                spriteBatch,
                "Score: " + scoringCalculator.getScore() +
                "\n" + "Multiplier: x" + scoringCalculator.getMultiplier(),
                cornerX + Constants.BOARD_UNIT_GUTTER,
                cornerY + Constants.SCORE_UNIT_HEIGHT - Constants.BOARD_UNIT_GUTTER
        );
        ...
    }

    public void onMatches(List<Match<TileType>> matches) {
        scoringCalculator.addToScore(matches);
        ...
    }
}
With these three places updated, we can safely say that the core mechanic of our game is complete!
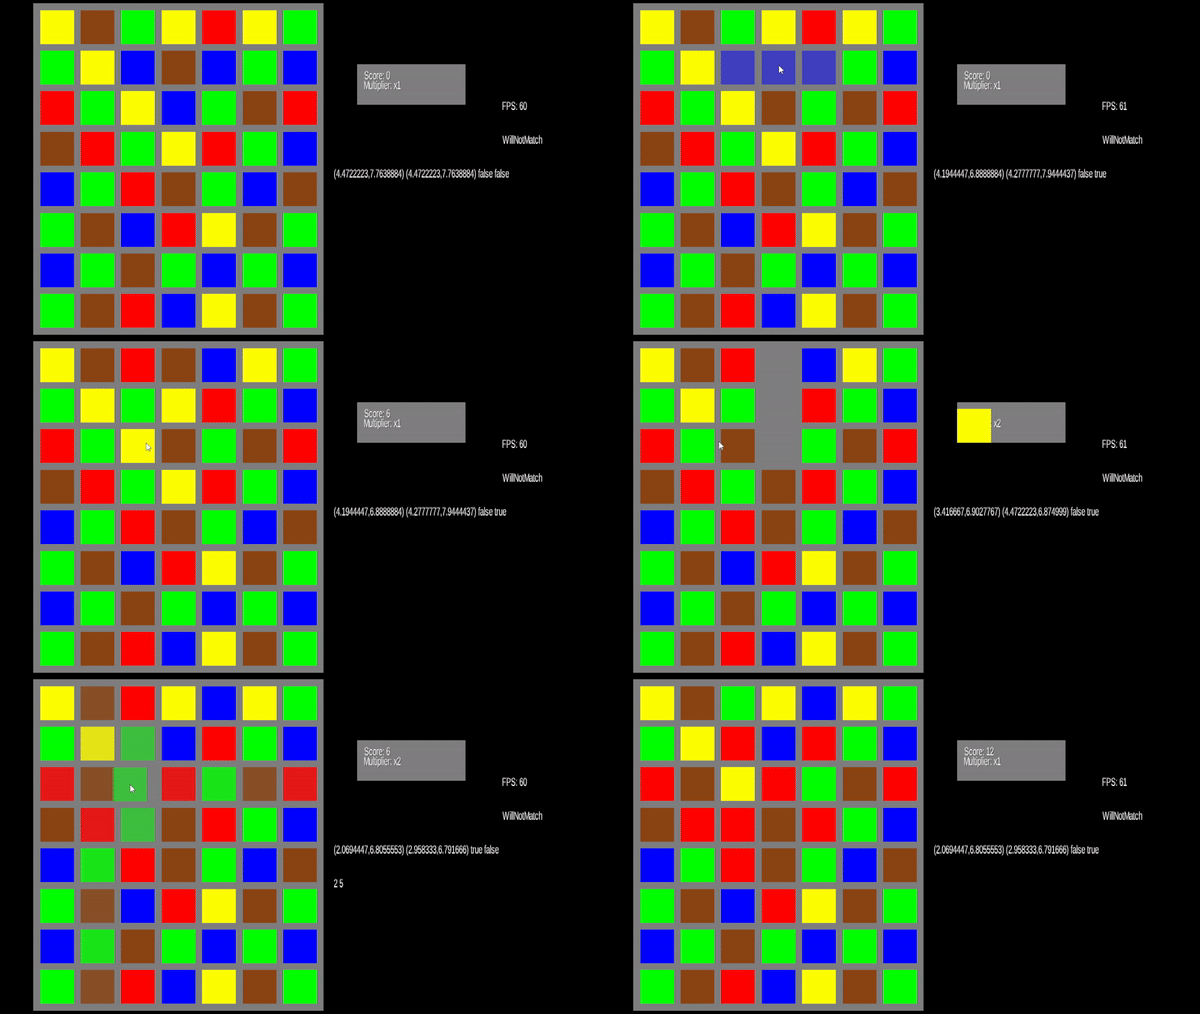
But as I noted above. We've still got a couple things we need to do. Obviously you wouldn't ship this out to steam or to any other than the most alpha of alpha testers. It lacks polish, and we can set ourselves up to get that. But before we handle that, we need to return to a bug I've left alone for a while.
An edge case we need to fix ↩
You remember all that processing code we wrote before for dealing with matches and the recursion we did to traverse the board? We'll... there's bit of an annoying edge case that our current code isn't handling that I ignored earlier. Most of the time, the game works as expected. But, if we get a specific setup, then we run into trouble. Check this unit test out:
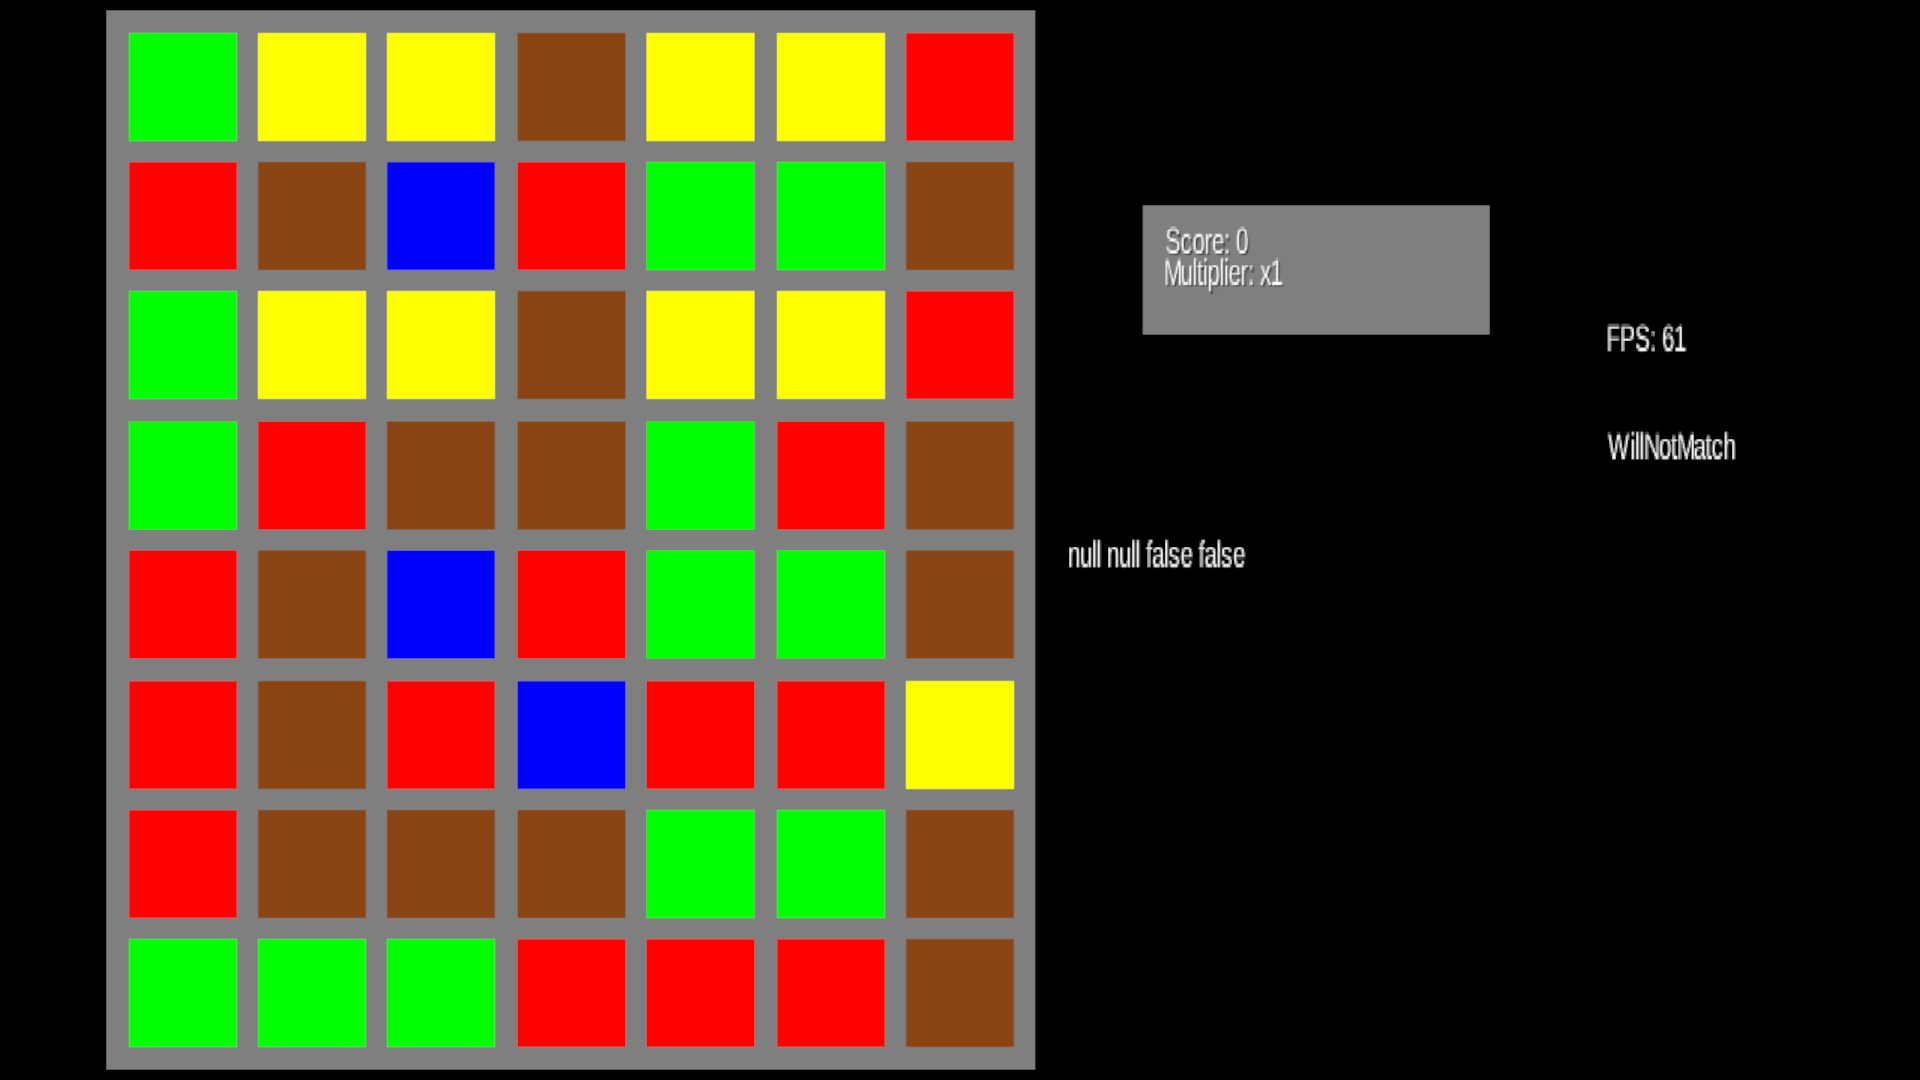
Specifically, look at the match we've constructed in the bottom left of the grid. If we run our
RowTileMatcher on the 2nd row up from the bottom, then we'd expect to see 2 matches,
one being the vertical red match, and the other being the L shaped brown one. So let's unit test that:
@Test
void findMatchesWhenProcessingEntireRow() {
    RowTileMatcher<TileType> matcher = new RowTileMatcher<>(grid, 2);
    List<Match<TileType>> matches = matcher.findMatches();
    Assertions.assertEquals(2, matches.size());

    final HashMap<GridSpace<TileType>, Boolean> expectedSeen = new HashMap<>();
    expectedSeen.put(grid.getTile(1, 0), false);
    expectedSeen.put(grid.getTile(2, 0), false);
    expectedSeen.put(grid.getTile(3, 0), false);
    expectedSeen.put(grid.getTile(1, 1), false);
    expectedSeen.put(grid.getTile(2, 1), false);
    expectedSeen.put(grid.getTile(3, 1), false);
    expectedSeen.put(grid.getTile(1, 2), false);
    expectedSeen.put(grid.getTile(1, 3), false);

    for (Match<TileType> match : matches) {
        for (GridSpace<TileType> gridSpace : match.getSpaces()) {
            expectedSeen.put(gridSpace, true);
        }
    }

    List<Executable> tests = new ArrayList<>();
    for (final GridSpace<TileType> key : expectedSeen.keySet()) {
        tests.add(
            new Executable() {
                @Override
                public void execute() throws Throwable {
                    Assertions.assertTrue(
                        expectedSeen.get(key),
                        key.getRow() + "," + key.getColumn() + "  not seen in match"
                    );
                }
            }
        );
    }
    Assertions.assertAll(tests);
}
In case it's not obvious by the fact that we're talking about it, this test fails:
As we can see in the results, the horizontal brown spaces at 1,2 and 1,3 in our grid didn't make it into the match
when we started the search for the matches from the row at index 2. You can reason this out if you return to our
AbstractMatcher code and the way it's searching the grid from its starting point.
_searchDir(row  + 1, column, 1, ShiftToken.Direction.UP, vMatch);
_searchDir(row - 1, column, 1, ShiftToken.Direction.DOWN, vMatch);
_searchDir(row, column - 1, 1, ShiftToken.Direction.LEFT, hMatch);
_searchDir(row, column + 1, 1, ShiftToken.Direction.RIGHT, hMatch);
The problem of course is that our search starts from where we told it to and then only goes in that direction. So for something like the L shaped match, if the row we're checking only contains the vertical part, the algorithm doesn't ever veer off to the right to check if the match has continued or not.
As with all things, trying to be clever can bite us. In my initial prototype for this code I checked the entire grid at all times rather than trying to only checking a given row or column, that was a simpler algorithm then this, but we can still deal with this by rewriting our search code to behave sort of like a flood fill in a painting program.
Before we do that though, we need to update our Match class to trim out invalid parts of matches.
Up until now, the match class has been relying on the fact that it's normally built by tokens that are in a line.
So we could reasonably assume that if the number of spaces in the match met our minimum length, that the tokens
were in a row. But if we're going to walk in every direction as we add spaces to our potential match,
we need to make sure that when we check for legality, we remove any segments below our minimum length.
If that's a bit much to comprehend with my poor description. Consider this picture instead:

If you imagine walking from one of these blue tiles in all directions, adding any matching space to the spaces list inside of the match class, you can see that we'd have 3 spaces, but we wouldn't have 3 spaces in a row.
So, when someone wants to check if a match is legal, we'll go ahead and clean up our current match:
public boolean isLegal() {
    LinkedHashMap<Integer, Integer> numberOfSpacesByRow = new LinkedHashMap<>();
    LinkedHashMap<Integer, Integer> numberOfSpacesByColumn = new LinkedHashMap<>();
    for (GridSpace<T> space : this.spaces) {
        int columnCount = numberOfSpacesByColumn.getOrDefault(space.getColumn(), 0);
        int rowCount = numberOfSpacesByRow.getOrDefault(space.getRow(), 0);
        numberOfSpacesByColumn.put(space.getColumn(), ++columnCount);
        numberOfSpacesByRow.put(space.getRow(), ++rowCount);
    }

    this.values.clear();
    ListIterator<GridSpace<T>> listIterator = this.spaces.listIterator();
    while(listIterator.hasNext()) {
        GridSpace<T> space = listIterator.next();
        int numSpacesSharingColumn = numberOfSpacesByColumn.get(space.getColumn());
        int numSpacesSharingRow = numberOfSpacesByRow.get(space.getRow());
        boolean partOfHorizontalMatch = numSpacesSharingColumn >= minMatchLength;
        boolean partOfVerticalMatch = numSpacesSharingRow >= minMatchLength;
        if (partOfVerticalMatch || partOfHorizontalMatch) {
            values.add(space.getValue());
        } else {
            listIterator.remove();
        }
    }

    return this.spaces.size() >= minMatchLength;
}
We've got a lot more code now than just this.spaces.size >= minMatchLength, and I
think you could make the argument that we could pull this into its own sort of trim
method or similar, but if legality requires trimming, then we might as well do them together for
now. If for some reason we need to put calls to isLegal into a loop that needs to be
optimal, then we can use a dirty flag
to avoid recomputing it.
Since this code is now slightly less trivial than it was before, we can add a test suite to ensure we don't break anything like this:
class MatchTest {

    @Test
    void acceptMinHorizontal() {
        Match<TileType> match = new Match<>(new GridSpace<TileType>(0,0, TileType.HighValue));
        match.addMatch(new GridSpace<TileType>(0, 1, TileType.HighValue));
        match.addMatch(new GridSpace<TileType>(0, 2, TileType.HighValue));
        Assertions.assertTrue(match.isLegal());
    }

    @Test
    void acceptMoreThanMinHorizontal() {
        Match<TileType> match = new Match<>(new GridSpace<TileType>(0,0, TileType.HighValue));
        match.addMatch(new GridSpace<TileType>(0, 1, TileType.HighValue));
        match.addMatch(new GridSpace<TileType>(0, 2, TileType.HighValue));
        match.addMatch(new GridSpace<TileType>(0, 3, TileType.HighValue));
        Assertions.assertTrue(match.isLegal());
    }

    @Test
    void rejectLessThanMinHorizontal() {
        Match<TileType> match = new Match<>(new GridSpace<TileType>(0,0, TileType.HighValue));
        match.addMatch(new GridSpace<TileType>(0, 1, TileType.HighValue));
        Assertions.assertFalse(match.isLegal());
    }

    @Test
    void acceptMinVertical() {
        Match<TileType> match = new Match<>(new GridSpace<TileType>(0,0, TileType.HighValue));
        match.addMatch(new GridSpace<TileType>(1, 0, TileType.HighValue));
        match.addMatch(new GridSpace<TileType>(2, 0, TileType.HighValue));
        Assertions.assertTrue(match.isLegal());
    }

    @Test
    void acceptMoreThanMinVertical() {
        Match<TileType> match = new Match<>(new GridSpace<TileType>(0,0, TileType.HighValue));
        match.addMatch(new GridSpace<TileType>(1, 0, TileType.HighValue));
        match.addMatch(new GridSpace<TileType>(2, 0, TileType.HighValue));
        match.addMatch(new GridSpace<TileType>(3, 0, TileType.HighValue));
        Assertions.assertTrue(match.isLegal());
    }

    @Test
    void rejectLessThanMinVertical() {
        Match<TileType> match = new Match<>(new GridSpace<TileType>(0,0, TileType.HighValue));
        match.addMatch(new GridSpace<TileType>(1, 0, TileType.HighValue));
        Assertions.assertFalse(match.isLegal());
    }

    @Test
    void trimSegmentsLowerThanMinHorizontal() {
        GridSpace<TileType> widow = new GridSpace<TileType>(0, 1, TileType.HighValue);
        Match<TileType> match = new Match<>(new GridSpace<TileType>(0,0, TileType.HighValue));
        match.addMatch(new GridSpace<TileType>(1, 0, TileType.HighValue));
        match.addMatch(new GridSpace<TileType>(2, 0, TileType.HighValue));
        match.addMatch(new GridSpace<TileType>(3, 0, TileType.HighValue));
        match.addMatch(widow);
        Assertions.assertTrue(match.isLegal());
        for (GridSpace<TileType> space : match.getSpaces()) {
            boolean sameLocationR = widow.getRow() == space.getRow();
            boolean sameLocationC = widow.getColumn() == space.getColumn();
            Assertions.assertFalse(sameLocationR && sameLocationC);
        }
    }

    @Test
    void trimSegmentsLowerThanMinVertical() {
        GridSpace<TileType> widow = new GridSpace<TileType>(1, 1, TileType.HighValue);
        Match<TileType> match = new Match<>(new GridSpace<TileType>(0,0, TileType.HighValue));
        match.addMatch(new GridSpace<TileType>(0, 1, TileType.HighValue));
        match.addMatch(new GridSpace<TileType>(0, 2, TileType.HighValue));
        match.addMatch(new GridSpace<TileType>(0, 3, TileType.HighValue));
        match.addMatch(widow);
        Assertions.assertTrue(match.isLegal());
        for (GridSpace<TileType> space : match.getSpaces()) {
            boolean sameLocationR = widow.getRow() == space.getRow();
            boolean sameLocationC = widow.getColumn() == space.getColumn();
            Assertions.assertFalse(sameLocationR && sameLocationC);
        }
    }
}
and thankfully, all of these will pass. You might look at the last two tests and wonder
why we're not simply doing a Assertions.assertFalse(space.contains(widow)) and
I'll remind you that we overrode our equals method for the grid spaces to
really only care about what their value is. So that would return true since all of our
spaces have the same value.
Now that our match class is more robust, we can go ahead and rewrite our search code. While a lot of people really like recursion, I find that when implementing a depth first search of a grid, I tend to prefer the iterative approach. It avoids blowing up the stack and is more reasonable for me to think about. Walking in one direction until we hit a base case, simple and easy to recurse. Tracking a bunch of flags for what we've seen already? Let's loop:
public Match<T> search(int row, int column, int minimumMatchLength) {
    GridSpace<T> space = grid.getTile(row, column);
    Match<T> m = new Match<>(space, minimumMatchLength);
    T value = space.getValue();
    if (null == value) {
        return m;
    }

    LinkedHashSet<GridSpace<T>> seen = new LinkedHashSet<>(3);
    Stack<GridSpace<T>> toVisit = new Stack<>();
    toVisit.push(space);
    while(!toVisit.isEmpty()) {
        GridSpace<T> curr = toVisit.pop();
        if (seen.contains(curr)) {
            continue;
        }
        seen.add(curr);
        if (!value.equals(curr.getValue())) {
            continue;
        }

        if (curr != space) {
            m.addMatch(curr);
        }

        int r = curr.getRow();
        int c = curr.getColumn();
        int aboveR = MathUtils.clamp(r + 1, 0, grid.getHeight() - 1);
        int belowR = MathUtils.clamp(r - 1, 0, grid.getHeight() - 1);
        int leftC = MathUtils.clamp(c - 1, 0, grid.getWidth() - 1);
        int rightC = MathUtils.clamp(c + 1, 0, grid.getWidth() - 1);

        toVisit.push(grid.getTile(aboveR, c));
        toVisit.push(grid.getTile(r, rightC));
        toVisit.push(grid.getTile(belowR, c));
        toVisit.push(grid.getTile(r, leftC));
    }

    if (m.isLegal()) {
        return m;
    }
    return new Match<>(space, minimumMatchLength);
}
We're coding a little bit more defensively here by starting off with a null check for the
value, since we don't really care about finding any empty spaces in a row. Once we've
confirmed that we want to start searching, we add our starting spot onto the list and then
add the tiles around it to the toVisit list. On subsequent loops to the first,
we'll skip over any tiles we've already seen or tiles that don't match the value we started
with.
The careful reader will probably notice that we're going to have a few places where we check
the same tile twice. If you profile the game and find that this search code is a hot spot, then
we could consider adding in a check against the seen set prior to pushing a tile
onto the grid. For now though, this hasn't dropped my FPS, so I didn't add it. Feel free though!
If you re-run the unit test suite. You can see that we now have every test passing!
One interesting thing I'd like to point out that I ran into when writing this up was I
initially had my value check like this: if (!value == curr.getValue) and
while the unit tests passed, the game itself broke in a rather interesting way:
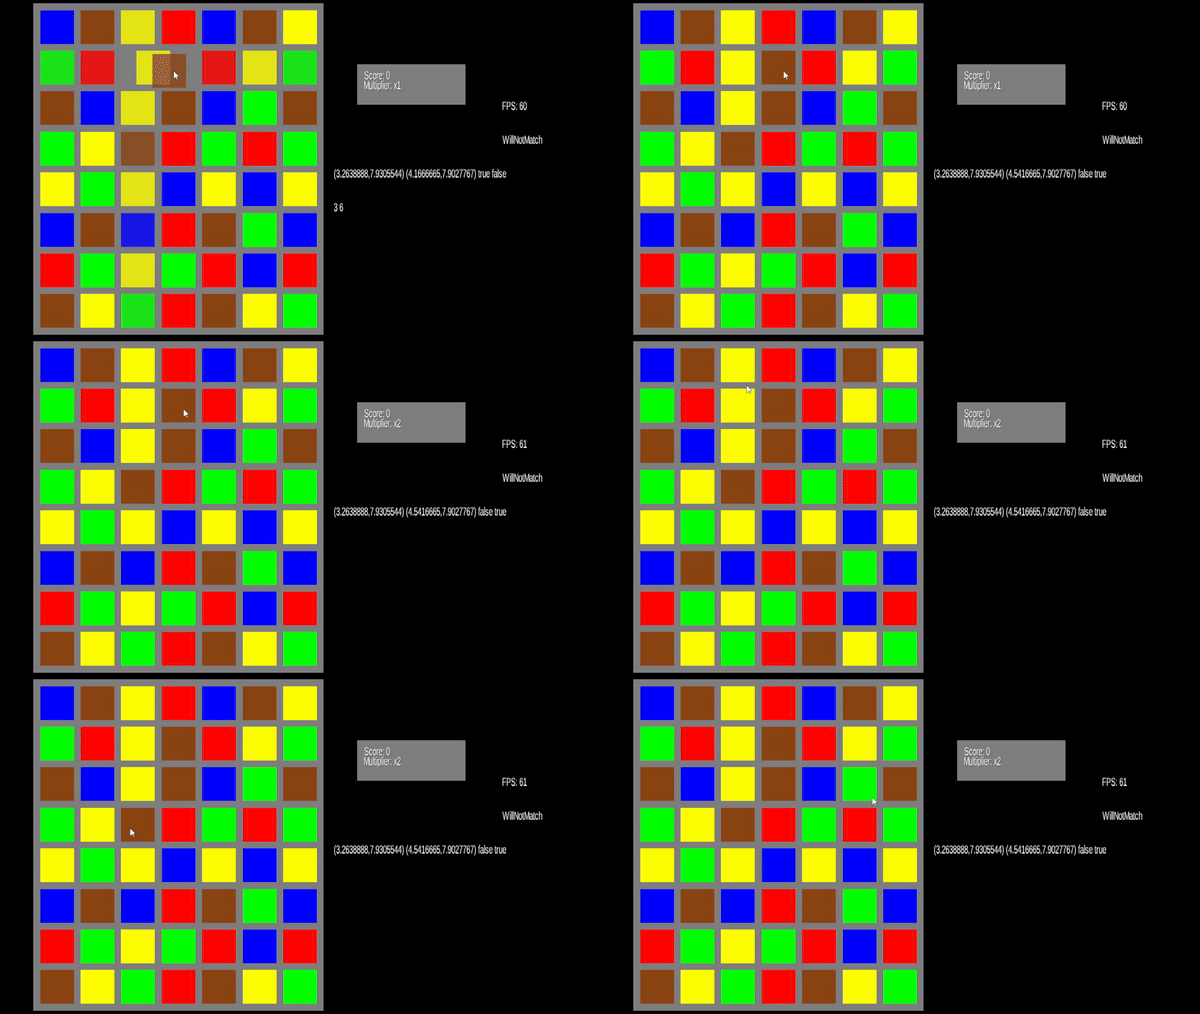
The test pass since they test with the TileType value and that has an == and equals
method that behave the same since its an enumeration. But for the TileGraphic class
that's not going to behave that way. In order for our code to compare the underlying tile value
and not just the object references, we need to make sure to use equals.
With that done though, you've got the core game and could stop here if you wanted to go and tweak things on your own to really make all of this yours. But I'm going to walk through a couple obvious polishing spots we can do for this game. So read ahead if you want to see how to make this look less like tutorial code and more like a real game you could show a non-programmer and impress them with!
Polish: A non bitmap font↩
We've been using the standard BitmapFont class for a while to render text onto the screen,
but it isn't the best looking thing and is a bit hard to work with if we want any sort of menus and the
like to look nice. So let's load a true type font instead.
We'll use this one since its free
and looks decent. Download the ttf files and then store them into the assets directory. I like to put
mine into a font folder.
In order to actually load these, we'll need to use the font extension library. So, update your project level gradle file:
project(":core") {
    ...
    dependencies {
        api "com.badlogicgames.gdx:gdx:$gdxVersion"
        testImplementation "org.junit.jupiter:junit-jupiter-api:5.10.0"
        testRuntimeOnly "org.junit.jupiter:junit-jupiter-engine:5.10.0"
        implementation "com.badlogicgames.gdx:gdx-freetype:$gdxVersion"
        implementation "com.badlogicgames.gdx:gdx-freetype-platform:$gdxVersion:natives-desktop"
    }
And now we can use the FreetypeFontLoader class to setup the parameters we need to load
the font we'll be using. This is pretty similar to the wiki example
except that we're going to be setting a few more properties and using the AssetManager to
load the fonts.
In order to not have to write a bunch of file names and string keys everywhere, let's go ahead and abstract all of our asset related code into an assets manager wrapper. Like so:
public class Match3Assets implements Disposable {
    public static String SCORE_FONT_KEY = "scorefont.ttf";
    AssetManager assetManager;

    public Match3Assets() {
        assetManager = new AssetManager();
        FileHandleResolver resolver = new InternalFileHandleResolver();
        assetManager.setLoader(FreeTypeFontGenerator.class, new FreeTypeFontGeneratorLoader(resolver));
        assetManager.setLoader(BitmapFont.class, ".ttf", new FreetypeFontLoader(resolver));
    }

    /** Synchronous load of assets required to display initial screen
     * @return true if there are additional assets that should be loaded.
     */
    public boolean loadEssentialAssets() {
        queueFont(0.5f, SCORE_FONT_KEY);
        assetManager.finishLoading();
        return assetManager.update();
    }

    public void queueFont(float ratioToOneTile, String key) {
        FreetypeFontLoader.FreeTypeFontLoaderParameter param = new FreetypeFontLoader.FreeTypeFontLoaderParameter();
        param.fontFileName ="font/PoeRedcoatNew-Y5Ro.ttf";
        param.fontParameters.size = (int)((TILE_UNIT_HEIGHT / GAME_HEIGHT) * Gdx.graphics.getHeight() * ratioToOneTile);
        param.fontParameters.color = Color.BLUE;
        param.fontParameters.borderColor = Color.WHITE;
        param.fontParameters.borderWidth = 2;
        AssetDescriptor<BitmapFont> bitmapFontAssetDescriptor = new AssetDescriptor<>(
                key,
                BitmapFont.class,
                param
        );
        assetManager.load(bitmapFontAssetDescriptor);
    }

    public BitmapFont getFont() {
        if (assetManager.isLoaded(SCORE_FONT_KEY)) {
            BitmapFont font = assetManager.get(SCORE_FONT_KEY);
            font.setUseIntegerPositions(false);
            font.getData().setScale((float) GAME_WIDTH / Gdx.graphics.getWidth(), (float) GAME_HEIGHT / Gdx.graphics.getHeight());
            return font;
        }
        // Fallback to crappy bitmap if needed
        return new BitmapFont();
    }

@Override
public void dispose() {
    assetManager.dispose();
}
If you haven't read the wiki page on the Asset Manager, now would probably be a good time to go do so. If you can't be bothered, know two things:
- Asset managers should not be static
- Asset managers are typically asynchronous
Since we haven't implemented a loading screen yet (we'll get there), we'll use the finishLoading method
to load everything all at once for the time being. But we'll at least be smart about it and wrap it up in a function
called loadEssentialAssets so it's easy to tweak later as needed. There's only really one thing I want
to call your attention to because this is pretty important for making the user interface not look like garbage:
param.fontParameters.size = (int)(
    (TILE_UNIT_HEIGHT / GAME_HEIGHT) * Gdx.graphics.getHeight() * ratioToOneTile
);
...
font.getData().setScale(
    (float) GAME_WIDTH / Gdx.graphics.getWidth(), (float) GAME_HEIGHT / Gdx.graphics.getHeight()
);
The first calculation is setting the size in pixels. Remember how we're using a viewport to describe everything
in world units? Well, unfortunately, fonts don't really work that way and we need to specify the actual size ourself. As
you can see, I'm setting up the size to be equal to 1 tile tall worth if someone passes in 1 for ratioToOneTile.
This makes sense since most of our other UI elements were setup in units of the tile. It also makes the font "fit in" with
the expectation that everything's going to be scaled by our world coordinate system.
The second call, to setScale is important because our font is defining everything in terms of pixels. So, if you
were to inspect the line height without setting the scale, you'd see it's somewhere around ~41 or so. Consider that the sprite
batch is going to be drawing in world coordinates and those range from 0 - 10 or 0 - 16 as defined by our viewport, you can see
that that's going to be a problem. So, we have to call setScale to convert that pixel number into a world coordinate
number that makes sense. Our new line height becomes around ~0.56 or so, so you can see even though we're trying to get it to be
about 1/2 of a tile it's not going to be perfect. Still, it's a lot better than if we had told the bitmap loader to try to define
our font to be half a pixel tall, you can imagine that that wouldn't work too well 9.
Let's hook up our asset manager and replace the standard BitmapFont we've been using with it. Returning to the
Match3Game class, we can update it with a new class level field and initialize it in the create method:
Match3Assets match3Assets;
...
public void create () {
    match3Assets = new Match3Assets();
    loadAssets();
    ...
    // Remove this.font = new BitmapFont();
}

public void loadAssets() {
    match3Assets.loadEssentialAssets();
    this.font = match3Assets.getFont();
}

@Override
public void dispose () {
    batch.dispose();
    match3Assets.dispose();
}
We'll tweak this later on once we get into handling multiple screens, but for now this is enough to change our
font. If you run the code now though, you'll see that the FPS and debug lines we've been using are now running
off the side of the screen. Let's move those a bit by modifying their x, y coordinates and introducing some
line breaks and telling the draw command to align them to the left and wrap them when they get
close to 6 units wide.
font.draw(batch, "FPS: " + Gdx.graphics.getFramesPerSecond(), 10, 3);
font.draw(batch, algo, 10, 2);
font.draw(batch,
        dragInputAdapter.dragStart + " " +
        dragInputAdapter.dragEnd + "\n" +
        dragInputAdapter.getIsDragging() +
        " " + dragInputAdapter.getWasDragged(),
        9, 5,
        6f, Align.left, true
);
if (dragInputAdapter.isDragging) {
    font.draw(batch,
            boardGraphic.gameXToColumn(dragInputAdapter.dragEnd.x) +
            " " + boardGraphic.gameYToRow(dragInputAdapter.dragEnd.y),
            9, 6,
            6f, Align.left, true
    );
}
With those updates in place, we can see we've got a nicer looking font now:
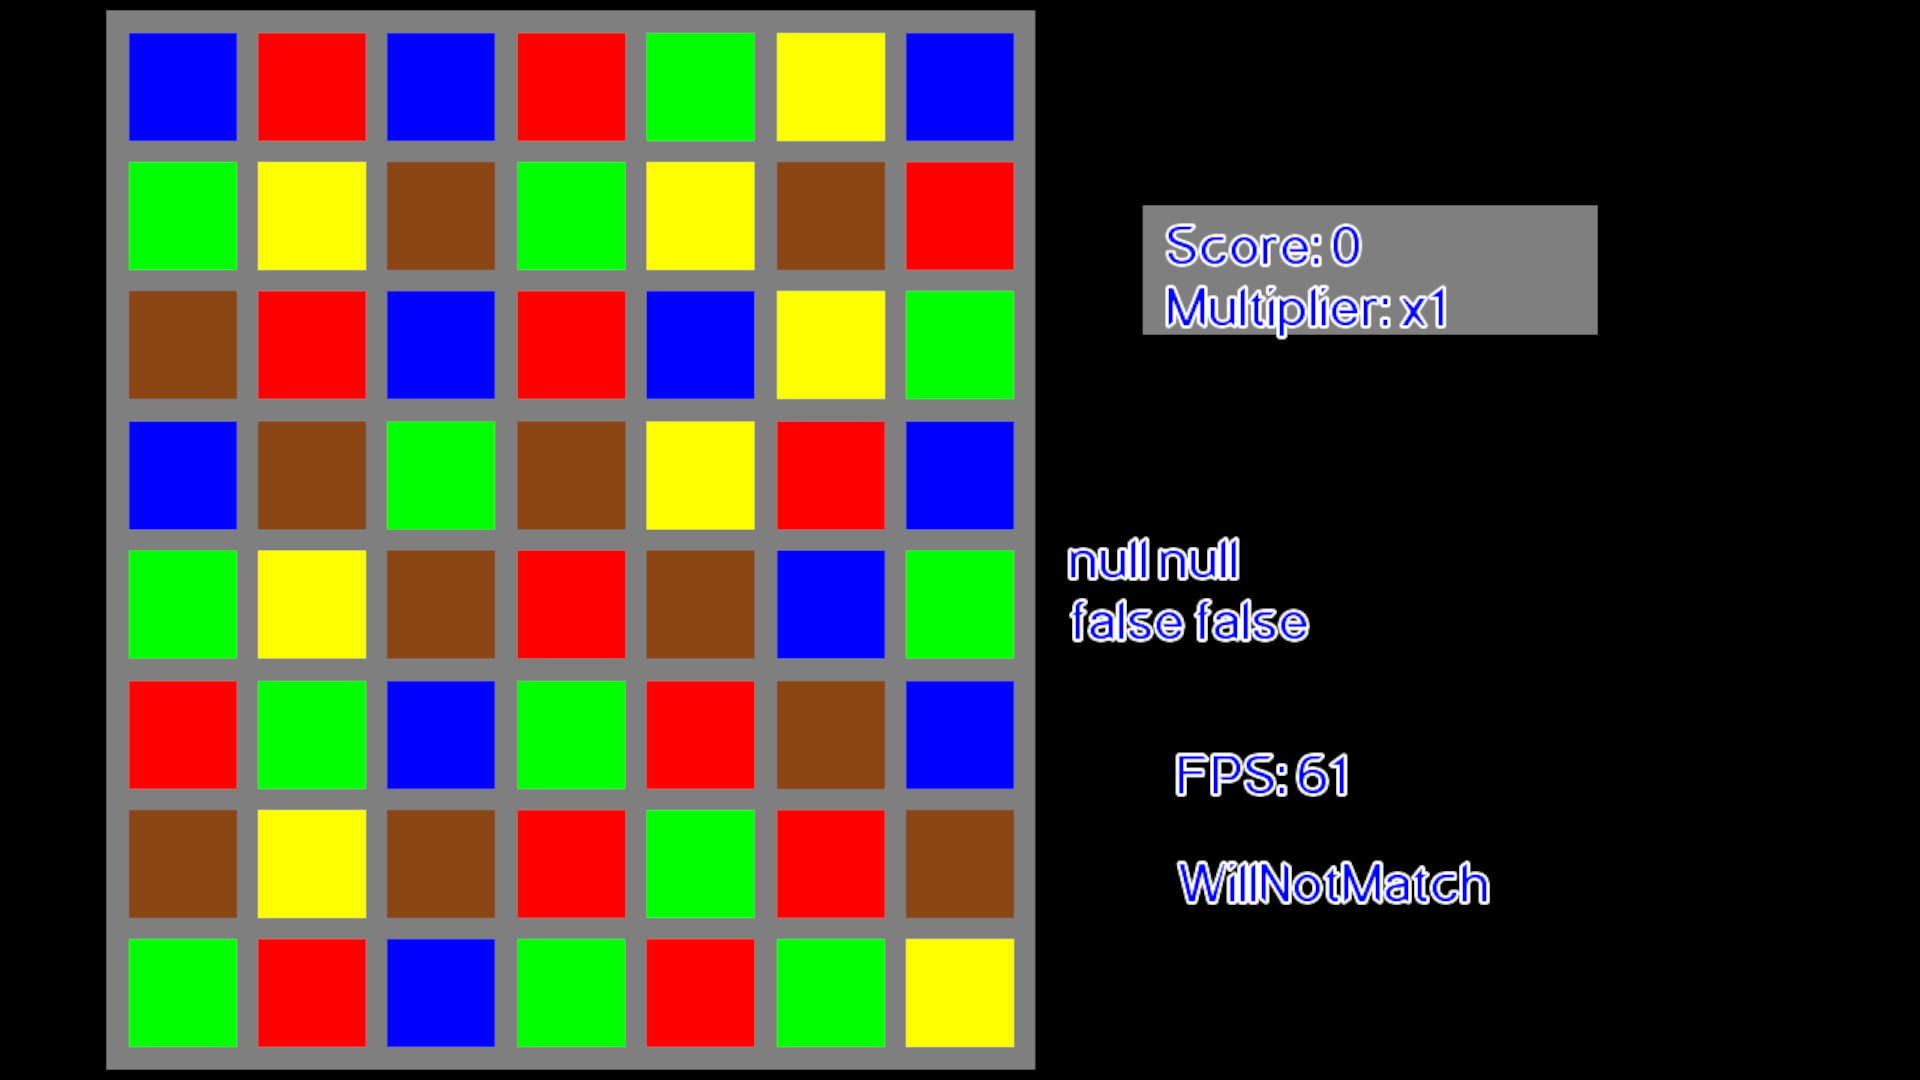
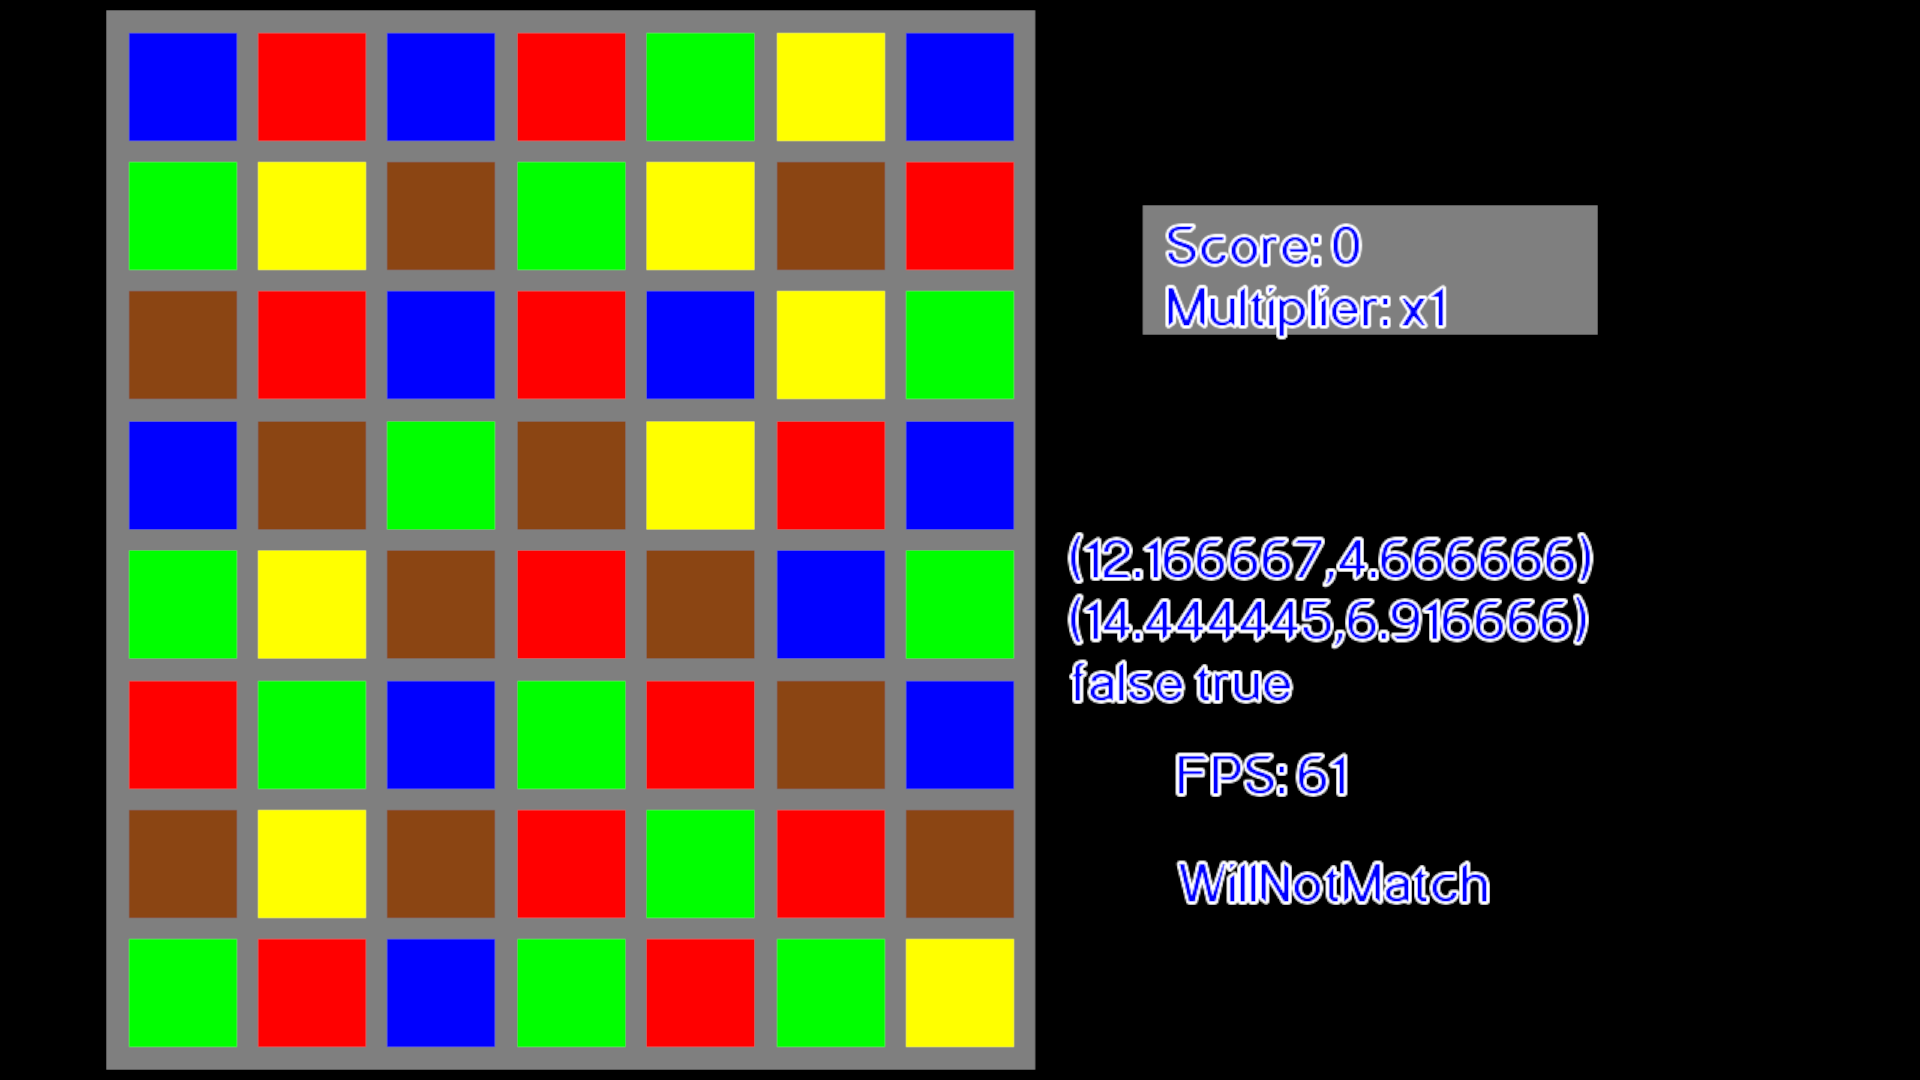
You can tweak and adjust the borders and color to your liking, but I'm going to stick with this for now because I think it looks ok once we introduce a background to our scene. Speaking of, let's move on to the next bit of polish shall we?
Polish: A background image↩
Now that we've setup a way to load file assets, we can display a texture for a background instead of just the cleared black void we've been using. Since I'm not an artist, I hopped up to itch.io and found some nice free assets to use. This is a tileset that you can use to build up anything you want as a background using programs such as Tiled to make maps to load into your game. I'm lazy, and I like what the creator made as an example, so I'm going to just use the example PNG and load it in.
This is even easier than our font was, so let's update our Match3Assets class first
to load in the texture from the disk:
public static final String BACKGROUND_TEXTURE_KEY = "textures/stringstar-fields-example-bg.png";
...

public void queueBackgroundTexture() {
    assetManager.load(BACKGROUND_TEXTURE_KEY, Texture.class);
}

public Texture getGameScreenBackground() {
    if (assetManager.isLoaded(BACKGROUND_TEXTURE_KEY)) {
        return assetManager.get(BACKGROUND_TEXTURE_KEY, Texture.class);
    }
    return TestTexture.makeTexture(Color.BLACK);
}
And then call queueBackgroundTexture from the loadEssentialAssets
method before we call finishLoading. Now the texture will be loaded at the
same time as the font. With that ready to be used, we just have to set it up in the
Match3Game class:
...
private Texture bgTexture;
...
public void loadAssets() {
    match3Assets.loadEssentialAssets();
    this.font = match3Assets.getFont();
    this.bgTexture = match3Assets.getGameScreenBackground();
}
...
public void render () {
    ...
    ScreenUtils.clear(Color.BLACK);
    batch.begin();
    batch.draw(bgTexture, 0, 0, GAME_WIDTH, GAME_HEIGHT);
    ...
}
Assuming you've stored the file in the same place as me this will work for you.
If not, or you have a different name for the file, make sure to update BACKGROUND_TEXTURE_KEY
so that it reflects where the file resolver should look to find it. Once you do
you should be greeted by something like this:
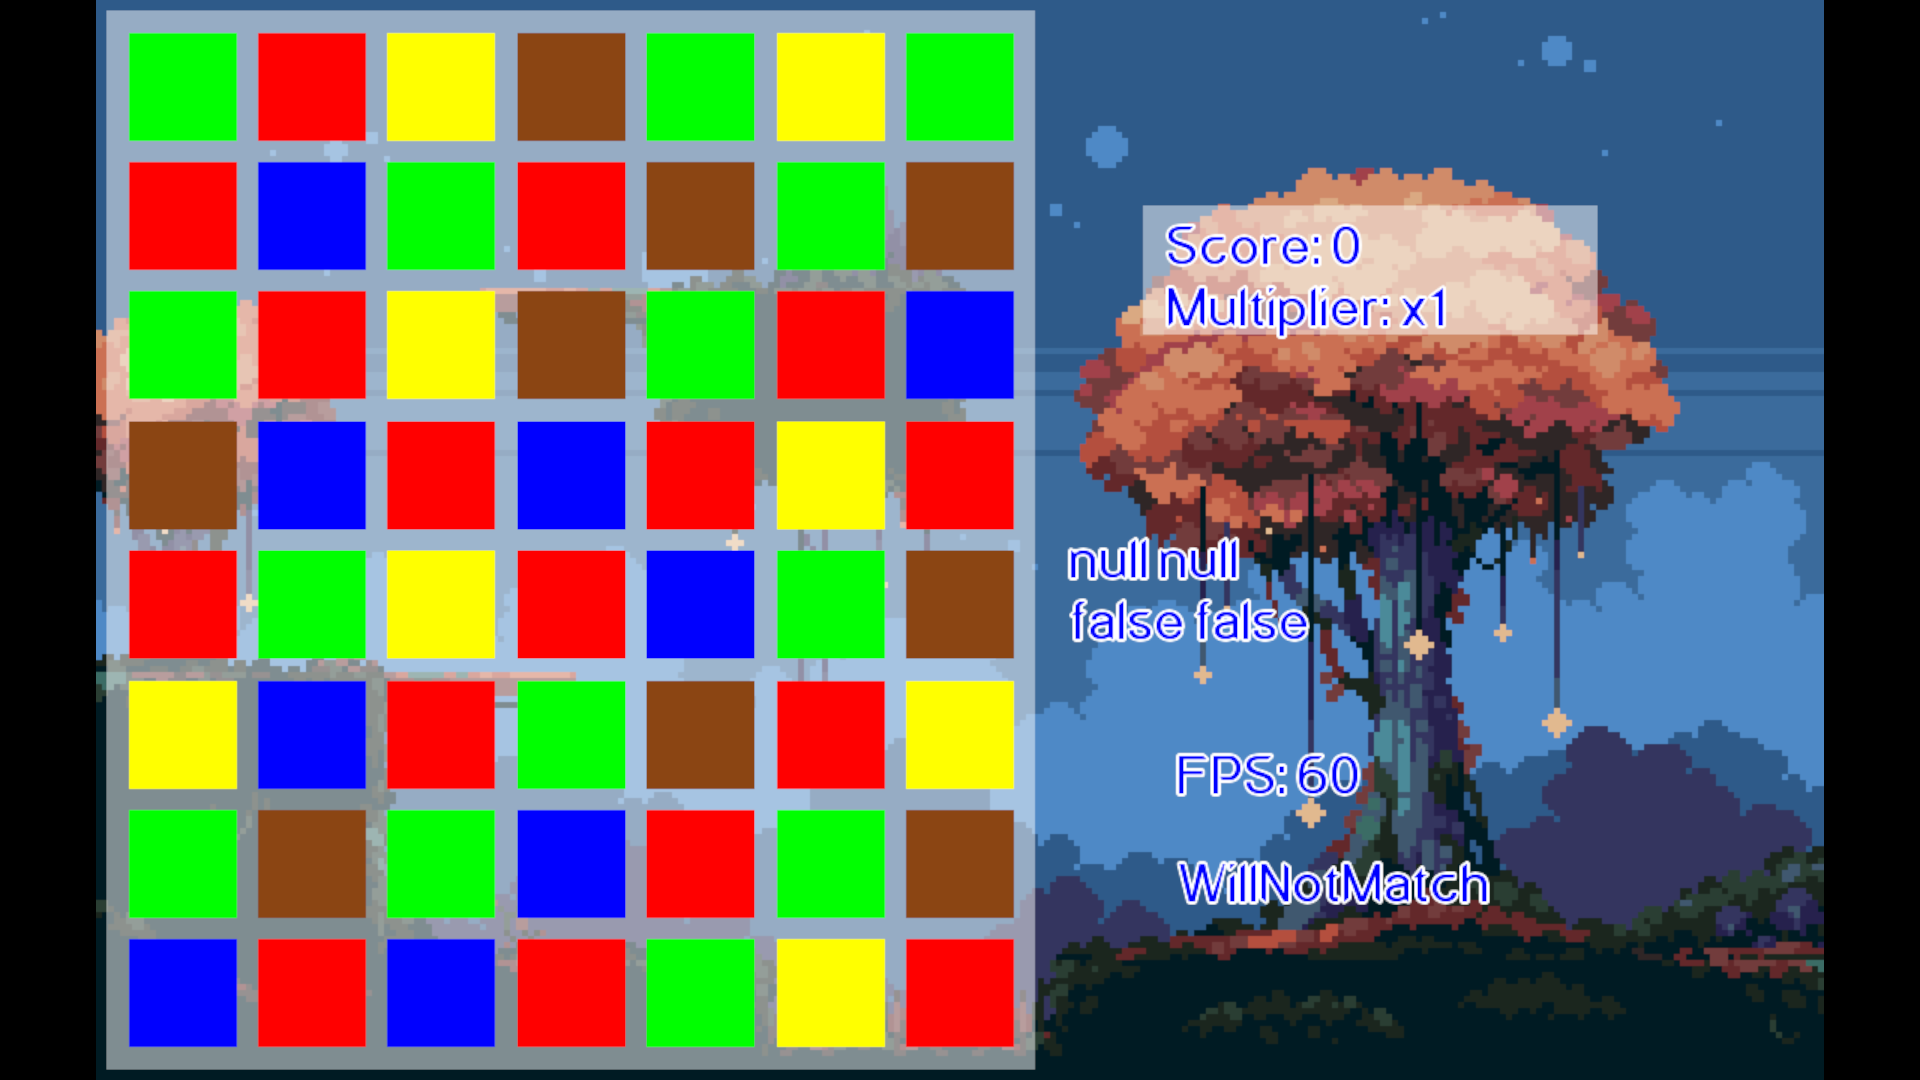
I'm using a static PNG, but there's no reason why you couldn't setup a simple sprite animation if you wanted the trees to sway, or the wind to blow or something similar. The possibilities are pretty endless, so look around for something that fits your idea for the game and then grab it. I like the idea of relaxing, so a nice cool and calm forest feels perfect for me.
But now that we've got a nice looking font, a real background, those placeholder tokens sure are looking like they need some love.
Polish: Token assets↩
Unlike our background, the tokens are something that we defined as having more than one state. Making our own graphics using piskelapp is possible, and we could then use the multiple "frames" to easily pack in a spritesheet we could use. But we need a base, and that's where this comes in. Itch.io has a ton of free assets, and given my lack of artistic skill, it's real blessing for me. So, using the pixel food sprites we can select a few that sort of fit into a theme.


However, you might notice that all of these are static images and in our TileGraphic
code we've defined different textures for different states such as idle, selected, or matched. So obviously
we have to do a little bit of work. We'll do two techniques for this.
First, for the selected tiles we'll make it feel like they've been elevated by modifying the sprites to include a shadow. You can use any painting application to do this, but I prefer piskel because it makes it really easy to modify sprites and create spritesheets that you can download. If you want to do this all yourself, then go ahead and make a sheet that's 64 pixels wide and 160 pixels tall so that we can have the standard texture from the pack, and then one frame with a shadow.

Generally speaking, you might want to read through the LibGDX wiki for how to pack sprites and use texture
atlases to efficiently load data. But since I want to explain how to setup a loading screen later, I don't
mind having a few different assets even though they're small. We'll circle back to what sort of sprites we'll
need for for the matching state in a minute. Let's get this sprite sheet loaded by updating Match3Assets
public class Match3Assets {
    public static final String TOKEN_SPRITE_SHEET_KEY = "textures/tokens/tokens.png";
    public static final int TOKEN_SPRITE_PIXEL_WIDTH = 32;
    public static final int TOKEN_SPRITE_PIXEL_HEIGHT = 32;
    public static final int TOKEN_SPRITE_IDLE_START = 0;
    public static final int TOKEN_SPRITE_SELECTED_START = 32;
    ...
    public boolean loadEssentialAssets() {
        ...
        queueTokenSheetTexture();
        assetManager.finishLoading();
        ...
    }

    public void queueTokenSheetTexture() {
        assetManager.load(TOKEN_SPRITE_SHEET_KEY, Texture.class);
    }

    public Texture getTokenSheetTexture() {
        return assetManager.get(TOKEN_SPRITE_SHEET_KEY, Texture.class);
    }
    ...
    public int getStartYOfTokenInSheet(TileType tileType) {
        switch (tileType) {
            case HighValue:
                return 0 * TOKEN_SPRITE_PIXEL_HEIGHT;
            case MidValue:
                return 1 * TOKEN_SPRITE_PIXEL_HEIGHT;
            case LowValue:
                return 2 * TOKEN_SPRITE_PIXEL_HEIGHT;
            case Multiplier:
                return 3 * TOKEN_SPRITE_PIXEL_HEIGHT;
            case Negative:
                return 4 * TOKEN_SPRITE_PIXEL_HEIGHT;
        }
        return 0;
    }
}
Assuming you've saved the file into the location specified by TOKEN_SPRITE_SHEET_KEY
then we'll be able to use the Match3Assets class to retrieve the texture we need.
Importantly, we don't want to do this every frame, we want to do it each time we make a new instance
of the TileGraphic class. The asset manager will keep track and reference count for us,
so even though each TileGraphic is requesting a texture, we'll only ever load it into memory once.
To make things easy, we'll load the texture, then create TextureRegions to load the
different sprites from the token sheet. I've put everything into constants because if you made your
own sprites you might not have 32x32 pixels for each token. So, adjust as needed, but essentially
we're loading one region of the token sheet row for the idle image and the other for the selected
state. Since our token sheet is vertical with 1 column per type, we use the helper getStartYOfTokenInSheet
to figure out which row of data we should be loading from.
public class TileGraphic {
    public TileGraphic(Vector2 position, TileType tileType, Match3Assets match3Assets) {
        ...
        Texture sheet = match3Assets.getTokenSheetTexture();
        int y = match3Assets.getStartYOfTokenInSheet(tileType);
        this.idleTextureRegion = new TextureRegion(sheet,
            TOKEN_SPRITE_IDLE_START,
            y,
            TOKEN_SPRITE_PIXEL_WIDTH,
            TOKEN_SPRITE_PIXEL_HEIGHT
        );
        this.selectedTextureRegion = new TextureRegion(sheet,
            TOKEN_SPRITE_SELECTED_START,
            y,
            TOKEN_SPRITE_PIXEL_WIDTH,
            TOKEN_SPRITE_PIXEL_HEIGHT
        );
        this.texture = idleTextureRegion;
        ...
    }

    public void useSelectedTexture() {
        texture = selectedTextureRegion;
    }

    public void useNotSelectedTexture() {
        texture = idleTextureRegion;
    }

    public void useMatchedTexture() {
        texture = selectedTextureRegion;
    }
    ...
And of course, the old TestTexture.makeTexture have disappeared and we simply set the texture to draw
for the frame to one of the regions we care about. Which also means that Texture texture in the code
will become TextureRegion texture; so our types line up. With these changes we've got compilation errors
from the fact that all of our existing calls to new TileGraphic are missing a parameter.
So, fix those. The compiler is your guide on this, and you should end up updating BoardGraphic and
ScoreGraphic's constructors to take in the new assets class. After that's done, you'll update Match3Game's
setup code and then be good to go. You should now be able to see the tiles loaded:
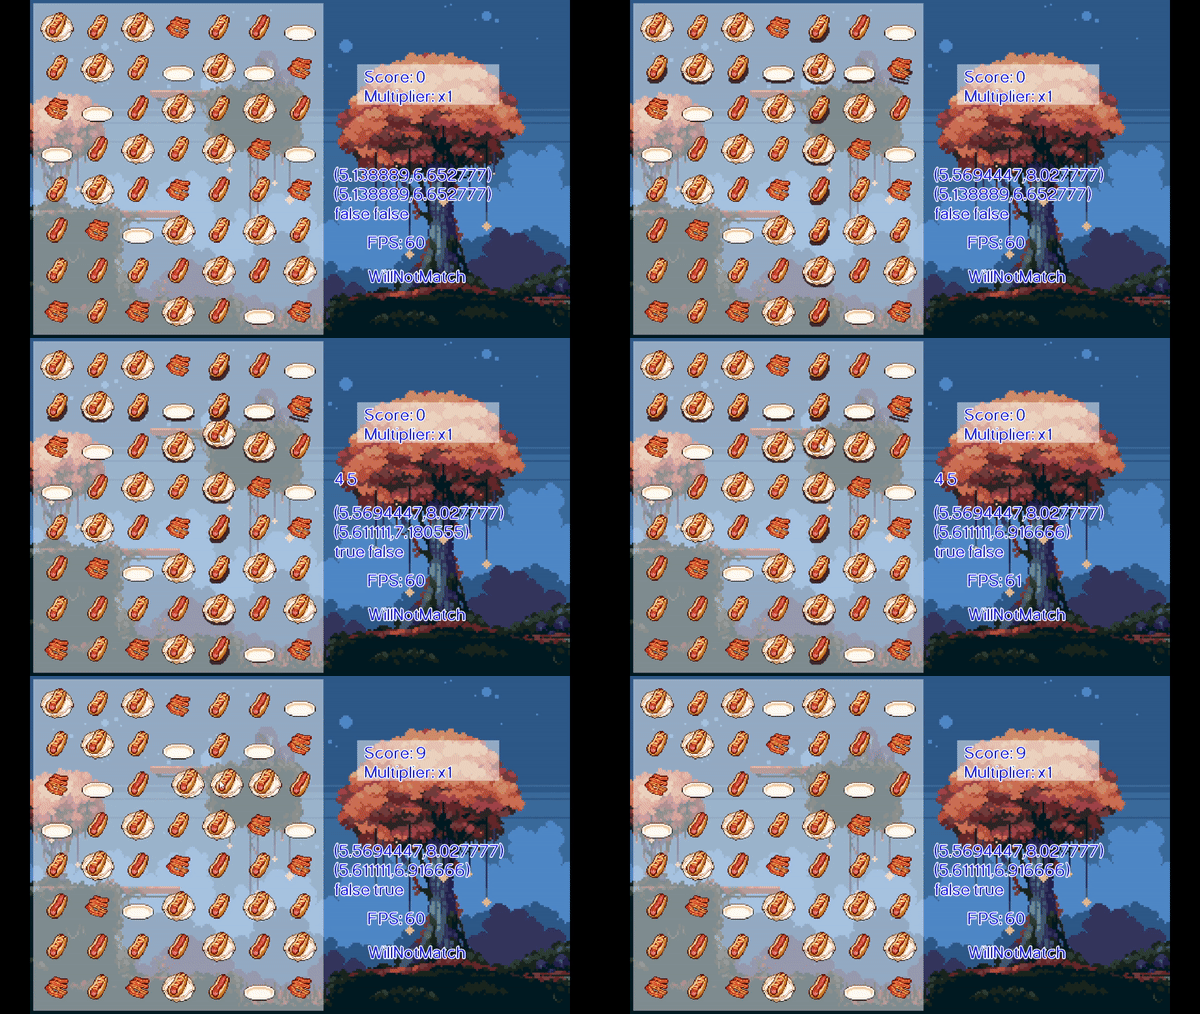
Feels less like a prototype now doesn't it? But we need one final piece of polish on these tokens before we can move on. Let's make matches stand out more. We can do this by layering another texture over the existing one to indicate to the user that this is something special.

This sprite is one that I made after following this handy tutorial. You can use it however you like, or feel free to make your own. We're going to spawn a few of these for the tokens and when we're in a match state we'll render them after we render the token. This will make it sparkle when it's part of a match.
To keep things easy to use, let's encapsulate the sparkles into their own class:
public class SparkleGraphic implements Disposable {
    private final List<Vector2> offsets;
    private final List<Float> stateTimes;
    public final Match3Assets match3Assets;
    private final Vector2 position;
    private boolean enabled;

    Animation<TextureRegion> sparkles;

    public SparkleGraphic(Vector2 position, Match3Assets match3Assets, float areaSize) {
        this.position = position;
        this.offsets = new ArrayList<Vector2>();
        this.stateTimes = new ArrayList<Float>();
        float offset = areaSize / 2;
        this.enabled = false;
        for (int i = 0; i < MathUtils.random(2, 4); i++) {
            this.offsets.add(new Vector2(
                    offset + MathUtils.random(-offset, offset),
                    offset + MathUtils.random(-offset, offset)
            ));
            this.stateTimes.add(MathUtils.random());
        }
        this.match3Assets = match3Assets;
        this.sparkles = makeSparkles(match3Assets.getSparkleSheetTexture());
    }

    private Animation<TextureRegion> makeSparkles(Texture sparkleSheetTexture) {
        TextureRegion[][] regions = TextureRegion.split(
            sparkleSheetTexture,
            SPARKLE_SPRITE_WIDTH,
            SPARKLE_SPRITE_HEIGHT
        );
        TextureRegion[] keyFrames = new TextureRegion[regions.length * regions[0].length];
        for (int row = 0; row < regions.length; row++) {
            for (int column = 0; column < regions[row].length; column++) {
                keyFrames[row] = regions[row][column];
            }
        }
        return new Animation<TextureRegion>(0.12f, keyFrames);
    }

    public void render(float delta, SpriteBatch batch) {
        if (!enabled) {
            return;
        }
        for (int i = 0; i < stateTimes.size(); i++) {
            Vector2 position = this.position.cpy().add(offsets.get(i));
            Float stateTime = stateTimes.get(i);
            stateTime += delta;
            stateTimes.set(i, stateTime);
            TextureRegion keyframe = sparkles.getKeyFrame(stateTime, true);
            batch.draw(
                keyframe,
                position.x,
                position.y,
                TILE_UNIT_WIDTH / 4,
                TILE_UNIT_HEIGHT / 4
            );
        }
    }

    @Override
    public void dispose() {
        match3Assets.unloadSparkleSheetTexture();
    }

    public void setEnabled(boolean enabled) {
        this.enabled = enabled;
    }
}
We haven't gone over the updates to the Match3Assets class, but you can probably infer what they are
based on the token loading code. It's very very similar. One interesting thing about this code is that if we keep
track of the position given to us, and then generate offsets to render at at render time. This is important because
the tile we're dragging is going to be in a match state most of the time, so we need the sparkles to travel along
with the original position. You can play around with how many sparkles you want to render, but you probably don't
want to go overboard.
The areaSize variable is for us to contain the sparklers within a reasonable distance from the token
they're for. Additionally, since drawing draws from a corner, we need to add half to both values in order to center
the sparkles. This, combined with the negative offset results in us scattering the sparkles around the
token on both sides.
Using this code is a small update to the TileGraphic's render and state change functions:
public class TileGraphic implements Disposable {
    SparkleGraphic sparkleGraphic;

    public TileGraphic(Vector2 position, TileType tileType, Match3Assets match3Assets) {
        ...
        sparkleGraphic = new SparkleGraphic(position, match3Assets, TILE_UNIT_HEIGHT);
        ...
    }

    public void render(float delta, SpriteBatch batch) {
        update(delta);
        batch.draw(
            texture,
            movablePoint.getPosition().x,
            movablePoint.getPosition().y,
            TILE_UNIT_WIDTH,
            TILE_UNIT_HEIGHT
        );
        sparkleGraphic.render(delta, batch);
    }

    public void useSelectedTexture() {
        texture = selectedTextureRegion;
        sparkleGraphic.setEnabled(false);
    }

    public void useNotSelectedTexture() {
        texture = idleTextureRegion;
        sparkleGraphic.setEnabled(false);
    }

    public void useMatchedTexture() {
        texture = selectedTextureRegion;
        sparkleGraphic.setEnabled(true);
    }
    ...
}
We track a new boolean value enableSparkles and make sure to enable and disable it when
we handle the use* methods to swap the texture to render. Honestly, we probably could push
the rendering code into its own state classes similar to how we've done before, but since we're not
handling a lot of values that change on a per state basis, we don't need to overcomplicate matters for now. If we had a lot
more going on (perhaps like spawning and despawning the sparkles in different locations) then we could
apply the state pattern to encapsulate and isolate different states concerns.
For now, let's finish up the update to the Match3Assets class and then run our code.
public class Match3Assets {
    public static final String SPARKLE_SHEET_KEY = "textures/sparkle.png";

    public static final int SPARKLE_SPRITE_WIDTH = 9;
    public static final int SPARKLE_SPRITE_HEIGHT = 9;

    public boolean loadEssentialAssets() {
        ...
        queueSparkleSheetTexture();
        assetManager.finishLoading();
        ...
    }

    public int getStartYOfTokenInSheet(TileType tileType) {
        switch (tileType) {
            case HighValue:
                return 0 * TOKEN_SPRITE_PIXEL_HEIGHT;
            case MidValue:
                return 1 * TOKEN_SPRITE_PIXEL_HEIGHT;
            case LowValue:
                return 2 * TOKEN_SPRITE_PIXEL_HEIGHT;
            case Multiplier:
                return 3 * TOKEN_SPRITE_PIXEL_HEIGHT;
            case Negative:
                return 4 * TOKEN_SPRITE_PIXEL_HEIGHT;
        }
        return 0;
    }

    public void queueSparkleSheetTexture() {
        assetManager.load(SPARKLE_SHEET_KEY, Texture.class);
    }

    public Texture getSparkleSheetTexture() {
        return assetManager.get(SPARKLE_SHEET_KEY, Texture.class);
    }

    public void unloadSparkleSheetTexture() {
        assetManager.unload(SPARKLE_SHEET_KEY);
    }
    ...
As expected, we queue up the sparkle asset sheet, setup our boilerplate for getting or unloading it, and then setup the constants we're using in the rest of the program. Tracking the size of the spritesheet here makes it easy to change if we add in a different token sheet and need to adjust, we'll only have to change the one class for that, which will make things easier for us to reskin this if we need to.
So, with the sparkles ready to render, if we pick up a token it will shine, and when we make a match with it the other tokens in the match will sparkle too:
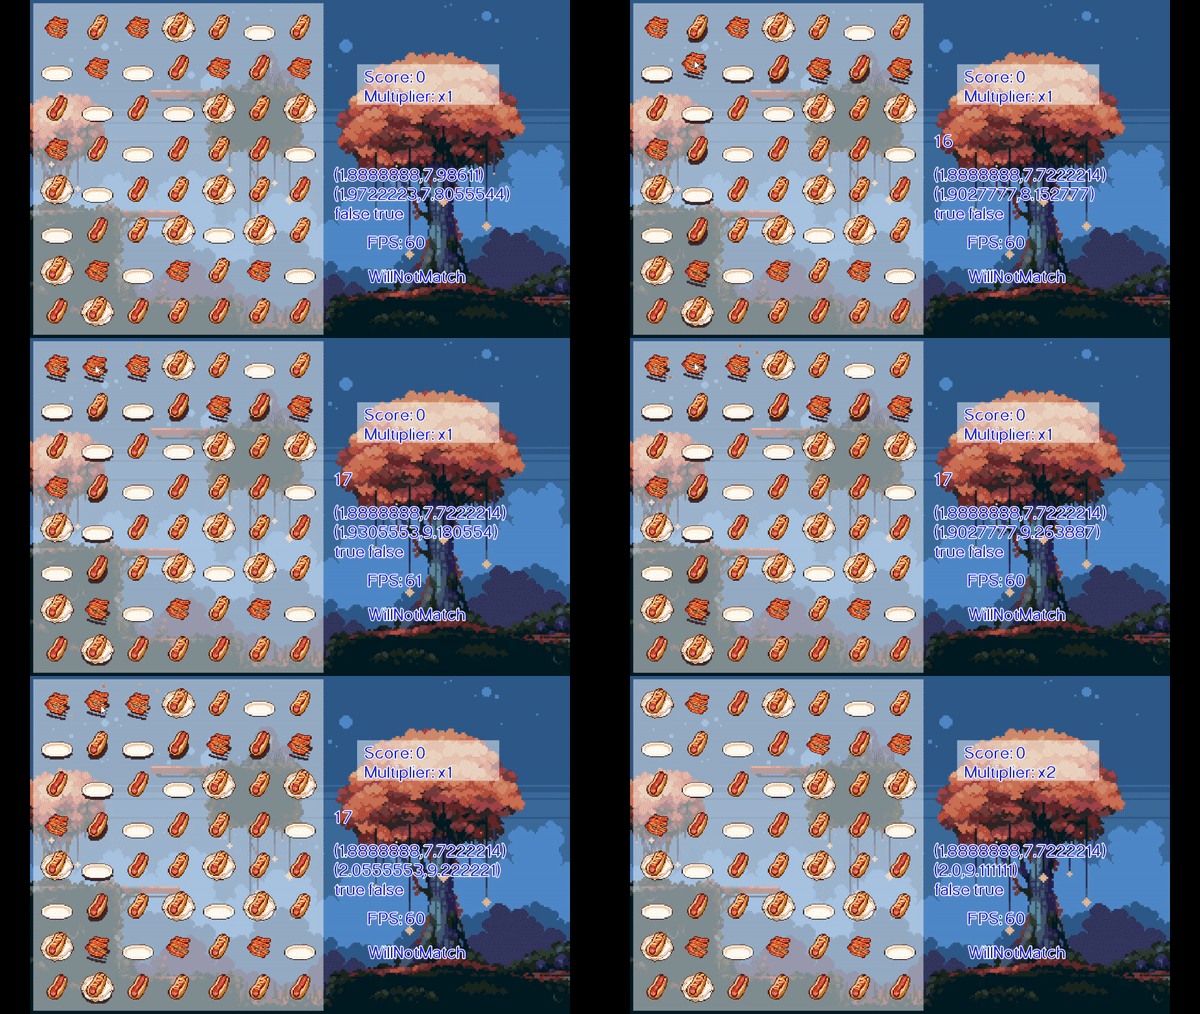
It's a subtle effect, but it's enough. Feels like we've come a long way since we had simple coloured squares, no?
Sound Effects ↩
Of course, unless you often play games on mute. You might feel like we're still missing an essential part of the game feel. Sound. We don't want to go overboard, but we definitely want to indicate to the user when something is happening that matters, or to draw attention. So, let's highlight what we want in a quick list:
- SFX when we score
- SFX when we increase our multiplier
- SFX when we select tiles
- SFX when we decrease our score with an empty plate
I found a good free asset pack here. but when I tried to load them initially I ran into a small problem:

So I converted the wav files into mp3's with an online tool and used those instead. I couldn't find a sound for the negative and multiplier I liked in the first asset pack. So I tracked down a second one and pulled a couple sounds I liked from there. I encourage you to look at what's available on itch and find something you like, finding good SFX is hard but they really impact how good your game feels.
Anyway, once you've got an asset for each of the cases above and any others you'd like, let's go ahead and load them.
Loading sounds is done the same way as the textures were, so we'll update our AssetManager code just like
we did before, but instead of loading Texture classes, we'll load up Sound classes.
public static final String SCORE_SFX_KEY = "sound/8-bit-16-bit-sound-effects-pack/Big Egg collect 1.mp3";
public static final String MULTIPLIER_SFX_KEY = "sound/--Pixelated UI/Pixel_08.wav";
public static final String SELECT_SFX_KEY = "sound/8-bit-16-bit-sound-effects-pack/Bubble 1.mp3";
public static final String NEGATIVE_SFX_KEY = "sound/--Pixelated UI/Pixel_11.wav";
private final Sound emptySound = new EmptySound();
...
public boolean loadEssentialAssets() {
    ...
    queueSounds();
    assetManager.finishLoading();
    ...
}

public void queueSounds() {
    assetManager.load(SCORE_SFX_KEY, Sound.class);
    assetManager.load(MULTIPLIER_SFX_KEY, Sound.class);
    assetManager.load(SELECT_SFX_KEY, Sound.class);
    assetManager.load(NEGATIVE_SFX_KEY, Sound.class);
}

private Sound getSFXOrEmpty(String key) {
    if (assetManager.isLoaded(key)) {
        return assetManager.get(key, Sound.class);
    }
    return emptySound;
}

public Sound getMultiplierSFX() {
    return getSFXOrEmpty(MULTIPLIER_SFX_KEY);
}

public void unloadMultiplierSFX() {
    assetManager.unload(MULTIPLIER_SFX_KEY);
}

public Sound getIncrementScoreSFX() {
    return getSFXOrEmpty(SCORE_SFX_KEY);
}

public void unloadIncrementScoreSFX() {
    assetManager.unload(SCORE_SFX_KEY);
}

public Sound getSelectSFX() {
    return getSFXOrEmpty(SELECT_SFX_KEY);
}

public void unloadSelectSFX() {
    assetManager.unload(SELECT_SFX_KEY);
}

public Sound getNegativeSFX() {
    return getSFXOrEmpty(NEGATIVE_SFX_KEY);
}

public void unloadNegativeSFX() {
    assetManager.unload(NEGATIVE_SFX_KEY);
}
There's a class here we haven't defined yet. Just like with the textures, I'm putting in a placeholder in
case the asset isn't loaded yet. We might end up removing this code later, but I like the idea of having
a stable fallback that won't crash the entire system if a single asset fails to load right away once we
remove the synchronous loading for every little thing. The EmptySound class is an empty
implementation of the Sound interface from libgdx, returning -1 for its id from functions like
play or loop and having empty bodies for stop and pause.
There's nothing else to say about that class implemenation, so I'll skip over including it here since this
blogpost might be getting pretty long, let's actually use these assets now. Luckily for us, the
areas of the code where we need to interact with these sounds is in places we already have access to the
AssetManager. Let's handle the scoring sound effect first, we'll update ScoreGraphic
private Sound multiplierSFX;
private Sound scoreUpSFX;
private Sound negativeSFX;

public ScoreGraphic(Vector2 position, BoardGraphic boardGraphic, Match3Assets match3Assets) {
    ...
    this.multiplierSFX = match3Assets.getMultiplierSFX();
    this.scoreUpSFX = match3Assets.getIncrementScoreSFX();
    this.negativeSFX = match3Assets.getNegativeSFX();
}
...
void update(float delta) {
    ListIterator<TileGraphic> iter = inFlightMatches.listIterator();
    while (iter.hasNext()) {
        TileGraphic tileGraphic = iter.next();
        if (tileGraphic.getMovablePoint().isAtDestination()) {
            switch (tileGraphic.getTileType()) {
                case Multiplier:
                    multiplierSFX.stop();
                    multiplierSFX.play();
                    break;
                case Negative:
                    negativeSFX.stop();
                    negativeSFX.play();
                    break;
                default:
                    scoreUpSFX.stop();
                    scoreUpSFX.play();
            }
            iter.remove();
        }
        tileGraphic.update(delta);
    }
}
...
@Override
public void dispose() {
    match3Assets.unloadMultiplierSFX();
    match3Assets.unloadIncrementScoreSFX();
    match3Assets.unloadNegativeSFX();
    this.texture.dispose();
}
You'll probably notice I'm calling stop and the play for each sound.
This is because if you play the same sound twice, the audio being played is going to be twice
as loud. While I haven't looked under the hood, waveforms generally work in the same way across
the board for audio. When you tell a computer to play more than one sound at once, say you have
two videos playing, or music and a game. You'll notice your computer doesn't pause one while
playing sounds from another source. Rather, it sums the waveforms together that it's been
asked to play and puts that out.
What happens if the waveform is summed with itself? Simple, the amplitude doubles. What does the amplitude control in a video game? Volume. So, unless you want to blow out someone's ears when they get more than one match at a time, I suggest you avoid playing the same sound twice in the same frame.
We've handled the score related sound effects with our updates to the update code
in the ScoreGraphic class, so now we can return our attention to the last item
remaining on our list. Giving the user audio feedback when they select a tile and move it around.
We'll need to head over to the manager class for the board, so, off to BoardGraphic
we go:
...
private Sound selectSfx;
...
public BoardGraphic(
        final Vector2 position,
        GameGrid<TileType> sourceOfTruth,
        Match3Assets match3Assets
    ) {
    ...
    this.selectSfx = match3Assets.getSelectSFX();
}

public void selectCrossSection(int row, int column) {
    selectSfx.stop();
    selectSfx.play();
    List<GridSpace<TileGraphic>> spacesInRow = gameGrid.getRow(row);
    List<GridSpace<TileGraphic>> spacesInColumn = gameGrid.getColumn(column);
    for (GridSpace<TileGraphic> space : spacesInRow) {
        space.getValue().handleCommand(new SelectTile(space.getValue()));
    }
    for (GridSpace<TileGraphic> space : spacesInColumn) {
        space.getValue().handleCommand(new SelectTile(space.getValue()));
    }
}
...
As you can recall, the BoardGraphic's method for selecting a cross section
is called by the SelectCrossSection command whenever our drag handler
starts a new drag. It's also called during our processing of when the mouse enters a grid
location we haven't seen before. So by calling the sound effect here, we end up getting
not just a sound when we click on the tile we'll drag, but also as we drag it around and
the other tiles shift out of its way. Which feels really nice.
If this added bonus feels like we've mixed up two things and you'd prefer they'd be separate,
then you can always create a Command to play the sound effect and then insert it
into the command list at the same place where we perform our selection inside of
BoardAcceptingMoves. Alternatively, you could even play the sound effect from
the TileGraphic or TileGraphicState state class.
I'm inclined to avoid doing that though, even though it makes sense, whenever we call the
selectCrossSection code, we generate a SelectTile commands for
every tile in the cross section, so we'd be asking our audio engine to stop/play a row
and column's worth of tiles every time instead of just once via the overall command.
Anyway, having a general command to play any old sound does sound useful though. So, we can go ahead and create that real quick:
package space.peetseater.game.shared.commands;

import com.badlogic.gdx.audio.Sound;
import space.peetseater.game.shared.Command;

public class PlaySound implements Command {

    private final Sound sound;

    public PlaySound(Sound sound) {
        this.sound = sound;
    }

    @Override
    public void execute() {
        // Prevent excess volume by ensure we're not already playing this sound.
        sound.stop();
        sound.play();
    }
}
And inside of the BoardAcceptingMoves state class, whereever we see the select
cross section command being inserted, we insert the play sound method:
private Sound selectSFX;

public BoardAcceptingMoves(Match3GameState match3GameState) {
    ...
    this.selectSFX = boardGraphic.match3Assets.getSelectSFX();
}

public void onDragStart(float gameX, float gameY) {
    ...
    this.commands.add(crossSection);
    this.commands.add(new PlaySound(selectSFX));
    ...
}
...
public void onDrag(float gameX, float gameY) {
    ...
    if (row == startRow || column == startColumn) {
        ...
        if (!newMoves.isEmpty()) {
            ...
            commands.add(crossSection);
            commands.add(new PlaySound(selectSFX));
            ...
}
...
@Override
public void dispose() {
    boardGraphic.match3Assets.unloadSelectSFX();
}
With this code in place we can now run our game and hear the feedback as we play:
This is all coming together rather quickly since we've structured the code in a way that makes things easily extensible for this sort of thing. The most obvious thing we could do next is to add in some background music, after all, what's a game without a nice track to listen to while you idle away the time making matches? Before we get that though, we should probably clean up after ourselves.
We've implemented the Disposable interface in the classes we've added the
sound effects to. But we need to actually call those methods in the right places. The
ScoreGraphic is really easy to deal with since we have a reference to it
inside of Match3Game, so we can just update the dispose function like this:
@Override
public void dispose () {
    batch.dispose();
    scoreGraphic.dispose();
    match3Assets.dispose();
}
But, what about the state update? Our initial implementation had the sound effect inside of
the BoardGraphic which would allow us to do exactly what we did with the
score graphic class for cleanup. But then we moved it down into the state instance of that
class which makes things tricky since we destory and recreate that class whenever we swap
states in the game. So, let's reverse course on that and then do one little thing to clear
up our code.
First, let's create a method in BoardGraphic to play the sound, and then wrap
that with a command as per usual.
public class BoardGraphic implements Disposable {
    private final Sound selectSFX;
    ...
    public final GameGrid<TileGraphic> gameGrid;
        public BoardGraphic(
            final Vector2 position,
            GameGrid<TileType> sourceOfTruth,
            Match3Assets match3Assets
        ) {
            ...
            this.selectSFX = match3Assets.getSelectSFX();
            ...
        }

        public void playSelectSFX() {
            selectSFX.stop();
            selectSFX.play();
        }
        ...

        @Override
        public void dispose() {
            match3Assets.unloadSelectSFX();
            texture.dispose();
        }
    }
}
// then in a separate file
public class PlaySelectSFX implements Command {
    private final BoardGraphic boardGraphic;

    public PlaySelectSFX(BoardGraphic boardGraphic) {
        this.boardGraphic = boardGraphic;
    }

    @Override
    public void execute() {
        this.boardGraphic.playSelectSFX();
    }
}
Then we can chose replace our call in board state to make a PlaySelectSFX
instead of the generic play sound one.
this.commands.add(new PlaySelectSFX(boardGraphic));
After removing the unneccesary Sound instance from the class, we can now move back to the
Match3Game and update the dispose method:
@Override
public void dispose () {
    batch.dispose();
    scoreGraphic.dispose();
    boardGraphic.dispose();
    match3Assets.dispose();
}
Great! Done right? Nope. One last thing before we move onto what we teased earlier. Look at our class names.
BoardGraphic and ScoreGraphic made sense at the start because we were only managing the
graphical part of things with these classes. But now we're managing more of the things GDX gives us, such as
sound and anything else we might need to add in for this UI component to work. So, rather than keep calling
these classes *Graphic let's rename them. These are really managers for the GDX related parts of the game,
so let's make it simple and call them that! Rename the class BoardGraphic to BoardManager,
fix the compile errors, rename your variables, and then repeat the process with the ScoreGraphic.
Adding in background music ↩
Similar with the sound effects, itch has plenty of music assets for us to use. I searched around for a while
and found some loopable music from a user
named joshuuu, I like the dessert track, it's pretty calm and fits the mood, so let's get it loaded up
in the AssetManager
public class Match3Assets implements Disposable {
    public static final String BGM_KEY = "sound/ogg-short-loopable-background-music/Lost in the Dessert.ogg";
    public boolean loadEssentialAssets() {
        ...
        queueBGM();
        ...
    }
    ...
    public void queueBGM() {
        assetManager.load(BGM_KEY, Music.class);
    }

    public Music getBGM() {
        return assetManager.get(BGM_KEY, Music.class);
    }

    public void unloadBGM() {
        assetManager.unload(BGM_KEY);
    }
    ...
And then we can use these functions inside of Match3Game to get this going:
public class Match3Game extends ApplicationAdapter {
    Music bgm;
    public void create () {
        ...
        loadAssets();
        this.bgm = match3Assets.getBGM();
        this.bgm.setVolume(0.6f);
        this.bgm.setLooping(true);
        this.bgm.play();
        ...
    }
    ...
    @Override
    public void dispose () {
        ...
        match3Assets.unloadBGM();
        match3Assets.dispose();
    }
As you can see, now that we've got a pattern for our sounds and assets, adding this type of stuff in is straightforward and simple. This feels nice to have all the environment running for us now, but since we're using these assets we need to give the proper credits to their authors. We also need to consider actually leveraging the asset manager in LibGDX to load our assets in asynchronously so that we don't make the user wait for everything to load in at the start of the game. Granted, we don't have that many assets to load right now, but having a framework to do this will help us in the long run. So, onto the next.
Using multiple screens↩
Up until this point we've been using ApplicationAdapter which is the entire game and a screen
all built into one. But, as soon as I added in music and sound effects, I wanted a mute button or some way
of turning things on and off. To do that, we could add a button onto our current screen to control
this, and that would work fine. We could keep this whole thing as a single screen application.
But...
I want to add in a title screen, a credits screen, and a configuration screen. Heck, maybe if I'm ambitious
I'll add in a tutorial or something. But to do any of that, we need to start using the Screen
interface instead of the ApplicationAdapter. We want one game, multiple screens.
Thankfully, this isn't that hard to do. In fact, in LibGDX's tutorial game
they show you how to do this and walk through the process. So we're in good hands here, but I want to add
my own spin on this that I used when I worked on the prototype that I thought made managing assets more
future proofed for any game you might want to make. While I was streaming on twitch10
I was showing the chat the Celeste 64 code
and talking about how much I was enjoying reading it. Specifically, the interface they used for Transition
was particularly inspiring to me.
Something about the way the transition class could trigger an asset reload lit a lightbulb in my head. Hey, why don't I define what each screen needs in its own asset class. Then I could make a loading screen that handled these and loaded up the screen once its dependencies were ready to go. Similar, if you look at the Scene class in the celeste code, you can see it specifies what music to play. So, all of this reading and seeing the stack manipulation for scenes and transitions between cutscenes and stuff was pretty inspiring.
Anyway, for us to actually get around to doing anything similar to this, we need to migrate the current code to a screen. So let's do that first.
Migrating from Game to Screen
Set aside a copy of your Match3Game for a moment, since we'll need the guts of it for the screen implemenation,
but let's first modify it to extend the Game class and remove all the play area logic from the class:
public class Match3Game extends Game {
    public SpriteBatch batch;
    public BitmapFont font;
    public Music bgm;
    public Match3Assets match3Assets;

    @Override
    public void create () {
        this.batch = new SpriteBatch();
        match3Assets = new Match3Assets();
        loadAssets();
        // Play one tune the whole game for now
        this.bgm.setVolume(0.6f);
        this.bgm.setLooping(true);
        this.bgm.play();
    }

    public void loadAssets() {
        match3Assets.loadEssentialAssets();
        this.font = match3Assets.getFont();
        this.bgm = match3Assets.getBGM();
    }

    @Override
    public void dispose () {
        batch.dispose();
        match3Assets.unloadBGM();
        match3Assets.dispose();
    }
}
This won't actually run or display anything at this point. We need to take all the play area logic about the board, the score,
and everything else, and move it into a Screen class. Let's call this PlayScreen because it's the
screen where the player plays the game.
One of the main differences between the ApplicationAdapter and the Screen code is that there is no
create class, so all of that code moves to the constructor. The SpriteBatch is a pretty important object
that's responsible for batching up our calls to the GPU (hence its name) so we don't really want to have more than one of those
in our application 11. So we'll make it public in the Match3Game class
and then call through the game from the screen for when we need it.
In the same way, the BitmapFont is also kept at the game class because when we transition between screens, we'll need to
show the user something like the words "Loading" or fun tips about the game. Whatever we show them we'll probably need to write it. So
we'll keep a global font available through the game as well. If more fonts are required for a specific screen, we can load them for it
when we load its other assets.
With all that in mind, we now construct the PlayScreen class:
public class PlayScreen extends ScreenAdapter {
    private Match3Game match3Game;
    private final BoardManager boardManager;
    GameGrid<TileType> tokenGrid;

    private final OrthographicCamera camera;
    private final FitViewport viewport;

    private TokenGeneratorAlgorithm<TileType> tokenAlgorithm;
    String algo = "WillNotMatch";
    private final DragInputAdapter dragInputAdapter;
    Match3GameState match3GameState;
    ScoreManager scoreManager;
    private final Texture bgTexture;

    public PlayScreen(Match3Game match3Game) {
        this.match3Game = match3Game;
        Vector2 boardPosition = new Vector2(.1f,.1f);
        Vector2 scorePosition = boardPosition.cpy().add(Constants.BOARD_UNIT_WIDTH + 1f, Constants.BOARD_UNIT_HEIGHT - 3f);
        this.bgTexture = match3Game.match3Assets.getGameScreenBackground();

        this.tokenGrid = new GameGrid<>(Constants.TOKENS_PER_ROW,Constants.TOKENS_PER_COLUMN);
        tokenAlgorithm = new NextTileAlgorithms.WillNotMatch(tokenGrid);
        for (GridSpace<TileType> gridSpace : tokenGrid) {
            gridSpace.setValue(tokenAlgorithm.next(gridSpace.getRow(), gridSpace.getColumn()));
        }
        boardManager = new BoardManager(boardPosition, tokenGrid, match3Game.match3Assets);
        scoreManager = new ScoreManager(scorePosition, boardManager, match3Game.match3Assets);
        camera = new OrthographicCamera();
        viewport = new FitViewport(GAME_WIDTH, GAME_HEIGHT, camera);
        camera.setToOrtho(false);
        camera.update();
        this.match3GameState = new Match3GameState(boardManager, tokenGrid, tokenAlgorithm);
        this.match3GameState.addSubscriber(scoreManager);
        this.dragInputAdapter = new DragInputAdapter(viewport);
        this.dragInputAdapter.addSubscriber(match3GameState);
        Gdx.input.setInputProcessor(dragInputAdapter);
    }

    @Override
    public void render(float delta) {
        super.render(delta);
        if (Gdx.input.isKeyJustPressed(Input.Keys.ESCAPE)) {
            Gdx.app.exit();
        }

        if (Gdx.input.isKeyJustPressed(Input.Keys.N)) {
            tokenAlgorithm = new NextTileAlgorithms.WillNotMatch(tokenGrid);
            algo = "WillNotMatch";
            match3GameState.setTokenAlgorithm(tokenAlgorithm);
        }
        if (Gdx.input.isKeyJustPressed(Input.Keys.M)) {
            tokenAlgorithm = new NextTileAlgorithms.LikelyToMatch(tokenGrid);
            algo = "LikelyToMatch";
            match3GameState.setTokenAlgorithm(tokenAlgorithm);
        }

        camera.update();
        match3Game.batch.setProjectionMatrix(camera.combined);
        update(delta);

        ScreenUtils.clear(Color.BLACK);
        match3Game.batch.begin();
        match3Game.batch.draw(bgTexture, 0, 0, GAME_WIDTH, GAME_HEIGHT);
        boardManager.render(delta, match3Game.batch);
        scoreManager.render(delta, match3Game.batch, match3Game.font);

        match3Game.font.draw(match3Game.batch, "FPS: " + Gdx.graphics.getFramesPerSecond(), 10, 3);
        match3Game.font.draw(match3Game.batch, algo, 10, 2);
        match3Game.font.draw(match3Game.batch,
                dragInputAdapter.dragStart + " " +
                        dragInputAdapter.dragEnd + "\n" +
                        dragInputAdapter.getIsDragging() +
                        " " + dragInputAdapter.getWasDragged(),
                9, 5,
                6f, Align.left, true
        );
        if (dragInputAdapter.isDragging) {
            match3Game.font.draw(match3Game.batch,
                    boardManager.gameXToColumn(dragInputAdapter.dragEnd.x) + " " + boardManager.gameYToRow(dragInputAdapter.dragEnd.y),
                    9, 6,
                    6f, Align.left, true
            );
        }

        match3Game.batch.end();
    }

    public void update(float delta) {
        match3GameState.update(delta);
        scoreManager.update(delta);
    }

    @Override
    public void resize(int width, int height) {
        super.resize(width, height);
        viewport.update(width, height);
        viewport.apply(true);
    }

    @Override
    public void dispose () {
        scoreManager.dispose();
        boardManager.dispose();
    }
}
One of the difference between this and our previous code is in the render function. The method inside of
the ApplicationAdapter had the arguments () while the signature for the Screen's render were
float delta. So, as you might expect, we no longer need to call Gdx.graphics.getDeltaTime()
since we have the value directly passed to us from the framework.
Lastly, we need to actually set the screen if we want to view it. Returning to our Match3Game class, we can
now add in the new field and call setScreen:
public class Match3Game extends Game {
...
PlayScreen playScreen;
...
public void create () {
... (loadAssets is called before this)
playScreen = new PlayScreen(this);
setScreen(playScreen);
}
...
public void dispose () {
...
playScreen.dispose();
}
Using asynchronous loading
The game will now run, exactly as it did before. But, we're in a better place to shift away from synchronous loading of
our assets, and instead load them during a loading screen. We still need to do one shift though. Right now we call the
assetManager.get method from the constructor of most classes. If we do this before loading an asset and its
ready we'll get an exception. So, we need to look through our code for any instances of this and then shift them over to
the render method.
Luckily for us, we can hunt for these pretty quickly since we never call .get directly except in the manager
wrapper we wrote. Another way to do this is to go look around in the classes for instances of Texture or Sound and remove
them, the broken compiler messages will be our guide then. There is some nuance to this though, for example. Inside of the
TileGraphic we're not just rendering the texture asset, we're rendering a TextureRegion which has
to be created based on the texture we load. If you look under the hood you'll see there's a bit of math and other things
going on to set that region up, so we should memoize this since we don't want to do this every frame.
Our old constructor had this code inside of it:
Texture sheet = match3Assets.getTokenSheetTexture();
int y = match3Assets.getStartYOfTokenInSheet(tileType);
this.idleTextureRegion = new TextureRegion(
sheet,
TOKEN_SPRITE_IDLE_START,
y,
TOKEN_SPRITE_PIXEL_WIDTH,
TOKEN_SPRITE_PIXEL_HEIGHT
);
this.selectedTextureRegion = new TextureRegion(sheet,
TOKEN_SPRITE_SELECTED_START,
y,
TOKEN_SPRITE_PIXEL_WIDTH,
TOKEN_SPRITE_PIXEL_HEIGHT
);
this.texture = idleTextureRegion;
and the render method had
batch.draw(
texture,
movablePoint.getPosition().x,
movablePoint.getPosition().y,
TILE_UNIT_WIDTH,
TILE_UNIT_HEIGHT
);
we also had a few methods that swapped that texture back and forth based on state.
public void useSelectedTexture() {
texture = selectedTextureRegion;
sparkleGraphic.setEnabled(false);
}
public void useNotSelectedTexture() {
texture = idleTextureRegion;
sparkleGraphic.setEnabled(false);
}
public void useMatchedTexture() {
texture = selectedTextureRegion;
sparkleGraphic.setEnabled(true);
}
To memoize the TextureRegions we're using, let's define two functions:
public TextureRegion getIdleTextureRegion() {
Texture sheet = match3Assets.getTokenSheetTexture();
if (this.idleTextureRegion == null) {
int y = match3Assets.getStartYOfTokenInSheet(tileType);
this.idleTextureRegion = new TextureRegion(
sheet,
TOKEN_SPRITE_IDLE_START,
y,
TOKEN_SPRITE_PIXEL_WIDTH,
TOKEN_SPRITE_PIXEL_HEIGHT
);
}
return this.idleTextureRegion;
}
public TextureRegion getSelectedTextureRegion() {
Texture sheet = match3Assets.getTokenSheetTexture();
if (this.selectedTextureRegion == null) {
int y = match3Assets.getStartYOfTokenInSheet(tileType);
this.selectedTextureRegion = new TextureRegion(
sheet,
TOKEN_SPRITE_SELECTED_START,
y,
TOKEN_SPRITE_PIXEL_WIDTH,
TOKEN_SPRITE_PIXEL_HEIGHT
);
}
return this.selectedTextureRegion;
}
There's nothing too crazy about this, if its null we create a new texture region, if it's not, then we return it. It's a very basic cache and allows us to easily do this setup once but also decouple it from our constructor. Now that we have these two, we can update the state change related methods:
public void useSelectedTexture() {
texture = getSelectedTextureRegion();
sparkleGraphic.setEnabled(false);
}
public void useNotSelectedTexture() {
texture = getIdleTextureRegion();
sparkleGraphic.setEnabled(false);
}
public void useMatchedTexture() {
texture = getSelectedTextureRegion();
sparkleGraphic.setEnabled(true);
}
And next, the render method change:
public void render(float delta, SpriteBatch batch) {
update(delta);
if (texture == null) {
useNotSelectedTexture();
}
batch.draw(
texture,
movablePoint.getPosition().x,
movablePoint.getPosition().y,
TILE_UNIT_WIDTH,
TILE_UNIT_HEIGHT
);
sparkleGraphic.render(delta, batch);
}
If we're trying to render this to the screen, it means that we've already loaded the assets for the screen, so this won't be a problem and we'll do our setup real quick. In our original constructor we set the texture to start as idle, and so that's the default we use here as well.
Similar, the SparkleGraphic we're creating through the TileGraphic also needs to be
updated in nearly this same way. We can't call this.sparkles = makeSparkles(match3Assets.getSparkleSheetTexture());
in the constructor if we're loading the assets asynchronously. So instead, we can start it as null,
then use the same technique as we just did for the texture region to create the animation only once on the first
call.
public Animation<TextureRegion> getSparkles() {
if (this.sparkles != null) {
return this.sparkles;
}
this.sparkles = makeSparkles(match3Assets.getSparkleSheetTexture());
return this.sparkles;
}
In our render method this code:
TextureRegion keyframe = sparkles.getKeyFrame(stateTime, true);
becomes this:
TextureRegion keyframe = getSparkles().getKeyFrame(stateTime, true);
The updates inside of ScoreManager are simpler than this, we only have to remove
the field level Sound instances and then our switch statement inside of the
update method becomes:
case Multiplier:
Sound multiplierSFX = match3Assets.getMultiplierSFX();
multiplierSFX.stop();
multiplierSFX.play();
break;
case Negative:
Sound negativeSFX = match3Assets.getNegativeSFX();
negativeSFX.stop();
negativeSFX.play();
break;
default:
Sound scoreUpSFX = match3Assets.getIncrementScoreSFX();
scoreUpSFX.stop();
scoreUpSFX.play()
Similar for the BoardManager you'll want to update the sfx method like so:
public void playSelectSFX() {
Sound selectSFX = match3Assets.getSelectSFX();
selectSFX.stop();
selectSFX.play();
}
Same with the PlayScreen class, we setup the bgTexture in the
constructor originally, now we remove it from the class's fields and in render the line
match3Game.batch.draw(bgTexture, 0, 0, GAME_WIDTH, GAME_HEIGHT);
becomes
match3Game.batch.draw(
match3Game.match3Assets.getGameScreenBackground(), 0, 0, GAME_WIDTH, GAME_HEIGHT
);
With all of those done, we should be able to run the game as usual since we didn't change the fact that we're loading all the assets synchronously in the game's creation code. If your code is broken at this point then it's probably going to fail at runtime with an exception about not loading an asset, make sure you haven't lost any of the setup code to queue the assets and they're in the right order.
Moving on, let's now tackle a very basic loading screen. The asset manager provides a getProgress
method we can use to determine how far along the assets have loaded. We can expose this via our Match3Assets
class like so:
public int getProgress() {
float zeroToOne = assetManager.getProgress();
return (int) (zeroToOne * 100);
};
Since the manager returns a value between 0 and 1 for the progress, we multiply it by 100 and cast it to an int in order to make a simple human readable percentage for display. With that ready, we can define our new screen:
public class LoadingScreen extends ScreenAdapter {
private final Match3Game match3Game;
private OrthographicCamera camera;
private FitViewport viewport;
public boolean hasConfirmedLoading = false;
public LoadingScreen(Match3Game match3Game) {
this.match3Game = match3Game;
camera = new OrthographicCamera();
viewport = new FitViewport(GAME_WIDTH, GAME_HEIGHT, camera);
camera.setToOrtho(false, GAME_WIDTH, GAME_HEIGHT);
camera.update();
}
@Override
public void render(float delta) {
super.render(delta);
camera.update();
match3Game.batch.setProjectionMatrix(camera.combined);
int progress = match3Game.match3Assets.getProgress();
ScreenUtils.clear(Color.BLACK);
match3Game.batch.begin();
match3Game.font.draw(
match3Game.batch,
"Loading: " + progress + "%",
6, 6
);
if (!hasConfirmedLoading && progress == 100) {
match3Game.font.draw(
match3Game.batch,
"Click to continue",
6, 5
);
if (Gdx.input.isTouched()) {
hasConfirmedLoading = true;
}
}
match3Game.batch.end();
}
@Override
public void resize(int width, int height) {
super.resize(width, height);
viewport.update(width, height);
}
public boolean isLoadingComplete() {
return hasConfirmedLoading;
}
public void setHasConfirmedLoading(boolean hasConfirmedLoading) {
this.hasConfirmedLoading = hasConfirmedLoading;
}
}
You could do a lot more with this if you wanted to. I'm keeping it extremely bare bones and simple, only requiring the font asset to be loaded for this screen. Other ideas that come to mind are using a shape renderer or open GL commands to create a screen with graphics that don't rely on loading too many assets as well. Since this screen is encapsulated in its own class, you can do whatever you want so long as you make sure you're ready to load the assets for it.
Speaking of, let's add a couple more methods onto the asset manager to make our job of loading our absolutely required assets easier:
public void blockingLoad() {
assetManager.finishLoading();
}
public void queueFont() {
queueFont(0.5f, SCORE_FONT_KEY);
}
public boolean queueAssets() {
queueFont();
queueBackgroundTexture();
queueTokenSheetTexture();
queueSparkleSheetTexture();
queueSounds();
queueBGM();
return assetManager.update();
}
The queueAssets method is basically the same thing as our loadEssentialAssets but we
don't call assetManager.finishLoading so that we can let the game handle incremental loads instead.
For convenience, I also added in an overload of queueFont since we've only got one font size and key
for now.
Finally, after all that work we can return to the Match3Game class and wire in our loading screen:
public class Match3Game extends Game {
LoadingScreen loadingScreen;
Screen currentScreen;
...
public void create () {
...
this.bgm.play();
match3Assets.queueAssets();
loadingScreen = new LoadingScreen(this);
playScreen = new PlayScreen(this);
currentScreen = playScreen;
setScreen(loadingScreen);
}
@Override
public void render() {
boolean doneLoading = match3Assets.assetManager.update(17);
if (!doneLoading) {
if (screen != loadingScreen) {
setScreen(loadingScreen);
}
}
if (loadingScreen.isLoadingComplete()) {
if (screen != currentScreen) {
loadingScreen.setHasConfirmedLoading(false);
setScreen(currentScreen);
}
}
super.render();
}
public void loadAssets() {
match3Assets.queueBGM();
match3Assets.queueFont();
match3Assets.blockingLoad();
this.font = match3Assets.getFont();
this.bgm = match3Assets.getBGM();
}
public void dispose () {
loadingScreen.dispose();
...
}
}
Besides setting up the screen values, we now start with the loading screen instead of the playscreen. If the game needs to load assets, then it will swap to display the loading screen until completed, where it will then wait for the user to touch the screen once. If you're wondering where the constant 17 comes from, it's the wiki page:
In this case the AssetManager blocks for at least 17 milliseconds (only less if all assets are loaded) and loads as many assets as possible, before it returns control back to the render method. Blocking for 16 or 17 milliseconds leads to ~60FPS as 1/60*1000 = 16.66667. Note that it might block for longer, depending on the asset that is being loaded so don’t take the desired FPS as guaranteed.
If you run the game now, you'll be greeted by the loading screen first:
clicking will of course, bring you to the play screen. So we've taken one step in the right direction here. Except that the game class's render method is a bit clunky in regards to how it's handling the screen setup. If we add in a title or a config screen, how are we going to swap between them?
Transitioning between screens
Remember how I said that the Celeste64 code was inspiration? Well, check out this part of the code here and also here. In order to swap between scenes, they use a stack. When a transition occurs the transition takes over directing the program on whether or not the new scene replaces the value on top of the stack or goes on top of it until it's completed.
This is a handy concept because we can think of swapping between screens in a visual way, and see that there's basically three operations we might do:

If we plan on returning to another screen soon, we should just push the next screen onto the stack to render, then when we're done we can pop it off to return to the other screen. In this way, we can keep state and other important things in scope as needed. For example, if you swap to a pause menu, you expect to return back to where you were in the game. But once we leave the title screen, we probably won't return for a while, so we're safe to replace it on the stack with the playing screen instead. We can represent the types of transitions in our image with a simple enumeration.
public enum TransitionType {
// Add to scene stack, do not remove current scene
// i.e Loading screen, Pause screen, etc
Push,
// Pop off old scene and discard, add new scene
// Title -> Game Screen, Level 1 to Level 2, etc
Replace,
// Pop off old scene and discard, let whatever is on the top of the stack become the current
// i.e: unpause
Pop,
}
Regardless of what the screen stack looks like, having to click to continue like we did with the LoadingScreen every time would be
an awful experience. So let's create a class to represent this transition between scenes instead that will give
the user enough time to process what's happening, but won't require their user input. A simple fade:
There's more than one way to do this type of thing, but let's talk about the simple naive approach to this first. If you were to try to do the fade out from the screen you're on, and fade in to the screen you're going to, it might look something like this:
- Create a value to increment per frame
- Use a boolean to track if were fading in or fading out
- Use that boolean to determine if we should be rendering the before or after scene
- Animate the fade according to the increment value
- set booleans to indicate when we're done transitioning
- continuously load the assets we're waiting on
Notice how we've got a lot of booleans to track? Trying to program this way is going to get confusing fast. And you're going to end up with code that nests differing if statement to try to handle two different animations in the same update/render codes. Like, do you really want to write code like:
public void render() {
if (isFadingOut) {
if (!started) {
// do setup
}
// render scene we're coming from
// render fade to black
// check if we're done
// setup isFadingOut and reset accumulator values
} else if (isFadingOut) {
// etc repeat all that stuff above with more temp variables and etc
}
}
Probably not, right? So, instead of trying to handle both the fade in and out in the same class. Let's separate them into their own classes so that we can keep things easy to follow. But let's go one step further than thinking about always having an in and out transition part, and instead think of an entire transition as multiple steps that complete one after the other. Or, in interface form, a step can look like this:
public interface TransitionStep {
void update(float delta);
void render(float delta);
boolean isComplete();
void onStart();
void onEnd();
}
You probably expected the update and render methods, and obviously if we need to move from one to another, we need to know when
a given step is complete. But one of things that might not have come to mind immediately is the need for onStart
and onEnd. For each of our steps, we might need to initialize some values based on the screen we're coming from or going
to, or maybe we created some textures or objects to show to the user, we want to make sure we can clean those up after we've
completed the step.
Following? Good. We're not going to actually implement a step yet. Mainly because we're going to build up the engine that
steps through them first. This will be our Transition class and its responsibility will be to set up, tear down,
and define which steps we're going to go through. It will also be the external contract to the main game loop in the
Match3Game class. The full class is about 100 lines, so let's take it one step at a time, first the constructor
and class field definitions:
public class Transition extends ScreenAdapter implements TransitionStep {
protected final Match3Game match3Game;
public final TransitionType transitionType;
public Scene from;
public Scene to;
public boolean started;
public boolean finished;
public final OrthographicCamera camera;
protected final FitViewport viewport;
protected LinkedList<TransitionStep> steps;
public Transition(
Match3Game match3Game,
TransitionType transitionType,
Scene from,
Scene to
) {
this.match3Game = match3Game;
this.transitionType = transitionType;
this.from = from;
this.to = to;
assert to != null;
this.started = false;
this.finished = false;
camera = new OrthographicCamera();
viewport = new FitViewport(GAME_WIDTH, GAME_HEIGHT, camera);
camera.setToOrtho(false, GAME_WIDTH, GAME_HEIGHT);
camera.update();
steps = new LinkedList<>();
initializeSteps();
}
...
There are some new classes being referenced here that we haven't made yet, but besides that
there's nothing too surprising. Bear with me while we walk through the rest of the class and then
we'll circle back to Scene.
the Transition is itself a screen, we have to
make sure we can render in the right units to the viewport. So we set that up in the usual way.
We'll be rendering, so we of course take in a reference to the Match3Game since that
holds our SpriteBatch and asset manager. Besides that, we've got a call to a function
called initializeSteps. Let's look at that next:
protected void initializeSteps() {
steps.add(new FadeOutToBlack(this, 0.3f));
steps.add(new FadeInFromBlack(this, 0.5f));
}
Like Scene we haven't defined these classes yet, but we will. These are just two implementations of the TransitionStep
interface that do exactly what you think they do. The reason for this to be inside of its own function and not just
in the constructor is that you're probably going to want to have more than one type of transition in a game.
Being able to subclass this base transition class will provide us with a simpler framework to work with, and we won't have
to constantly refer back to the parent class when we do because the methods to override will make things clear.
Next up, let's get into the meat of the engine:
public void onStart() {
// Ensure that the game knows to load the assets for the screen we're transitioning to
match3Game.match3Assets.queue(to);
if (!steps.isEmpty()) {
steps.peek().onStart();
}
started = true;
}
public void update(float delta) {
boolean canTransition = match3Game.match3Assets.assetManager.update(17);
if (steps.isEmpty() && canTransition) {
finished = true;
return;
}
if (steps.isEmpty()) {
return;
}
steps.peek().update(delta);
if (steps.peek().isComplete()) {
steps.peek().onEnd();
steps.pop();
if (!steps.isEmpty()) {
steps.peek().onStart();
}
}
}
public void render(float delta) {
if (steps.isEmpty()) {
return;
}
steps.peek().render(delta);
}
The onStart method is referencing a function we haven't defined yet in the Match3Assets
class that's going to take in the Scene class and queue up whatever assets it requires to display. This
is pretty important for how our transition works, since the whole point is to give our user something to watch while
we load the game up for them. We'll implement this when we define the Scene interface so sit tight on that.
The update method is straightforward and full of checks against the steps we're taking. One thing you might
recognize from when we were implementing our basic loading screen is that we're once again calling .update(17)
on the AssetManager. In order for our transition screen to function as a loading screen of sorts, we need it
to actually load things! Hence the call. Beyond that, we've got some simple logic to check if a step is done and move onto
the next one if we've got one.
The render method is the simplest of the bunch. If we've got a step to render, render it, otherwise bail. If we
somehow end up with an empty steps list then our render is going to probably result in a black screen to the user, but if our
steps are empty, then we should be loaded and ready to leave the transition state anyway, so it's not really much of
a concern since our main game loop will push us along to the next scene as soon as we're ready.
Lastly, we've got these methods in our Transition class:
@Override
public boolean isComplete() {
return finished;
}
public boolean isStarted() {
return started;
}
public void onEnd() {}
@Override
public void resize(int width, int height) {
super.resize(width, height);
viewport.update(width, height);
}
The code is pretty self explanatory so I won't go into it. But I will say that making sure to resize and update the viewport is important if you don't want to get confused. It wouldn't look very good if your transition screen rendered an asset super stretched out or zoomed in after all.
Now, let's circle back to the classes we glossed over. These are:
- Match3Game
- FadeInFromBlack
- FadeOutToBlack
- Scene
- And some updates to the asset manager
Let's work backwards in this list for a change in pace. And if you're following along, try to guess where we're going!
First up, the main change to the Match3Assets class:
public void queue(Scene scene) {
for (AssetDescriptor<?> asset : scene.getRequiredAssets()) {
assetManager.load(asset);
}
}
public void unload(AssetDescriptor<?> asset) {
assetManager.unload(asset.fileName);
}
Simple, right? The scene is going to have a list of assets it needs in order to be used, so when we queue
we load them all up, and of course, you can imagine that if we've got a list of things we need to load, we'll have to
have a way to unload them, thus the other method. Now, that was the main change, but we also have another change to make
that will be in service of the scene class implementations.
Notice how we're looping over AssetDescriptor's? We need to define those for each of the assets we've got.
The simple case that most of our assets fall into is like this:
public static final String BACKGROUND_TEXTURE_KEY = "textures/stringstar-fields-example-bg.png"; public static final AssetDescriptor<Texture> background = new AssetDescriptor<>(BACKGROUND_TEXTURE_KEY, Texture.class);
For the font loading, we need to do a little bit of refactoring for our queueFont method.
Since these are static descriptors, we need to move the setup for the FreeTypeFontLoaderParameter
instances to a static method:
public static String SCORE_FONT_KEY = "scorefont.ttf";
public static final AssetDescriptor<BitmapFont> scoreFont = fontDescriptorForSize(0.5f, SCORE_FONT_KEY);
static public AssetDescriptor<BitmapFont> fontDescriptorForSize(float ratioToOneTile, String key) {
FreetypeFontLoader.FreeTypeFontLoaderParameter param = new FreetypeFontLoader.FreeTypeFontLoaderParameter();
param.fontFileName ="font/PoeRedcoatNew-Y5Ro.ttf";
param.fontParameters.size = (int)((TILE_UNIT_HEIGHT / GAME_HEIGHT) * Gdx.graphics.getHeight() * ratioToOneTile);
param.fontParameters.color = Color.BLUE;
param.fontParameters.borderColor = Color.WHITE;
param.fontParameters.borderWidth = 2;
AssetDescriptor<BitmapFont> bitmapFontAssetDescriptor = new AssetDescriptor<>(
key,
BitmapFont.class,
param
);
return bitmapFontAssetDescriptor;
}
public void queueFont(float ratioToOneTile, String key) {
AssetDescriptor<BitmapFont> bitmapFontAssetDescriptor = fontDescriptorForSize(ratioToOneTile, key);
assetManager.load(bitmapFontAssetDescriptor);
}
Repeat this for each of the assets keys and you'll be in good shape. With a descriptor for each asset, we can move
on to defining the Scene interface.
public interface Scene extends Screen {
List<AssetDescriptor<?>> getRequiredAssets();
}
Not a lot going on here. But we can update our title and play screen to implement this interface.
public class PlayScreen extends ScreenAdapter implements Scene {
...
private List<AssetDescriptor<?>> assets;
...
public PlayScreen(Match3Game match3Game) {
...
assets = new LinkedList<>();
assets.add(Match3Assets.background);
assets.add(Match3Assets.multiplierSFX);
assets.add(Match3Assets.scoreSFX);
assets.add(Match3Assets.selectSFX);
assets.add(Match3Assets.negativeSFX);
assets.add(Match3Assets.sparkle);
assets.add(Match3Assets.tokens);
assets.add(Match3Assets.scoreFont);
assets.add(Match3Assets.bgm);
}
...
@Override
public List<AssetDescriptor<?>> getRequiredAssets() {
return assets;
}
@Override
public void dispose () {
for (AssetDescriptor<?> asset : assets) {
match3Game.match3Assets.unload(asset);
}
scoreManager.dispose();
boardManager.dispose();
}
}
Since we're going to be swapping screens, rather than having everything loaded all the time, we'll be able to unload the assets when we dispose of the screen with our loop over the asset list. This will help keep the memory footprint down if we've got a lot loaded in. Not a huge concern for this particular game, but a nice thing regardless. If you don't like doing all this setup in the constructor, you could also make a separate class to do that and delegate.
Before we implement the transition steps, let's go ahead and update our game loop to take advantage
of our new loading mechanisms. Open up Match3Game and replace the fields
playScreen, loadingScreen, and currentScreen with
public Stack<Scene> scenes; Transition transition;
Next, in the create method. Instantiate the stack and create a new transition to
the first scene you want to see. We can start with the loading screen like this:
scenes = new Stack<>(); transition = new Transition(this, TransitionType.Push, null, new LoadingScreen(this));
Since we've removed the screen from the field level, we can update our dispose method to pop our stack instead:
@Override
public void dispose () {
batch.dispose();
for (Scene scene : scenes) {
scene.dispose();
}
match3Assets.unloadFont();
match3Assets.unloadBGM();
match3Assets.dispose();
}
As far as getting things onto that stack, let's define some helper methods that our screens can call so they don't need to know all the details or try to manipulate the stack directly:
public void replaceSceneWith(Scene scene) {
transition = new Transition(this, TransitionType.Replace, scenes.peek(), scene);
}
public void overlayScene(Scene scene) {
transition = new Transition(this, TransitionType.Push, scenes.peek(), scene);
}
public void closeOverlaidScene() {
Scene leaving = scenes.pop();
transition = new Transition(this, TransitionType.Pop, leaving, scenes.peek());
scenes.push(leaving);
}
Lastly, we need to update the render method. We'll no longer need to check to see if a loading screen is complete.
And we're now able to handle any screen being rendered that our transitions might have brought us to.
@Override
public void render() {
if (transition == null) {
super.render();
return;
}
if (!transition.isStarted()) {
transition.onStart();
setScreen(transition);
}
float delta = Gdx.graphics.getDeltaTime();
transition.update(delta);
transition.render(delta);
if (transition.isComplete()) {
switch (transition.transitionType) {
case Push:
scenes.push(transition.to);
break;
case Replace:
scenes.pop().dispose();
scenes.push(transition.to);
break;
case Pop:
scenes.pop().dispose();
break;
}
setScreen(scenes.peek());
transition.onEnd();
transition = null;
}
}
If there's no active transition, then we'll render the current screen as per usual. Otherwise,
we'll make sure that we started it exactly once, and then update and render it. After we've made
sure the user has seen that render, we can confirm if the transition is over or not, and if so
then we can use the TransitionType to manipulate the stack. Importantly, we set the
transition to null after we've finished it.
Even without creating the steps, you should be able to run the code now. But to make it actually
feel like something real is happening, let's update the loading screen to trigger a screen transition
when the user clicks on the screen. This will make the game behave just like it did before we implemented
the Transition class:
if (Gdx.input.isTouched()) {
hasConfirmedLoading = true;
match3Game.replaceSceneWith(new PlayScreen(match3Game));
}
The transition is instant since we have no steps to do:

So let's fix that. First up, let's define our fade in:
class FadeInFromBlack implements TransitionStep {
private final Transition transition;
private float accum = 0f;
public boolean done = false;
private float minLength = 1f;
private Texture black;
public FadeInFromBlack(Transition transition, float minLength) {
this.transition = transition;
this.minLength = minLength;
this.black = TestTexture.makeTexture(Color.BLACK);
}
@Override
public void onStart() {}
@Override
public void update(float delta) {
accum += delta;
if (accum > minLength) {
done = true;
}
}
@Override
public boolean isComplete() {
return done;
}
@Override
public void onEnd() {
black.dispose();
}
@Override
public void render(float delta) {
transition.camera.update();
transition.match3Game.batch.setProjectionMatrix(transition.camera.combined);
ScreenUtils.clear(Color.BLACK);
// Render the screen we're going to go to underneath our transition piece.
transition.to.render(delta);
transition.match3Game.batch.begin();
float lerped = MathUtils.lerp(0, 1, accum / minLength);
Color batchColor = transition.match3Game.batch.getColor().cpy();
transition.match3Game.batch.setColor(
batchColor.r,
batchColor.g,
batchColor.b,
1 - lerped
);
transition.match3Game.batch.draw(
black,
0, 0,
GAME_WIDTH,
GAME_HEIGHT
);
Color fontColor = transition.match3Game.font.getColor().cpy();
transition.match3Game.font.getColor().set(fontColor.r, fontColor.g, fontColor.b, 1 - lerped);
transition.match3Game.font.draw(
transition.match3Game.batch,
"Loading " + transition.match3Game.match3Assets.getProgress() + "%",
GAME_WIDTH - 4, 1
);
transition.match3Game.font.getColor().set(fontColor.r, fontColor.g, fontColor.b, 1);
transition.match3Game.batch.setColor(batchColor.r, batchColor.g, batchColor.b, 1);
transition.match3Game.batch.end();
}
}
That's a lot of code to take in all at once, so let's focus on the important part. The render
method. There's multiple ways to do a fade in effect in LibGDX. You might be tempted to write a shader
script that can be ran after a render. But you don't really need to do that if you take advantage of the
SpriteBatch method getColor and setColor. As you can see in the code
above, we're modifying the color's 4th attribute. Which is the alpha value. By tweaking this value we can
tell the sprite batch to render whatever we pass to .draw at that opacity level.
How does this work? Well, if you look at the guts of the SpriteBatch inside of LibGDX, you'll spot
the createDefaultShader method. Which basically does exactly what you would have written into a
shader program yourself. The color is used to tint every pixel on the screen, so it's normally just set to white
so whatever color the texture has is mixed in with the overall batch texture to display itself at full opacity.
Setting the alpha value like we do changes the attribute in the shader program when the batch runs, which is why
we leave it alone when we render the to screen so that we render it at full opacity, then we render
the black pixel over the entire screen to achieve the desired effect. The only trouble with this is that technically
you can interact with the screen while it's still fading in, but we could split up the update from the actual graphical
render if we wanted to avoid that.
Return to the Transition class and add our new step into the list:
private void initializeSteps() {
steps.add(new FadeInFromBlack(this, 0.5f));
}
And now? Well. Sadly the game will crash. The reason being that we called to.render but all the assets
weren't actually loaded yet. This is a problem because fading in the next screen is supposed to happen after we finish
fading out from the other one while loading assets. We can work around this by adding this into the onStart
method of the step to make sure we're ready.
@Override
public void onStart() {
if (!transition.match3Game.match3Assets.assetManager.update(1)) {
transition.match3Game.match3Assets.blockingLoad();
}
}
Now we can see half of the transition work:

Of course, it's still clunky feeling since the previous screen just quickly turns to black when the initial value of the faded pixel kicks in. And that's hard to tell since the very first transition is from a null screen, so it's not like there's anything to render at all. So, let's go ahead and finish the other half of the fading transition we've made.
This one will be a little different in that we'll use the frame buffer to capture what the previous scene looked like:
class FadeOutToBlack implements TransitionStep {
private final Transition transition;
private float accum = 0f;
public boolean done = false;
private float minLength = 1f;
private final Texture black;
private Texture fromTexture;
private FrameBuffer frameBuffer;
public FadeOutToBlack(Transition transition, float minLength) {
this.transition = transition;
this.minLength = minLength;
this.black = TestTexture.makeTexture(Color.BLACK);
}
public void update(float delta) {
accum += delta;
if (accum >= minLength) {
done = transition.match3Game.match3Assets.getProgress() == 100;
}
}
public boolean isComplete() {
return done;
}
public void onStart(){
if (transition.from != null) {
// Save last rendered scene to texture
// Otherwise I suppose we're just coming from black.
frameBuffer = new FrameBuffer(
Pixmap.Format.RGBA8888,
Gdx.graphics.getWidth(),
Gdx.graphics.getHeight(),
false
);
transition.match3Game.batch.flush();
frameBuffer.begin();
transition.from.render(0);
frameBuffer.end();
fromTexture = frameBuffer.getColorBufferTexture();
}
}
public void onEnd() {
// Make sure that the scene we just waited to load is sized to the screen correctly
transition.to.resize(Gdx.graphics.getWidth(), Gdx.graphics.getHeight());
black.dispose();
if (fromTexture != null) {
fromTexture.dispose();
frameBuffer.dispose();
fromTexture = null;
}
}
public void render(float delta) {
int progress = transition.match3Game.match3Assets.getProgress();
// Set fade in progress to the slowest of the accum or asset load.
float alpha = Math.min(accum / minLength, progress / 100f);
transition.camera.update();
transition.match3Game.batch.setProjectionMatrix(transition.camera.combined);
ScreenUtils.clear(Color.BLACK);
transition.match3Game.batch.begin();
if (fromTexture != null) {
// We must flip the texture vertical since the FB is upside down
transition.match3Game.batch.draw(
fromTexture, 0f, 0f, GAME_WIDTH, GAME_HEIGHT,
0, 0, Gdx.graphics.getWidth(), Gdx.graphics.getHeight(), false, true
);
Color batchColor = transition.match3Game.batch.getColor().cpy();
transition.match3Game.batch.setColor(
batchColor.r,
batchColor.g,
batchColor.b,
MathUtils.lerp(0, 1, alpha)
);
transition.match3Game.batch.draw(
black,
0, 0,
GAME_WIDTH,
GAME_HEIGHT
);
transition.match3Game.batch.setColor(batchColor.r, batchColor.g, batchColor.b, 1);
}
transition.match3Game.font.draw(
transition.match3Game.batch,
"Loading " + (int) (alpha * 100) + "%",
GAME_WIDTH - 4, 1
);
transition.match3Game.batch.end();
}
}
Let's go over the more interesting parts. First off, the definition of "done" for this step
has two dimensions: the minimum time set by the constructor and marched towards on every update
by the accum value; and the actual progress of the asset manager loading resources.
This is set only within the update method.
The other facet of the step relying on both of these values is the fade out itself. In order to give the user a good visual indicator of progress, we set the alpha value to the slowest of the two. This means that we won't fade out to black faster than we've loaded and we also won't flash from the previous screen to black super fast.
float alpha = Math.min(accum / minLength, progress / 100f);
Another interesting piece of this is that in order to show the previous screen, we render it
once in onStart to a FrameBuffer, which basically creates a screenshot
of the screen as we last rendered it. Since we don't need to keep rendering the last screen when
we move away from it, we can just hold onto our snapshot and use that until we're done.
The weird thing about textures made in this way is that it's rendered upside down. So, when we
call the draw method of the SpriteBatch we have to call the overload
that lets us pass along the flip boolean, which unfortunately is the longest one.
Lastly, when we end the step we know that the to scene's assets have all been loaded
into the asset manager. In order to prepare the scene for the next step, we call resize
on it. If you don't you get a weird bug:

See that tiny little splash of color in the bottom corner? That would be my PlayScreen
I'm telling the system to transition to. It's pretty obviously too small and needs to be resized.
In retrospect, it would probably make more sense to do this in the other step, but this is where
I fixed the problem originally so I left it in. In the interest of making each step fully encapsulated
and not relying on each other, you can update the onStart code in FadeInFromBlack
like so:
@Override
public void onStart() {
if (!transition.match3Game.match3Assets.assetManager.update(1)) {
transition.match3Game.match3Assets.blockingLoad();
}
transition.to.resize(Gdx.graphics.getWidth(), Gdx.graphics.getHeight());
}
Now that we have a fade out and fade in step, we can finish the Transition's initialization
step. Back in the class, we can update the method like so
protected void initializeSteps() {
steps.add(new FadeOutToBlack(this, 0.3f));
steps.add(new FadeInFromBlack(this, 0.5f));
}
And now between screens we'll get a nice fade out fade in sort of feel. We don't really need our loading screen code anymore either since it's been rendered obselete by our transition code. So go ahead and delete it, if you want to implement the "click to continue" functionality, it's as simple as adding in a middle step that simply waits for the user to click while rendering the text.
So let's return to our initial motivation for creating transitions in the first place. We want to make a title screen, credits scene, and configuration screen. The configuration screen can probably also act as our pause menu since that's pretty common and will save the user some clicks here or there. Either way, we can define some simple screens and then flush each one out a bit more.
The Title Screen
It's typical for a title screen to have some large text or logo for the game. So let's add in a new font
asset first. Open up Match3Assets and create the asset descriptor using our font creation
function.
public static String TITLE_FONT_KEY = "titlefont.ttf"; public static final AssetDescriptor<BitmapFont> titleFont = fontDescriptorForSize(1.5f, TITLE_FONT_KEY);
Using 1.5 the size of a tile is a pretty decent size for the text on the title screen. But when we want to use it, we need do the same thing we do for the other font and make sure it's scaled appropriately.
public BitmapFont getTitleFont() {
BitmapFont font = assetManager.get(titleFont);
font.setUseIntegerPositions(false);
font.getData().setScale(
(float) GAME_WIDTH / Gdx.graphics.getWidth(),
(float) GAME_HEIGHT / Gdx.graphics.getHeight()
);
return font;
}
Let's go ahead and define the basic title screen next:
public class TitleScreen extends ScreenAdapter implements Scene {
private final Match3Game match3Game;
private final List<AssetDescriptor<?>> assets;
private OrthographicCamera camera;
private FitViewport viewport;
public TitleScreen(Match3Game match3Game) {
this.match3Game = match3Game;
camera = new OrthographicCamera();
viewport = new FitViewport(GAME_WIDTH, GAME_HEIGHT, camera);
camera.setToOrtho(false, GAME_WIDTH, GAME_HEIGHT);
camera.update();
assets = new LinkedList<>();
assets.add(Match3Assets.scoreFont);
assets.add(Match3Assets.bgm);
assets.add(Match3Assets.background);
assets.add(Match3Assets.titleFont);
}
@Override
public void render(float delta) {
super.render(delta);
if (Gdx.input.isKeyJustPressed(Input.Keys.ESCAPE)) {
Gdx.app.exit();
}
camera.update();
match3Game.batch.setProjectionMatrix(camera.combined);
ScreenUtils.clear(Color.BLACK);
match3Game.batch.begin();
match3Game.batch.draw(match3Game.match3Assets.getGameScreenBackground(), 0, 0, GAME_WIDTH, GAME_HEIGHT);
match3Game.match3Assets.getTitleFont().draw(
match3Game.batch,
"Relax n Match",
0, GAME_HEIGHT - 2,
GAME_WIDTH, Align.center, false
);
match3Game.batch.end();
}
@Override
public void resize(int width, int height) {
super.resize(width, height);
viewport.update(width, height);
}
@Override
public List<AssetDescriptor<?>> getRequiredAssets() {
return assets;
}
}
Since this is a Scene implemention, we define the list of what resources we'll be needing, and then
in the render method use the asset manager to fetch them and use them. One thing we haven't used yet
is the overload of the draw method for the font that will center our text on the screen. Initially, I
was thinking I might have to get the size of the glyphs for the characters and center the font by hand, but thankfully
the Align.Center saves me a lot of work.
If we go back to the Match3Game setup code and have the transition create this screen. We'll get our expected
fade in and that simple screen.
public void create () {
...
transition = new Transition(this, TransitionType.Push, null, new TitleScreen(this));
}

Of course, our title screen is no good if we can't get to the game right? We could display some text like "press enter to start" or something but I don't think that's a great idea. Why would we ask our user to press a button on the keyboard and then expect them to understand they should be dragging tiles with their mouse? Swapping between input methods feels like a weird thing to do to a person, so let's define some buttons that the user will intuitively know to click.
While we can define our buttons to all be the same size, it'd be really nice if we had something flexible enough to fill the space as needed for any text we might need to display in a button. Enter the ninepatch. A ninepatch is a pretty cool technique that allows us to define a texture that can be stretched without looking like garbage.

This is a pretty intuitive concept, the corners will stay the same, while the other patches will be expanded and stretched as needed to fill up any amount of space you might need. I like to think of old gameboy or NES dialogue boxes because I'm pretty sure that they probably used a similar technique, perhaps more like a 4 patch where they flipped similar items to save memory and space in the more limited buffers of the time. To make one of these, you can read the wiki page and then use any of the tools they mention to construct a .9.png file.
or
You can do what I did and take advantage of the JavaDoc to see that we can programatically construct a 9 patch from any texture. A quick hop over to Piskel again and I'd made myself a simple box to use as my buttons. Since we're going to want to indicate the state of the button when a user interacts with it, I went ahead and defined a sprite sheet with 9patches of the idle, hovering, and actively pressed state:

Actually loading the 9 patch into memory nets us a trip to the Match3Assets class again:
public static String BUTTON_NINE_PATCH_KEY = "textures/button9patch.png";
public static final AssetDescriptor<Texture> button9Patch = new AssetDescriptor<>(BUTTON_NINE_PATCH_KEY, Texture.class);
public Texture getButton9PatchTexture() {
return assetManager.get(button9Patch);
}
Since it's just a simple texture like the background and tokens, we'll handle splitting the texture and loading it into textures
when we need to create the NinePatch itself. The code to do this is straightforward. We'll use TextureRegion.split
to cut up our sprite for each of its states, and then the constructor
new NinePatch(texture, left, right, top, bottom)
to define how far into the texture the center part of the nine patch is. This constructor doesn't let us have too fine grained control over the patch, but if you need that you probably want to use one of the tools to construct those and not do what I'm doing here.
With the knowledge of how to use and create a simple NinePatch, we can get a button rendered to the screen.
It won't be interactable yet, but we'll come to that after we've taken our first baby step.
public class MenuButton{
protected float xActiveOffset;
protected float yActiveOffset;
static enum ButtonState {
IDLE,
HOVER,
ACTIVE
}
protected final String text;
protected ButtonState buttonState;
protected final Vector2 minSize;
protected final Vector2 position;
protected final Match3Assets match3Assets;
protected NinePatch inactive;
protected NinePatch hovering;
protected NinePatch active;
public MenuButton(String text, Vector2 position, Vector2 minimumSize, Match3Assets match3Assets) {
this.text = text;
this.buttonState = ButtonState.IDLE;
this.position = position;
this.minSize = minimumSize;
this.match3Assets = match3Assets;
this.inactive = this.hovering = this.active = null;
this.xActiveOffset = 0;
this.yActiveOffset = -0.1f;
}
public void setHorizontalActiveOffset(float xOffsetWhenPressed) {
this.xActiveOffset = xOffsetWhenPressed;
}
public void setVerticalActiveOffset(float yOffsetWhenPressed) {
this.yActiveOffset = yOffsetWhenPressed;
}
protected void make9Patch() {
Texture texture = match3Assets.getButton9PatchTexture();
TextureRegion[][] regions = TextureRegion.split(texture, 32, 32);
this.inactive = new NinePatch(regions[0][0], 8, 8, 8, 8);
inactive.scale(GAME_WIDTH / (float) Gdx.graphics.getWidth(), GAME_HEIGHT /(float) Gdx.graphics.getHeight());
this.hovering = new NinePatch(regions[0][1], 8, 8, 8, 8);
hovering.scale(GAME_WIDTH / (float) Gdx.graphics.getWidth(), GAME_HEIGHT /(float) Gdx.graphics.getHeight());
this.active = new NinePatch(regions[0][2], 8, 8, 8, 8);
active.scale(GAME_WIDTH / (float) Gdx.graphics.getWidth(), GAME_HEIGHT /(float) Gdx.graphics.getHeight());
}
public void render(float delta, SpriteBatch batch, BitmapFont font) {
if (inactive == null) {
make9Patch();
}
float yOffset = 0;
float xOffset = 0;
Color batchColor = batch.getColor().cpy();
switch (buttonState) {
case IDLE:
batch.setColor(batchColor.r, batchColor.g, batchColor.b, 0.8f);
inactive.draw(batch, position.x, position.y, minSize.x, minSize.y);
break;
case HOVER:
batch.setColor(batchColor.r, batchColor.g, batchColor.b, batchColor.a);
hovering.draw(batch, position.x, position.y, minSize.x, minSize.y);
break;
case ACTIVE:
yOffset = yActiveOffset;
xOffset = xActiveOffset;
batch.setColor(batchColor.r, batchColor.g, batchColor.b, batchColor.a);
active.draw(batch, position.x + xOffset, position.y + yOffset, minSize.x, minSize.y);
break;
}
batch.setColor(batchColor);
// Textures are draw from the bottom left corner, but font is from the top left corner
// So we have to compute where the font's y value is by flipping and shifting
float fontYPosition = position.y + minSize.y - inactive.getPadTop() - inactive.getPadBottom() + yOffset;
font.draw(batch, text, position.x + inactive.getPadLeft() + xOffset, fontYPosition, minSize.x, Align.center, false);
}
}
Just like we did with the tile animations, we start off with the nine patches set to null and the first time we attempt to render them
we'll construct the nine patches and save the results for rendering. There are two things I want to draw your attention
to besides the make9Patch method.
First, the font drawing code has some extra work being done because, annoyingly, font positioning is done from the top left of the string. But textures are anchored by the bottom left. So we have to do a tiny amount of math to deal with getting the text to appear in the correct place; we're also somewhat reliant on how we're going to define the sizing vector since I'm being a bit lazy and plan on defining the height by the lineheight of the font itself. We could do some math to figure that out, but I'm going to be a bit lazy here, feel free to not be if you'd like to work out the numbers yourself (˙ᵕ˙).
Secondly, the setHorizontalActiveOffset and setVerticalActiveOffset methods are defined because
we're going to have more than one type of button eventually. Our menu buttons for the title screen will all shift down in
the same sort of way when we activate them. But when we get to the configuration screen and let the user lower or raise the
volume, it would be nice if they moved horizontally instead, so rather than a simple field we've encapsulated the field with
a method to make it simple to override in a subclass.
Moving back to the TitleScreen class, let's define our four buttons by their text.
public class TitleScreen extends ScreenAdapter implements Scene {
public static final String START_GAME = "Start Game";
public static final String SETTINGS = "Settings";
public static final String CREDITS = "Credits";
public static final String QUIT = "Quit";
private final LinkedList<MenuButton> buttons;
public TitleScreen(Match3Game match3Game) {
...
buttons = new LinkedList<>();
Vector2 buttonPositionsStart = new Vector2(GAME_WIDTH / 2f - 2.5f, GAME_HEIGHT / 2f - 1);
Vector2 buttonMinSize = new Vector2(5f, match3Game.font.getLineHeight() + 0.2f);
String[] buttonTexts = new String[]{START_GAME, SETTINGS, CREDITS, QUIT};
for (int i = 0; i < buttonTexts.length; i++) {
Vector2 buttonPosition = buttonPositionsStart.cpy().sub(0, i * buttonMinSize.y);
MenuButton button = new MenuButton(buttonTexts[i], buttonPosition, buttonMinSize, match3Game.match3Assets);
buttons.add(button);
}
}
And then in our render method, we can loop over our buttons and render each.
for (MenuButton button : buttons) {
button.render(delta, match3Game.batch, match3Game.font);
}
This will give us a title screen that looks good, but doesn't really let us do anything. In order to do that we need to setup a new input handler. Since this is for our menus, let's call it the menu input handler! And since we've got a handler, we know we'll need a listener for the events that come off of it.
public interface MenuEventSubscriber {
public boolean onMouseMove(Vector2 point);
public boolean onTouchDown();
public boolean onTouchUp();
}
If you recall from the last time we made an input handler, the various coordinates we get from the
mouse are always in screen coordinates. So, we'll need to use a viewport to unproject
those back into our world unit space. The code is pretty simple though and straightforward though:
public class MenuInputAdapter extends InputAdapter {
protected Viewport viewport;
protected HashSet<MenuEventSubscriber> subscribers;
public MenuInputAdapter(Viewport viewport) {
this.viewport = viewport;
this.subscribers = new HashSet<>(2);
}
@Override
public boolean touchDown(int screenX, int screenY, int pointer, int button) {
boolean handled = false;
for (MenuEventSubscriber dragEventSubscriber : subscribers) {
handled = handled || dragEventSubscriber.onTouchDown();
}
return handled || super.touchDown(screenX, screenY, pointer, button);
}
@Override
public boolean touchUp(int screenX, int screenY, int pointer, int button) {
boolean handled = false;
for (MenuEventSubscriber dragEventSubscriber : subscribers) {
handled = handled || dragEventSubscriber.onTouchUp();
}
return handled || super.touchDown(screenX, screenY, pointer, button);
}
@Override
public boolean mouseMoved(int screenX, int screenY) {
Vector2 worldUnitVector = viewport.unproject(new Vector2(screenX, screenY));
boolean handled = false;
for (MenuEventSubscriber subscriber : subscribers) {
handled = handled || subscriber.onMouseMove(worldUnitVector);
}
return handled || super.mouseMoved(screenX, screenY);
}
public void addSubscriber(MenuEventSubscriber... subscribers) {
this.subscribers.addAll(Arrays.asList(subscribers));
}
}
The only thing that might surprise you about this is that the touch up and down methods to call on the subcribers to our events don't take any arguments. Given that our buttons have three states and the user should only be able to click on something they're hovering on, as long as we setup those state transitions correctly, we shouldn't need to do any extra bounds checking beyond the ones we do when we move the mouse 12.
Since we're hooking up the button with incoming events, what about letting other people know that we've clicked the button? Let's define a listener class that will do just that.
public interface ButtonListener {
void buttonClicked(MenuButton button);
}
Now that we have the two interfaces for inputs and output, let's define the buttons as MenuEventSubscribers
and let them inform any listeners who want to hear them:
public class MenuButton implements MenuEventSubscriber {
...
protected HashSet<ButtonListener> listeners;
public MenuButton(String text, Vector2 position, Vector2 minimumSize, Match3Assets match3Assets) {
...
this.listeners = new HashSet<>();
}
...
public boolean contains(Vector2 point) {
boolean insideX = position.x <= point.x && point.x <= position.x + minSize.x;
boolean insideY = position.y <= point.y && point.y <= position.y + minSize.y;
return insideY && insideX;
}
public boolean onMouseMove(Vector2 point) {
if (contains(point)) {
if (buttonState == ButtonState.IDLE) {
buttonState = ButtonState.HOVER;
return true;
}
} else {
buttonState = ButtonState.IDLE;
}
return false;
}
public boolean onTouchDown() {
switch (buttonState) {
case IDLE:
case ACTIVE:
break;
case HOVER:
buttonState = ButtonState.ACTIVE;
for (ButtonListener listener : listeners) {
listener.buttonClicked(this);
}
return true;
}
return false;
}
public boolean onTouchUp() {
switch (buttonState) {
case IDLE:
case HOVER:
break;
case ACTIVE:
buttonState = ButtonState.HOVER;
return true;
}
return false;
}
public void addButtonListener(ButtonListener buttonListener) {
listeners.add(buttonListener);
}
}
We still need to actually use the input adapter we've defined and setup the buttons to listen to it. So we can return to
the TitleScreen class and handle that in the constructor:
public class TitleScreen extends ScreenAdapter implements Scene, ButtonListener {
...
public TitleScreen(Match3Game match3Game) {
...
MenuInputAdapter menuInputAdapter = new MenuInputAdapter(viewport);
Gdx.input.setInputProcessor(menuInputAdapter);
String[] buttonTexts = new String[]{START_GAME, SETTINGS, CREDITS, QUIT};
for (int i = 0; i < buttonTexts.length; i++) {
Vector2 buttonPosition = buttonPositionsStart.cpy().sub(0, i * buttonMinSize.y);
MenuButton button = new MenuButton(buttonTexts[i], buttonPosition, buttonMinSize, match3Game.match3Assets);
button.addButtonListener(this);
buttons.add(button);
menuInputAdapter.addSubscriber(button);
}
...
}
}
Hovering over the buttons and clicking on them will now give you a tactile sense:
but of course if we want them to actually DO something we need to implement the ButtonListener interface
properly with the buttonClicked method. This is just a simple delegation method based on which button that
responded to our request:
public void buttonClicked(MenuButton button) {
for (MenuButton menuButton : buttons) {
if (button == menuButton) {
switch (button.getText()) {
case START_GAME:
match3Game.replaceSceneWith(new PlayScreen(match3Game));
break;
case SETTINGS:
// match3Game.overlayScene(new ConfigurationScreen(match3Game));
break;
case CREDITS:
// match3Game.overlayScene(new CreditsScreen(match3Game));
break;
case QUIT:
Gdx.app.exit();
default:
// Do nothing.
}
}
}
}
If you wanted to take some inspiration from swing, we could feed the button a Command to execute instead
of constructing this switch statement, but it's all a matter of taste in this. Do you want to make the construction
code loop over strings and a list of which commands belong to them? You could. Doing this would even let us remove the
concept of a button listener entirely since a command would let us reify the transition call we're doing with the game.
For now though, this will work just fine and we'll be able to press the start button to move to the play screen. As we wanted to.
There's an interesting bug happening right now though, if you navigate to a screen that doesn't set an input handler
you can click on the place where the buttons should be, and they'll execute their actions. This is because we didn't
change the input handlers yet. It's a pretty easy fix though, in your TitleScreen add in overrides for
the hide and show actions to setup the input processor:
@Override
public void hide() {
super.hide();
Gdx.input.setInputProcessor(null);
}
@Override
public void show() {
super.show();
Gdx.input.setInputProcessor(menuInputAdapter);
}
Our current PlayScreen has a similar problem, but the same solution for the drag input adapter will work here too.
Generally speaking, if there's something that should be resetting every time we show or hide the screen, then we want to move
that sort of logic into those methods. Keeping it in the constructor will mean we'll only ever execute it once per instance we
make, which might not be what you want.
At this point, you should be able to create a simple screen for ConfigurationScreen and CreditsScreen
on your own and hook up the button to transition you to that screen. Within each of those screens, you'll need to provide a way
to get back to the previous screen. So wire up a keyboard press if you want, or even place a back button somewhere. Either way,
let's move to our next section because this post is long enough without more sample code you can write yourself if you've made
it this far 13.
The configuration screen ↩
While this tutorial/dev blog is fatiguing me and I want to end it soon. At the very least, there are a few things that I want to control from the settings screen that we should talk through.
- The volume of the background music
- The volume of the sound effects
- Easy or Hard mode, which will impact the token generator we use during the game
Right now, the background music is tracked in Match3Game at the top level with a raw Music instance.
We could leave it like this and call methods on it directly, but that doesn't sit well with me. Music and sound effects
feel like they belong as a logical unit to some extent. So I'd like to be able to manage them with one class that is configured
via our configuration screen. Something like this:

Since these are all settings controlled via the configuration page, it probably makes sense to define these in a class named after that.
public enum GameDifficulty {
NORMAL,
EASY
}
... in another file ...
public class GameSettings {
private float bgmVolume;
private float sfxVolume;
private GameDifficulty difficult;
public static GameSettings getInstance() {
if (_this == null) {
_this = new GameSettings();
}
return _this;
}
private GameSettings() {
this.bgmVolume = 1f;
this.sfxVolume = 1f;
this.difficult = GameDifficulty.NORMAL;
}
...
setters and getters
...
}
We'll use the difficulty to swap between token algorithms at runtime, and then the other two values we'll handle exactly how you would expect us to. One other thing to note about this is that it's a singleton. We're only ever going to have one of these and we primarily read values, so there's not a lot of risk about threads accessing or modifying the same value at the same time. This class being a singleton will make it easy for us to incoporate the volume settings into our existing code, and it just makes sense since it's not like you'd ever want to have two setting instances defined at the same time.
Anyway, if we want the sound effects to play at the volume of the game settings each time, we'll need to update all the places we
call .play to use the overload that takes in the volume to play at:
.play(GameSettings.getInstance().getSFXVolume())For the music we can control it with less changes across the codebase since the
Music instance actually lets you set the
volume on the instance that's playing. So we can update Match3Game's create method to set the volume to the setting instead of
a hardcoded number.
@Override
public void create () {
scenes = new Stack<>();
this.batch = new SpriteBatch();
match3Assets = new Match3Assets();
loadAssets();
// Play one tune the whole game for now
this.bgm.setVolume(GameSettings.getInstance().getBgmVolume());
this.bgm.setLooping(true);
this.bgm.play();
transition = new Transition(this, TransitionType.Push, null, new TitleScreen(this));
}
For the sound effects, the classes we need to update as I described above are:
- MenuButton (If you added any SFX)
- ScoreManager
- AssetManager (see below)
- BoardManager
An easy way to deal with the music, if you want to not have to tweak things in a bunch of places, is to change
public Music getBGM() {
return assetManager.get(bgm);
}
to
public Music getBGM() {
Music m = assetManager.get(bgm);
m.setVolume(GameSettings.getInstance().getBgmVolume());
return m;
}
And then if you were to grab out the background music at any point it would always be set to the volume level the game settings decided. But of course, none of this really does us any good if we can't change these values. So, let's go ahead and flush out a proper configuration screen. We can re-use our button class from the title screen with a little bit of subclassing to make it useful for this type of thing.
First off, let's go for the simple case of a toggle button. This is the exact same as our existing MenuButton
except that we have two different texts to display and want the user to be able to tell when we've toggled between them.
If you're expecting polymorphism, you're right!
public class ToggleButton extends MenuButton {
protected String altText;
protected boolean isToggled = false;
public ToggleButton(String startText, String toggledText, Vector2 position, Vector2 minimumSize, Match3Assets match3Assets) {
super(startText, position, minimumSize, match3Assets);
this.altText = toggledText;
this.isToggled = false;
}
@Override
public boolean onTouchDown() {
if (super.onTouchDown()) {
setToggled(!isToggled());
}
return false;
}
@Override
public String getText() {
if (isToggled()) {
return this.altText;
}
return super.getText();
}
public boolean isToggled() {
return isToggled;
}
public void setToggled(boolean toggled) {
isToggled = toggled;
}
}
Being toggled means that the user pressed the button so we've gone from whatever our start state was where we were showing the start text, to the state where we should be showing the alternate text. As you can see, our re-use of the menu button gets us the rest of the behavior for free and we can now happily spam a button to swap it between two values:
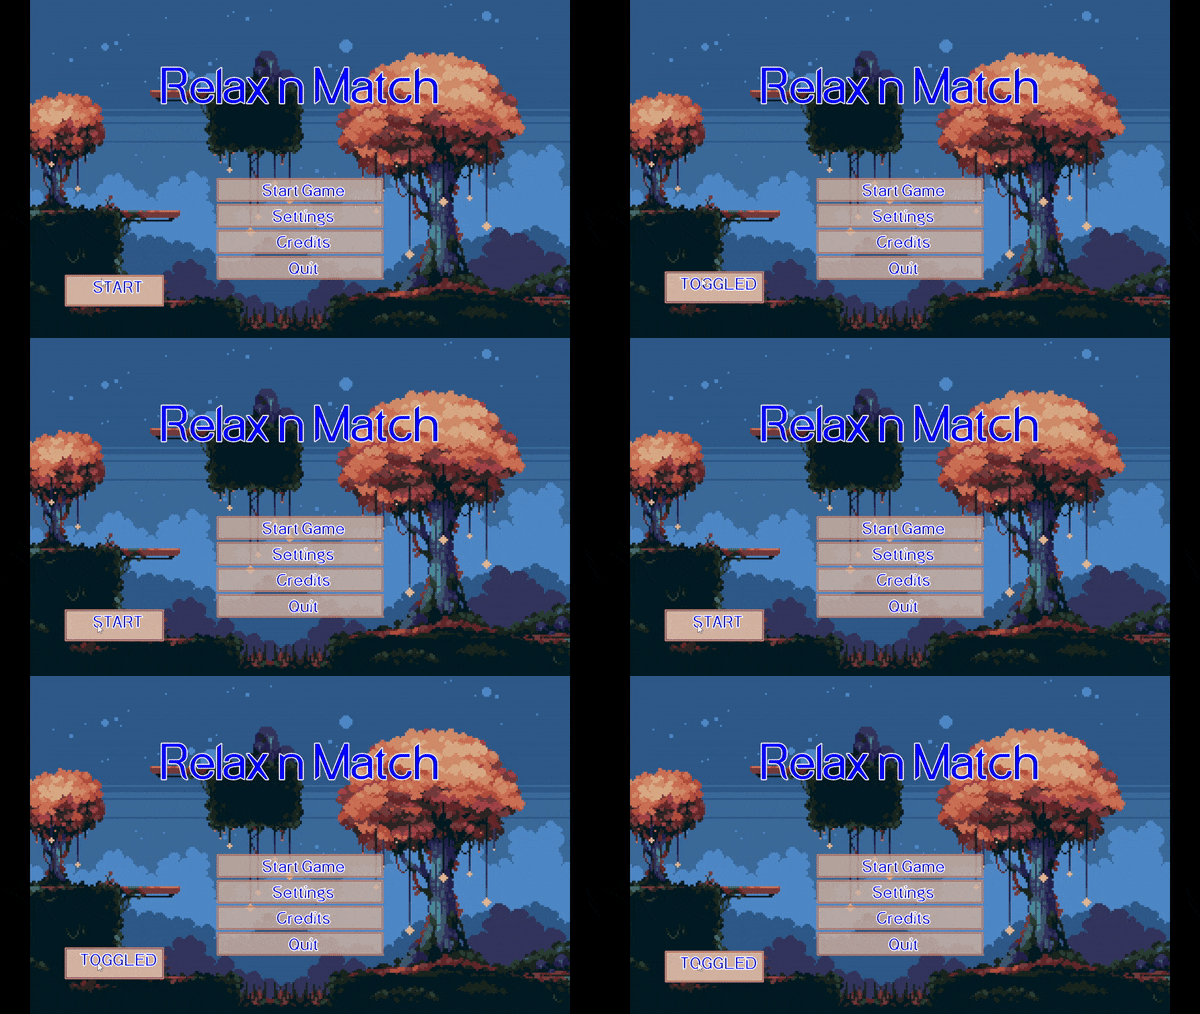
This will be useful for a difficult button that swaps between game modes. For the volume control we need to use this toggle button in a group setting. There's a lot of ways to make volume configurable, we could make a slider and use the amount to the right as the percentage to apply, or we could do something that fits into our game's theme a bit more. Let's use the toggle button, but instead of swapping between two text values, let's swap between two image values:
public class PlateButton extends ToggleButton {
TextureRegion emptyPlate;
TextureRegion filledPlate;
public PlateButton(Vector2 position, Vector2 minimumSize, Match3Assets match3Assets) {
super("", "", position, minimumSize, match3Assets);
}
private TextureRegion getEmptyTexture() {
Texture sheet = match3Assets.getTokenSheetTexture();
if (this.emptyPlate == null) {
int y = match3Assets.getStartYOfTokenInSheet(TileType.Negative);
this.emptyPlate = new TextureRegion(sheet, TOKEN_SPRITE_IDLE_START, y, TOKEN_SPRITE_PIXEL_WIDTH, TOKEN_SPRITE_PIXEL_HEIGHT);
}
return this.emptyPlate;
}
private TextureRegion getFilledTexture() {
Texture sheet = match3Assets.getTokenSheetTexture();
if (this.filledPlate == null) {
int y = match3Assets.getStartYOfTokenInSheet(TileType.HighValue);
this.filledPlate = new TextureRegion(sheet, TOKEN_SPRITE_IDLE_START, y, TOKEN_SPRITE_PIXEL_WIDTH, TOKEN_SPRITE_PIXEL_HEIGHT);
}
return this.filledPlate;
}
@Override
public void render(float delta, SpriteBatch batch, BitmapFont font) {
TextureRegion toDraw;
if (isToggled()) {
toDraw = getFilledTexture();
} else {
toDraw = getEmptyTexture();
}
float yOffset = 0;
float xOffset = 0;
switch (buttonState) {
case IDLE:
case HOVER:
batch.draw(toDraw, position.x, position.y, minSize.x, minSize.y);
break;
case ACTIVE:
yOffset = yActiveOffset;
xOffset = xActiveOffset;
batch.draw(toDraw, position.x + xOffset, position.y + yOffset, minSize.x, minSize.y);
break;
}
}
}
With the above code, we have a button that takes the shape of the empty plate token and the filled plate token. Now, let's wrap it up inside of a container that will hold 10 of them and control the volume with it. This will be a good chunk of code so let's break it down by the constructor and then the interface methods.
public class VolumeControl extends MenuButton implements ButtonListener, MenuEventSubscriber {
private final List<PlateButton> volumeButtons;
private float volume;
private HashSet<ButtonListener> listeners;
public VolumeControl(String text, float startingVolume, Vector2 position, Vector2 minimumSize, Match3Assets match3Assets) {
super(text, position, minimumSize, match3Assets);
volumeButtons = new LinkedList<>();
listeners = new HashSet<>();
this.volume = startingVolume;
Vector2 plateSize = new Vector2(0.5f, 0.5f);
Vector2 plateStart = position.cpy().sub(0, 1);
for (int i = 0; i < 10; i++) {
Vector2 pos = plateStart.cpy().add(i * 0.5f, 0);
PlateButton plateButton = new PlateButton("", pos, plateSize, match3Assets);
plateButton.setToggled(i < volume*10);
plateButton.addButtonListener(this);
volumeButtons.add(plateButton);
}
}
public void render(float delta, SpriteBatch spriteBatch, BitmapFont font) {
font.draw(spriteBatch, getText(), position.x, position.y, minSize.x, Align.center, false);
for (PlateButton plateButton : volumeButtons) {
plateButton.render(delta, spriteBatch, font);
}
}
public void addButtonListener(ButtonListener buttonListener) {
listeners.add(buttonListener);
}
public float getVolume() {
return this.volume;
}
There's nothing too shocking here. Since we want to have a label for the buttons we're showing, we position the font above it and then shift the vector for the starting position of each toggle button down by one. It's not perfect, and we could probably get into a whole bunch of interesting algorithms to pack in UI controls and do alignment, spacing, padding, etc, but this will do to get a label and a multi-button slider up and running.
Now, the VolumeControl is implementing MenuEventSubscriber like the other buttons, but it's
also a ButtonListener itself because it need to listen to its child components for it to take any action.
@Override
public void buttonClicked(MenuButton menuButton) {
int idx = volumeButtons.indexOf(menuButton);
if (idx == -1) {
return;
}
this.volume = (float) idx / (volumeButtons.size() - 1);
int i = 0;
for (PlateButton plateButton : volumeButtons) {
plateButton.setToggled(i < volume*10f);
i++;
}
for (ButtonListener listener : listeners) {
listener.buttonClicked(this);
}
}
There's multiple ways to implement this method, and I did it a couple different ways first before settling on the above
approach. Your IDE might complain about indexOf because it's a generic collection method that takes in
Object and MenuButton and PlateButton are different types. It will work just fine
though. If you're concerned, feel free to iterate across the volume buttons and compute idx manually like we do when setting
the toggled state of each button.
In order for the toggle buttons to actually respond to user input, we need to forward the inputs the VolumeControl
class will be taking in from the MenuInputAdapter, if one of our child buttons handles the input then we can say
the overall control did and report that to the caller:
@Override
public boolean onMouseMove(Vector2 point) {
boolean handled = false;
for (PlateButton plateButton : volumeButtons) {
handled = plateButton.onMouseMove(point) || handled;
}
return handled;
}
@Override
public boolean onTouchDown() {
boolean handled = false;
for (PlateButton plateButton : volumeButtons) {
handled = plateButton.onTouchDown() || handled;
}
return handled;
}
@Override
public boolean onTouchUp() {
boolean handled = false;
for (PlateButton plateButton : volumeButtons) {
handled = plateButton.onTouchUp() || handled;
}
return handled;
}
@Override
public boolean onTouchDown(Vector2 point) {
boolean handled = false;
for (PlateButton plateButton : volumeButtons) {
handled = plateButton.onTouchDown(point) || handled;
}
return handled;
}
@Override
public boolean onTouchUp(Vector2 point) {
boolean handled = false;
for (PlateButton plateButton : volumeButtons) {
handled = plateButton.onTouchUp(point) || handled;
}
return handled;
}
}
With all the delegation done and out of the way. We can actually use these control in our screen! So, an example configuration screen we might create with all these new UI elements could be something like this:
public class ConfigurationScreen extends ScreenAdapter implements Scene, ButtonListener {
private final Match3Game match3Game;
private final List<AssetDescriptor<?>> assets;
private final OrthographicCamera camera;
private final FitViewport viewport;
private final MenuButton backButton;
private final MenuInputAdapter menuInputAdapter;
private final ToggleButton difficultyToggle;
private final VolumeControl sfxVolumeControl;
private final VolumeControl bgmVolumeControl;
public ConfigurationScreen(Match3Game match3Game) {
this.match3Game = match3Game;
camera = new OrthographicCamera();
viewport = new FitViewport(GAME_WIDTH, GAME_HEIGHT, camera);
camera.setToOrtho(false, GAME_WIDTH, GAME_HEIGHT);
camera.update();
assets = new LinkedList<>();
assets.add(Match3Assets.scoreFont);
assets.add(Match3Assets.bgm);
assets.add(Match3Assets.button9Patch);
assets.add(Match3Assets.confirmSFX);
assets.add(Match3Assets.cancelSFX);
assets.add(Match3Assets.titleFont);
assets.add(Match3Assets.tokens);
menuInputAdapter = new MenuInputAdapter(viewport);
float menuButtonX = GAME_WIDTH / 2f - 2f;
Vector2 backButtonPosition = new Vector2(menuButtonX, 2);
Vector2 size = new Vector2(5f, match3Game.font.getLineHeight() + 0.2f);
backButton = new MenuButton("Back to Title", backButtonPosition, size, match3Game.match3Assets);
backButton.addButtonListener(this);
Vector2 difficultPosition = backButtonPosition.cpy().add(0, GAME_HEIGHT - 6);
difficultyToggle = new ToggleButton("Difficulty: Normal", "Difficulty: Easy", difficultPosition, size, match3Game.match3Assets);
difficultyToggle.setToggled(GameSettings.getInstance().getDifficult().equals(GameDifficulty.EASY));
difficultyToggle.addButtonListener(this);
bgmVolumeControl = new VolumeControl(
"BGM Volume",
GameSettings.getInstance().getBgmVolume(),
backButtonPosition.cpy().add(0, 3.5f),
size.cpy(),
match3Game.match3Assets
);
bgmVolumeControl.addButtonListener(this);
sfxVolumeControl = new VolumeControl(
"SFX Volume",
GameSettings.getInstance().getSfxVolume(),
backButtonPosition.cpy().add(0, 2f),
size.cpy(),
match3Game.match3Assets
);
sfxVolumeControl.addButtonListener(this);
menuInputAdapter.addSubscriber(backButton);
menuInputAdapter.addSubscriber(difficultyToggle);
menuInputAdapter.addSubscriber(bgmVolumeControl);
menuInputAdapter.addSubscriber(sfxVolumeControl);
}
@Override
public void render(float delta) {
super.render(delta);
if (Gdx.input.isKeyJustPressed(Input.Keys.ESCAPE)) {
match3Game.closeOverlaidScene();
}
camera.update();
match3Game.batch.setProjectionMatrix(camera.combined);
ScreenUtils.clear(Color.BLACK);
match3Game.batch.begin();
match3Game.batch.draw(match3Game.match3Assets.getGameScreenBackground(), 0, 0);
match3Game.match3Assets.getTitleFont().draw(
match3Game.batch,
"Configuration",
0, (float) GAME_HEIGHT - 1,
GAME_WIDTH, Align.center, false
);
backButton.render(delta, match3Game.batch, match3Game.font);
difficultyToggle.render(delta, match3Game.batch, match3Game.font);
bgmVolumeControl.render(delta, match3Game.batch, match3Game.font);
sfxVolumeControl.render(delta, match3Game.batch, match3Game.font);
match3Game.batch.end();
}
@Override
public void resize(int width, int height) {
super.resize(width, height);
viewport.update(width, height);
}
@Override
public List<AssetDescriptor<?>> getRequiredAssets() {
return assets;
}
@Override
public void show() {
super.show();
Gdx.input.setInputProcessor(menuInputAdapter);
}
@Override
public void hide() {
super.hide();
Gdx.input.setInputProcessor(null);
}
@Override
public void buttonClicked(MenuButton menuButton) {
if (menuButton == sfxVolumeControl) {
GameSettings.getInstance().setSfxVolume(sfxVolumeControl.getVolume());
}
if (menuButton == bgmVolumeControl) {
GameSettings.getInstance().setBgmVolume(bgmVolumeControl.getVolume());
match3Game.match3Assets.getBGM().setVolume(bgmVolumeControl.getVolume());
}
if (menuButton == difficultyToggle) {
GameDifficulty changeTo = GameDifficulty.NORMAL;
if (difficultyToggle.isToggled()) {
changeTo = GameDifficulty.EASY;
}
GameSettings.getInstance().setDifficult(changeTo);
}
if (menuButton == backButton) {
match3Game.closeOverlaidScene();
}
}
}
Most of this is just simple setup code and placement of the elements on the screen. The only business
logic worth calling out here is probably the buttonClicked handler which actually modifies
the GameSettings instance we created earlier. This has the impact of course that all sound
effects and music are altered when we change these values!
Before we call it a day though, let's go ahead and make sure that the difficulty toggle actually works by
wiring it up in PlayScreen
this.tokenGrid = new GameGrid<>(Constants.TOKENS_PER_ROW,Constants.TOKENS_PER_COLUMN);
tokenAlgorithm = new NextTileAlgorithms.WillNotMatch(tokenGrid);
for (GridSpace<TileType> gridSpace : tokenGrid) {
gridSpace.setValue(tokenAlgorithm.next(gridSpace.getRow(), gridSpace.getColumn()));
}
if (GameSettings.getInstance().getDifficult().equals(GameDifficulty.EASY)) {
this.tokenAlgorithm = new NextTileAlgorithms.LikelyToMatch(tokenGrid);
}
We don't want to generate a bunch of matches right away, so we'll keep the algorithm as WillNotMatch
when we create the board the first time. But after that, we can let the easy mode "likely to match" algorithm
take the helm and let the user get lots of matches all the time. Although, funny enough, since that algorithm
doesn't bias itself away from negative tokens, it can sometimes be harder to get a good score since you can't
predict and line up your multipliers as easily.
Either way, we now have the basics in place and can move onto the next screen we should make.
A credits screen ↩
Assuming you didn't draw every image and craft every song yourself, you probably need to credit a few people for providing assets or similar. We can do this in a simple way by making a list of strings and then displaying each for a short time then fading them out.
public class CreditsScreen extends ScreenAdapter implements Scene {
private final Match3Game match3Game;
private OrthographicCamera camera;
private FitViewport viewport;
List<String> credits;
float timeForEachCredit = 3f;
float accum;
int idxToShow = 0;
private List<AssetDescriptor<?>> assets;
public CreditsScreen(Match3Game match3Game) {
this.match3Game = match3Game;
camera = new OrthographicCamera();
viewport = new FitViewport(GAME_WIDTH, GAME_HEIGHT, camera);
camera.setToOrtho(false, GAME_WIDTH, GAME_HEIGHT);
camera.update();
credits = new ArrayList<>();
// ... add in all the strings you want here
assets = new LinkedList<>();
assets.add(Match3Assets.scoreFont);
assets.add(Match3Assets.bgm);
assets.add(Match3Assets.background);
}
@Override
public void render(float delta) {
super.render(delta);
camera.update();
match3Game.batch.setProjectionMatrix(camera.combined);
ScreenUtils.clear(Color.BLACK);
match3Game.batch.begin();
match3Game.batch.draw(match3Game.match3Assets.getGameScreenBackground(), 0,0, GAME_WIDTH, GAME_HEIGHT);
match3Game.font.draw(match3Game.batch, "Credits", 1, GAME_HEIGHT - 1);
float alpha = 1 - MathUtils.lerp(0, 1, accum / timeForEachCredit);
String credit = getCreditToShow(delta);
Color restoreTo = match3Game.font.getColor().cpy();
match3Game.font.setColor(restoreTo.cpy().set(restoreTo.r, restoreTo.g, restoreTo.b, alpha));
match3Game.font.draw(match3Game.batch, credit, 2, (float) GAME_HEIGHT / 2, GAME_WIDTH - 2, Align.left, true);
match3Game.font.setColor(restoreTo);
if (Gdx.input.isKeyJustPressed(Input.Keys.ESCAPE)) {
match3Game.closeOverlaidScene();
}
match3Game.batch.end();
}
private String getCreditToShow(float delta) {
accum += delta;
if (accum > timeForEachCredit) {
accum = 0;
idxToShow++;
}
return credits.get(idxToShow % credits.size());
}
@Override
public void resize(int width, int height) {
super.resize(width, height);
viewport.update(width, height);
}
@Override
public List<AssetDescriptor<?>> getRequiredAssets() {
return assets;
}
}
Fading the font out is done via the same trick we used in the screen transitions, setting the alpha value of the color used by the font to render the characters.
And now we've got all the screens we need. The game however, needs just a bit more work. After all, we've still got debugging information showing up next to the grid we made!
The end game ↩
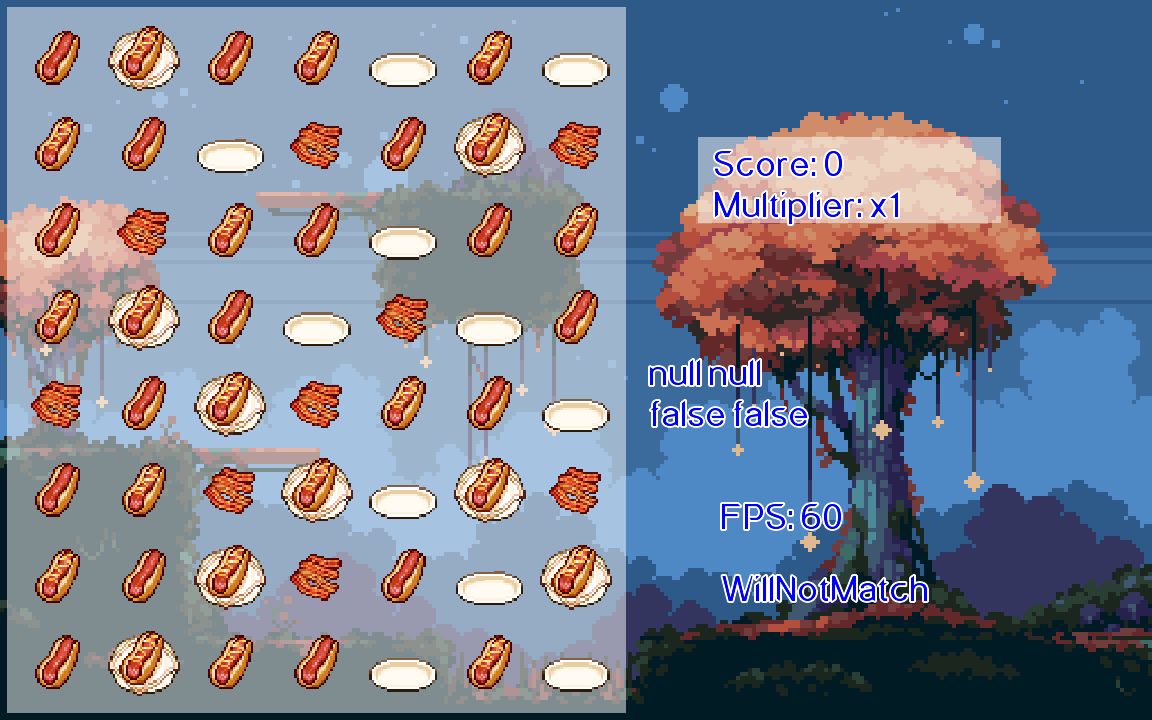
While it's great for us to see the FPS counter and some other random information, it's not really doing much for our users now does it. Similar, the matching and score going up is nice, but there's nothing pressing about this to really make this into a "game". Right now it's just enjoying the act of matching tokens. Which, I like, but most people probably need more.
So let's raise the stakes a bit. First, let's remove the debugging code. So stuff like
match3Game.font.draw(match3Game.batch, algo, 10, 2);
should be ditched, along with its variables until we have a clean simple score and multiplier being shown like this:
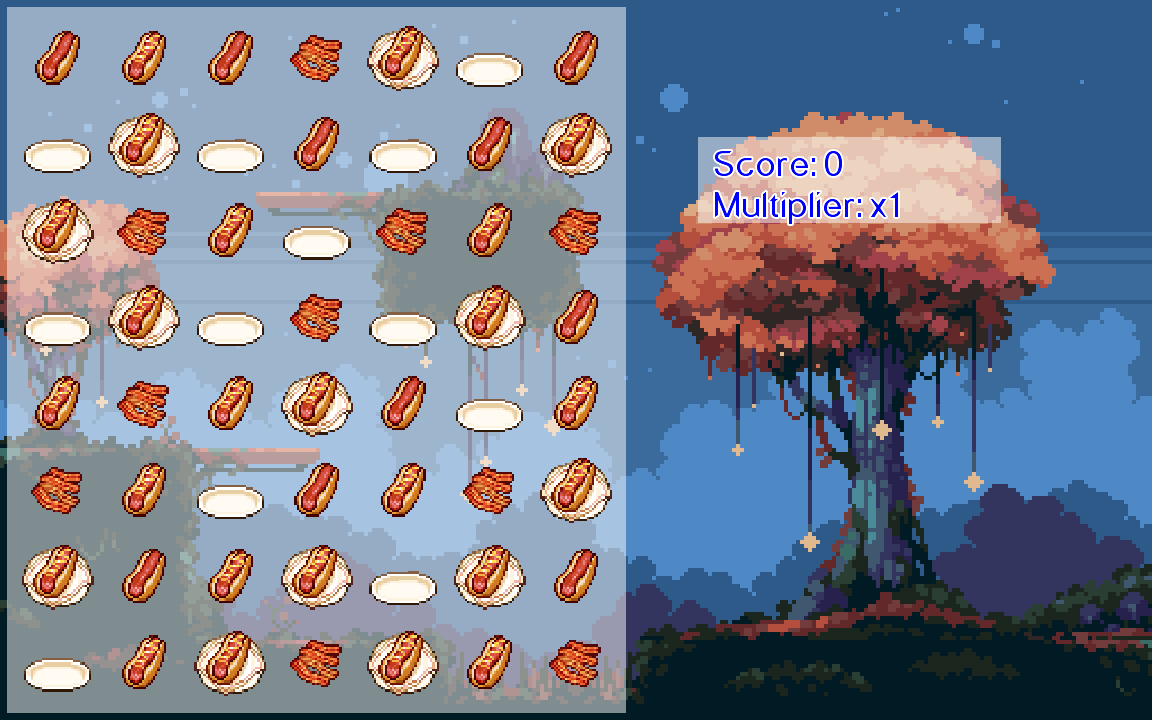
Next, let's have add a goal to the game. While showing the game to a friend and talking with her about it, she gave me a great idea. Why not have a target goal for them to reach and if they get there then they get to continue, otherwise they lose. That's an easy and simple idea to have! So now we have two more fields we need to track:
- How many moves are left before we check if the game should end
- A target score to reach
Given that this has to do with the score, let's add it to the code that cares about it.
public class ScoreManager implements MatchSubscriber<TileType>, Disposable {
...
private int movesCompleted;
private int movesToGo;
private int targetScore;
public ScoreManager(Vector2 position, BoardManager boardManager, Match3Assets match3Assets) {
...
movesCompleted = 0;
movesToGo = 20;
targetScore = 100;
}
...
}
Of course, for us to change those move related variables, we need to know that a move has happened. You might think that we could hook into the matching event, but that would be wrong. We don't want to punish a user for cascading matches, rather they should be trying to make those so they don't consumer a move! So, let's create an observer style interface for that:
public interface MoveEventSubscriber {
void onMoveComplete();
}
The part of the code that knows that the move has been made and finished is our ProcessingMatches
code. Specifically the update method. So, if we make the Match3GameState an implementor of the
interface then we can call it when we're done processing like so:
@Override
public BoardState update(float delta) {
if (commands.isEmpty()) {
processMatches();
}
while (!this.commands.isEmpty()) {
Command command = this.commands.remove();
command.execute();
}
if (isDoneProcessing) {
match3GameState.onMoveComplete();
return new BoardAcceptingMoves(match3GameState);
}
return this;
}
The match3GameState itself, being a delegator to its internal state classes, does exactly what you think it would. It delegates:
public class Match3GameState implements DragEventSubscriber, MatchEventPublisher<TileType>, MatchSubscriber<TileType>, MoveEventSubscriber {
...
private final HashSet<MoveEventSubscriber> moveEventSubscribers;
public Match3GameState(BoardManager boardManager, GameGrid<TileType> gameGrid, TokenGeneratorAlgorithm<TileType> tokenAlgorithm) {
...
this.moveEventSubscribers = new HashSet<>();
}
...
@Override
public void onMoveComplete() {
for (MoveEventSubscriber moveEventSubscriber : this.moveEventSubscribers) {
moveEventSubscriber.onMoveComplete();
}
}
public void addMoveSubscriber(MoveEventSubscriber moveEventSubscriber) {
this.moveEventSubscribers.add(moveEventSubscriber);
}
public void removeMoveSubscriber(MoveEventSubscriber moveEventSubscriber) {
this.moveEventSubscribers.remove(moveEventSubscriber);
}
}
So, who actually calls addMoveSubscriber to subscribe? The PlayScreen is interested but
the score manager is the real one who cares. So no need for us to put in delegation here. Let's update the score manager
to be a MoveEventSubscriber:
public class ScoreManager implements MatchSubscriber<TileType>, Disposable, MoveEventSubscriber {
...
@Override
public void onMoveComplete() {
movesCompleted++;
movesToGo--;
if (movesToGo == 0) {
handleEndGame();
}
}
...
private void handleEndGame() {
// We'll do this in a minute or three.
}
Lastly, we'll link them together in the play screen so that the score handler can actually get the event. Updating the constructor to do that is pretty simple:
public PlayScreen(Match3Game match3Game) {
...
this.match3GameState = new Match3GameState(boardManager, tokenGrid, tokenAlgorithm);
this.match3GameState.addSubscriber(scoreManager);
this.match3GameState.addMoveSubscriber(scoreManager);
...
}
We can confirm this is working by displaying the moves on the screen. So, to the render method we go:
bitmapFont.draw(
spriteBatch,
"Score: " + scoringCalculator.getScore() +
"\n" + "Multiplier: x" + scoringCalculator.getMultiplier() +
"\nMoves left: " + movesToGo +
"\nTarget Score: " + targetScore,
cornerX + Constants.BOARD_UNIT_GUTTER,
cornerY + Constants.SCORE_UNIT_HEIGHT - Constants.BOARD_UNIT_GUTTER
);
And running this we can see it incrementing once as we make a move that causes secondary matches:
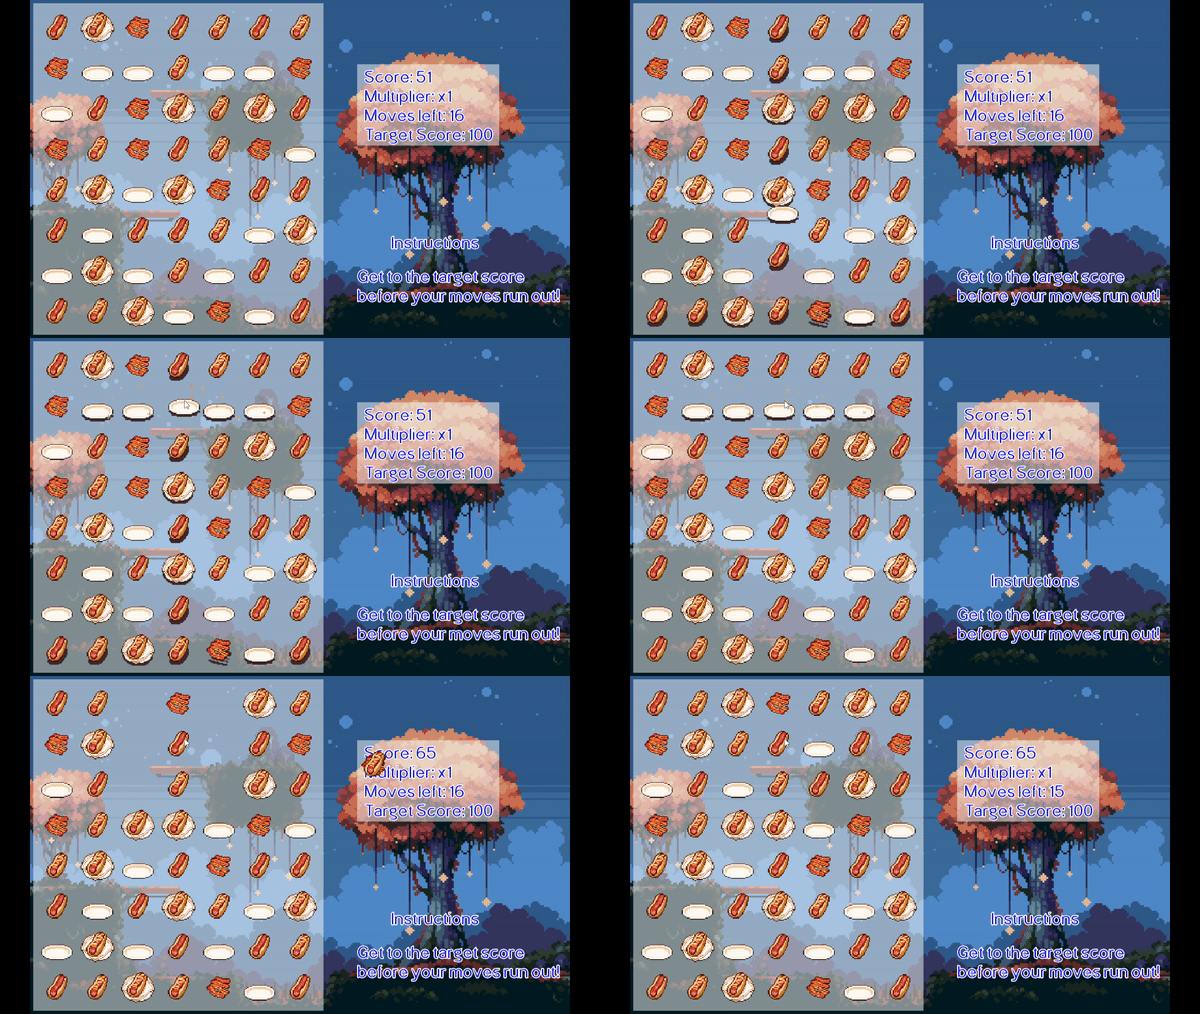
You'll notice in my screenshot that I've added in some simple instructions so the user knows what the target goal and moves counter means. We could probably also stand to add in point values for each token so they don't feel totally lost when they start the game for the first time. But lets finish one thought at a time.
Returning to our score calculator. Let's make sure its possible for it to notify people that the game should be ending. We'll make an interface for that:
public interface EndGameSubscriber {
void notifyGameShouldEnd(GameStats gameStats);
}
And that GameStats class will be a simple record type object we can use to track anything
we might want to display in an end game screen:
public class GameStats {
private final int score;
private final int moves;
public GameStats(int movesCompleted, int finalScore) {
this.moves = movesCompleted;
this.score = finalScore;
}
public int getScore() {
return score;
}
public int getMoves() {
return moves;
}
}
With our new interface done, we can implement it and the goal related code. For simplicity, we'll just set the goalpost to be double the users current score. This will allow them to reach it in the early game, but get really hard later on. Is it fair? Nah, but getting to see how far you can get before a game brutally shuts you down is part of the fun. If it works for tetris's levels past 30 then it will work for us here 14.
private void handleEndGame() {
if (scoringCalculator.getScore() < targetScore) {
for (EndGameSubscriber endGameSubscriber : endGameSubscribers) {
endGameSubscriber.notifyGameShouldEnd(new GameStats(movesCompleted, scoringCalculator.getScore()));
}
} else {
recalculateTargetGoal();
movesToGo = 20;
}
}
private void recalculateTargetGoal() {
targetScore = scoringCalculator.getScore() * 2;
// For now let's just always have 20 moves.
}
It shouldn't surprise you that if we've setup an object to be able to broadcast information,
then our next step is to subscribe someone to that. We'll be wanting to transition to an
ending screen when we finish, so. The PlayScreen can do that in the constructor
after we've updated the class to implement EndGameSubscriber:
public PlayScreen(Match3Game match3Game) {
...
scoreManager.addEndGameSubscriber(this);
...
}
and then we can implement the interface method
...
@Override
public void notifyGameShouldEnd(GameStats gameStats) {
// TODO make a screen to show the end game.
Gdx.app.log("END", gameStats.toString());
match3Game.replaceSceneWith(new TitleScreen(match3Game));
}
For now, this just sends the user back to the title screen. But obviously we can create a new screen if we want to. If we had a leaderboard or anything we could hook into that here, but I think tracking high scores isn't something we need to dive into for this simple gamme. So lets just show the user a simple screen and then return them to the title screen or restart the game if they want to get right back into the action.
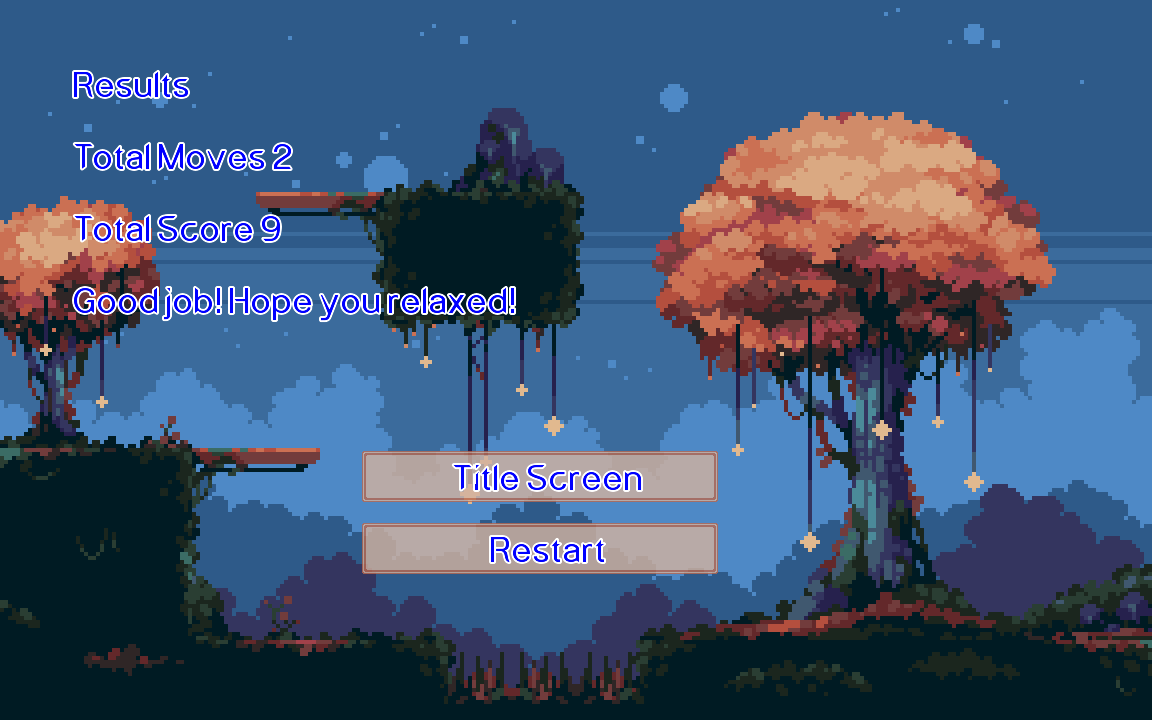
Something like the above is easy for us to make using our existing screen code and menu button classes.
public class ResultsScreen extends ScreenAdapter implements Scene, ButtonListener {
private final Match3Game match3Game;
private final GameStats gameStats;
private final MenuButton titleScreenButton;
private final MenuButton restartButton;
private final MenuInputAdapter menuInputAdapter;
private OrthographicCamera camera;
private FitViewport viewport;
private List<AssetDescriptor<?>> assets;
public ResultsScreen(Match3Game match3Game, GameStats gameStats) {
this.match3Game = match3Game;
this.gameStats = gameStats;
camera = new OrthographicCamera();
viewport = new FitViewport(GAME_WIDTH, GAME_HEIGHT, camera);
camera.setToOrtho(false, GAME_WIDTH, GAME_HEIGHT);
camera.update();
assets = new LinkedList<>();
assets.add(Match3Assets.scoreFont);
assets.add(Match3Assets.bgm);
assets.add(Match3Assets.background);
assets.add(Match3Assets.button9Patch);
Vector2 position = new Vector2((float) GAME_HEIGHT / 2, 3);
Vector2 size = new Vector2(5f, match3Game.font.getLineHeight() + 0.2f);
this.titleScreenButton = new MenuButton("Title Screen" , position, size, match3Game.match3Assets);
this.titleScreenButton.addButtonListener(this);
this.restartButton = new MenuButton("Restart" , position.cpy().sub(0, 1), size, match3Game.match3Assets);
this.restartButton.addButtonListener(this);
menuInputAdapter = new MenuInputAdapter(viewport);
menuInputAdapter.addSubscriber(titleScreenButton, restartButton);
Gdx.input.setInputProcessor(menuInputAdapter);
}
@Override
public void render(float delta) {
super.render(delta);
camera.update();
match3Game.batch.setProjectionMatrix(camera.combined);
ScreenUtils.clear(Color.BLACK);
match3Game.batch.begin();
match3Game.batch.draw(match3Game.match3Assets.getGameScreenBackground(), 0,0, GAME_WIDTH, GAME_HEIGHT);
match3Game.font.draw(match3Game.batch, "Results", 1, GAME_HEIGHT - 1);
match3Game.font.draw(match3Game.batch, "Total Moves " + gameStats.getMoves(), 1, GAME_HEIGHT - 2);
match3Game.font.draw(match3Game.batch, "Total Score " + gameStats.getScore(), 1, GAME_HEIGHT - 3);
match3Game.font.draw(match3Game.batch, "Good job! Hope you relaxed!", 1, GAME_HEIGHT - 4);
titleScreenButton.render(delta, match3Game.batch, match3Game.font);
restartButton.render(delta, match3Game.batch, match3Game.font);
if (Gdx.input.isKeyJustPressed(Input.Keys.ESCAPE)) {
match3Game.replaceSceneWith(new TitleScreen(match3Game));
}
match3Game.batch.end();
}
@Override
public void resize(int width, int height) {
super.resize(width, height);
viewport.update(width, height);
}
@Override
public List<AssetDescriptor<?>> getRequiredAssets() {
return assets;
}
@Override
public void buttonClicked(MenuButton menuButton) {
if (menuButton == this.restartButton) {
match3Game.replaceSceneWith(new PlayScreen(match3Game));
}
if(menuButton == this.titleScreenButton) {
match3Game.replaceSceneWith(new TitleScreen(match3Game));
}
}
@Override
public void hide() {
super.hide();
Gdx.input.setInputProcessor(null);
}
@Override
public void show() {
super.show();
Gdx.input.setInputProcessor(menuInputAdapter);
}
}
And with that, we've got an incentive to play the game and try to compete with yourself. So, we're nearly done. We've got one more issue to resolve and you might have already experienced it. So, let's fix one last bug and then we'll call this game complete.
One last bug to fix ↩
If you attempt to press one of the title buttons as it's loading. You'll be treated to this error:
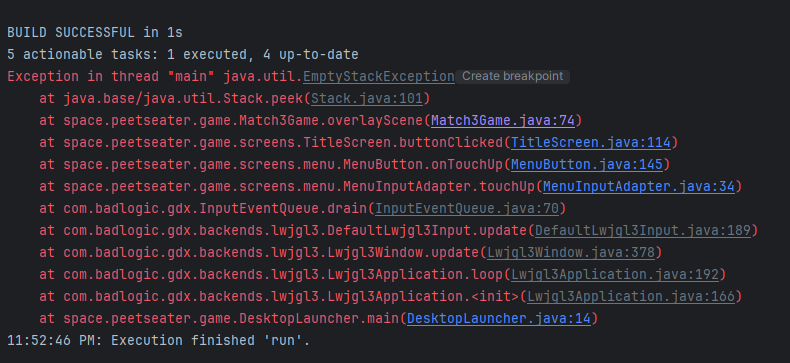
If we follow that trace, we might be tempted to resolve this issue by guarding the peek on the stack like this:
private Scene currentTopScene() {
Scene top = null;
if (!scenes.isEmpty()) {
top = scenes.peek();
}
return top;
}
public void replaceSceneWith(Scene scene) {
transition = new Transition(this, TransitionType.Replace, currentTopScene(), scene);
}
public void overlayScene(Scene scene) {
transition = new Transition(this, TransitionType.Push, currentTopScene(), scene);
}
public void closeOverlaidScene() {
Scene leaving = currentTopScene();
transition = new Transition(this, TransitionType.Pop, leaving, scenes.peek());
if (leaving != null) {
scenes.push(leaving);
}
}
This does result in the exception no longer being thrown, but if you click on a button while the transition is still working on loading, then you'll end up unable to move off that screen because there's nothing to return to when it comes to closing the overlay since the overlays currently expect there to have been a scene underneath them to return to.
So, how do we fix this problem?
Well, we could make an empty screen and use that instead of null. But similar, if we click too soon we'll end up with a bug. Because we'll overlay a screen, but when we return we'll just get the empty screen with no way to get off of it. So that's a no go.
One of the ways we can actually solve this issue is to make sure we don't try to move to a new transition while we're still in the middle of one. Which we know we're in if the transition is null or its just not finished. So, if we only create a new transition when it IS null or finished then:
public void replaceSceneWith(Scene scene) {
if (transition == null || transition.finished) {
transition = new Transition(this, TransitionType.Replace, scenes.peek(), scene);
}
}
public void overlayScene(Scene scene) {
if (transition == null || transition.finished) {
transition = new Transition(this, TransitionType.Push, scenes.peek(), scene);
}
}
And now if you spam the button as the game first loads, you'll see it doesn't actually do anything. No error! And once the game finishes the transition, you're able to use the button as usual. The only thing awkward is that if someone's spamming the button as the transition finishes then it does react. But to make it so that it doesn't, you'd need to figure out a good way to disable the scene until the transition finishes.
To do that, you'd probably want to have a proper separation of update and render methods, which is decently tricky. Alternatively, one could push the transitions into the scenes themselves rather than keeping them separate. There's probably a lot of ways of making it simpler to disable buttons so they don't do odd behavior. So, feel free to come up with your own ideas on this! I'd love to hear them, or see them implemented on github if you want to link them to me.
Adding instructions and persisting settings ↩
At this point the game runs, it can be played, and it's comprehensible to someone who has played a match 3 game before. We can make things a bit more clear for first time users though. We can add a panel on the side with instructions. To make this a bit nicer than font overlaid across the background, let's use the ninepatch we made before to make a simple background:
public class BackgroundPanel {
private final Vector2 position;
private final Vector2 size;
private final Match3Assets match3Assets;
private NinePatch bg;
public BackgroundPanel(Vector2 position, Vector2 size, Match3Assets match3Assets) {
this.position = position;
this.size = size;
this.match3Assets = match3Assets;
this.bg = null;
}
protected void make9Patch() {
Texture texture = match3Assets.getButton9PatchTexture();
TextureRegion[][] regions = TextureRegion.split(texture, 32, 32);
this.bg = new NinePatch(regions[0][0], 8, 8, 8, 8);
bg.scale(GAME_WIDTH / (float) Gdx.graphics.getWidth(), GAME_HEIGHT /(float) Gdx.graphics.getHeight());
}
public void render(float delta, SpriteBatch batch) {
if (this.bg == null) {
make9Patch();
}
Color batchColor = batch.getColor().cpy();
batch.setColor(batchColor.r, batchColor.g, batchColor.b, 0.8f);
bg.draw(batch, position.x, position.y, size.x, size.y);
batch.setColor(batchColor);
}
}
We can then update the play area and other areas that are using the white texture background from the
TestTexture class to use this instead.
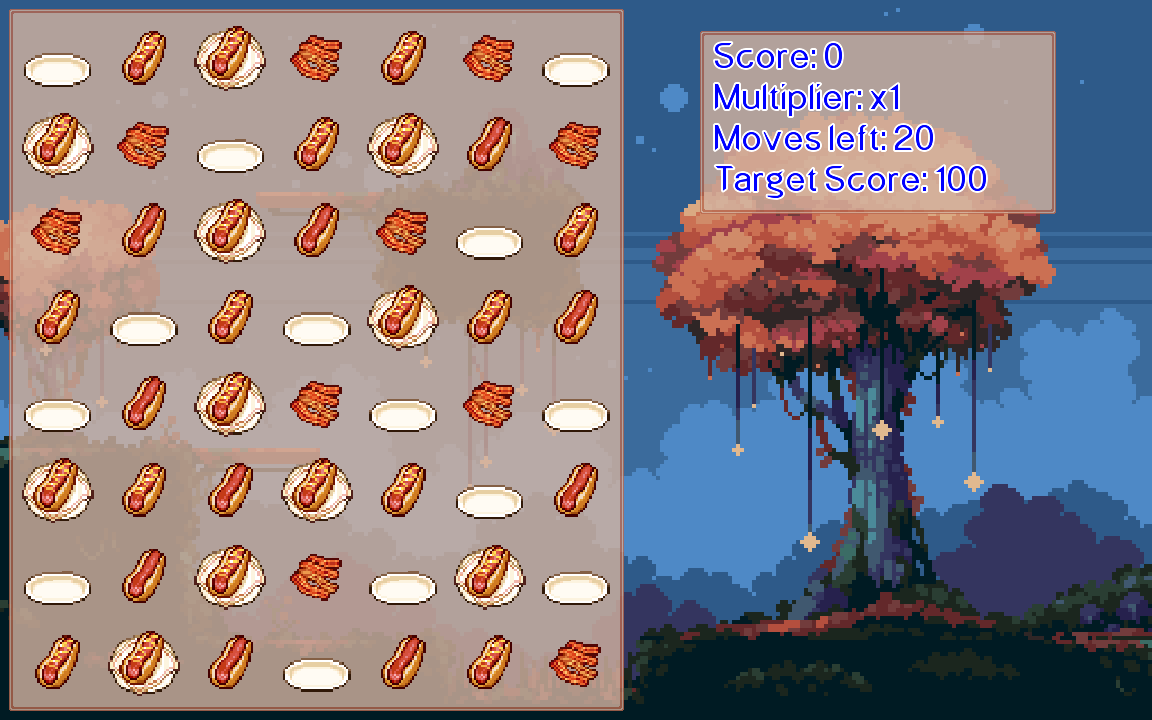
This isn't that hard to do. For the BoardManager class we can remove the texture field
and then add in the appropriate code:
private final BackgroundPanel bg;
public BoardManager(final Vector2 position, GameGrid<TileType> sourceOfTruth, Match3Assets match3Assets) {
...
this.bg = new BackgroundPanel(position, new Vector2(BOARD_UNIT_WIDTH, BOARD_UNIT_HEIGHT), match3Assets);
}
public void render(float delta, SpriteBatch batch) {
update(delta);
bg.render(delta, batch);
...
}
You can repeat the same procedure for the score manager to replace the white transparent background with that too.
Once we're done with that, lets make sure the user can change the volume and go back to the title from the main play area. Otherwise people are going to feel like they're stuck playing the game and not able to leave whenever they want. Since this is a relaxing game to match and chill to music, we don't want people to feel trapped.
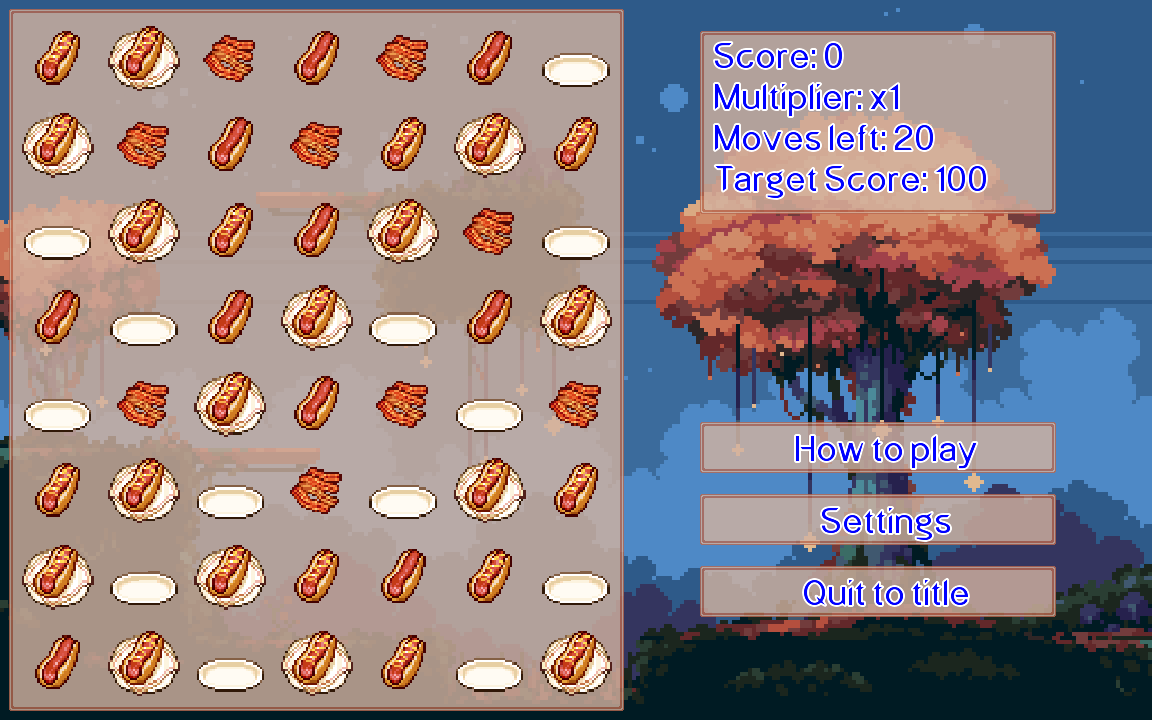
It should be obvious, but in the constructor the PlayScreen we'll setup our buttons:
menuInputAdapter = new MenuInputAdapter(viewport);
Vector2 buttonMinSize = new Vector2(5f, match3Game.font.getLineHeight() + 0.2f);
helpButton = new MenuButton("How to play", scorePosition.cpy().sub(0, 5), buttonMinSize, match3Game.match3Assets);
helpButton.addButtonListener(this);
menuInputAdapter.addSubscriber(helpButton);
settingsButton = new MenuButton("Settings", scorePosition.cpy().sub(0, 6), buttonMinSize, match3Game.match3Assets);
settingsButton.addButtonListener(this);
menuInputAdapter.addSubscriber(settingsButton);
quitButton = new MenuButton("Quit to title", scorePosition.cpy().sub(0, 7), buttonMinSize, match3Game.match3Assets);
quitButton.addButtonListener(this);
menuInputAdapter.addSubscriber(quitButton);
And now for the last obvious part. Our playscreen already has an input adapter. So, for us to handle both the drag inputer adapter and the menu button adapter. We need to use a multiplexer:
@Override
public void show() {
super.show();
InputMultiplexer inputMultiplexer = new InputMultiplexer();
inputMultiplexer.addProcessor(menuInputAdapter);
inputMultiplexer.addProcessor(dragInputAdapter);
Gdx.input.setInputProcessor(inputMultiplexer);
}
The games looking good, but we just need to implement the help text and we're done! So, make sure the
menu buttons render in your render method and then setup the ButtonListener
method for the PlayScreen class:
@Override
public void buttonClicked(MenuButton menuButton) {
if (menuButton == quitButton) {
match3Game.replaceSceneWith(new TitleScreen(match3Game));
}
if (menuButton == settingsButton) {
match3Game.overlayScene(new ConfigurationScreen(match3Game));
}
if (menuButton == helpButton) {
// TODO! Overlay our new help screen here!
}
}
You can make your help text look however you want. If you have faith in your users, you can even just do nothing and let them figure it out. Granted you'll probably get a bunch of negative reviews about how the game doesn't tell you what to do at all, but it's your choice. For me, I've got this code:
public class HelpScreen extends ScreenAdapter implements Scene, ButtonListener {
private final Match3Game match3Game;
private final String instructionText;
private final MenuButton backButton;
private final Vector2 textPosition;
private OrthographicCamera camera;
private FitViewport viewport;
private List<AssetDescriptor<?>> assets;
private LinkedList<TileGraphic> tileGraphics;
MenuInputAdapter menuInputAdapter;
BackgroundPanel backgroundPanel;
public HelpScreen(Match3Game match3Game) {
this.match3Game = match3Game;
camera = new OrthographicCamera();
viewport = new FitViewport(GAME_WIDTH, GAME_HEIGHT, camera);
camera.setToOrtho(false, GAME_WIDTH, GAME_HEIGHT);
camera.update();
textPosition = new Vector2(1, GAME_HEIGHT - 1);
instructionText = "Drag the tokens and try to make matches of at least 3 tokens in a straight line." +
"\nThe bacon is a multiplier so try to stack as many as you can before making a match!" +
"\nAvoid making empty plate matches since it will reduce your score." +
"\nDo your best to reach the target score within 20 moves to keep playing!";
backgroundPanel = new BackgroundPanel(textPosition.cpy().sub(-3.5f, 5.75f), new Vector2(11, 5), match3Game.match3Assets);
tileGraphics = new LinkedList<>();
Vector2 pos = new Vector2(1, GAME_HEIGHT - 3);
for (TileType tileType : TileType.values()) {
TileGraphic tileGraphic = new TileGraphic(
pos.cpy().sub(0, tileGraphics.size()),
tileType,
match3Game.match3Assets
);
tileGraphics.add(tileGraphic);
}
menuInputAdapter = new MenuInputAdapter(viewport);
backButton = new MenuButton("Back", new Vector2(1, 1), new Vector2(5, match3Game.font.getLineHeight() + BOARD_UNIT_GUTTER), match3Game.match3Assets);
backButton.addButtonListener(this);
menuInputAdapter.addSubscriber(backButton);
assets = new LinkedList<>();
assets.add(Match3Assets.scoreFont);
assets.add(Match3Assets.bgm);
assets.add(Match3Assets.background);
assets.add(Match3Assets.tokens);
assets.add(Match3Assets.button9Patch);
assets.add(Match3Assets.sparkle);
assets.add(Match3Assets.confirmSFX);
assets.add(Match3Assets.cancelSFX);
}
@Override
public void render(float delta) {
super.render(delta);
camera.update();
match3Game.batch.setProjectionMatrix(camera.combined);
ScreenUtils.clear(Color.BLACK);
match3Game.batch.begin();
match3Game.batch.draw(match3Game.match3Assets.getGameScreenBackground(), 0,0, GAME_WIDTH, GAME_HEIGHT);
backgroundPanel.render(delta, match3Game.batch);
match3Game.font.draw(match3Game.batch, "Instructions", textPosition.x, textPosition.y);
for (TileGraphic tileGraphic : tileGraphics) {
tileGraphic.render(delta, match3Game.batch);
match3Game.font.draw(
match3Game.batch,
TileType.scoreFor(tileGraphic.getTileType()) + " points",
tileGraphic.getMovablePoint().getPosition().x + TILE_UNIT_WIDTH + BOARD_UNIT_GUTTER,
tileGraphic.getMovablePoint().getPosition().y + TILE_UNIT_HEIGHT - BOARD_UNIT_GUTTER
);
}
backButton.render(delta, match3Game.batch, match3Game.font);
match3Game.font.draw(
match3Game.batch,
instructionText,
5,
GAME_HEIGHT - 2,
GAME_WIDTH - 6,
Align.left,
true
);
if (Gdx.input.isKeyJustPressed(Input.Keys.ESCAPE)) {
match3Game.closeOverlaidScene();
}
match3Game.batch.end();
}
@Override
public void resize(int width, int height) {
super.resize(width, height);
viewport.update(width, height);
}
@Override
public List<AssetDescriptor<?>> getRequiredAssets() {
return assets;
}
@Override
public void buttonClicked(MenuButton menuButton) {
if (menuButton == backButton) {
match3Game.closeOverlaidScene();
}
}
@Override
public void show() {
super.show();
Gdx.input.setInputProcessor(menuInputAdapter);
}
@Override
public void hide() {
Gdx.input.setInputProcessor(null);
}
}
All the hardcoded numbers to tweak things around could definitely be cleaned up. You could also use scene 2d because it has actual layouts and ways to position your elements not by hand, but you can tweak and modify things however you'd like. I think the hard part about this is the difference between position for a texture versus a font. This is one of the things I don't like about LibGDX in my experience, but I'm sure there's some way to get it to work as you'd expect more.
Anyway, if you hook up your menu button and click on the help button from the play area, then you'll get something like this:
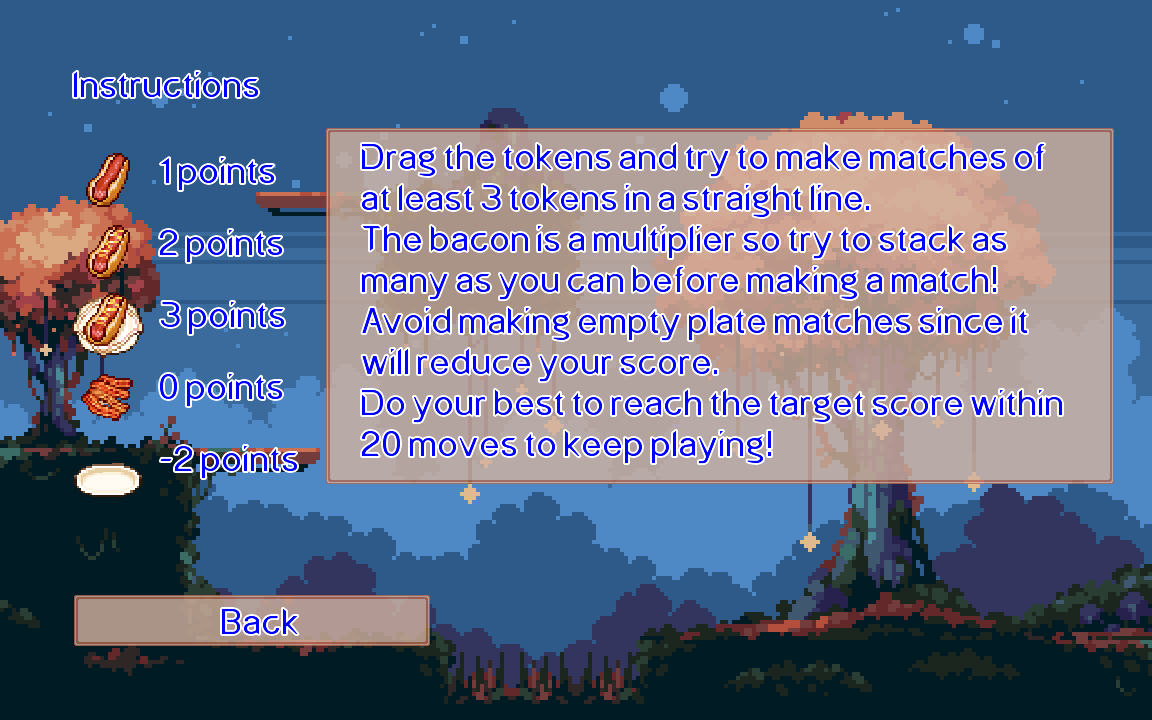
So now our user's will know what to do. The last thing we can do for the benefit our users is to not annoy them.
Right now, whenever you launch the game, the music plays at full volume. Even if you turned it down before. Generally, people expect their settings to persist between sessions with their games. So we need to make sure we persist this data. Luckily, LibGDX can use preferences for that.
It's pretty simple to use, it's basically just a hash map as far as usage goes and we need to make sure to flush it down to disk.
public class GameSettings {
private static GameSettings _this;
private final Preferences preferences;
private float bgmVolume;
private float sfxVolume;
private GameDifficulty difficult;
public static GameSettings getInstance() {
if (_this == null) {
_this = new GameSettings();
}
return _this;
}
private GameSettings() {
this.preferences = Gdx.app.getPreferences("RELAXNMATCH");
this.bgmVolume = this.preferences.getFloat("bgmVolume", 1f);
this.sfxVolume = this.preferences.getFloat("sfxVolume", 1f);
this.difficult = GameDifficulty.valueOf(this.preferences.getString("difficulty", GameDifficulty.NORMAL.name()));
}
public float getBgmVolume() {
return bgmVolume;
}
public synchronized void setBgmVolume(float bgmVolume) {
this.preferences.putFloat("bgmVolume", bgmVolume);
this.bgmVolume = bgmVolume;
this.preferences.flush();
}
public float getSfxVolume() {
return sfxVolume;
}
public synchronized void setSfxVolume(float sfxVolume) {
this.preferences.putFloat("sfxVolume", sfxVolume);
this.sfxVolume = sfxVolume;
this.preferences.flush();
}
public GameDifficulty getDifficult() {
return difficult;
}
public synchronized void setDifficult(GameDifficulty difficult) {
this.preferences.putString("difficulty", difficult.name());
this.difficult = difficult;
this.preferences.flush();
}
}
Preferences are stored in a file on disk, so a user COULD edit this if they wanted to and potentially screw up the game. Like if they put in a value that isn't in the enum for difficulty. But, power users who are going to do that probably can also understand an exception, so let's assume the best case scenario and assume everything will be set nicely.
With that done, we're ready for our final step.
Deploying the game ↩
Now that we have a game, how do we get it in front of other people?
The wiki tells us how of course!
Or at least, it kind of does. We've got the dist task, and that will generate a jar file for us.
But it doesn't bundle up our assets with it, and it doesn't do anything with jpackage or other tools. Thankfully,
I found a pretty good one that made it relatively easy to make an exe.
Enter Packr, a handy java CLI tool that takes in a few arguments and then spits out exactly what you need. In my case, I needed to:
- Grab packr from the release and move it to my root folder of this project
- Grab a JRE from adoptium for Java 8.
- Actually run packr
Those first two are pretty easy besides checking which architecture my windows is running (x64 it turns out). And then it was just a matter of reading the packr readme file and coming up with this command:
java -jar packr-all-4.0.0.jar \
--platform windows64\
--jdk OpenJDK8U-jre_x64_windows_hotspot_8u412b08.zip\
--executable relaxnmatch\
--classpath desktop/build/libs/desktop-1.0.jar\
--mainclass space.peetseater.game.DesktopLauncher\
--resources assets/*\
--output distribution\
--minimizejre soft
One really important thing here is that * for the resources. If you don't do that then it won't copy the assets over and it will get all confused when you try to run it.
With that complete. You can now play the game just by downloading and unzipping the directory that was made by that command. Give it a shot yourself! I hope you have fun, and I have you enjoyed this rather lengthy blog post. It was a fun project, even if I got fatigued at the end a bit and it shifted from tutorial to "you can do it yourself now" style blog post.
Download and play the game here if you have windows, or here if you have a mac.
Or, if you want to see the full code and check it out in detail there if you need to compare something you worked on versus what I had when I built the release above, then look here on github.
