What are we doing? ↩
We're making pong today. In Java. With LibGDX. But while we do this, we're going to set ourselves up for some success in our future game efforts by putting together a bit of framework for ourselves in the future. So, to that point, here's what we'll be doing for the game pulled from the challenge's website requirements:
- Create an arena with two walls and a divider.
- Add a paddle on either end of the play field. Use player inputs to move the paddles up and down.
- Add a ball that moves around the playfield and bounces off of the paddles and walls.
- Detect when the ball leaves the playfield. Assign a point to the player who scored.
- Track and display the score for each player.
Then of course, we have our stretch goals that should be decently easy to do:
- Write an AI script that can follow the ball so you can play with only one player.
- Add a menu and allow the player to reset the game.
- Add some basic sounds. Play a sound every time the ball collides with something, and every time a player scores.
But the thing that puts the over into engineering for this post is that while we do this, I also want to do the following:
- Change scenes in a decoupled way
- Setup some transitions between screens
- Load assets via the AssetManager
Now, you might understandably be asking yourself: why would you need half of what you're talking about for pong. That's a fair question, and my dear reader. We code not because it is easy. But because we can delude ourselves into thinking that we'll need the code later.
Ok, I'm joking, but really though. The idea here is that we'll use the fact that Pong is so dang simple, that I can spend some cycles here to set up things that we'll actually want reference code for later on. It's also a good way to experiment and see if we like a pattern within a smaller prototypical setup before we have a lot of code to juggle and think about. So, without further yappage. Let's get started.
Project setup ↩
Just like last time we'll be using LibGDX for our game library of choice. 1 So we can get the initial project created using gdx-liftoff to easily setup the project structure for us. Of course, the first question immediately stumped me, what are we naming this project? We can't just call it PONG after all, but unlike last time, I don't really have a cute idea like "Nyappy bird" to draw inspiration from.
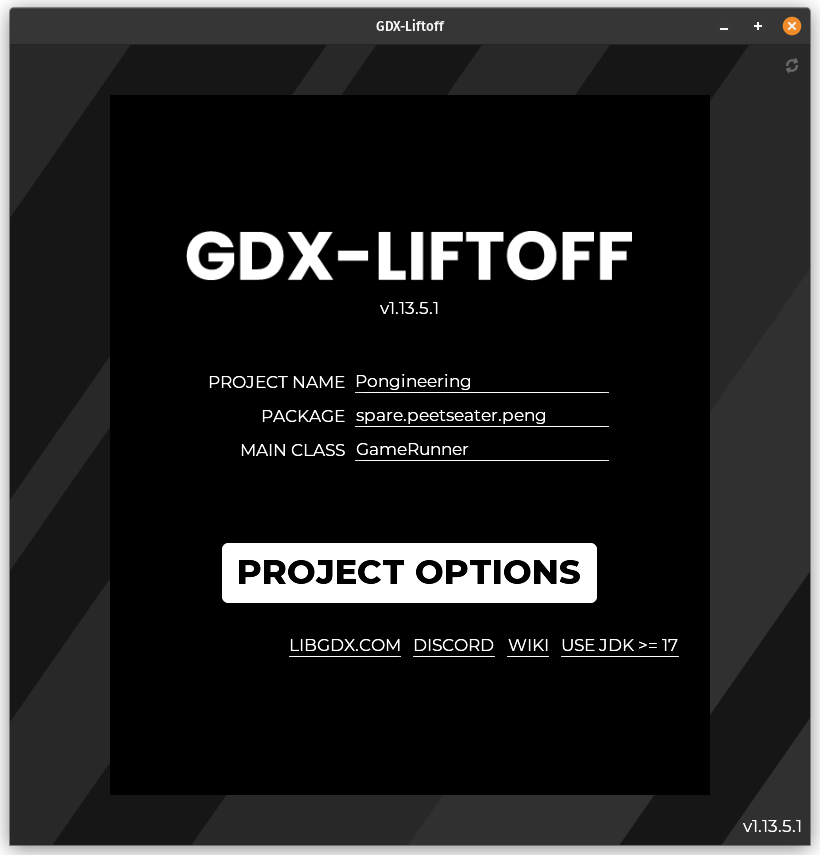
Since we're planning on doing a bit if software engineering, I suppose I'll call it pongineering for fun and confirm that the empty game template works as expected:
Unsurprisingly, it does. Great. Perfect time to git commit, or well,
git init first and then the usual song and dance to get an initial
commit up and into github.
As per usual, the source code exists for you to download to look at, run yourself,
or make modifications to. I don't have a license file attached in the REPO, but
so long as you're not feeding it to an AI, I don't care what else you use the code
for.
Since I elected to use the "Game" template from the liftoff selection, we just have
the FirstScreen (which does nothing) and the class extending Game
which calls setScreen with the aforementioned class. Rather than keeping
around that silly name, let's do the right thing and call it what it is! The battle
screen!!! 2
package spare.peetseater.peng;

import com.badlogic.gdx.Screen;

public class BattleScreen implements Screen {
    public void show() { ... }
    public void render(float delta) { ... }
    public void resize(int width, int height) { ... }
    public void pause() { ... }
    public void resume() { ... }
    public void hide() { ... }
    public void dispose() { ... }
}
Now, let the overengineering commence! Let us commit the cardinal sin of game creation and not get the mechanics of the game working right away. Instead, I want to explore a question. Do I need to implement screen here?

This might seem like a stupid question. Stick with me. Obviously these are lifecycle events that we can hook into from the underlying libgdx game loop that's handling the screen for us. But let's stop and think for a moment. The various stretch goals I mentioned about screen transitions and that sort of thing? I've actually done all of those before in my match 3 game and the way I did that was similar to how the code in Celeste 64's code base worked. Which was to have the idea of a "scene" and then the Game class handled managing a stack of these that ensured the right screen was in the right place at the right time.
The show, resize, pause, resume, hide, and dispose
functions? All of those are things that our game camera will care about, but are they things our main game code will?
I don't actually think so. If we're never going to actually change our camera viewport or
have more than one, than it'd be nice to handle the resizing operation in just the one place
for all of them.
Pausing? The lifecycle pause, as noted on the wiki, is for when the application is minimized or we're exiting. Do we have any game state to persist or save when minizing that won't be tracked by instance variables? No. We're not making a mobile game, so we don't really care. If we want to pause any music we might be playing from the game when a user minimizes, then sure we want this hook, but also, I tend to do BGM as a function of the sound related code, not so much the individual scene, so this is once again going to likely sit in the Game runner code, and not the individual screens.
Surely, you say, dispose would make you reconsider this stupid tangeant?
I'm afraid not.
Note that thedispose()method of theGameScreenclass is not called automatically, see the Screen API. It is your responsibility to take care of that. You can call this method from thedispose()method of theGameclass, if theGameScreenclass passes a reference to itself to theGameclass or by callingscreen.dispose()inDropclassdispose()method. It is important to do this, elseGameScreenassets might persist and occupy memory even after exiting the application.
source
If you're still fighting me on this, asking "what about show and hide?"
Those hooks are called when the game class calls setScreen to or from the instance
of the screen. You might be thinking: oh well that's where screen transitions should go then!
No… A screen should update or render itself when we ask it to, if we're transitioning between
screens, and need something to happen onStart or onEnd then we can
codify that into our interface design for the game runner state machine.
So. Assuming you're still with me here that maybe we don't need a bunch of extra empty methods
laying around and we can shirk some LibGDX specific code here, then you might be asking: "Do you
even need a screen then?" To be honest. I'm not sure we do? Perhaps rather than the Game
class, I should have just extended ApplicationListener instead. All this really does
is shift the empty methods I noted above into the game runner class:
public class GameRunner implements ApplicationListener {
    @Override
    public void create() {}

    @Override
    public void resize(int width, int height) {}

    @Override
    public void render() {}

    @Override
    public void pause() {}

    @Override
    public void resume() {}

    @Override
    public void dispose() {}
}
And we can make our screen class completely empty:
public class BattleScreen {}
Though let's change that because an empty class does us no good as far as
managing these things. Let's have our new screen type, which I'm going to
call a Scene 3,
have three required methods:
package spare.peetseater.peng.scenes;

import com.badlogic.gdx.assets.AssetDescriptor;

import java.util.List;

public interface Scene {
    void update(float delta);
    void render(float delta);
    List<AssetDescriptor<?>> requiredAssets();
}
I am strongly considering tweaking the render method to take one more
parameter, but let's hold off on that for now. We're already getting ahead of ourselves,
so we don't want to take another step and trip over ourselves too. With our new
interface, let's make the BattleScreen become the BattleScene
and then wire it into the runner class. As per usual when getting ahead of ourselves,
I started writing down some things I felt I'd need first:
public class BattleScene implements Scene {

    int p1Score;
    int p2Score;

    enum Turn {
        Player1Turn,
        Player2Turn
    };
    Turn toServe;

    enum GameState {
        CountDown,
        Playing,
        Paused,
    }
    GameState currentState;

    BattleScene() {
        p1Score = p2Score = 0;
        toServe = MathUtils.randomBoolean() ? Turn.Player1Turn : Turn.Player2Turn;
        currentState = GameState.CountDown;
    }

    @Override
    public void update(float delta) {

    }

    @Override
    public void render(float delta) {
        ScreenUtils.clear(Color.LIGHT_GRAY);
    }

    @Override
    public List<AssetDescriptor<?>> requiredAssets() {
        return new LinkedList<>();
    }
}
This unfortunately got me into that sort of mood where you sit in front of your computer and scratch your chin repeatedly, beard stroking.
.jpg)
I layed myself down in bed, letting some music play and debated with myself about where this could or should go. For example, some of the raging tornado of thoughts and ideas included:
- An enum for game state might as well be an indicator that the states belong in a scene of their own
- If its in a seperate scene, will it show the score?
- What's the best way to share that score across scenes? Just dup it?
- Well, what about pausing, is that truly its own scene? Should it be?
- How will I swap scenes, should I do
game.changeScenetype things? - Should I consider a queue of events to feed the game runner instead?
- What would be a good way to pass those along? Pub sub? Mutable list passed along to
updatemethods? - What's not to say that serving the ball shouldn't be different scenes, that would be something huh...
- When playing the game, if I wanted the ball to squish, how would I keyframe that?
- If the direction of the ball influences the keyframe state, then perhaps I could mirror the animation to make it easy
- Wait, I don't even have a ball or paddle yet, should I make that class now?
- Do I want the collision logic to be in there or should I seperate and just have a util for the math
- I suppose I should have the asset manager set up though before I do any keyframing
- If I have a seperate renderer class I could unit test the actual scenes and their behavior
- Unit testing is nice, but am I going to actually get around to that, I mean, do we need it, it's pong
- Pong's pretty easy, it really shouldn't take much effort to get the prototype going
- I should get the scene setup, I should look at my code again to remember where I was going to go
.jpg)
I'm over-engineering my planned over-engineering!
I thought about cutting this bit out. But, like in previous game dev blog posts, I'm leaving it in, just like I would a refactoring step because I think it's valuable to any one reading to see how inane and silly this spiral of thoughts is. We're not being productive here, we're just getting lose in thought and not making any forward progress. When your thoughts aren't directed and motivated by actual progress on the goal, they're not worth pursuing. So. With that said. Let's discard the notion of most of what I have and reduce our coding sauce to a fine wine of "hey it works" baby steps.
First off. We're keeping the stack scene idea, so let's set that up in the game runner:
Stack<Scene> scenes;
@Override
public void create() {
    Scene scene = new BattleScene();
    scenes = new Stack<>();
    scenes.push(scene);
}

@Override
public void render() {
    float delta = Gdx.graphics.getDeltaTime();
    scenes.peek().update(delta);
    scenes.peek().render(delta);
}
...
We're lacking the reason why we want to use a stack yet, but that's okay for now. We're stepping back from the thought spiral of before and concentrating on the task in front of us. Therefore, let's add some very basic rendering to prove out that yes indeed, it's working:
public class BattleScene implements Scene {

    private final BitmapFont temporaryFont;
    private final SpriteBatch temporaryBatch;
    int p1Score;
    int p2Score;

    public BattleScene() {
        p1Score = p2Score = 0;
        temporaryFont = new BitmapFont();
        temporaryBatch = new SpriteBatch();
    }

    @Override
    public void update(float delta) {
        p1Score += 1;
        p2Score -= 1;
    }

    @Override
    public void render(float delta) {
        ScreenUtils.clear(Color.LIGHT_GRAY);
        temporaryBatch.begin();
        temporaryFont.draw(
            temporaryBatch,
            String.format("%d | %d\n", p1Score, p2Score),
            0f, Gdx.graphics.getHeight() - temporaryFont.getLineHeight(),
            Gdx.graphics.getWidth(),
            Align.center,
            false
        );
        temporaryBatch.end();
    }
    ...
}
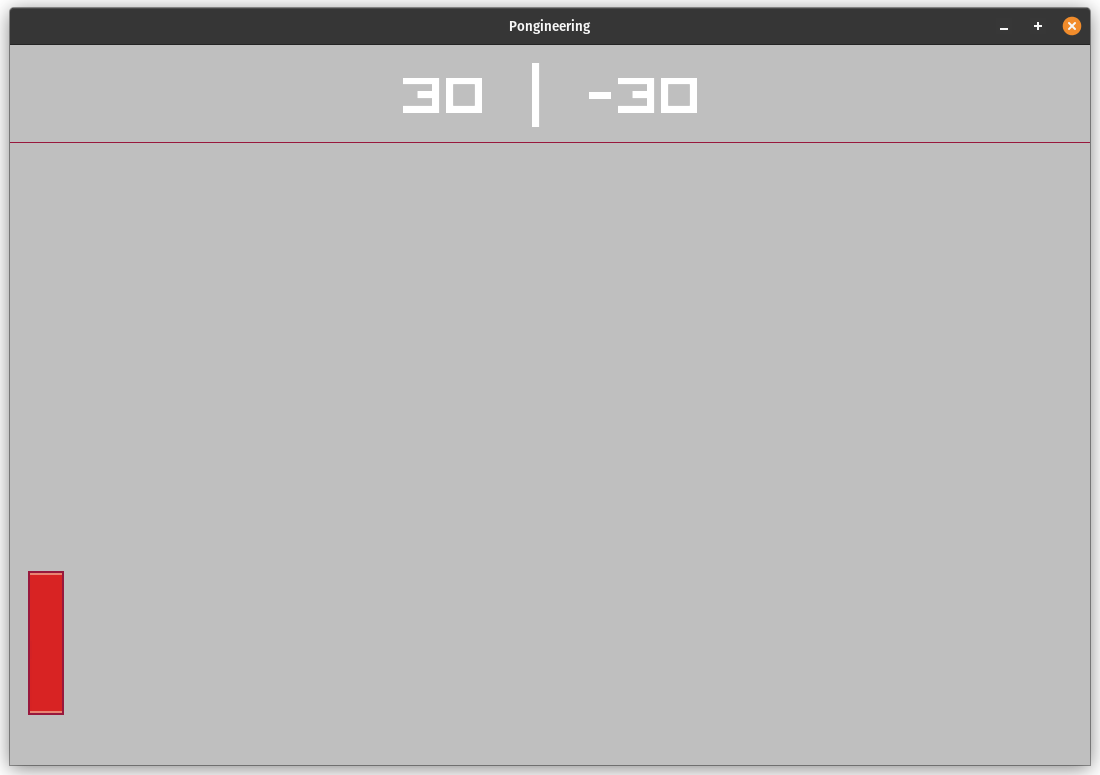
Temporarily, I'm creating the font and batch inside of our scene because I don't have the asset manager loading anything up, Yet. But just by doing this little bit of work I've broken myself out of the spiral of thoughts and now have a jumping point for my thoughts to be more directed:
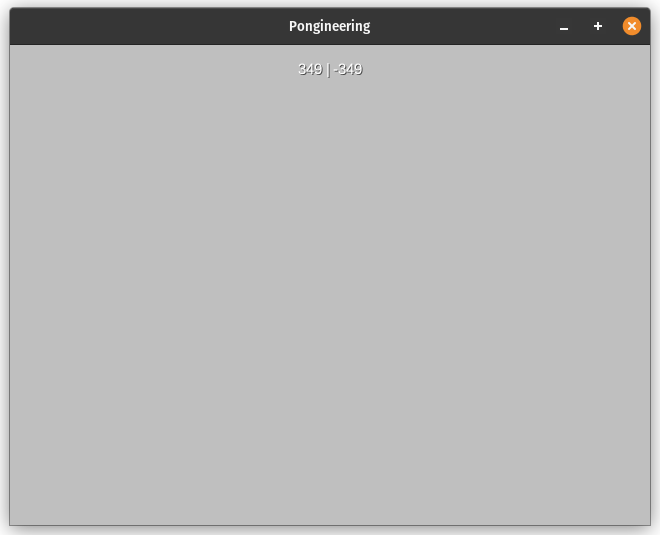
I didn't capture a video but as you can see, the scores are counter balancing themselves nicely. We now have two branches of progress to proceed down:
- Add the paddles and move them around
- Load a font asset
Unless we use my little trick of creating block textures to create assets on the fly, both of the above paths will require us to get the asset manager working since we need to have something to show for the paddle. I would normally do that because I really suck at "art" in case my previous game didn't showcase that, but since paddles are literally just a block… I think I can handle making the asset pretty quickly without getting too distracted.
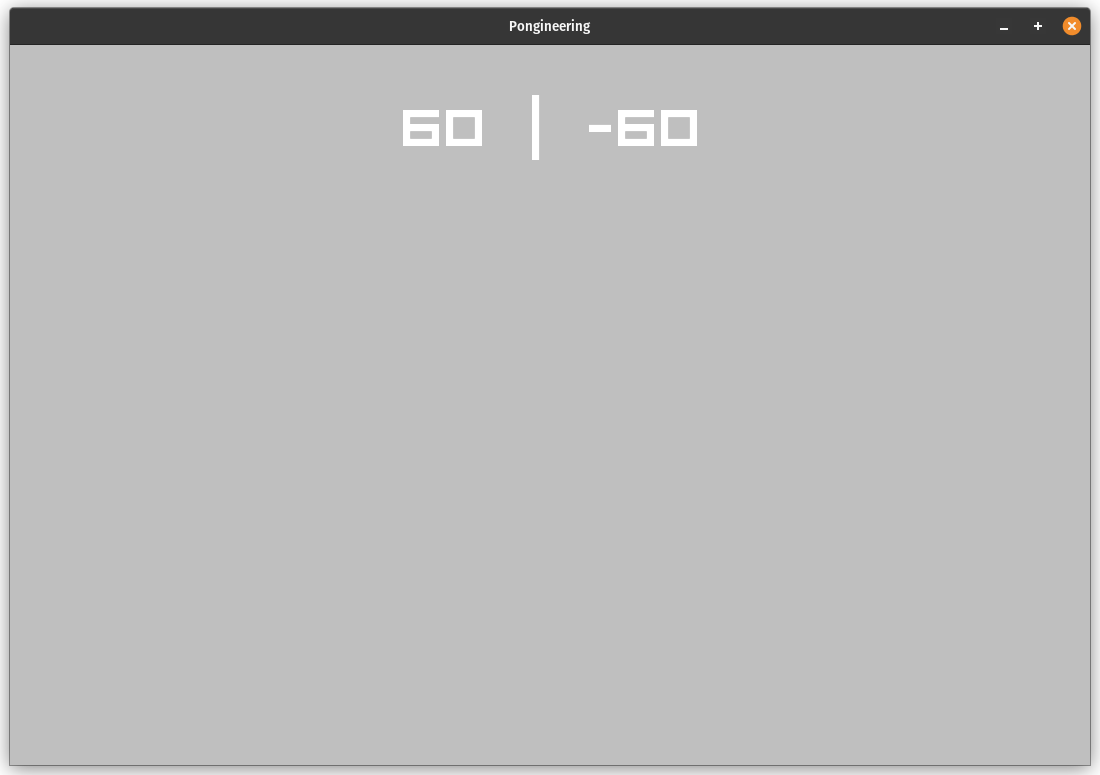
Before that though, let's refactor the "temporary" stuff I had in the scene one level
up and go from there, and before that let's make the screen a little bit
bigger by tweaking the configuration in the Lwjgl3Launcher class that's
in the lwjgl3 folder.
configuration.setWindowedMode(1080, 720);
While the smaller window wasn't really bad, I want a bit more space today, and 1080 feels like a good size for what I'm envisioning in my head. Since we'll need to use these values in some of the calculations relating to the fonts, we can move that to a constants file:
package spare.peetseater.peng;

public class Constants {
    public static final int VIRTUAL_WIDTH = 1080;
    public static final int VIRTUAL_HEIGHT = 720;
}
In order to handle when users resize the viewport, we need a camera which will
keep all the math we're doing sane and as if the world is always 1080x720 and not
whatever the user has dragged it around to be. In the create method of our
GameRunner code we can set those up:
public Batch batch;
OrthographicCamera camera;
FitViewport viewport;

@Override
public void create() {
    batch = new SpriteBatch();
    camera = new OrthographicCamera();
    viewport = new FitViewport(VIRTUAL_WIDTH, VIRTUAL_HEIGHT, camera);
    camera.setToOrtho(false);
    camera.update();

    ...
}
And before we call the current scene's render methods we can use them:
@Override
public void render() {
    camera.update();
    batch.setProjectionMatrix(camera.combined);

    float delta = Gdx.graphics.getDeltaTime();
    scenes.peek().update(delta);

    batch.begin();
    scenes.peek().render(delta);
    batch.end();
}
You might wonder why I'm bothering to do this as part of the setup. When I
made the nyappy bird game, I ran into a 10 minutes debugging session of
trying to figure out why one screen rendered super tiny, but another screen
rendered correctly. The confusing thing was that if I swapped the order of the
screens and loaded them, it would all suddenly scale and appear properly. The
culprit? I had forgetten to call setProjectionMatrix in one of
the screens. It bit me, and so I'm making sure we don't get bit this time by
setting up our code so that we'll only ever need to call it in one place.
To replace the temporaryBatch from our scene, we need to make
our newly created sprite batch from the GameRunner available
to the scene. I'm still not sold on an idea I have yet about a seperate
renderer class, so for now let's just pass it down into the scene like I
did in the last game. Note that since I'm now calling batch.begin
in the game runner, I don't have to do so in the scene's render method 4
private final GameRunner gameRunner;
...
public BattleScene(GameRunner gameRunner) {
    this.gameRunner = gameRunner;
    p1Score = p2Score = 0;
    temporaryFont = new BitmapFont();
    ...
}

public void render(float delta) {
    ScreenUtils.clear(Color.LIGHT_GRAY);
    temporaryFont.draw(
        gameRunner.batch,
        String.format("%d | %d\n", p1Score, p2Score),
        0f, Gdx.graphics.getHeight() - temporaryFont.getLineHeight(),
        Gdx.graphics.getWidth(),
        Align.center,
        false
    );
}
That's simple enough. But I still have a temporaryFont in place
that I want to get rid of. So let's construct our way of managing assets now
and then we'll move on to actually implementing parts of the game and not just
all this setup code.
Something I thought worked well in the match 3 game was an asset class that
centralized where the assets should load from and had an easy way to enqueue
the assets into the asset manager for a given scene. Fonts are always a pain
in the butt, and having to remember to set their scale based on the viewport
is an easy bug. So a quick and simple way to define fonts and load them up,
outside of the scene they'll be used in, pays off quite a bit on the mental
overhead. In the match 3 game I called this Match3Assets and in
our pong game I'll just call it:
public class GameAssets {
    private final AssetManager assetManager;

    public GameAssets() {
        assetManager = new AssetManager();
        Texture.setAssetManager(assetManager);
        FileHandleResolver resolver = assetManager.getFileHandleResolver();
        assetManager.setLoader(FreeTypeFontGenerator.class, new FreeTypeFontGeneratorLoader(resolver));
        assetManager.setLoader(BitmapFont.class, ".ttf", new FreetypeFontLoader(resolver));
   }
the GameAssets class is going to be a relatively thin wrapper
around the asset manager, which we'll keep private for now, and which we'll
setup font loading via helper methods
public static AssetDescriptor<BitmapFont> visitorFontDescriptor(int sizeInPixels, String key) {
    FreetypeFontLoader.FreeTypeFontLoaderParameter params = new FreetypeFontLoader.FreeTypeFontLoaderParameter();
    params.fontFileName = "visitor/visitor1.ttf";
    params.fontParameters.size = sizeInPixels;
    return new AssetDescriptor<>(key, BitmapFont.class, params);
}

public BitmapFont getFont(AssetDescriptor<BitmapFont> key) {
    BitmapFont font;
    if (!assetManager.isLoaded(key)) {
        Gdx.app.log("ASSETS", String.format("Failed to load key %s", key.toString()));
        font = new BitmapFont();
    } else {
        font = assetManager.get(key);
    }
    font.setUseIntegerPositions(false);
    font.getData().setScale(
        (float) VIRTUAL_WIDTH / Gdx.graphics.getWidth(),
        (float) VIRTUAL_HEIGHT / Gdx.graphics.getHeight()
    );
    return font;
}
I'm going to re-use the font I used from Nyappy Bird, the Visitor font created by Brian Kent because it's got a good retro gaming feel to it:
The code we just added is pretty close to what libgdx has for loading up true type fonts, just slightly adapted to set the font scale so that we don't see any weirdness from world coordinates and such. If we want to use a different font at some point, we can add in a new descriptor function. For now though, if I want to use it I can do so like so:
public static final String SCORE_FONT_KEY = "scorefont.ttf";
public static final AssetDescriptor<BitmapFont> scoreFont = visitorFontDescriptor(72, SCORE_FONT_KEY);
You'll notice that the font key doesn't have to match the actual name of the font, we can work in words that make sense to our game's domain 5. Which is nice! That said, the asset class isn't that useful if it doesn't let us queue up resources without having to break its encapsulation. So, we can take advantage of the fact that I thought ahead and write this handy scene loading code:
public void queueScene(Scene scene) {
    for (AssetDescriptor<?> assetDescriptor : scene.requiredAssets()) {
        assetManager.load(assetDescriptor);
    }
}

public void blockingLoad() {
    assetManager.finishLoading();
}
You'll remember that the interface for Scene included a requested assets
function. This is why we put that in place. That way, each scene can easily define
the assets it cares about, like so:
List<AssetDescriptor<?>> assets;

public BattleScene(GameRunner gameRunner) {
    ...
    assets = new LinkedList<>();
    assets.add(GameAssets.scoreFont);
}
@Override
public List<AssetDescriptor<?>> requiredAssets() {
    return assets;
}
Having done this, the GameRunner can then ensure that we load all
the assets the scene might need before we ever try to render it. This
means that we won't run into any asset loading exceptions, so long as we remember
to keep our scene list up to date! We don't actually have the code written to
throw up a loading screen while we asynchronously load assets and whatnot, but
we can hold off on that for when we want more than one screen. For now, in our
GameRunner we can just do this:
Scene scene = new BattleScene(this);
assets = new GameAssets();
assets.queueScene(scene);

// Force the first scene to load all its assets right away
assets.blockingLoad();

scenes = new Stack<>();
scenes.push(scene);
Then our goal of removing the temporaryFont can be realized
by using the asset manager to get the font within the scene's render
function:
@Override
public void render(float delta) {
    ScreenUtils.clear(Color.LIGHT_GRAY);
    BitmapFont font = gameRunner.assets.getFont(GameAssets.scoreFont);
    font.draw(
        gameRunner.batch,
        String.format("%d | %d\n", p1Score, p2Score),
        0f, Gdx.graphics.getHeight() - font.getLineHeight(),
        Gdx.graphics.getWidth(),
        Align.center,
        false
    );
}
I know we're bouncing back and forth between the two classes, which maybe might be a little bothersome to follow. But I'm hoping that by walking through the thought process for how these things effect each other, that it was clear enough. Most importantly, we now have a framework for how to get assets loaded for a scene and how a scene can request them for usage. So we can move along to the meat of the game!
Paddles and balls ↩
Pong needs two things. A ball to bounce back and forth, and the paddle to hit it with. I don't plan on straying away from the idea of 2 player pong 6 and I also suck at art. So two colors will do the trick. How about red vs blue? I can whip up a couple paddles with two tones, yeah?
Our game area is 720 units tall, and I'm not actually sure if there are "official" measurements for this sort of thing. Which inspired me to take a look on the wikipedia page and I saw some useful tips:
He divided the paddle into eight segments to change the ball's angle of return. For example, the center segments return the ball at a 90° angle in relation to the paddle, while the outer segments return the ball at smaller angles. He also made the ball accelerate the longer it remained in play; missing the ball reset the speed.
Eight segments huh? Well, 8 times 9 is 72, so I could see what a 10% pong paddle looks like on the board to see if it's any good. Since the width is 1080, I'll just follow my heart and see if 18 pixels wide is a good size as well:
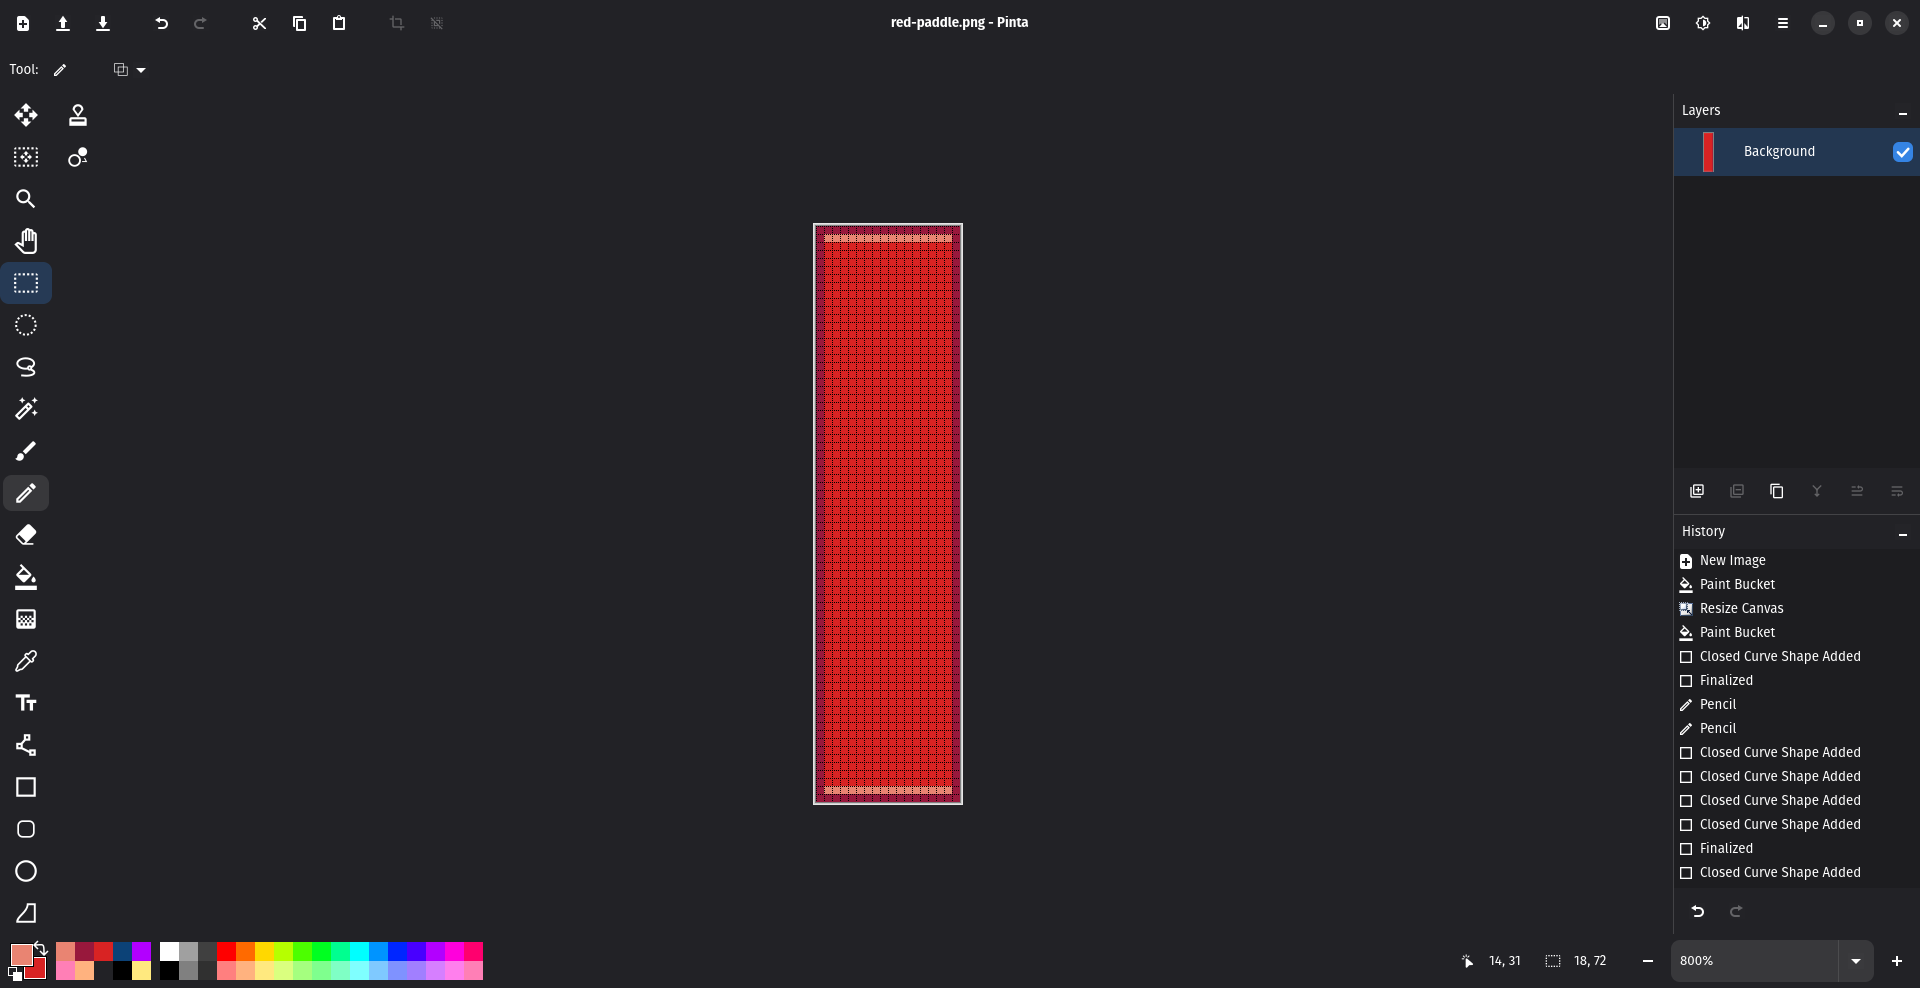
I used #e98472,#d82323, and #98183c since they were a pretty nice way to make it look a bit better than just a single red rectangle and I think it'd be neat to maybe add cracks to the paddle as the scores increase or something, like battle damage! But more importantly, does it look good rendered into the game? Setting up the asset means I need a helper for texture types:
public static final String RED_PADDLE_FILE = "red-paddle.png";
public static final AssetDescriptor<Texture> redPaddle = new AssetDescriptor<>(RED_PADDLE_FILE, Texture.class);

public Texture getTexture(AssetDescriptor<Texture> assetDescriptor) {
    if (!assetManager.isLoaded(assetDescriptor)) {
        String reason = String.format("Could not load texture asset %s. Is the scene misconfigured?", assetDescriptor.toString());
        Gdx.app.log(getClass().getSimpleName(), reason);
        throw new RuntimeException(String.format("THE DEV IS AN IDIOT: %s", reason));
    }
    return assetManager.get(assetDescriptor);
}
And then I can declare that the scene will use it and update the render code to draw it onto the board
... in the constructor ...
assets = new LinkedList<>();
assets.add(GameAssets.scoreFont);
assets.add(GameAssets.redPaddle);

... in the render ...
Texture p1 = gameRunner.assets.getTexture(GameAssets.redPaddle);
gameRunner.batch.draw(p1, 0, Gdx.graphics.getHeight() - font.getLineHeight() * 1.5f, Gdx.graphics.getWidth(), 1);
gameRunner.batch.draw(p1, 18, 50, 18 * 1, 72 * 1);
The * 1 is in the code because I was checking to see if I liked the idea of * 2 for each
or not:

I don't. So I'll be sticking with my initial size. I remember in the past as a kid, playing a break-out game on windows 98 that had power ups that made your pong paddle get bigger, or double up and mirror your movements on a second place… it was a lot of fun, but we'll have to save those ideas for the next game. 7
For now, I can make a second paddle in pinta and load up it up into the game in the same sort of way. This time with the colors #26dddd, #1867a0, and #6a5fa0
assets.add(GameAssets.bluePaddle);
...
Texture p2 = gameRunner.assets.getTexture(GameAssets.bluePaddle);
gameRunner.batch.draw(p2, Gdx.graphics.getWidth() - 18 - 18, 150, 18, 72);
The - 18 - 18 looks odd, and we'll stop hard coding numbers into place in a moment,
but right now we're just interested in getting a feel for if the sprite is good or not. I think
it's alright, like I said before, I might add some amusing polish onto it in a little bit, but
we need to make the ball too. But… should the "ball" be a ball? Or a square? The classic pong
just wrote out pixels, I'm not 100% sure on the screen resolution, but I did have pong on the
atari back in the day, and I distinctly remember it being… chunky. So let's stick with
that idea. Since one player is red, and the other is blue, I'll make the ball a mix!

And there's not much to write about as far as the rendering code beyond the fact that we're about to rewrite a bunch of it. But for now, it's the same sort of thing:
... constructor ...
assets.add(GameAssets.ball);

... render ...
Texture ball = gameRunner.assets.getTexture(GameAssets.ball);
gameRunner.batch.draw(ball, Gdx.graphics.getWidth() / 2f, 500, 18, 18);
We basically have everything we need to finish the prototype of the game as far as assets are concerned. We could certainly add in a few others here or there I suspect, but for the time being, I think this will be okay. So, let's move on from mocking out how the assets will look in play, and actually get them moving!
I don't want to track a bunch of x,y and width variables inside of the scene as that
will likely lead to hard to follow code as we add more interesting bits of polish onto
it. So instead, we'll make a nice little Paddle class:
package spare.peetseater.peng.objects;

import static spare.peetseater.peng.Constants.VIRTUAL_HEIGHT;

public class Paddle {
    float x;
    float y;
    public static final float WIDTH = 18f;
    public static final float HEIGHT = 72f;
    private final float speed = VIRTUAL_HEIGHT; // 1 screen height per second

    public Paddle(float startX, float startY) {
        this.x = startX;
        this.y = startY;
    }

    public void moveUp(float delta) {
        float yShift = speed * delta;
        y += yShift;
        if (y + HEIGHT > VIRTUAL_HEIGHT) {
            y = VIRTUAL_HEIGHT - HEIGHT;
        }
    }

    public void moveDown(float delta) {
        float yShift = speed * delta;
        y -= yShift;
        if (y < 0) {
            y = 0;
        }
    }
    ... getter/setters ...
}
We'll be adding more to this once we do the ball to, but for now, we can construct a couple paddles over in the scene and tweak our render code to use it:
Paddle red;
Paddle blue;
...

public BattleScene(GameRunner gameRunner) {
    ...
    red = new Paddle(18, VIRTUAL_HEIGHT / 2f);
    blue = new Paddle(VIRTUAL_WIDTH - Paddle.WIDTH * 2, VIRTUAL_HEIGHT / 2f);
}
...
public void render(float delta) {
    Texture redTexture = gameRunner.assets.getTexture(GameAssets.redPaddle);
    Texture blueTexture = gameRunner.assets.getTexture(GameAssets.bluePaddle);
    ...
    gameRunner.batch.draw(redTexture, red.getX(), red.getY(), Paddle.WIDTH, Paddle.HEIGHT);
    gameRunner.batch.draw(blueTexture, blue.getX(), blue.getY(), Paddle.WIDTH, Paddle.HEIGHT);
}
Now this doesn't actually change anything about the behavior of our current code. But we can now tweak our update function to add in the simplest form of input handling:
public void update(float delta) {
    p1Score += 1;
    p2Score -= 1;
    if (Gdx.input.isKeyPressed(Input.Keys.W)) {
        red.moveUp(delta);
    }
    if (Gdx.input.isKeyPressed(Input.Keys.S)) {
        red.moveDown(delta);
    }
    if (Gdx.input.isKeyPressed(Input.Keys.UP)) {
        blue.moveUp(delta);
    }
    if (Gdx.input.isKeyPressed(Input.Keys.DOWN)) {
        blue.moveDown(delta);
    }
}
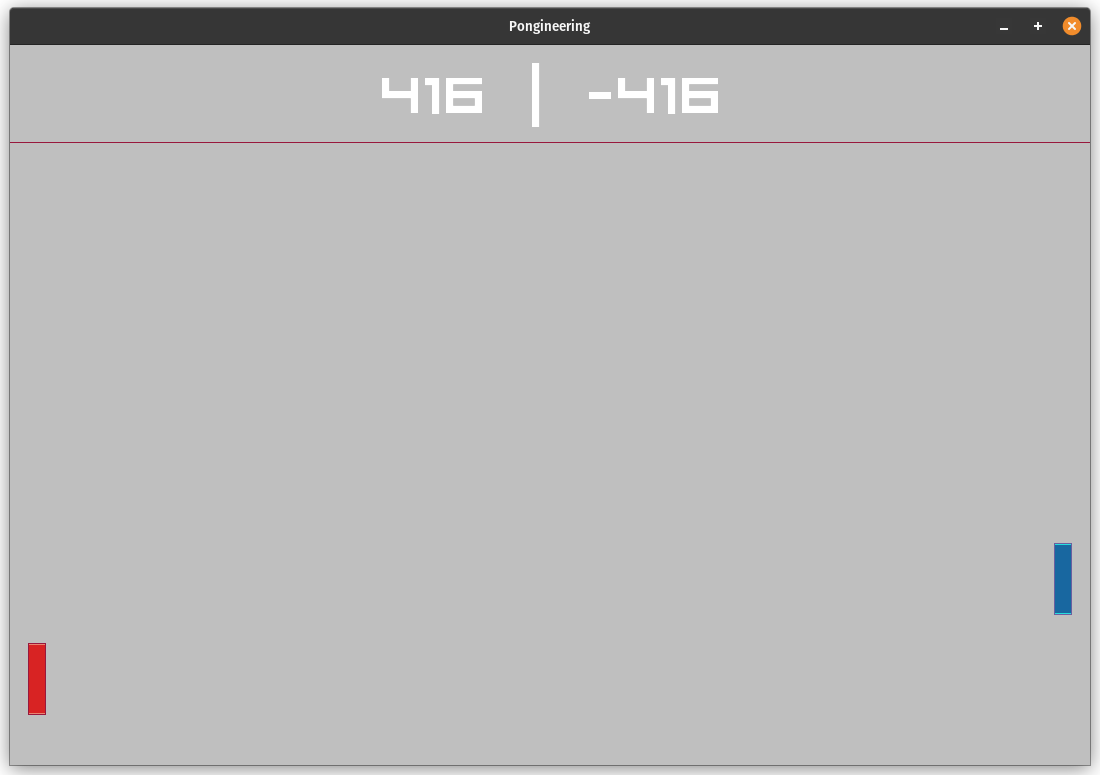
We'll assign the left side of the keyboard to the left paddle, and the right hand side to the right paddle. We'll want to tweak this later for sure, (when we add AI) but for the simplest proof of concept, this works well enough:
We'll see if being able to move the length of the screen in a single second is too fast or not after we get the ball moving. Speaking of, let's do that now. Same as before, let's not pollute the scene with code tracking the particulars of the ball and instead have it track a ball class:
public class Ball {
    public final static float RADIUS = 9f;
    public final static float CIRCUMFERENCE = RADIUS * 2f;
    public final static float INITIAL_SPEED = VIRTUAL_WIDTH;
    private float x;
    private float y;

    public Ball(float startX, float startY) {
        this.x = startX;
        this.y = startY;
    }

    public float getAnchorX() {
        return x - RADIUS;
    }
    public float getAnchorY() {
        return y - RADIUS;
    }

}
I want to track the ball by its centerpoint, so I've added some helpers to get the
bottom left X and Y coordinates since when we render with LibGDX we need those as
well as the full width of the ball. While the ball is a rectangle. I'm going
to pretend its a circle so I'll be using the term CIRCUMFERENCE rather
than width. We'll see if I regret that later.
Anyway, you might be asking why do I want to track the ball by its centerpoint. Well, I was thinking about the way that a ball might squish a bit as it hits something and then rebounds. It sounds like it'd be kind of tricky to figure out, but if I track the centerpoint and then ensure that the draw order always draws the ball beneath the paddles, then we can do the bounce based on the center and for a moment it might seem like the ball is squishing in.
It might also look really stupid and bad. In order to figure out, we'll need to actually program in the collision between paddle and ball, as well as the movement vectors for how the ball is supposed to move.
Collision code ↩
I think it's easy to waffle back and forth on whomst should be intersecting with whom
and get caught up n those thoughts when it comes to the abstractions around this sort
of thing. So. Let's toss those thoughts mostly outside and just start making a mess in the
BattleScene class. We don't actually have most of these methods
yet, but roughly speaking, we want to logically do this:
if (red.intersects(ball)) {
    // bounce ball off red
}
if (blue.intersects(ball)) {
    // bound ball off blue
}
if (top.intersects(ball) || bottom.intersects(ball)) {
    // bounce ball off non scoring walls
}
if (ball.toTheLeftOf(red)) {
    // Score a point for blue.
}
if (ball.toTheRightOf(blue)) {
    // Score a point for red
}
The red highlights are code we haven't written yet. And well, obviously, the comments are also code we need to write. As you can see, we've got our work cut out for us, but at least we have a todo list of sorts to tackle rather than a spiral thought swirl of sadness to drown in. The first 2 bits are easy:
public boolean intersects(Ball ball) {
    // For the time being, proper square check
    float pLeftX = ball.getAnchorX();
    float pLeftY = ball.getAnchorY();
    float pRightX = pLeftX + Ball.CIRCUMFERENCE;
    float pRightY = pLeftY + Ball.CIRCUMFERENCE;

    boolean overlapsXProjection = pRightX >= x && (x + WIDTH) >= pLeftX;
    boolean overlapsYProjection = pRightY >= y && (y + HEIGHT) >= pLeftY;
    return overlapsXProjection && overlapsYProjection;
}
This is the same code (ever so slightly modified) from our nyappy blog post from a few weeks ago. I think it's worth repeating the explanation about the projections though so that the words I'm using in my variables above make sense.
A projection from a 2d plane (the box) to the 1d plane (the axis lines) can be used to figure out if something intersects. A box in 2d space intersects with another box in 2d space if both of their projections into those 2 axes also intersect. A 1 dimensional projection is easy to see that something is intersecting or not because the start and end range overlap. Like the green and blue you see in the example above.
That was a bit of an abbreviation, but you can either read the other blog post if you want more explanatory text, or you can read this stack overflow post that explains the concepts as well. The important thing for our game though, is that we can now use the fact that we can test intersection of paddles and balls and then do something based on that. Specifically, we can bounce the ball back the other direction it's going.
if (red.intersects(ball)) {
    ball.bounceOffOf(red);
}
if (blue.intersects(ball)) {
    ball.bounceOffOf(blue);
}
So following our broken code, we can then implement the idea that we should bounce off of a given paddle at some angle, and that's going to tweak our velocity vector in the appropriate way. We'll hold off on adjusting the speed as we play for now, but I'll leave a note to do it later.
public void bounceOffOf(Paddle blue) {
    // TODO: add speed multiplier
    float radians =  blue.getBounceAngle(ball);
    float dx = MathUtils.cos(radians);
    float dy = MathUtils.sin(radians);
    v.x = dx * INITIAL_SPEED;
    v.y = dy * INITIAL_SPEED;
}
As a quoted at the start of the paddles and ball sections, there's a suggestion in the wikipedia article that the different segments of the paddle should result in a different angle. Once we have that angle, then we can easily get the X and Y component of that via some trig functions. Since those results are just on the unit circle, we can multiple those values by the speed magnitude we defined before and that should give us what we need.
Now, about the missing function determining the radians. We planned out the size of the paddle with 8 segments in mind, and so I'll do something similar as what was noted in wikipedia and have the two center segments reflect the ball at 90 degrees from the paddle. Importantly, we'll need to take into account the side that the ball is on so that we produce the correct angle. For example, if you hit the paddle from the left, you should bounce off to the right, and vice versa.
So, I poorly coded up a first attempt:
// eh... not quite....
public float getBounceAngle(Ball ball) {
    float segmentSize = HEIGHT / 8f;
    // use center point for bounce determination!
    float yTouchPoint = ball.getAnchorY() + Ball.RADIUS;
    int segmentToBounceOffOf = 0;
    for (int i = 0; i < segmentSize; i++) {
        boolean withinSegment = (
            y + i * segmentSize <= yTouchPoint
        ) && (
            yTouchPoint < (y + (i + 1) * segmentSize)
        );
        if (withinSegment) {
            segmentToBounceOffOf = i;
            break;
        }
    }
    // [15, 30, 60, 90, 90, 60, 30, 15] are the angles
    // assuming we have 8 segments. But how would we
    // generalize? If we have 9? [15,30,60,75,90,90,75,60,30,15]?
    // Perhaps we define a bell curve that peaks at 90?
    // We can use cos? where cos 1 = 90 and we span from -2 to 2 ?
    float radians = MathUtils.cos(segmentToBounceOffOf + 2);

    // Last, determine the sign based on if the ball is to the left or right
    boolean paddleToTheLeft = x <= ball.getAnchorX() + Ball.RADIUS;
    return (paddleToTheLeft ? 1 : -1) * Math.abs(radians);
}
This uh. This wasn't quite right:
While I'm testing and don't have the scoring mechanism and ball reset setup, I'm just having the ball wrap around the screen, which is why you see it doing that. If you watch closely, when the ball actually manages to hit a paddle, some stuff does happen. But uh, not anything you'd expect from what I've been talking about so far.
So let's think about this a bit. My comments are suggestive here about where I want to go and what I actually want to do. I'm thinking that it should be possible to define a curve and normalize the y values of the paddle and ball in order to figure out which angle is mapped to where on the curve. Something like this:
Though maybe a bit more bulbuous or quicker shifting. Either way, I think that we can probably use cosine for this. So, I found a page online that refreshed my memory about how to control the curve of that line here on mathisfun and got to fiddling. 8
So that you don't have to search for it, and so I have it as a reference somewhere I can find without having to get an 2 minutes hate feeling, here are the ways to control cosine that we care about:
- Modifying the period will make the peaks of the wave further or close together (x)
- Modifying the amplitude will increase the height of the waves (y)
- Phase shifting moves the entire wave horizontally from its normal position +x
- Vertical shift does the same as phase shift, but in the vertical direction +y
So, We want to phase shift the wave so that 0 lines up with 0 and the period lines up with the length of the paddle. Then we want the amplitude to be a maximum of 90 degrees (or the equal in radians), and we want to ensure that the vertical shift lines up the center of the paddle with that maximum. As variables, the equation to handle amplitude, period, phase and vertical shift is:
y = A cos( ( ( 2 * pi ) / B )(x + C)) + D
So. Then we want 0 to be 0, we should just use sin rather than cosine since
it starts at 0. To shift the 2nd time it gets to 0 to be the height of the paddle, we'll
tweak our equation to be:
y = A sin (( pi / HEIGHT ) (x + C) ) + D
Since we're just going off the unit circle, C and D can both be 0, so we should be able to use:
y = A sin( ( pi / HEIGHT ) ( x ) )
I suppose we could use the phase shift or vertical shift to be based on the paddle location in order to flip the angle appropriately. After all, the function will return an angle that would be correct for that sort of thing if we do it right. In that case, I think we'd just shift it by 1 PI in radians? Let's get back to code and out of formula land to see if our heads in the right space:
public float getBounceAngle(Ball ball) {
    // use center point for bounce determination!
    float yTouchPoint = ball.getAnchorY() + Ball.RADIUS;
    float normalizedBallY = Math.min(0, yTouchPoint - y);

    boolean paddleToTheLeft = x <= ball.getAnchorX() + Ball.RADIUS;
    float amplitude = MathUtils.degreesToRadians * 90;
    float shift = paddleToTheLeft ? 0 : MathUtils.PI;

    return amplitude * MathUtils.sin(MathUtils.PI/HEIGHT * normalizedBallY) + shift;
}
We've got a little bit of bugginess to figure out, but it's a lot better looking than what we had before! To get to the bottom of this, I think it's time we introduce some unit testing into place. Since we now know what values we expect to get back with our formula, we should be able to figure out if we've got something wrong going on in the bounce angle method, or if it's just the fact that we're wrapping things around and not handling a score reset yet.
Adding JUnit to LibGDX always seems way harder than it should be and I don't really
know why. I tried to refer back to the method I did in the match 3 blogpost, but
quickly found that the gradle project had changed structure enough that I quickly
found myself feeling lost. I ended up added in the dependencies twice, which feels
wrong, but considering I just want the dang thing to run the test without a class
loader error, I'll take it. I updated the root build file with a new configure
block:
configure(":core") {
  apply plugin: 'java-library'
  repositories {
    mavenCentral()
  }
  dependencies {
    testImplementation('org.junit.jupiter:junit-jupiter-api:5.10.0')
    testRuntimeOnly('org.junit.jupiter:junit-jupiter-engine:5.10.0')
  }
   test {
    useJUnitPlatform()
    testLogging {
      events "passed", "skipped", "failed"
    }
  }

  sourceSets.test.java.srcDirs = [ "test/" ]
}
And then the core/build.gradle file with a pretty similar set:
repositories {
    mavenCentral()
}

dependencies {
  testImplementation('org.junit.jupiter:junit-jupiter-api:5.10.0')
  testRuntimeOnly('org.junit.jupiter:junit-jupiter-engine:5.10.0')
}

test {
  useJUnitPlatform()
  testLogging {
    events "passed", "skipped", "failed"
  }
}
Then created a simple test in the test directory under the appropriate package structure:
package spare.peetseater.peng.objects;

import com.badlogic.gdx.math.MathUtils;
import org.junit.jupiter.api.Test;

import static org.junit.jupiter.api.Assertions.*;

class PaddleTest {
    @Test
    void test90DegreesLeftPaddle() {
        Paddle left = new Paddle(0,0);
        Ball ball = new Ball(0, Paddle.HEIGHT/2);
        float radians = left.getBounceAngle(ball);
        assertEquals(MathUtils.degreesToRadians * 90, radians);
    }
}
This failed! The radians being returned was 0! So I stepped through and noticed
that normalizedBallY was becoming 0. Upon closer inspection I realized
I had screwed up the Math call to do min rather than max.
Wups! How embarassing, I even had put a comment on that line about not going
negative, noting to myself what I had wanted. 9
public float getBounceAngle(Ball ball) {
    ...
    float normalizedBallY = Math.max(0, yTouchPoint - y);
    ...
}
Ok, that works. What about the right paddle?
@Test
void test90DegreesRightPaddle() {
    Paddle right = new Paddle(100, 0);
    Ball ball = new Ball(100 - Ball.RADIUS, Paddle.HEIGHT/2);
    float radians = right.getBounceAngle(ball);
    assertEquals(MathUtils.degreesToRadians * 270, radians);
}
This passed too! That's great! So when the ball is perfectly lined up with the center, you get a straight shot. Cool. What about some other placement though? checking the paddles at y=0 won't exercise the code that's trying to normalize the y values. I was thinking that it would make sense to have 15 degrees be the limits so that we don't just send a ball straight down. But I'm pretty sure our current equation is wrong. I can confirm that:
@Test
void test15DegreesLeftPaddleAt0() {
    Paddle left = new Paddle(10,60);
    Ball ball = new Ball(10, 60);
    float radians = left.getBounceAngle(ball);
    assertEquals(MathUtils.degreesToRadians * 15, radians);
}

@Test
void test15DegreesRightPaddleAt0() {
    Paddle right = new Paddle(100, 100);
    Ball ball = new Ball(100 - Ball.CIRCUMFERENCE, 100);
    float radians = right.getBounceAngle(ball);
    assertEquals(MathUtils.degreesToRadians * 270, radians);
}
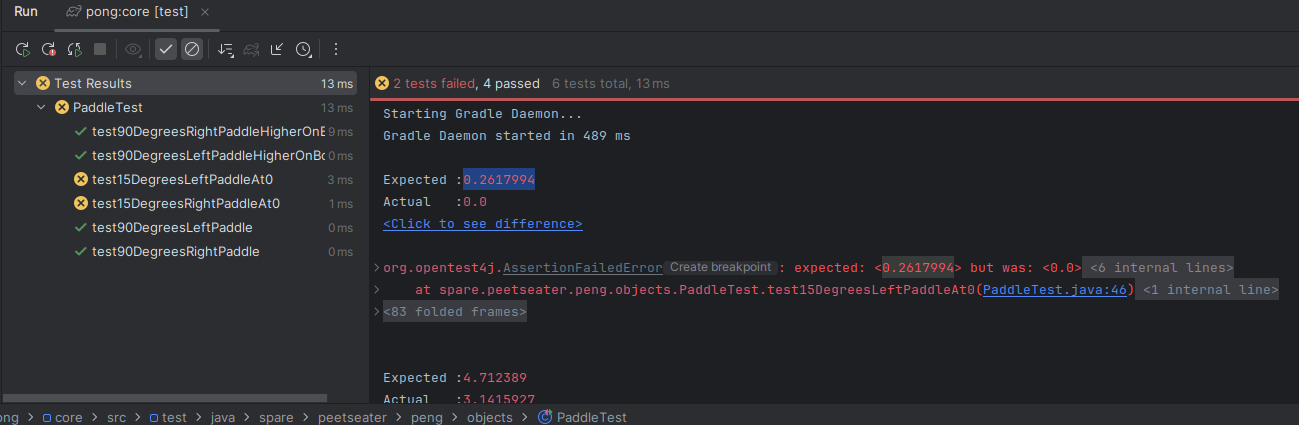
Yup. Ok, so, we need to shift the 0 to be 15, while also maintaining the 90 amplitude. This sounds a lot like we reduce the overall amplitude and phase shift vertically! I attempted to tweak this, then printed out some points to check that things seemed relatively correct:
boolean paddleToTheLeft = x <= ball.getAnchorX() + Ball.RADIUS;
float amplitude = MathUtils.degreesToRadians * (90 - 15);
float shift = (paddleToTheLeft ? 0 : MathUtils.PI) + MathUtils.degreesToRadians * 15;
float radians = amplitude * MathUtils.sin(MathUtils.PI/HEIGHT * normalizedBallY) + shift;
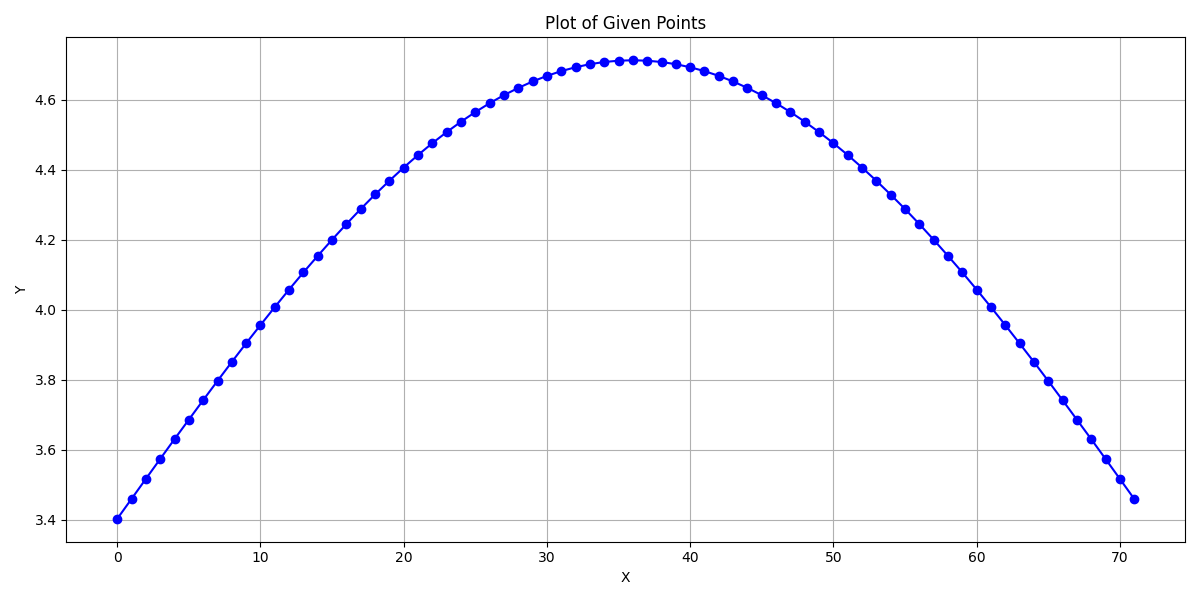
That seems curvey! The peak point (at 36) is 4.712389 radians which is 270°, and the 0 and 72 input results in 3.403392 radians (195°). I produced these values from the left paddle, so... is that right? It doesn't sound right. Playing the game:
No? What's up with that weird sliding? Man, I thought life would be easier if I used a bit of math to define these rather than the segment based approach I tried first. But the more I stare at the formulas the more I queston my life choices and feel the spiral of "Wow you're really stupid aren't you, huh? You can't do anything right, can you? Amazing how you have no friends, wait, no it's not, you're a massive failure, can't even get a ball to bounce. Idiot!"

Let's take a step back. I think I'm getting lost looking at pictures of unit circles and getting confused by the circle's x,y assignments versus the curve we've actually defined. Rather than trying to shift things based on left and right, let's take a step back and define two different equations entirely. I know that the curve of the wave is a nice way to define going up and then back down, I think the values are just off. For the left paddle, we need to return an angle from 285° to 75°. Couldn't I just interpolate for that if I represent 75° as 360°+75° = 435° in radians?
public float getBounceAngle(Ball ball) {
    // use center point for bounce determination!
    float yTouchPoint = ball.getAnchorY() + Ball.RADIUS;
    float normalizedBallY = Math.max(0, yTouchPoint - y); // this shouldn't go negative, but just in case.
    boolean paddleToTheLeft = x <= ball.getAnchorX() + Ball.RADIUS;

    if (paddleToTheLeft) {
        float bottomAngle = MathUtils.degreesToRadians * (270 + 15);
        float topAngle = MathUtils.degreesToRadians * (360 + 90 - 15);
        return MathUtils.lerpAngle(bottomAngle, topAngle, normalizedBallY / HEIGHT);
    } else {
        float bottomAngle = MathUtils.degreesToRadians * (270 - 15);
        float topAngle = MathUtils.degreesToRadians * (90 + 15);
        return MathUtils.lerpAngle(bottomAngle, topAngle, normalizedBallY / HEIGHT);
    }
}
All my unit tests are failing still since they expect radians that are different than what we're returning here, but if I just pop open the game to see if things are behaving a bit better I see this:
And that looks much better behaved. So, let's update our unit tests a bit to confirm that things work as expected, and then I'll plot the graph again to see how the curvature, or probable lack-thereof, looks like.
// floats lose precision quickly and 179.9999 is the same as 180 to us.
public static final float EPSILON = 0.0001f;

@Test
void test90DegreesLeftPaddle() {
    Paddle left = new Paddle(0,0);
    Ball ball = new Ball(0, Paddle.HEIGHT/2);
    float radians = left.getBounceAngle(ball);
    assertEquals(0, radians * MathUtils.radiansToDegrees, EPSILON);
}
... other tests at 90 and 15 degrees...
@Test
void test15DegreesRightPaddleAt0() {
    Paddle right = new Paddle(100, 100);
    Ball ball = new Ball(100 - Ball.CIRCUMFERENCE, 100);
    float radians = right.getBounceAngle(ball);
    assertEquals(270 - 15, radians * MathUtils.radiansToDegrees, EPSILON);
}
And our graph?
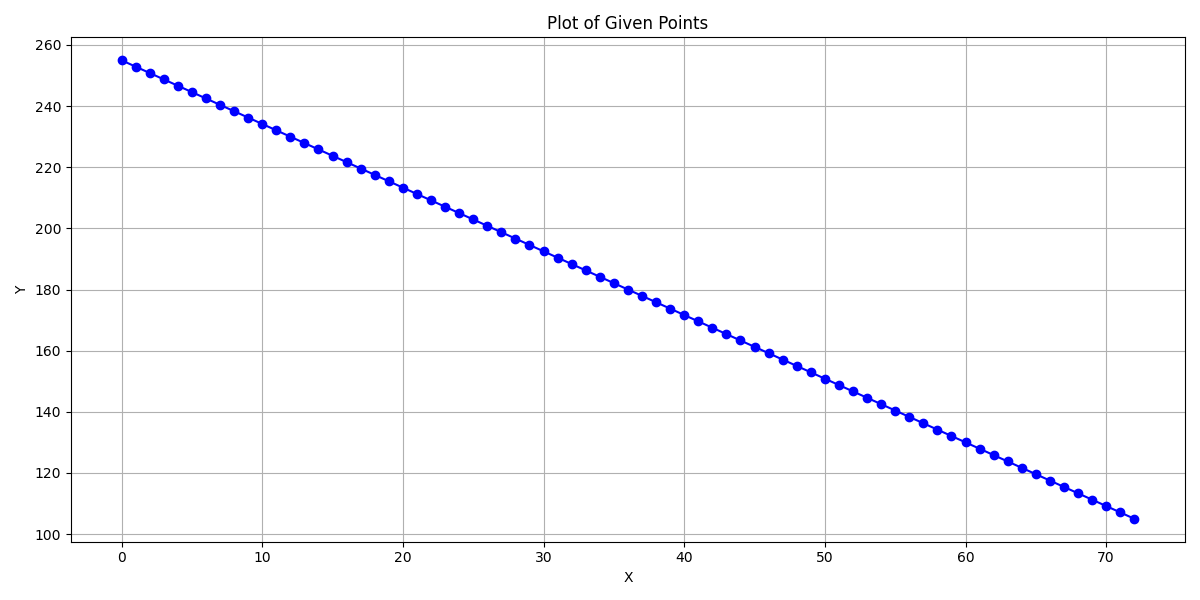
The above might be surprising to you, it might not be. We are linearly interpolating between the angles, so the line appears to be, well, a line! But if you think about what radians actually represent, it's actually still a curve! In case you're not super familiar, a radian is just the angle it takes to travel along an edge of a circle the same distance as the circle's radius. I'm pretty sure my explanation isn't very good, so, here's a visual instead that should help flush it out a bit better:
So anyway, my point is that the thing that is linearly increasing is an angle, and so the ball is actually going to be bouncing off of the paddle in the exact same way as we were thinking about before with the sin wave formula. Just... a heck of a lot simpler to think about and code up. 10
Now. What else were we doing before we got so distracted by math?
if (top.intersects(ball) || bottom.intersects(ball)) {
    // bounce ball off non scoring walls
}
if (ball.toTheLeftOf(red)) {
    // Score a point for blue.
}
if (ball.toTheRightOf(blue)) {
    // Score a point for red
}
Oh right. Our ball still flies waaay off the screen doesn't it. I'm pretty sure I should be able to write this code up without falling into existential dread again. After all, if we think about it, we just want to do this:
if (ball.getAnchorY() <= 0) {
    ball.bounceUp();
}
if (ball.getAnchorY() + Ball.CIRCUMFERENCE >= VIRTUAL_HEIGHT) {
    ball.bounceDown();
}
And bouncing off the top or bottom of the screen doesn't lose any forward momentum, it just reflects along the y axis, so that's simple:
public void bounceUp() {
    v.y = -1 * v.y;
}

public void bounceDown() {
    v.y = -1 * v.y;
}
And that just leaves us with the score detection, which we could also describe
as collision with the x boundaries of the world. Or, as I've pseudo-coded up,
as being to the left or right of the paddle on that side of the screen. To make
things easy, rather than calling them "p1" and "p2" I'm going to change my variables
to be red, blue, and similarly: redScore, blueScore.
For whatever reason I find it easier to remember that red's on the left than p1 is on the left
or similar.
Anyway, just wanted to note that to avoid confusion in the code snippets going
forward. Inside of the ball class:
public boolean toTheLeftOf(Paddle paddle) {
    return x + RADIUS < paddle.getX();
}

public boolean toTheRightOf(Paddle paddle) {
    return x - RADIUS > paddle.getX();
}
Then inside the update function back in the battle scene:
if (ball.toTheLeftOf(red)) {
    blueScore += 1;
    resetBall();
}
if (ball.toTheRightOf(blue)) {
    redScore += 1;
    resetBall();
}
Then one last function to temporarily set the ball off in a random direction after each score:
private void resetBall() {
    ball = new Ball(VIRTUAL_WIDTH/2f, VIRTUAL_HEIGHT/2f);
    ball.setVelocity(new Vector2(MathUtils.random() * VIRTUAL_WIDTH * 0.5f, MathUtils.random() * VIRTUAL_HEIGHT * 0.6f));
}
And we've officially done it. The basics of pong!
Or well, almost! We have one last requirement to go before we have the basic game that was outlined by the 20 games challenge.
Two walls and a divider ↩
The only item from the requirements we haven't done is:
- Create an arena with two walls and a divider.
I suppose we haven't technically made two walls either. Honestly, I don't really know if pong needs walls. But we can probably just make a sprite and load things in without too much trouble to try to get something looking approximately like how the older pong game looks. Since we've got a light grey as our background color, I'll use a darker color for the main color of the wall:

And then loading it up just we did the other assets before by declaring it in our game asset class:
public static final String WALL_FILE = "wall.png";
public static final AssetDescriptor<Texture> wall = new AssetDescriptor<>(WALL_FILE, Texture.class);
Then informing the game runner that the BattleScene needs that asset by updating
our scene's constructor to list it in the assets it cares about:
public BattleScene(GameRunner gameRunner) {
    ...
    assets.add(GameAssets.ball);
}
And using it in the render function to draw the blocks along the edges and the center of the screen
to serve as a divider for the play areas:
Texture wallTexture = gameRunner.assets.getTexture(GameAssets.wall);

for (int i = 0; i < VIRTUAL_WIDTH / Ball.CIRCUMFERENCE; i++) {
    int x = i * (int)Ball.CIRCUMFERENCE;
    gameRunner.batch.draw(wallTexture, x, 0, Ball.CIRCUMFERENCE, Ball.RADIUS);
    gameRunner.batch.draw(wallTexture, x, VIRTUAL_HEIGHT - Ball.RADIUS, Ball.CIRCUMFERENCE, Ball.RADIUS);
}
for (int i = 0; i < VIRTUAL_HEIGHT / Ball.CIRCUMFERENCE; i++) {
    int y = i * (int)Ball.CIRCUMFERENCE;
    gameRunner.batch.draw(wallTexture, VIRTUAL_WIDTH/2, y, Ball.CIRCUMFERENCE, Ball.CIRCUMFERENCE);
}
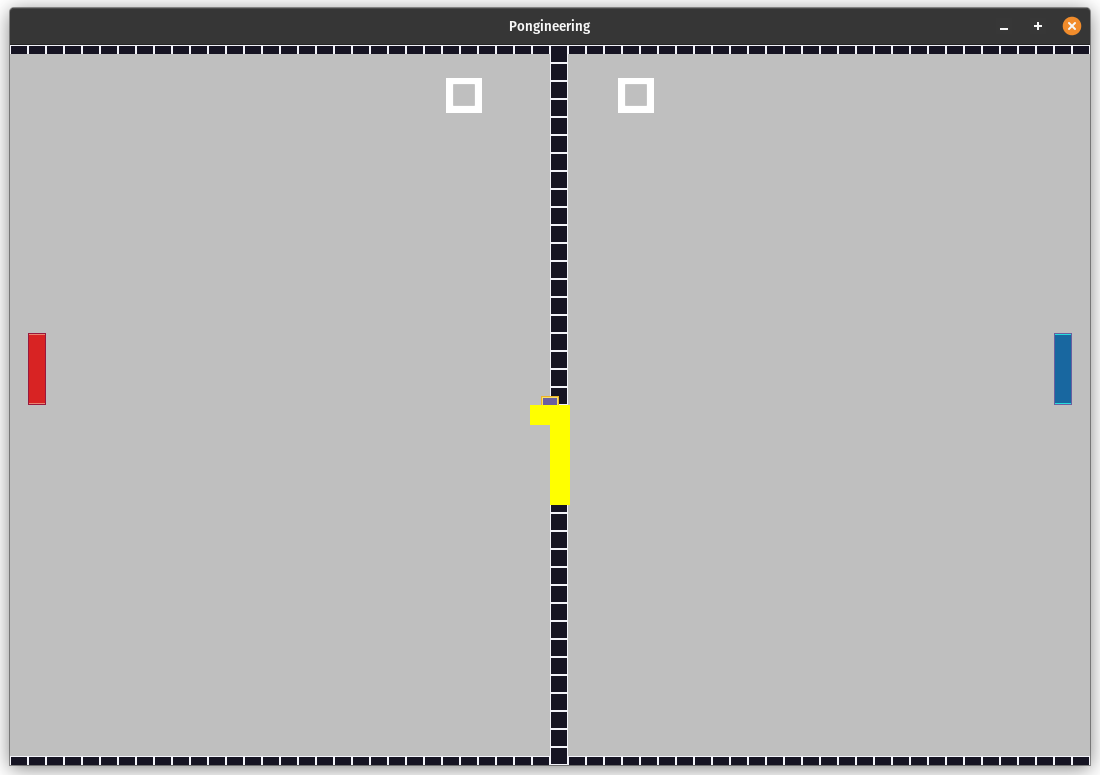
This works fine to get the visual up and working:
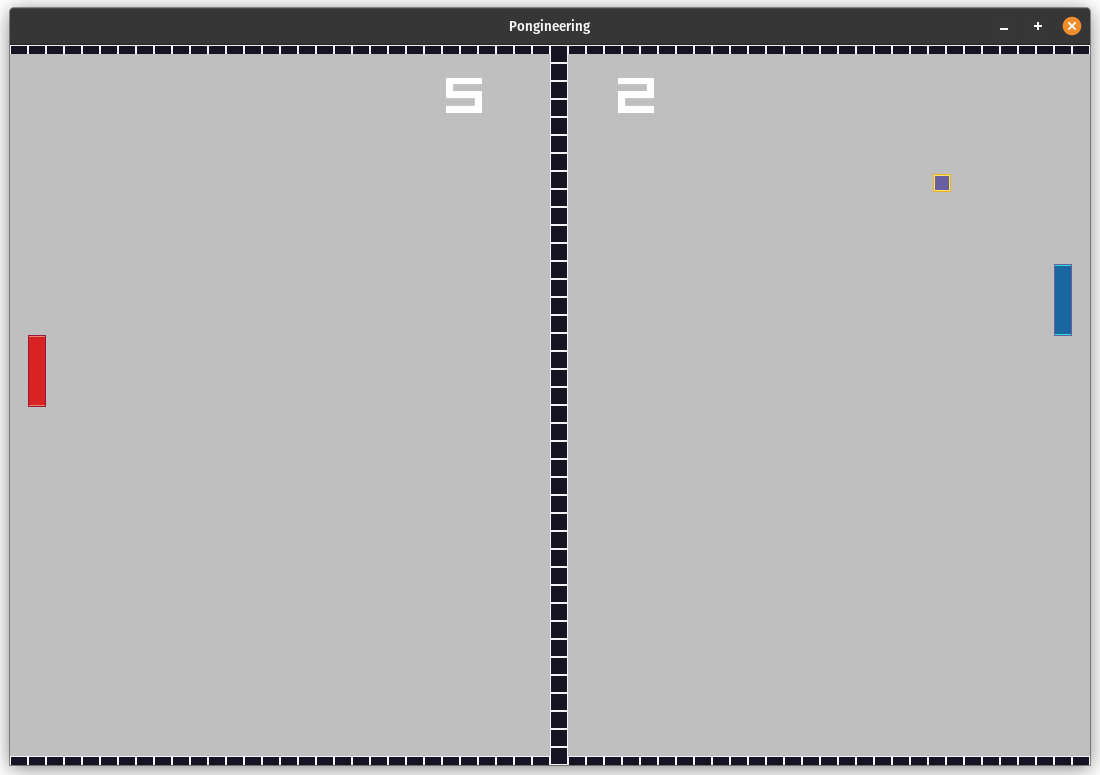
Though these "walls" don't really exist since there's no collision or anything of that nature going on. The ball moves fast enough that I'm not sure if there's actually much point in tweaking things so that the ball bounces off the drawn border, and not just the actual screen boundaries themselves. Also, as you can see, I drew the top and bottom borders at the same size as the radius of the ball. This means that there's a little bit of overlap, but not full, and this gives an alright effect that makes it look okay when the ball is bouncing off the wall:
And that matches the requirements. I guess the past me that said: Let's track the ball by its center point, had a good idea after all! Speaking of things past me said we should do, let the feature creep commence!
Title, countdown, and winner scenes ↩
We spent the time up front to set up the game runner, so now it's time to return to it. Before we get into transitions between scenes, we need to actually have the scenes. Thankfully, I don't think it's going to take too much effort to make a few scenes that display a bit of text. I'd like to maybe put an AI controlled pong paddle or two playing the game on the title screen, but we can start small. A title screen and a selection to start or quit.
So, for now, we'll just take in two assets:
public class TitleScreen implements Scene {

private List<AssetDescriptor<?>> requiredAssets;

public TitleScreen(GameRunner gameRunner) {
    requiredAssets = new LinkedList<>();
    requiredAssets.add(GameAssets.wall);
    requiredAssets.add(GameAssets.scoreFont);
    selectedButton = 0;
}

@Override
public List<AssetDescriptor<?>> requiredAssets() {
    return requiredAssets;
}
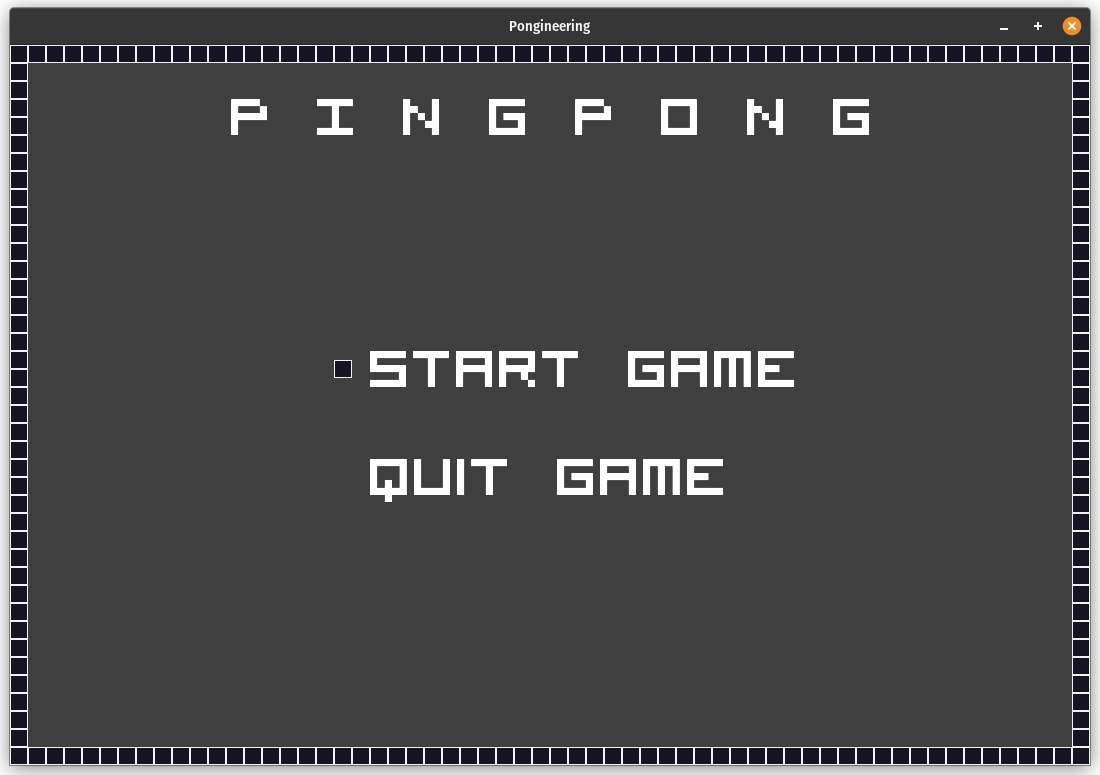
and then we can create a basic pong title screen. A border of the wall asset around the edge, and then a little marker for the selected option to either start or quit the game:
@Override
public void render(float delta) {
    Texture wall = gameRunner.assets.getTexture(GameAssets.wall);
    BitmapFont font = gameRunner.assets.getFont(GameAssets.scoreFont);

    ScreenUtils.clear(Color.DARK_GRAY);

    for (int x = 0; x < VIRTUAL_WIDTH; x += (int)Ball.CIRCUMFERENCE) {
        gameRunner.batch.draw(
        wall,
        x, 0, // x, y location
        Ball.CIRCUMFERENCE, Ball.CIRCUMFERENCE // width, height
    );
        gameRunner.batch.draw(
        wall,
        x, VIRTUAL_HEIGHT - Ball.CIRCUMFERENCE,
        Ball.CIRCUMFERENCE, Ball.CIRCUMFERENCE
    );
    }
    for (int y = 0; y < VIRTUAL_HEIGHT; y += (int)Ball.CIRCUMFERENCE) {
        gameRunner.batch.draw(
        wall,
        0, y,
        Ball.CIRCUMFERENCE, Ball.CIRCUMFERENCE
    );
        gameRunner.batch.draw(
        wall,
        VIRTUAL_WIDTH - Ball.CIRCUMFERENCE, y,
        Ball.CIRCUMFERENCE, Ball.CIRCUMFERENCE
    );
    }

    float buttonHeight = Ball.CIRCUMFERENCE * 3f;
    float buttonsStartY = VIRTUAL_HEIGHT / 2f + buttonHeight;
    float buttonsQuitY = VIRTUAL_HEIGHT / 2f - buttonHeight;
    float selectedOffset = selectedButton == 0 ? buttonsStartY : buttonsQuitY;

    float selectedY = selectedOffset - buttonHeight/2f;

    // font x,y are top left, not bottom left
    gameRunner.batch.draw(
        wall,
        VIRTUAL_WIDTH /3f - Ball.CIRCUMFERENCE*2f, selectedY,
        Ball.CIRCUMFERENCE, Ball.CIRCUMFERENCE
    );

    font.draw(
        gameRunner.batch,
        "P I N G P O N G",
        0, VIRTUAL_HEIGHT - Ball.CIRCUMFERENCE * 3,
        VIRTUAL_WIDTH, Align.center, false
    );

    font.draw(
        gameRunner.batch,
        "Start Game",
        VIRTUAL_WIDTH /3f, buttonsStartY,
        VIRTUAL_WIDTH /3f, Align.left, false
    );

    font.draw(
        gameRunner.batch,
        "Quit Game",
        VIRTUAL_WIDTH /3f, buttonsQuitY,
        VIRTUAL_WIDTH /3f, Align.left, false
    );
}
The selected index could probably be an enum I suppose, but for a quick little thrown together title screen. It looks pretty decent:
So, next, let's make it possible to move the marker. That's easy enough. Arrow keys, or the W and S keys like we control the pong paddles, are easy enough to use.
@Override
public void update(float delta) {
    if (Gdx.input.isKeyJustPressed(Input.Keys.UP) || Gdx.input.isKeyJustPressed(Input.Keys.W)) {
        selectedButton -= 1;
        selectedButton = Math.max(0, selectedButton);
    }

    if (Gdx.input.isKeyJustPressed(Input.Keys.DOWN) || Gdx.input.isKeyJustPressed(Input.Keys.S)) {
        selectedButton += 1;
        selectedButton = Math.max(1, selectedButton);
    }
}
The natural instinct for how to actually choose the button the marker is to press the enter key. So we can do the exit button easily enough since, at the moment, it just kills the application:
if (Gdx.input.isKeyJustPressed(Input.Keys.ENTER)) {
    switch (selectedButton) {
        case 0: // Start game
            // TODO!
            break;
        case 1: // End game
            Gdx.app.exit();
    }
}
But I don't really like this very much. Typing in 0 and 1 feels
gross. I'd rather have constants honestly. Or better yet, have a list of buttons and action
handlers setup. But. While we are over-engineering, we really do only have two
buttons. so I think a couple of constants will satisfy the cleaning feeling I want:
public final int START_BUTTON_CHOICE = 0;
public final int QUIT_BUTTON_CHOICE = 1;
...
public void update(float delta) {
    if (Gdx.input.isKeyJustPressed(Input.Keys.ENTER)) {
        switch (selectedButton) {
            case START_BUTTON_CHOICE: // Start game
                // TODO!
                break;
            case QUIT_BUTTON_CHOICE: // End game
                Gdx.app.exit();
        }
    }
    ...
}
Now. To get that TODO working. We need to circle back to the GameRunner class
and the fact that our scene is sitting on a stack. We can define a helper in the game
runner for when we want to swap to an entirely new scene like so:
public void changeToNewScene(Scene newScene) {
    assets.queueScene(newScene);
    // TODO: swap to a loading screen here.
    // For now, just block then swap.
    assets.blockingLoad();
    if (!scenes.isEmpty()) {
        Scene oldScene = scenes.pop();
        assets.unload(oldScene);
    };
    scenes.push(newScene);
}
But our asset class doesn't know how to unload a scene yet. This is pretty simple though, it's just like the queue asset method, but unloading. Or well, mostly the same:
public void unload(Scene scene) {
    for (AssetDescriptor<?> assetDescriptor : scene.requiredAssets()) {
        assetManager.unload(assetDescriptor.fileName);
    }
}
The weird thing about the load/unload of the
asset manager from LibGDX is that it doesn't have an overload for the
asset descriptor, it only has an unload for the filename attached to that.
I'm not really sure why this is, but it strikes me as an oddity in the
API design. Anyway. This will let us change to a new scene and abandon the
old one.
We can call this from the start button handling code in the update
method of the title screen and see it working:
if (Gdx.input.isKeyJustPressed(Input.Keys.ENTER)) {
    switch (selectedButton) {
        case START_BUTTON_CHOICE:
            gameRunner.changeToNewScene(new BattleScene(gameRunner));
            break;
        case QUIT_BUTTON_CHOICE:
            Gdx.app.exit();
    }
}
To be honest, I don't really like the fact that I pass the gameRunner
reference inside the TitleScreen class over to the new scene. I'd
rather do something like pass the class itself and have the GameRunner
handle setting up the parameters for it and whatnot. We could set up some basic
handlers in the game runner for this, or maybe use something as advanced as
guice's dependency injection for this.
But, again, while we're over-engeering on purpose, let's stay the course on some
of the enterprise urges and wait til we've got the basics in place first.
Sweet. We can now start the game and end it! The load time is tiny since we're not really loading much, so the blocking load doesn't really slow down or feel noticeable at all. So we'll deal with that in a bit, but first I want to handle the fact that you press enter and then are expected to react to a ball right away. That's not ideal. So, let's define a countdown to show before the game starts.
We can do this in two different ways. One: we create a countdown to render and
have the BattleScene treat it as a component to show until the
countdown ends. Or two: we create the countdown as its own seperate scene and overlay
it on top of the other scene. Part of me thinks it would be interesting to
have the countdown be its own scene and define ways for an overlay scene to render
a frame from the underlying scene. But, the fact that we need some game logic
during the countdown to happen, and I want the paddles to be controllable during
the countdown, means that we'll do the first option:
package spare.peetseater.peng.objects;

public class Countdown {

    float elaspedSeconds = 0;
    int currentSecond;

    public Countdown(int from) {
        this.currentSecond = from;
    }

    public void update(float delta) {
        elaspedSeconds += delta;
        if (elaspedSeconds > 1) {
            currentSecond -= 1;
            elaspedSeconds = 1 - elaspedSeconds;
        }
        currentSecond = Math.max(currentSecond, 0);
    }

    public int getSecondToDisplay() {
        return currentSecond;
    }

    public boolean isCountingDown() {
        return currentSecond != 0;
    }
}
There's not a lot to say about this code. It accumulates the seconds via the update
method that's handled the number of seconds since the last call. Once we've collected a single
seconds's worth of frames, then we tweak the integral value of the second, and then reset the
accumulator to be whatever remains. By ensuring that the value never goes negative, we can
expose a simple method to inform a caller if we're still counting down or not.
There's no reset method, so instead callers just need to create a new instance if they want another countdown. The caller in this case is the battle scene. Setting it up is just one line, but I moved it to a helper function since its calling site reads better that way:
Countdown countdown;
...
private void resetCountdown() {
    countdown = new Countdown(3);
}
Then in the update method of the battle scene the main change is
that we're either going to update the ball or the countdown, but not
at the same time. This will give the players a moment to breathe.
public void update(float delta) {
    ...
    if (ball.toTheLeftOf(red)) {
        blueScore += 1;
        resetBall();
        resetCountdown();
    }
    if (ball.toTheRightOf(blue)) {
        redScore += 1;
        resetBall();
        resetCountdown();
    }

    if (countdown.isCountingDown()) {
        countdown.update(delta);
    } else {
        ball.update(delta);
    }
}
Of course, we need to actually render it. So that helper method about if its countdown or not becomes the trigger for that:
...
public void render(float delta) {
    ...
    if (countdown.isCountingDown()) {
        font.draw(
            gameRunner.batch,
            String.format("%d", countdown.getSecondToDisplay()),
            0f, VIRTUAL_HEIGHT / 2f,
            VIRTUAL_WIDTH,
            Align.center,
            false
        );
    }
}
Rendering the countdown is the last thing that happens in the render function since we want the text to be above anything it might overlap with.
There we go. We get a moment to collect our thoughts, then off we go. The font could probably be a bit bigger to be more eye catching, maybe colored in too:
... Declare a larger font in GameAssets.java ...
public static final String COUNTDOWN_FONT_KEY = "countdownfont.ttf";
public static final AssetDescriptor<BitmapFont> countdownFont = visitorFontDescriptor(200, COUNTDOWN_FONT_KEY);

... Then after declaring it in the required assets list, in render ...
BitmapFont countdownFont = gameRunner.assets.getFont(GameAssets.countdownFont);
Color toRestore = countdownFont.getColor().cpy();
countdownFont.setColor(Color.YELLOW);
countdownFont.draw(
    ...
);
countdownFont.setColor(toRestore);
Tada! Great! Though, how are you supposed to know who's going to be served the ball? Maybe we should show that information, we could do it in a subtle way, like having the countdown color be who's going to be served to, or we could literally write something like "Red to serve" or something. But since it's not like the paddle has the ball on it and then actually hits it, I'm not sure if calling it "serving" is right. I don't want to think too hard about that, so let's just do the color coding and set the velocity in the right direction after each reset. Lets just define an enum:
enum ToReceive {
    Red,
    Blue
};
Then in the constructor for the battle scene flip a coin:
ToReceive sendBallTo;
...
public BattleScene(GameRunner gameRunner) {
    ...
    sendBallTo = MathUtils.randomBoolean() ? ToReceive.Blue : ToReceive.Red;
    ...
Now we can revisit the resetBall function and use this to determine
which direction we're sending the ball. We were just setting a random direction
before, so instead, let's choose a random angle from 30 to 60 degrees and then
shoot it at the proper paddle:
private void resetBall() {
    ball = new Ball(VIRTUAL_WIDTH/2f, VIRTUAL_HEIGHT/2f);
    float from, to;
    switch (sendBallTo) {
        case Red:
            from   = MathUtils.degreesToRadians * 120;
            to = MathUtils.degreesToRadians * 240;
            break;
        default:
        case Blue:
            from = MathUtils.degreesToRadians * 300;
            to   = MathUtils.degreesToRadians * (360 + 60);
            break;
    }
    float angle = MathUtils.lerpAngle(from, to, MathUtils.random());
    float speedX = VIRTUAL_WIDTH * 0.5f;
    float speedY = VIRTUAL_HEIGHT * 0.6f;
    ball.setVelocity(
        new Vector2(
            MathUtils.cos(angle) * speedX,
            MathUtils.sin(angle) * speedY
        )
    );
}
For this to work, we need to actually set the player to send to whenever someone scores:
if (ball.toTheLeftOf(red)) {
    blueScore += 1;
    sendBallTo = ToReceive.Blue;
    resetBall();
    resetCountdown();
}
if (ball.toTheRightOf(blue)) {
    redScore += 1;
    sendBallTo = ToReceive.Red;
    resetBall();
    resetCountdown();
}
So if blue scored on red, then we send the ball in blues direction so that they're on the defensive. That way the person who just got scored on doesn't feel overwhelmed. Or at least, that's what I'm intending. For all I know, maybe that will make the player feel like the attacker is getting an unfair advantage to get the 'softball' of the initial toss? I don't know, but either way, we can show who's about to get sent the ball via the countdown color:
if (sendBallTo.equals(ToReceive.Blue)) {
    countdownFont.setColor(Color.BLUE);
} else {
    countdownFont.setColor(Color.RED);
}
I suppose while we're at it. Maybe I should be color coding the score font too? But is that neccesary? Like, the divider is between the two score numbers, so it's pretty clear without that. I think we'll leave it alone for now and move onto something else. Specifically. The winning screen!
Though uh. Before we have a winning screen. How do we win? Is it first to 3? 10? The games are pretty quick so 3 seems too small, but 10 seems way to big. Maybe we just go until 5, then there's a maximum of 9 rounds but there's a fighting chance for either player to come from behind and win it. The code for this can go into the update method for the battle scene, after the other calculations.
if (redScore >= 5 || blueScore >= 5) {
    // TODO send us to the new winner screen!
    gameRunner.changeToNewScene(new TitleScreen(gameRunner));
}
Obviously we need to actually make the Win screen. But since we don't have it yet, we can just confirm that the title screen comes up when we're all wrapped up and a victor has been decided:
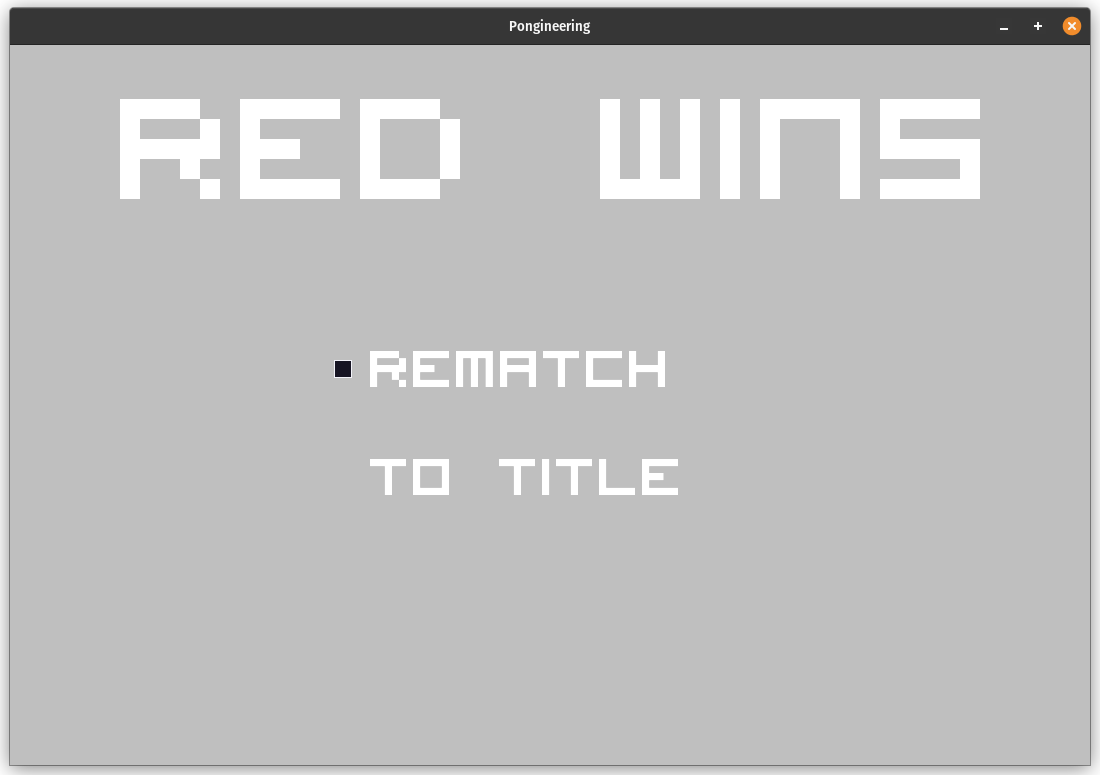
Cool. The winner screen doesn't have to be that complicated I think. Just something that shows who won and then provides an option to either go back to the title screen, or to rematch should work fine. To keep things simple, we can just take in the message to display and do a bit of setup in the constructor.
public class WinScene implements Scene {
private final GameRunner gameRunner;
private final String message;
private final List<AssetDescriptor<?>> requiredAssets;
private int selectedButton;

public WinScene(GameRunner gameRunner, String msg) {
    this.gameRunner = gameRunner;
    this.message = msg;
    this.selectedButton = 0;
    requiredAssets = new LinkedList<>();
    requiredAssets.add(GameAssets.scoreFont);
    requiredAssets.add(GameAssets.countdownFont);
    requiredAssets.add(GameAssets.wall);
}

@Override
public List<AssetDescriptor<?>> requiredAssets() {
    return requiredAssets;
}
Then in the render method we can draw the message and the
buttons.
@Override
public void render(float delta) {
    Texture wall = gameRunner.assets.getTexture(GameAssets.wall);
    BitmapFont btnFont = gameRunner.assets.getFont(GameAssets.scoreFont);
    BitmapFont msgFont = gameRunner.assets.getFont(GameAssets.countdownFont);

    ScreenUtils.clear(Color.LIGHT_GRAY);

    msgFont.draw(
        gameRunner.batch,
        message,
        0, VIRTUAL_HEIGHT - Ball.CIRCUMFERENCE * 3,
        VIRTUAL_WIDTH, Align.center, false
    );

    float buttonHeight = Ball.CIRCUMFERENCE * 3f;
    float buttonsStartY = VIRTUAL_HEIGHT / 2f + buttonHeight;
    float buttonsQuitY = VIRTUAL_HEIGHT / 2f - buttonHeight;
    float selectedOffset = selectedButton == 0 ? buttonsStartY : buttonsQuitY;

    float selectedY = selectedOffset - buttonHeight/2f;

    gameRunner.batch.draw(
        wall,
        VIRTUAL_WIDTH /3f - Ball.CIRCUMFERENCE*2f, selectedY,
        Ball.CIRCUMFERENCE, Ball.CIRCUMFERENCE
    );

    btnFont.draw(
        gameRunner.batch,
        "Rematch",
        VIRTUAL_WIDTH /3f, buttonsStartY,
        VIRTUAL_WIDTH /3f, Align.left, false
    );

    btnFont.draw(
        gameRunner.batch,
        "To Title",
        VIRTUAL_WIDTH /3f, buttonsQuitY,
        VIRTUAL_WIDTH /3f, Align.left, false
    );
}
This is unsurprisingly nearly the same code as what we had for the title screen. It is a pretty similar setup after all. Part of me wants to take in an enum for the player and make the win text their color. But I'm also feeling lazy because pong can really only be so interesting as an experiment before one starts to long for the next thing. So, with that in mind, let's add in the functionality to select an option so we can move onto something slightly more interesting:
public final int REMATCH_CHOICE = 0;
public final int TO_TITLE_CHOICE = 1;
...
public void update(float delta) {
    if (Gdx.input.isKeyJustPressed(Input.Keys.UP) || Gdx.input.isKeyJustPressed(Input.Keys.W)) {
        selectedButton -= 1;
        selectedButton = Math.max(0, selectedButton);
    }

    if (Gdx.input.isKeyJustPressed(Input.Keys.DOWN) || Gdx.input.isKeyJustPressed(Input.Keys.S)) {
        selectedButton += 1;
        selectedButton = Math.max(Math.max(REMATCH_CHOICE, TO_TITLE_CHOICE), selectedButton);
    }

    if (Gdx.input.isKeyJustPressed(Input.Keys.ENTER)) {
        switch (selectedButton) {
            case REMATCH_CHOICE:
                gameRunner.changeToNewScene(new BattleScene(gameRunner));
                break;
            case TO_TITLE_CHOICE:
            default:
                gameRunner.changeToNewScene(new TitleScreen(gameRunner));
                break;
        }
    }
}
I'll make the game finish in 1 round so that you can see the whole thing working without having to wait too long:
Beautiful! The game is practically done! But there's still two little stretch goals I want to hit before we wrap things up and move on from our pong adventure.
Sounds! ↩
The easiest of these stretch goals is sound. We only really need two sounds. One for the bounce of the ball against something, and one for when a player scores. But what if we had some fun with this? What if instead of going to the free assets on itch.io, we instead used something like audiomass to edit and cut out some silly sounds that we made?
Then it's just a matter of defining their location and adding a method to our asset class to load the sound:
public static final String BOUNCE_SFX_1 = "sounds/bounce-1.mp3";
public static final AssetDescriptor<Sound> bounce1 = new AssetDescriptor<>(BOUNCE_SFX_1, Sound.class);

public static final String BOUNCE_SFX_2 = "sounds/bounce-2.mp3";
public static final AssetDescriptor<Sound> bounce2 = new AssetDescriptor<>(BOUNCE_SFX_2, Sound.class);

public static final String BOUNCE_SFX_3 = "sounds/bounce-3.mp3";
public static final AssetDescriptor<Sound> bounce3 = new AssetDescriptor<>(BOUNCE_SFX_3, Sound.class);

public static final String BOUNCE_SFX_4 = "sounds/bounce-4.mp3";
public static final AssetDescriptor<Sound> bounce4 = new AssetDescriptor<>(BOUNCE_SFX_4, Sound.class);

public static final String BOUNCE_SFX_5 = "sounds/bounce-5.mp3";
public static final AssetDescriptor<Sound> bounce5 = new AssetDescriptor<>(BOUNCE_SFX_5, Sound.class);

public static final String BOUNCE_SFX_6 = "sounds/bounce-6.mp3";
public static final AssetDescriptor<Sound> bounce6 = new AssetDescriptor<>(BOUNCE_SFX_6, Sound.class);

public static final String BOUNCE_SFX_7 = "sounds/bounce-7.mp3";
public static final AssetDescriptor<Sound> bounce7 = new AssetDescriptor<>(BOUNCE_SFX_7, Sound.class);

public Sound getSound(AssetDescriptor<Sound> assetDescriptor) {
    if (!assetManager.isLoaded(assetDescriptor)) {
        String reason = String.format("Could not load sound asset %s. Is the scene misconfigured?", assetDescriptor.toString());
        Gdx.app.log(getClass().getSimpleName(), reason);
        throw new RuntimeException(String.format("THE DEV IS AN IDIOT: %s", reason));
    }
    return assetManager.get(assetDescriptor);
}
Then I can define a wrapper around these sounds to make it easy to get one bounce out at a time:
public class Sounds {
    private final List<AssetDescriptor<Sound>> bounces;
    int idx;

    public Sounds() {
        idx = 0;
        this.bounces = bounceAssets();

    }

    public AssetDescriptor<Sound> nextBounce() {
        AssetDescriptor<Sound> descriptor = this.bounces.get(idx % this.bounces.size());
        idx++;
        return descriptor;
    }

    public List<AssetDescriptor<Sound>> bounceAssets() {
        List<AssetDescriptor<Sound>> list = new LinkedList<>();
        list.add(GameAssets.bounce1);
        list.add(GameAssets.bounce2);
        list.add(GameAssets.bounce3);
        list.add(GameAssets.bounce4);
        list.add(GameAssets.bounce5);
        list.add(GameAssets.bounce6);
        list.add(GameAssets.bounce7);
        return list;
    }
}
Then we can tell the BattleScene to instantiate one of these, ensure its assets are
in the list of required assets for the screen, and then tweak the code slightly to play one any
time we bounce off something:
public BattleScene(GameRunner gameRunner) {
    ...
    sounds = new Sounds();
    ...
    assets = new LinkedList<>();
    ...
    for (AssetDescriptor<?> soundAsset : sounds.bounceAssets()) {
        assets.add(soundAsset);
    }
}
...
public void update(float delta) {
    ...
    boolean bounced = false;

    if (red.intersects(ball)) {
        ball.bounceOffOf(red);
        bounced = true;
    }
    if (blue.intersects(ball)) {
        ball.bounceOffOf(blue);
        bounced = true;
    }

    // bounce ball off non scoring walls
    if (ball.getAnchorY() <= 0) {
        ball.bounceUp();
        bounced = true;
    }
    if (ball.getAnchorY() + Ball.CIRCUMFERENCE >= VIRTUAL_HEIGHT) {
        ball.bounceDown();
        bounced = true;
    }

    if (bounced) {
        AssetDescriptor<Sound> sfx = sounds.nextBounce();
        gameRunner.assets.getSound(sfx).play();
    }
}
Then, playing the game becomes more of a, uhm, personal experience? I guess? Or at least a more whimsical one. Reminiscent of the 90s and 00s flash games where you'd find silly stuff like this showing up on newgrounds and other time waster sites.
We can also add in something for when the user scores. Given our helpful Sound
class, we could even define a set of sounds for each player, ranging from encouraging to,
uh, not! Really, our imagination is the limit there. Though in my case, the limit is how
much I want to listen to my own voice11.
public static final AssetDescriptor<Sound> defenseisnotyour = new AssetDescriptor<>("sounds/defenseisnotyour.mp3", Sound.class);
public static final AssetDescriptor<Sound> dobetter = new AssetDescriptor<>("sounds/dobetter.mp3", Sound.class);
public static final AssetDescriptor<Sound> dontletheballthrough = new AssetDescriptor<>("sounds/dontletheballthrough.mp3", Sound.class);
public static final AssetDescriptor<Sound> goodjob = new AssetDescriptor<>("sounds/goodjob.mp3", Sound.class);
public static final AssetDescriptor<Sound> niceOne = new AssetDescriptor<>("sounds/nice-one.mp3", Sound.class);
public static final AssetDescriptor<Sound> score = new AssetDescriptor<>("sounds/score.mp3", Sound.class);
public static final AssetDescriptor<Sound> shameful = new AssetDescriptor<>("sounds/shameful.mp3", Sound.class);
public static final AssetDescriptor<Sound> soClose = new AssetDescriptor<>("sounds/so-close.mp3", Sound.class);
public static final AssetDescriptor<Sound> victoryIsNigh = new AssetDescriptor<>("sounds/victory-is-nigh.mp3", Sound.class);
public static final AssetDescriptor<Sound> youresupposedtohittheball = new AssetDescriptor<>("sounds/youresupposedtohittheball.mp3", Sound.class);
Which apparently was 10. These assets can be loaded up in the same exact way as before.
A little next method for the Sounds class, and a list to use for scene asset
listing:
public AssetDescriptor<Sound> nextScore() {
    AssetDescriptor<Sound> descriptor = this.scores.get(idx % this.scores.size());
    idx++;
    return descriptor;
}

private List<AssetDescriptor<Sound>> scoreAssets() {
    List<AssetDescriptor<Sound>> list = new LinkedList<>();
    list.add(GameAssets.goodjob);
    list.add(GameAssets.defenseisnotyour);
    list.add(GameAssets.score);
    list.add(GameAssets.dobetter);
    list.add(GameAssets.dontletheballthrough);
    list.add(GameAssets.shameful);
    list.add(GameAssets.soClose);
    list.add(GameAssets.victoryIsNigh);
    list.add(GameAssets.youresupposedtohittheball);
    list.add(GameAssets.niceOne);
    return list;
}
Then we just call the sound after a score has happened! Easy.
boolean scored = false;
if (ball.toTheLeftOf(red)) {
    scored = true;
    blueScore += 1;
    sendBallTo = ToReceive.Blue;
    resetBall();
    resetCountdown();
}
if (ball.toTheRightOf(blue)) {
    scored = true;
    redScore += 1;
    sendBallTo = ToReceive.Red;
    resetBall();
    resetCountdown();
}

if (scored) {
    AssetDescriptor<Sound> sfx = sounds.nextScore();
    gameRunner.assets.getSound(sfx).play();
}
I went ahead and playtested it quickly, and despite myself, had a bit of a giggle.
It might just be soem sort of vanity, but I do think that it's kind of funny and
that the novelty would last for at least one game of pong. At least long
enough for a player to want to try to see what all the sounds are. Since the idx
value that's incrementing is shared between the bounce and score counter, you're
not guaranteed to get them all in a row, so there might be a surprise for you that
could keep you playing! 12
That said. I think there's one more area that needs some sounds. The win screen! It's kind of lame that you hear these funny whose-line -esque noises but then the win screen is just silent. I suppose that's one of the many troublesome things about polishing, one thing always leads to another. That's another reason why I think its important to get your mechanics programmed first, then you start chasing the white rabbit down into wonderland.
I'll just record a few more voice lines for the win screen and then we'll call it a day:
public static final String WIN_SCREEN_SFX_1 = "sounds/areYouProudOfThatPerformance.mp3";
public static final AssetDescriptor<Sound> areYouProudOfThatPerformance = new AssetDescriptor<>(WIN_SCREEN_SFX_1, Sound.class);
public static final String WIN_SCREEN_SFX_2 = "sounds/congratsOldBoy.mp3";
public static final AssetDescriptor<Sound> congratsOldBoy = new AssetDescriptor<>(WIN_SCREEN_SFX_2, Sound.class);
public static final String WIN_SCREEN_SFX_3 = "sounds/congratulationsYouWon.mp3";
public static final AssetDescriptor<Sound> congratulationsYouWon = new AssetDescriptor<>(WIN_SCREEN_SFX_3, Sound.class);
public static final String WIN_SCREEN_SFX_4 = "sounds/haYouDidIt.mp3";
public static final AssetDescriptor<Sound> haYouDidIt = new AssetDescriptor<>(WIN_SCREEN_SFX_4, Sound.class);
public static final String WIN_SCREEN_SFX_5 = "sounds/takeThatLyingDown.mp3";
public static final AssetDescriptor<Sound> takeThatLyingDown = new AssetDescriptor<>(WIN_SCREEN_SFX_5, Sound.class);
public static final String WIN_SCREEN_SFX_6 = "sounds/youWon.mp3";
public static final AssetDescriptor<Sound> youWon = new AssetDescriptor<>(WIN_SCREEN_SFX_6, Sound.class);
Then the usual song and dance with the Sounds class, defining a next method, and
the list of assets:
public AssetDescriptor<Sound> nextWin() {
    AssetDescriptor<Sound> descriptor = this.wins.get(idx % this.wins.size());
    idx++;
    return descriptor;
}

public List<AssetDescriptor<Sound>> winAssets() {
    List<AssetDescriptor<Sound>> list = new LinkedList<>();
    list.add(GameAssets.areYouProudOfThatPerformance);
    list.add(GameAssets.congratsOldBoy);
    list.add(GameAssets.congratulationsYouWon);
    list.add(GameAssets.haYouDidIt);
    list.add(GameAssets.takeThatLyingDown);
    list.add(GameAssets.youWon);
    return list;
}
Then wiring it into the construction of the win screen and playing the sound once on load:
...
private Sounds sounds;
boolean hasPlayedSFX = false;

public WinScene(GameRunner gameRunner, String msg) {
    this.sounds = new Sounds();
    ...
    requiredAssets.addAll(sounds.winAssets());
}

@Override
public void update(float delta) {
    if (!hasPlayedSFX) {
        gameRunner.assets.getSound(sounds.nextWin()).play();
        hasPlayedSFX = true;
    }
    ...
}
And now we have some form of congratulatory sound when a player wins!
My audio balancing isn't very good. But for the purposes of this challenge. It's good enough I suppose. Let's move on to the next stretch goal!
Computer controlled paddles ↩
Now, as much as I love playing with myself, I'd really like to not have to control two paddles at once. In fact, sometimes I'd like to just lay back and let the computer have fun for a while whilst I get a snack. So let's think about adding some intelligence to the machine.
The first idea that comes to mind is that we should move out input processing
logic over to an actual InputProcessor class, and then we can
define an automated one for computer. But, let's review our current code to
get our head on straight before we start to do that.
if (Gdx.input.isKeyPressed(Input.Keys.W)) {
    red.moveUp(delta);
}
if (Gdx.input.isKeyPressed(Input.Keys.S)) {
    red.moveDown(delta);
}
if (Gdx.input.isKeyPressed(Input.Keys.UP)) {
    blue.moveUp(delta);
}
if (Gdx.input.isKeyPressed(Input.Keys.DOWN)) {
    blue.moveDown(delta);
}
Some
package spare.peetseater.peng.inputs;

import com.badlogic.gdx.InputAdapter;

public class PCPaddleInputProcessor extends InputAdapter {

    private final int upKey;
    private final int downKey;
    public PADDLE_COMMAND currentDecision;

    public PCPaddleInputProcessor(int upKey, int downKey) {
        this.upKey = upKey;
        this.downKey = downKey;
        this.currentDecision = PADDLE_COMMAND.NOTHING;
    }

    public PADDLE_COMMAND getCurrentCommand() {
        return this.currentDecision;
    }

    @Override
    public boolean keyDown(int keycode) {
        if (keycode == upKey) {
            currentDecision = PADDLE_COMMAND.UP;
            return true;
        }
        if (keycode == downKey) {
            currentDecision = PADDLE_COMMAND.DOWN;
            return true;
        }
        return super.keyDown(keycode);
    }

    @Override
    public boolean keyUp(int keycode) {
        currentDecision = PADDLE_COMMAND.NOTHING;
        return super.keyUp(keycode);
    }
}
With the assumption that we've declared a useful PADDLE_COMMAND enum
with the used values elsewhere. The code in the update function is
nearly identical to what it was before:
if (redInputProcessor.getCurrentCommand().equals(PADDLE_COMMAND.UP)) {
    red.moveUp(delta);
}
if (redInputProcessor.getCurrentCommand().equals(PADDLE_COMMAND.DOWN)) {
    red.moveDown(delta);
}

if (blueInputProcessor.getCurrentCommand().equals(PADDLE_COMMAND.UP)) {
    blue.moveUp(delta);
}
if (blueInputProcessor.getCurrentCommand().equals(PADDLE_COMMAND.DOWN)) {
    blue.moveDown(delta);
}
But in order for this to actually work, we need to tell LibGDX to use
the input processors. We can do that in our constructor for the BattleScene:
...
red = new Paddle(18, VIRTUAL_HEIGHT / 2f);
redInputProcessor = new PCPaddleInputProcessor(Input.Keys.W, Input.Keys.S);

blue = new Paddle(VIRTUAL_WIDTH - Paddle.WIDTH * 2, VIRTUAL_HEIGHT / 2f);
blueInputProcessor = new PCPaddleInputProcessor(Input.Keys.UP, Input.Keys.DOWN);

InputMultiplexer multiPlexer = new InputMultiplexer();
multiPlexer.addProcessor(redInputProcessor);
multiPlexer.addProcessor(blueInputProcessor);
Gdx.input.setInputProcessor(multiPlexer);
...
And you can probaly see how flexible this is. We can easily change the keys used to control either paddle. And importantly, if we abstract the interface out a bit, we can just define the input processors in terms of which commands they give and then create an artifical one that can update like all the other entities in our game's world. So, here's the interface:
package spare.peetseater.peng.inputs;

public interface PaddleInputProcessor {
    PADDLE_COMMAND getCurrentCommand();
}
And our first omniscent CPU implementation that is far too good at the game to keep if we were releasing this on steam:
public class CPUPaddleProcessor implements PaddleInputProcessor {
    private Ball ball;
    private final Paddle myPaddle;

    public CPUPaddleProcessor(Ball ball, Paddle cpuControlledPaddle) {
        this.ball = ball;
        this.myPaddle = cpuControlledPaddle;
    }

    @Override
    public PADDLE_COMMAND getCurrentCommand() {
        if (ball.getAnchorY() < myPaddle.getY()) {
            return PADDLE_COMMAND.DOWN;
        } else if (ball.getAnchorY() > myPaddle.getY()) {
            return PADDLE_COMMAND.UP;
        }
        return PADDLE_COMMAND.NOTHING;
    }

    public void setBall(Ball ball) {
        this.ball = ball;
    }
}
Since the CPU knows where the ball is and can just copy the y value out, it makes it pretty easy for it to handle straight on shots perfectly. Though, a human can predict where a ball will be, so they'd win in very bouncy situations as you can see here:
Now, there is a question here though. How do we choose which input processor to use exactly? And since we create a brand new ball whenever we reset, how do we make sure that we deal with that properly when a CPU and Player character are mixed? Let's define an enum for the situations we'll care about:
package spare.peetseater.peng.inputs;

public enum PlayerSet {
    PLAYER_VS_PLAYER,
    PLAYER_VS_CPU,
    CPU_VS_CPU
}
Then we insert some logic into the constructor to set up the correct processors:
Gdx.input.setInputProcessor(null);
switch (playerSet) {
    case PLAYER_VS_PLAYER:
        redInputProcessor = new PCPaddleInputProcessor(Input.Keys.W, Input.Keys.S);
        blueInputProcessor = new PCPaddleInputProcessor(Input.Keys.UP, Input.Keys.DOWN);
        InputMultiplexer multiPlexer = new InputMultiplexer();
        multiPlexer.addProcessor((InputProcessor) redInputProcessor);
        multiPlexer.addProcessor((InputProcessor) blueInputProcessor);
        Gdx.input.setInputProcessor(multiPlexer);
        break;
    case PLAYER_VS_CPU:
        redInputProcessor = new CPUPaddleProcessor(null, red);
        blueInputProcessor = new PCPaddleInputProcessor(Input.Keys.UP, Input.Keys.DOWN);
        Gdx.input.setInputProcessor((InputProcessor) blueInputProcessor);
        break;
    case CPU_VS_CPU:
        redInputProcessor = new CPUPaddleProcessor(null, red);
        blueInputProcessor = new CPUPaddleProcessor(null, blue);
        break;
}
And we set the Input type from the Title screen to start. And we'll need to pass the current setting over through the Win screen in order to handle the rematch. Alternatively, we could define the setting within the GameRunner and just use that. I like this idea because everything already cares about the game runner, so it's one less thing to tweak. Speaking of, let's handle the reseting of the ball when CPUs are involved. Since we make a new ball we have to ensure that they know about the newly created ball or else they'll just sit around doing nothing:
private void resetBall() {
    ball = new Ball(VIRTUAL_WIDTH/2f, VIRTUAL_HEIGHT/2f);
    if (redInputProcessor instanceof CPUPaddleProcessor) {
        ((CPUPaddleProcessor)redInputProcessor).setBall(ball);
    }
    if (blueInputProcessor instanceof CPUPaddleProcessor) {
        ((CPUPaddleProcessor)blueInputProcessor).setBall(ball);
    }
    ...
And lastly, the change I mentioned in the GamerRunner:
PlayerSet playerSet;

@Override
public void create() {
    playerSet = PlayerSet.CPU_VS_CPU;
    ...
}

public void setPlayersSet(PlayerSet playerSet) {
    this.playerSet = playerSet;
}

public PlayerSet getPlayersSet() {
    return this.playerSet;
}
But how will we set this? We can't just hard code it and think that people will run a different executable for each game mode. I think we can make a couple more buttons on the title screen but, I don't really love the idea of stuffing 3 buttons onto that screen in addition to the quit button.
What if we just have an interstitial screen between the title and the battle screen? You press start, then the selection for what game mode, then you're good to go? Ah, you know what I like about this idea? We could totally display the controls on this screen! At this point, the usual song and dance for the Scene setup should seem pretty natural:
public class GameModeSelectScene implements Scene {

    public static final String P1_V_P2 =   "P1  v  P2 ";
    public static final String P1_V_CPU =  "P1  v  CPU";
    public static final String CPU_V_CPU = "CPU v  CPU";
    private final GameRunner gameRunner;
    List<String> buttons;
    int currentSelectedButton;

    public GameModeSelectScene(GameRunner gameRunner) {
        this.gameRunner = gameRunner;
        this.currentSelectedButton = 0;
        this.buttons = new LinkedList<>();
        this.buttons.add(P1_V_P2);
        this.buttons.add(P1_V_CPU);
        this.buttons.add(CPU_V_CPU);
    }

    @Override
    public List<AssetDescriptor<?>> requiredAssets() {
        List<AssetDescriptor<?>> list = new LinkedList<>();
        list.add(GameAssets.wall);
        list.add(GameAssets.scoreFont);
        return list;
    }
    ...
then we define handling the inputs:
@Override
public void update(float delta) {
    if (Gdx.input.isKeyJustPressed(Input.Keys.DOWN)) {
        currentSelectedButton += 1;
        currentSelectedButton = Math.min(this.buttons.size() - 1, currentSelectedButton);
    }
    if (Gdx.input.isKeyJustPressed(Input.Keys.UP)) {
        currentSelectedButton -= 1;
        currentSelectedButton = Math.max(0, currentSelectedButton);
    }
    if (Gdx.input.isKeyJustPressed(Input.Keys.ENTER)) {
        gameRunner.setPlayersSet(getSelectedPlayerSet());
        gameRunner.changeToNewScene(new BattleScene(gameRunner));
    }
}

private PlayerSet getSelectedPlayerSet() {
    String buttonText = this.buttons.get(currentSelectedButton);
    switch (buttonText) {
        case P1_V_CPU:   return PlayerSet.PLAYER_VS_CPU;
        case P1_V_P2:    return PlayerSet.PLAYER_VS_PLAYER;
        case CPU_V_CPU:
        default:         return PlayerSet.CPU_VS_CPU;
    }
}
and lastly, define the render to try to place things in a somewhat readable place. I'm not looking to win any awards here with this user interface. The challenge is about making games in order to get better at it, and to have fun. Not to amaze anyone with anything beyond how lazy I can be perhaps:
@Override
public void render(float delta) {
    BitmapFont font = gameRunner.assets.getFont(GameAssets.scoreFont);
    Texture wall = gameRunner.assets.getTexture(GameAssets.wall);

    float buttonHeight = Ball.CIRCUMFERENCE * 3;
    float windowTitleTextY = VIRTUAL_HEIGHT - buttonHeight;
    float buttonYStart = windowTitleTextY - buttonHeight * 2;
    float controlsY = buttonYStart - buttonHeight * this.buttons.size() * 2 - Ball.CIRCUMFERENCE;

    ScreenUtils.clear(Color.DARK_GRAY);
    font.draw(
        gameRunner.batch,
        "Game Mode Select",
        0, windowTitleTextY,
        VIRTUAL_WIDTH, Align.center, false
    );

    for (int i = 0; i < this.buttons.size(); i++) {
        float buttonY = buttonYStart - (buttonHeight + 1) * i * 2;
        font.draw(
            gameRunner.batch,
            this.buttons.get(i),
            VIRTUAL_WIDTH/3 - 100, buttonY,
            VIRTUAL_WIDTH, Align.left, false
        );
        if (currentSelectedButton == i) {
            gameRunner.batch.draw(wall, VIRTUAL_WIDTH/3f - 100 - Ball.CIRCUMFERENCE * 2, buttonY - buttonHeight/2f, Ball.CIRCUMFERENCE, Ball.CIRCUMFERENCE);
        }
    }

    font.draw(
        gameRunner.batch,
        "Controls:\nRed: W + S\nBlue: Up + Down",
        0, controlsY,
        VIRTUAL_WIDTH, Align.center, true
    );
}
This mess of math renders out the following screen:
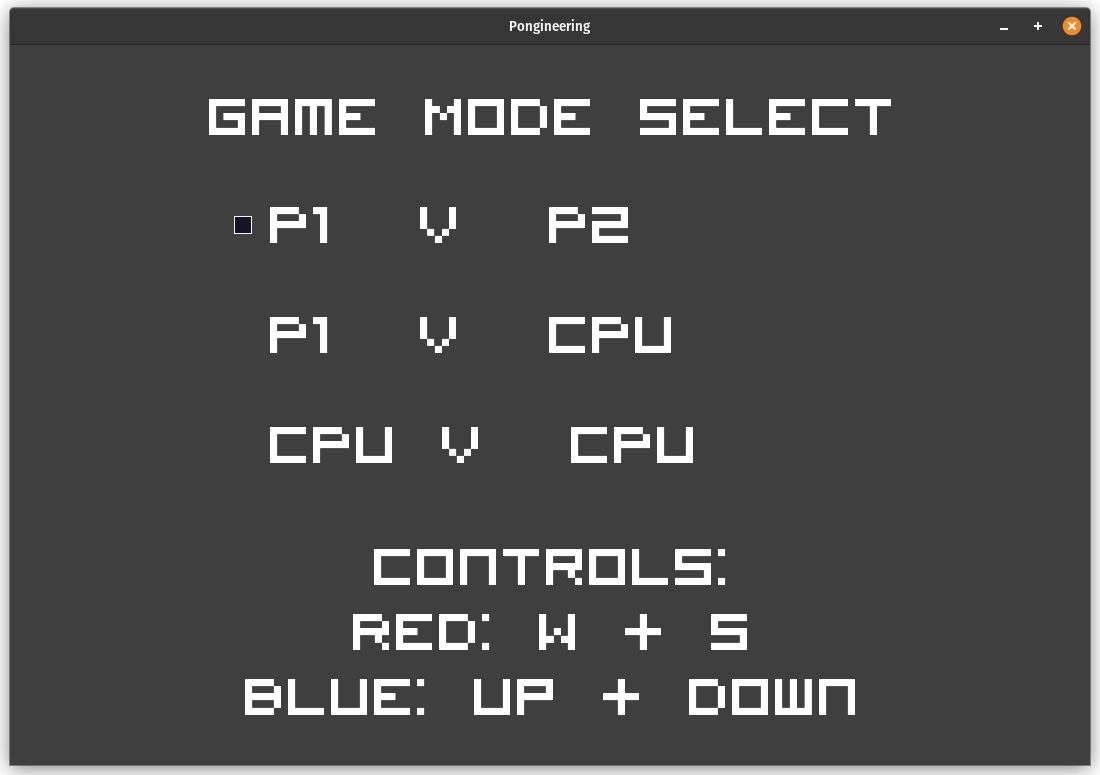
Like I said. I'm not winning any awards here for design. As much as I'd like to make something beautiful. I feel like the place to spend that sort of effort and learning is not on pong. Functional is the name of the game here, and the game mode selection screen is functional if we tweak the title screen like so:
if (Gdx.input.isKeyJustPressed(Input.Keys.ENTER)) {
    switch (selectedButton) {
        case START_BUTTON_CHOICE:
            gameRunner.changeToNewScene(new GameModeSelectScene(gameRunner));
            break;
        case QUIT_BUTTON_CHOICE:
            Gdx.app.exit();
    }
}
So then! That's a simple AI done! What else was on our list again before we call this game done? Screen transitions… Let's not bother with this today. Let's call it a wrap. 13
Wrap up ↩
So that's pong. We got the basic implementation of the game down, false starts on the math side of things notwithstanding, and we did set up a CPU and some non-game screens. So we've ticked all the boxes that the challenge set up for us.
Did we hit every stretch goal? We hit the ones that 20 game's challenge defined.
The over-engineering goals I through out there? Yeah, we hit all but one of those.
I didn't want to spend the time on transitions between screens when there's really
not much point since the game loads instantly on a modern machine. Our scenes are
swapped by the GameRunner class and we don't have a bunch of setScreenToX
type functions for every different screen like our previous game's code did. We're
also properly using the asset manager, even if we're not asynchronously loading and
streaming in assets behind a load screen.
I had fun making those silly sound effects, and while I think there's a slight bug in the collision code, where the ball can clip past the paddle in certain circumstances, the game works well enough that you could probably play it with a friend have fun. So, I'll call it a success.
As per usual, you can download the game to play it yourself off of the github repository. The various files to run if you don't want to compile it yourself are in the release section. If you have thoughts about it, want to improve it, or want to blog about your own implementation, feel free to let me know! You can always find me on twitch during the business week in the evening for live chatter, or find me in IRC if you know where.
See you next time! We'll probably be either doing the break out clone, or maybe something else depending on what strikes my interest! Here's two CPUs going at it in the pong game for your amusement to close out the post: