Setup and design decisions ↩
As noted on the 20 games challenge website The idea is to learn about game development through a series of (I'm assuming) ever-increasing difficult programming assignments. There are a series of suggested games to make for your first 10, and I think the idea is to have you get creative with the process and come up with ideas as needed for the others if you want. Additionally, there's a few rules:
- No tutorials allowed, though you can ask questions and look up information online
- Constrain yourself, attempt to complete each game within 20 dev hours, or at least develop a good sense of when to stop
- Be flexible, start with a rough plan but expand and explore new ideas as you go
Since I'll be blogging as I write my code, and probably taking time to construct a visual here or there to explain what I'm up to for all you lovely readers of this blog, I'm going to be very flexible with the 20 dev hours aspect of this challenge. After all, I haven't even setup my IDE yet and I'm already writing this introduction! But then again, that's sort of par for the course with me and my blog. Also, I'll be doing the same thing that I did when I made a match 3 game last year as far as assets go. I'll either toss something together myself in pinta, or I'll hunt for CC licensed content on itch.io.
With the rules out of the way, let's talk about the game we'll be making! On the challenge page the first recommended set of games is either Pong, or Flappy bird. As you can tell from the title of this blog post, we'll be going with the second option. If you're unfamiliar:
Flappy bird was a mobile game from 2013. It was a sleeper hit, gaining sudden and massive popularity in 2014, likely due to attention from a popular YouTuber at that time. The game was removed from the App store after it’s sudden popularity due to negative media attention.
I never knew about the "negative media attention", though I do remember a lot of clones of the game at the time trying to ride the coattails, and it's been a staple in Wario-ware type clones, so it's certainly had an impact lasting longer than its 1 year stint. Neat. Anyway, the challenge page lists off our basic requirements, which I'll paraphrase:
- The game world has a floor
- There must be a main character who is affected by gravity
- There must be obstacles that slide in from the right, they should appear as a pair with a vertical gap between them
- Touching the floor or obstacles will result in a game reset
- Each obstacle passed through scores the player 1 point, their score should be displayed
Funnily enough, the actual way one interacts with the player character isn't specified. But in the flappy bird clones I've played, you click or tap to flap the birds wings and this gives a bit of upward velocity each time. So, tap enough and the bird goes up, then stop tapping and the bird falls down. Simple. There's also a few stretch goals that we can consider as well:
- Add sound effects
- Add a game over screen
- Track high score over sessions and display it and the current score
- Add background art and consider parallax scrolling
We'll see if we can knock any of those out or not. But first things first, I recently migrated from Windows to PopOS and I have yet to set up any editor beyond Sublime Text. While I do very much love Sublime Text and using it to write this blog and rust, when it comes to game development, I'm one of those weird people who says: Let's use Java! 1
So let's setup IntelliJ and get a basic LibGDX project started. 2 It's been quite some time since I had to think about how to get java onto a computer that doesn't have it. And so part of me was thinking: "Has anything changed? do we still use JAVA_HOME? Do people just tweak that to have multiple version of java on their machine? Has anyone invented things like a version manager for java that has nice commands or anything? Do I just apt-get it?" But after a quick 10s mental pause that reminded me of Harrison Bergeron I went ahead and decided to download intelliJ's tar file first because I would be unsurprised if it ended up giving me an easier time than trying to navigate the actual Java website.
To my unsurprise, there was an option for just that!
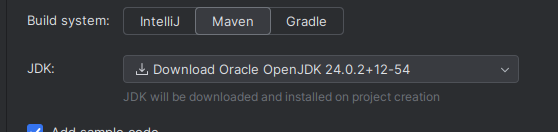
Granted, I don't want to just setup a plain Java project. Much like before, I want to use the LibGDX launcher to configure my project and deal with all the nonsense around gradle and whatnot. Downloading the latest release and double clicking on the binary shows me that we've got a fancy new version!

Very cool looking. Aftering setting up some project configuration 3 I clicked a few buttons, told IntelliJ to create a desktop launcher for itself and then was waiting for the little loading bar at the bottom to finish setting up gradle:

And then I executed the application run task:
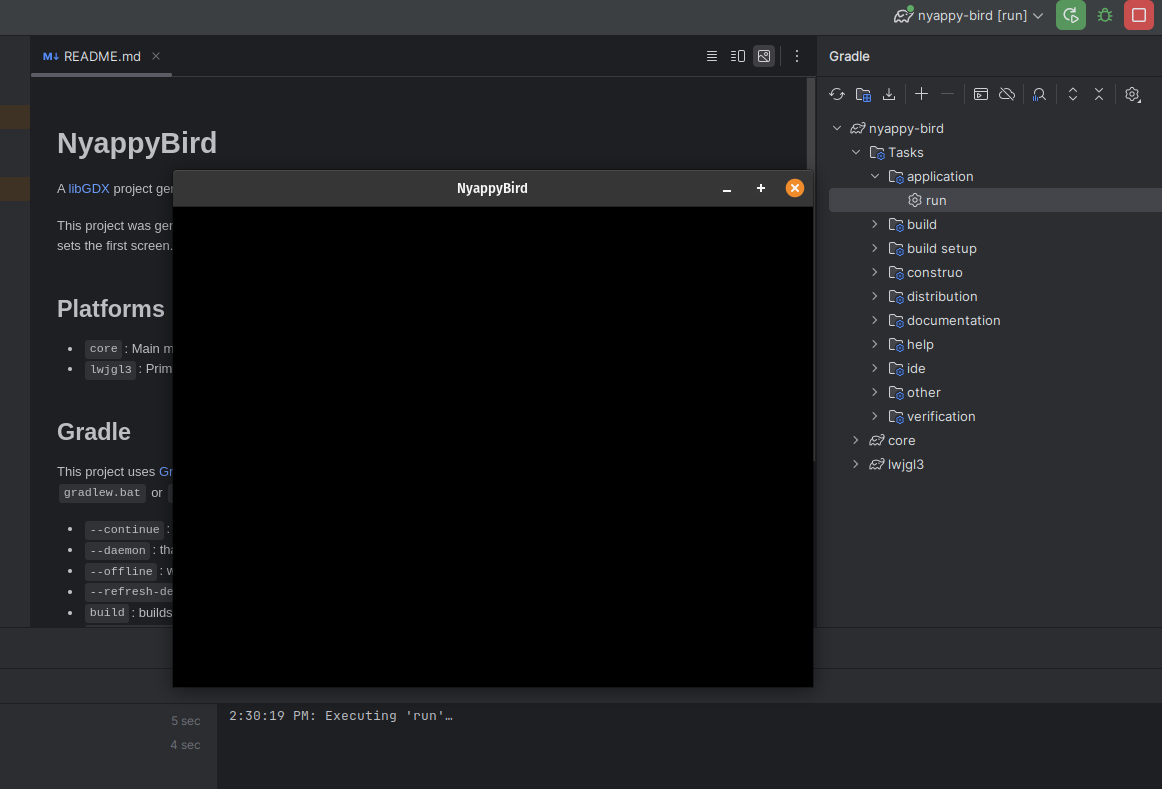
Excellent. Sounds like a perfect time to git commit the initial working project
before I screw anything up. And also back it up on github just in case my computer gets struck by a bolt of lightning. Great, so we've
got a project set up, we've got a list of requirements to do, and really the only thing left
before we dive into it is to tell you why I'm calling this Nyappy Bird in the first place.
Nyan Cat was a silly meme that went around the internet while I was in college. I had a couple friends who were obsessed with it and I enjoyed it myself. While I was thinking about whether or not I should do pong or flappy bird, it came to mind when I was asking myself: "What kind of sprite would I use for the bird?" Obviously, a cat. The Cat is just "the nyan cat" and so nya + flappy = nyappy. Easy. This also gives you a hint as to what we're going to eventually try to do with a sprite and probably what we'll try to do with our background music as well. Let's get started.
Gravity and an empty world ↩
As I've used the "Game", rather than that "Classic" template for our project skeleton.
The code at the moment is quite minimal. We have two files, one is a class named Main
that's extending the Game class:
package spare.peetseater.nb;

import com.badlogic.gdx.Game;

/** {@link com.badlogic.gdx.ApplicationListener} implementation shared by all platforms. */
public class Main extends Game {
    @Override
    public void create() {
        setScreen(new FirstScreen());
    }
}
The other is the FirstScreen class mentioned in the above snippet.
package spare.peetseater.nb;

import com.badlogic.gdx.Screen;

/** First screen of the application. Displayed after the application is created. */
public class FirstScreen implements Screen {
    @Override
    public void show() {
        // Prepare your screen here.
    }

    @Override
    public void render(float delta) {
        // Draw your screen here. "delta" is the time since last render in seconds.
    }

    @Override
    public void resize(int width, int height) {
        // If the window is minimized on a desktop (LWJGL3) platform, width and height are 0, which causes problems.
        // In that case, we don't resize anything, and wait for the window to be a normal size before updating.
        if(width <= 0 || height <= 0) return;

        // Resize your screen here. The parameters represent the new window size.
    }

    @Override
    public void pause() {
        // Invoked when your application is paused.
    }

    @Override
    public void resume() {
        // Invoked when your application is resumed after pause.
    }

    @Override
    public void hide() {
        // This method is called when another screen replaces this one.
    }

    @Override
    public void dispose() {
        // Destroy screen's assets here.
    }
}
As you can see. We've got very little going on here and we need to change that. If you're wondering why I didn't go with the "Classic" template. It's because I didn't want to have to refactor the code to be ready for multiple screens later in its life. Rather, it makes things simpler if you have your Game class manage that sort of thing since then you don't have to rip half the world out when you want to set up nice things like screen transitions later on in life.
Unfortunately, it does mean that I need to look up some documentation to get the ball actually rolling. The first thing being that I want a camera. It's fine to draw pixel perfect things all the time, but I think that it's generally nice to work with "world coordinates" and not be stuck counting pixels when really you'd prefer to think about stuff in terms of how big it is in relation to the player character. For example, would you rather have to do math or remember how big your character sprite is when we construct the holes in the obstacles it will go through? Or would you rather define 1 to be the size of the character's height and then ensure that you never go beneath that?
That's what I thought. So, let's declare our camera in the Screen.
public class FirstScreen implements Screen {
private OrthographicCamera camera;
private FitViewport viewport;

public FirstScreen() {
    this.camera = new OrthographicCamera();
    this.viewport = new FitViewport(~~~);
}
As you can see by the red squiggle. This code won't compile yet. The FitViewport needs to know the width and height of our game world in order to know how to, erm, view it. I don't like to hard code these things, rather, let's track it in the game class.
private OrthographicCamera camera;
private FitViewport viewport;
Main game;

public FirstScreen(Main game) {
    this.camera = new OrthographicCamera();
    this.viewport = new FitViewport(game.worldWidth, game.worldHeight, camera);
    this.game = game;
}
There are two things I don't like about our code now. One, it still doesn't compile because I haven't declared the fields. And two, I very much dislike the fact that our game's class name is Main. While it does provide an obvious "START HERE" flag to anyone unfamiliar with the code. It's bad when it comes to reading it here in context. We can kill two birds with one stone:
public class NyappyBirdGame extends Game {
    public float worldWidth = 8;
    public float worldHeight = 6;

    @Override
    public void create() {
        setScreen(new FirstScreen(this));
    }
}
If you were seeing the repo for the first time and saw the class "ThingGame", you'd likely start there. So that aligns with the "Main" mental model, and over in the screen class
private OrthographicCamera camera;
private FitViewport viewport;
NyappyBirdGame game;

public FirstScreen(NyappyBirdGame game) {
    this.camera = new OrthographicCamera();
    this.viewport = new FitViewport(game.worldWidth, game.worldHeight, camera);
    this.camera.setToOrtho(
        false, game.worldWidth, game.worldHeight // bottom left is 0,0
    );
    this.game = game;
}

@Override
public void resize(int width, int height) {
    // If the window is minimized, width and height are 0, which causes problems.
    if(width <= 0 || height <= 0) return;
    viewport.update(width, height);
}
Everything now happily compiles and we're able to deal with someone resizing the screen. Good. You might be wondering why I set the world height to 8 and height to 6 though.
The overally application is currently launched as a 640x480 window. So our aspect ratio is 4:3, which sounds like a perfectly fine size to me for this game. Assuming I make the character sprite be 1 world unit tall, I want there to be enough leeway for people seeing obstacles come in as fairly possible, but also don't want the sprite to be too small 4. We may need to adjust in a bit, but for off the cuff estimates, this will do for now.
So I have a camera looking into the scene. Let's draw something! I think this is an important teaching moment though. So let me emphasize this for you all:
Starting your game by creating assets before you make game logic is a surefire way to tank your productivity. All the time you spend tweaking pixels and visuals to get something "just" right, is time spent away from making your game mechanics fun.
- Peetseater
This was a pretty valuable lesson that I found out firsthand when I finished my match 3 game, but then in another project (which I didn't finish) I spent all my time getting screen transitions looking neat and none of my time figuring out mechanics and I ultimately moved on to other projects because I couldn't stay focused on the game when I could see visuals that I really wanted to adjust still because they felt off.
As such, let's make our player character very very simple to start:
package spare.peetseater.nb;

import com.badlogic.gdx.graphics.Color;
import com.badlogic.gdx.graphics.Pixmap;
import com.badlogic.gdx.graphics.Texture;

public class NyappyAssets {
    public static Texture makeTexture(Color color) {
        int width = 64;
        int height = 64;
        Pixmap pixmap = new Pixmap(width, height, Pixmap.Format.RGBA8888);
        pixmap.setColor(color);
        pixmap.fill();
        Texture texture = new Texture(pixmap);
        pixmap.dispose();
        return texture;
    }
}
Yup. That's right. We're going to just use a simple tile for the time being
for this. There's no reason to get fancy yet, we can just have a coloured
block until we're ready to continue on with our journey. The second step in
that journey is actually drawing this to the screen, which means we need a
SpriteBatch available to us to call from within the render
function. The LibGDX wiki pages
talk about recommendations on using SpriteBatches, but the general rule of
thumb that we'll be following in our 2d games is that we'll have one
of these objects. And so, we'll attach it to our main game class and then
reference it as needed. 5
public class NyappyBirdGame extends Game {
    ...
    SpriteBatch batch;
    ...
    public void create() {
        this.batch = new SpriteBatch();
        setScreen(new FirstScreen(this));
    }
}
And then we can use it in our render method in the screen class:
public FirstScreen(NyappyBirdGame game) {
    ...
    playerTexture = NyappyAssets.makeTexture(Color.BLUE);
}

@Override
public void render(float delta) {
    this.camera.update();
    this.game.batch.setProjectionMatrix(camera.combined);
    ScreenUtils.clear(Color.YELLOW);
    this.game.batch.begin();
    this.game.batch.draw(playerTexture, 4, 3, 1, 1);
    this.game.batch.end();
}
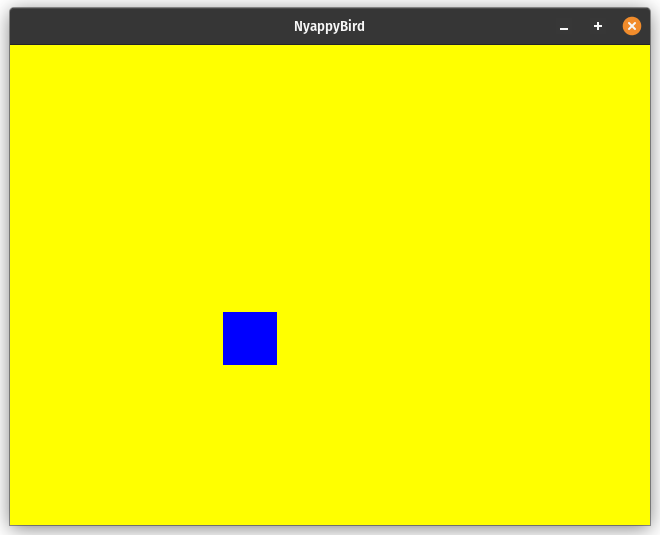
Unlike before, these magic numbers are just some basics so that we can confirm everything works as expected and that we're making good choices as far as our world height and width go. I've explained in detail before about how world coordinates work in the camera section of my match 3 blog post here, so I won't go into too much detail now. But, in essence, we just told the game to render the texture for the player character at the world location of (4, 3), with a size of 1 unit by 1 unit for both its width and height. This looks like this:

I hope that between the blood now streaming from your eyes from the harsh colors here that you can see that clearly, we've made some poor choices. The world is a bit too small, we want to be able to fit at least 4 or 5 obstacles on screen at once eventually, and so the current width isn't acceptable. The height isn't too bad, but it could stand to be a bit taller as well. Let's multiply everything by 1.5:
        	    	public float worldWidth = 12f;
    				public float worldHeight = 9f;
That's better. Perfect. What was out goal for this section again? Oh, right. You'd think it'd weigh more on my mind, but I suppose it's easy to forget about gravity sometimes. As anyone who's passed a physics course can tell you, gravity is approximately 9.8 meters per second towards the surface of the earth.
We're not working in "earth" units though. But we can work out a reasonable equalvalent value for our little world. But I think first, I'd like to create a simple class to track our sprite so that we don't pollute the screen space with extra fields.
public class Player {
    private float y;
    private float x;

    public Player(float x, float y) {
        this.x = x;
        this.y = y;
    }

    public void update(float delta, float gravity) {
        this.y -= gravity * delta;
    }

	... getter and setters...
}
For the time being, we'll apply the results of gravity to the player's
y location by the simple measure of v = d/t or, distance = velocity * time.
Technically, this isn't the correct way to do this, because gravity is
an acceleration and not just a plain velocity vector. But, we're
making a flappy bird clone. We can handwave it away a bit for the time being
while we get the main game mechanics and then circle back if we want to do
more realistic calculations later. For now, let's update our drawing code
to use this:
public FirstScreen(NyappyBirdGame game) {
    ...
    player = new Player(4,3);
}

@Override
public void render(float delta) {
    this.camera.update();
    this.player.update(delta, 0.5f);

    this.game.batch.setProjectionMatrix(camera.combined);
    ScreenUtils.clear(Color.YELLOW);
    this.game.batch.begin();
    this.game.batch.draw(playerTexture, player.getX(),player.getY(), 1, 1);
    this.game.batch.end();
}
Our call to update each frame will result in gravity being applied,
but also, the bird will fall into the abyss eventually becuase we haven't created
a floor yet:
This is simple to fix. It's just a question of do we want our "world" to be the
one responsible for this, or do we want to have the player class deal with it?
Thinking about the trade offs here, if we never allow our player to fall through
the world, then we'll probably be doing some if (y <= 0) checks
when it comes to figuring out if we should make the game reset or not. That's fine
and all, but I have an idea.
What if we just use the idea of a "kill plane" for both the floors and the obstacles?
If you've ever played a game where there were pits before, you know that if you fall into one, your player doesn't normally immediately die. Typically, you can jump into a pit like a lemming, and watch your character fall through and disappear into the hole, and then a little death sound happens or the game over screen pops up. Similar, if you go out of bounds of the play area somehow, a lot of games detect this and then kill your character to return the game world into a valid state.
If you think about it, both the floor and the obstacles we'll be dealing with act as kill planes. So, why don't we just work with that and do some simple 2d collision detection? This will simplify the number of concepts we have to actively think about down to two: the bird and the bonk of its beak against the boundary. So, let's codify that real quick into code.
package spare.peetseater.nb;

public class KillPlane {
    private float leftCornerX;
    private float leftCornerY;
    private final float width;
    private final float height;

    public KillPlane(float leftCornerX, float leftCornerY, float width, float height) {
        this.leftCornerX = leftCornerX;
        this.leftCornerY = leftCornerY;
        this.width = width;
        this.height = height;
    }

    public boolean intersects(Player player) {
        float px = player.getX();
        float py = player.getY();
        boolean withinXRange = leftCornerX <= px && px <= leftCornerX + width;
        boolean withinYRange = leftCornerY <= py && py <= leftCornerY + height;
        return withinXRange && withinYRange;
    }
    ... getters and setters ...
And then let's define our "floor" and draw in a texture for it as well, back in the first screen class:
List<KillPlane> killPlanes;

public FirstScreen(NyappyBirdGame game) {
    ...
    tunnelTexture = NyappyAssets.makeTexture(Color.RED);
    killPlanes = new LinkedList<KillPlane>();
    // The floor and ceiling
    killPlanes.add(new KillPlane(0, 0, game.worldWidth, 1));
    killPlanes.add(new KillPlane(0, game.worldHeight - 1, game.worldWidth, 1));
}

public void render(float delta) {
    ...
    boolean playerMustDie = false;
    for (KillPlane killPlane : killPlanes) {
        playerMustDie = killPlane.intersects(player);
        if (playerMustDie) break;
    }

    this.game.batch.setProjectionMatrix(camera.combined);
    ScreenUtils.clear(Color.YELLOW);
    if (playerMustDie) {
        ScreenUtils.clear(Color.GREEN);
    }

    this.game.batch.begin();
    this.game.batch.draw(playerTexture, player.getX(),player.getY(), 1, 1);
    for (KillPlane killPlane : killPlanes) {
        this.game.batch.draw(
            tunnelTexture,
            killPlane.getLeftCornerX(), killPlane.getLeftCornerY(),
            killPlane.getWidth(), killPlane.getHeight()
        );
    }
    this.game.batch.end();
}
Straightforward right? There's really not a whole lot of logic yet, but the important thing is that it works. When we touch a kill plane, the background should turn green:
You'll notice that the screen turns back to yellow at the end. That's because we're not clamping our bird at all, so eventually we fall through and are no longer touching the plane. Given that we'll be resetting the game, we can safely ignore this for now, provided we make sure that the ceiling and floor don't allow the bird to fall through them on a single frame update.
So. We've got gravity, and we've got a floor! So we've met the requirement,
but let's do a quick refactor on the code in our render function
real quick:
+ private boolean playerMustDie;

+ private void update(float delta) {
    this.camera.update();
    this.player.update(delta, 0.5f);
    playerMustDie = false;
    for (KillPlane killPlane : killPlanes) {
        playerMustDie = killPlane.intersects(player);
        if (playerMustDie) break;
    }

    this.game.batch.setProjectionMatrix(camera.combined);
+ }

+ private void draw(float delta) {
    ScreenUtils.clear(Color.YELLOW);
    if (playerMustDie) {
        ScreenUtils.clear(Color.GREEN);
    }
    this.game.batch.begin();
    this.game.batch.draw(playerTexture, player.getX(),player.getY(), 1, 1);
    for (KillPlane killPlane : killPlanes) {
        this.game.batch.draw(
            tunnelTexture,
            killPlane.getLeftCornerX(), killPlane.getLeftCornerY(),
            killPlane.getWidth(), killPlane.getHeight()
        );
    }
    this.game.batch.end();
+ }

@Override
public void render(float delta) {
+    update(delta);
+    draw(delta);
}
As you can see by the +, this is a very minor
refactor. I just wanted to split the render calls two primary concerns up
into separate functions. Since we have render logic that's conditional on this
state, the playerMustDie value became a class field, and its simple
to know where to go to look for stateful updates or rendering code. 6
Let's move on to our next requirement.
Obstacles ↩
Given our perspective shift that has unified the concept of an obstacle with a kill plane, this next step is pretty straightforward. Really, the only additional work we need to do is the part where they're moving. Luckily, we have setters and getters for the x and y, so we could set these directly as needed on each update.
Or, we could unify the way we interact with the objects in the game world and
define an update function. I like this idea a good bit because having things
be consistent generally makes for a nicer feeling for me as I try to explain
concepts to you all in blogform, and I think it just makes for more manageable
code. So let's make it possible to update a KillPlane and also
make it possible to set its velocity.
public class KillPlane {
    ...
    private Vector2 velocity;

    public KillPlane(float leftCornerX, float leftCornerY, float width, float height) {
        ...
        velocity = Vector2.Zero;
    }

    public void update(float delta) {
        this.leftCornerX -= this.velocity.x * delta;
        this.leftCornerY -= this.velocity.y * delta;
    }

    ... getters/setters ...
And then we can construct our first obstacle and set the velocity with an arbitrary number:
KillPlane jaw1Bottom = new KillPlane(6, 0, 0.5f, 3);
KillPlane jaw1Top = new KillPlane(6, 5, 0.5f, 3);
Vector2 obstacleSpeed = new Vector2(1, 0);
jaw1Bottom.setVelocity(obstacleSpeed);
jaw1Top.setVelocity(obstacleSpeed);
killPlanes.add(jaw1Bottom);
killPlanes.add(jaw1Top);
and lastly, add the update call in:
private void update(float delta) {
    this.camera.update();
    this.player.update(delta, 0.5f);
    playerMustDie = false;
    for (KillPlane killPlane : killPlanes) {
        + killPlane.update(delta);
        playerMustDie = killPlane.intersects(player);
        if (playerMustDie) break;
    }

    this.game.batch.setProjectionMatrix(camera.combined);
}
There's a bug here though. See if you can spot it before you click on the webm:
Do you see it? The bug is pretty obvious if you look at the loop. The optimization we were doing to break out of the loop after we found any intersection point stops the kill planes that haven't been iterated yet from updating, and so they stall out. Pretty easy to fix though, we just nix the break and carry the boolean through:
playerMustDie = false;
for (KillPlane killPlane : killPlanes) {
    killPlane.update(delta);
+   playerMustDie = playerMustDie || killPlane.intersects(player);
-   if (playerMustDie) break;
}
Now the obstacle doesn't stop. But there's still a bug! Pay attention to the background color as the obstacle passes by the player,
We were only green for one frame! And we were lucky we got that! As you can probably surmise, our intersection method isn't quite right here. We didn't see this issue with the floor because the y coordinate happens to be the first touch point. But, in the case of the horizontal scrolling items, it's the other side that hits first, but we're not taking the player's width into account here. Thus, our problem!
Of course, before we can update the intersection code, we need to update the player to become more than a single pixel wide.
private final float width;
private final float height;

public Player(float x, float y, float width, float height) {
    ...
    this.width = width;
    this.height = height;
}
... getters ...
And of course, where we declared our player is updated player = new Player(4, 3, 1, 1);
with the magic numbers matching the current texture's size so that we don't have a weird situation
on our hands where the hitbox doesn't match the "sprite". 7
With that out of the way, the bounding box intersection that the KillPlane
does can now be updated.
public boolean intersects(Player player) {
    float pLeftX = player.getX();
    float pLeftY = player.getY();
    float pRightX = pLeftX + player.getWidth();
    float pRightY = pLeftY + player.getHeight();

    boolean withinX = pRightX >= leftCornerX && (leftCornerX + width) >= pLeftX;
    boolean withinY = pRightY >= leftCornerY && (leftCornerY + height) >= pLeftY;
    return withinX && withinY;
}
To be honest, I don't know why, but every single time I write intersection code I always have to go look it up. In today's case, I found a very helpful stackoverflow post which I'll quote a bit: 8
Two axes aligned boxes (of any dimension) overlap if and only if the projections to all axes overlap. The projection to an axis is simply the coordinate range for that axis.
The stackoverflow post uses a diagram to show three boxes and filled in lines to illustrate the point, and I don't want to wholesale copy the answer verbatim, but I think that most people don't think about "projections to an axis" in their daily lives. So that phrase might not click very well without the picture. So, here's an SVG:
See how the axes have a thick line of the same color as the box? And it goes from the start to the stop of the box's size for that axis? That's the projection. You can see how the overlapping boxes overlap on both axes. For red and blue, or even for red and green, there's overlap on one axis, but not the other. It's pretty neat because this generalizes to any number of dimensions. So, if someone ever asks you to find out if a N-dimensional hypercube happens to intersect with another, you can use the same logic to deal with it.
And the moment of truth:
I accidently stopped recording a moment before the "bird" cleared the bottom plane. But trust me, it works. And we can move on to the actual meat of the requirement here. The obstacles are supposed to slide in from the right. So, it's not enough to hard code them in, we need some form of obstacle generator. I'm thinking that this could be sort of similar to how we had multiple token generator types in the match 3 game. We could create a generic interface, then hide behind things like "easy level, hard level, pre-specified level", etc, which could be pretty fun. However, let's not get ahead of ourselves, what's the simplest generator we could make?
Let's start with what an obstacle generator would need to make intelligent decisions about how it places the pieces down. Consider the following pic:

While the path between the first two obstacles is probably do-able, the near-sheer drop that happens next, and then the cliff to fly up is asking for your player to throw their computer across the room. So, it's important that our generator creates do-able levels, or else no one would want to keep playing. That said, a solution of putting really long spaces between obstacles isn't viable either. If there's never any challenge, then there's reason to try to beat your highscore unless you're expecting extra-masochistic players who just want to test their endurance.
Thinking about it. I think the solution here is actually more straightforward than one might think. The only thing is that we need to actually define some stuff we haven't yet, and then we need to do math. Here's the components of my idea:
- We need to know the maximum speed at which a user can climb upwards
- We need to know the maximum speed a user can fall
- We need to know the rate of displacement in the horizontal axis
- We need to calculate the distance between the opening of each obstacle
- We must seed an initial obstacle
If we were to choose a point for a new obstacle x2, then we can
do basic math to tell us the distance to that point. Then, we need to check
our constraints. The user must be able to reach that point given the maximum
speed they can travel. If the new opening is beneath the other, then that
constraint is how fast gravity allows us to move downwards. If the opening is
above us, then whatever the max speed that we can flap upwards is becomes our
constraint.
Rather than choosing random x coordinates and checking to see if we gambled correcting or not, we can flip the equation and instead try to solve for X instead given the various speeds. Once we have this minimum boundary, we can relax the constraint a bit to control the difficulty of the level. 9
With this in mind, I sat down with a notepad, sketched out y=mx+b a few times, and thought about how we can basically consider the last known (x,y) pair as our origin point to simplify things, and then came up with the following code:
package spare.peetseater.nb;

import com.badlogic.gdx.math.MathUtils;
import com.badlogic.gdx.math.Vector2;
import java.util.LinkedList;
import java.util.List;

public class ObstacleGenerator {
    float lastOpeningX;
    float lastOpeningY;
    float minGapSize;
    private final float maxHeight;

    public ObstacleGenerator(
        float initialOpeningX,
        float initialOpeningY,
        float minGapSize,
        float maxHeight
    ) {
        this.lastOpeningX = initialOpeningX;
        this.lastOpeningY = initialOpeningY;
        this.minGapSize = minGapSize;
        this.maxHeight = maxHeight;
    }
    ...
We'll do like I said before, and treat our initial x,y as if we had generated a obstacle already. We also need to make sure that we respect the world height or else we could generate something a player can't ever bypass. Then, the generator:
public List<KillPlane> next(float gravity, float maxUpSpeed, float xVelocity) {
    float x1 = lastOpeningX;
    float y1 = lastOpeningY;

    boolean generateAbove = MathUtils.randomBoolean();
    float maxDeltaY = generateAbove ? maxUpSpeed : gravity;
    float dx = 1 + xVelocity; // + 1 for at least one unit of space between

    float dy = MathUtils.lerp(0, maxDeltaY, MathUtils.random());
    float x2 = x1 + dx;
    float y2 = (dy / dx) * x2 + y1;

    float gapSize = MathUtils.lerp(minGapSize, minGapSize * 1.5f, MathUtils.random());
    float combinedHeight = (maxHeight - gapSize);
    float bottomHeight = MathUtils.lerp(0, combinedHeight, MathUtils.random());
    float topHeight = combinedHeight - bottomHeight;

    KillPlane bottom = new KillPlane(
        x2, 0, 0.5f, bottomHeight
    );
    Vector2 obstacleVelocity = new Vector2(xVelocity, 0);
    bottom.setVelocity(obstacleVelocity);
    KillPlane top = new KillPlane(
        x2, bottomHeight + gapSize, 0.5f, topHeight
    );
    top.setVelocity(obstacleVelocity);

    List<KillPlane> newPlanes = new LinkedList<>();
    newPlanes.add(bottom);
    newPlanes.add(top);
    this.lastOpeningY = y2;
    this.lastOpeningX = x1; // this is on purpose.
    return newPlanes;
}
This isn't precisely as I described above. But it's the same spirit. You can ignore
some of the hardcoding of values like the obstacle width and focus instead on the
calculation of the (x2, y2) point. We flip a coin as to whether or not
we'll want the user to go up or down, then ensure we've got at last a player unit's
worth of space between the x coordinates, then we just compute y = mx + b, or rather
y2 = (dy / dx) * x2 + y1 where we interpret the last known location as the
intercept point (hence b = y1), and where we'd want the user to be solving for the y
point at the x2 location, and so dy/dx * x2. Pretty simple. I think it
can be improved, but for now, in the prototyping phase, this seems ok ish if I spawn
a new obstacle every 3 seconds:
The 3 seconds was abitrary by the way, but it does make me think that that
should be something that's given to the next function. So that we can
compute actual distances from the x velocity and then say "given this much time,
give me an obstacle that the player can get to". It would make sense to get that
working so that we can be sure the player can play, but the only way I'll be able
to test that it feels right is by being able to… well, play!
But to play, we need to handle user input, which I've neglected to do so far. So,
let's put a pin in the "smart" generation of obstacles for the moment, and wrap up
the generator code in the screen before we swap gears to input handling. This isn't
much code. First, inside of the KillPlane class:
 public boolean isOutOfSight() {
    return this.leftCornerX + this.width < 0;
}
A trivial check to see if the right hand side of the kill plane has passed out
of sight. Then, we can use this during the update method of the
scene to decide what to toss out:
private void update(float delta) {
    ...
    List<KillPlane> toRemove = new ArrayList<>();
    for (KillPlane killPlane : killPlanes) {
        if (killPlane.isOutOfSight()) {
            toRemove.add(killPlane);
        }
        killPlane.update(delta);
        playerMustDie = playerMustDie || killPlane.intersects(player);
    }
    killPlanes.removeAll(toRemove);
}
Yup. It really is that simple. We find the values to remove first, because typically
lists don't enjoy when you remove an element in the middle of traversing the same
list. It feels a little odd to call killPlane.update on something we
know that we'll delete, but it's not like if the plane has reached that point that
it's able to impact the player at all anymore, so no harm no foul.
User input & fine tuning ↩
Back in section 2 we setup gravity, and while I disabled it in the last video I showed so that it was easier to see when we had a collision, it's time to renable it and put the flap in flappy. Recall our update function for the player:
public void update(float delta, float gravity) {
    this.y -= gravity * delta;
}
This code doesn't let us do anything but fall. Thankfully, it's easy to think about what we should do to let us fly. If you think about vectors, what we have now is a constant downward vector like this:
Whenever we click the mouse or press a button to flap, we want to fight against this. With physics and vectors, we'd simply add two vectors together to find the resulting force, like so:
But this would just give a net result of 0, so the amount of lift we need to use to fight gravity has to be able to overcome gravity and let the player go up!
But the key thing to keep in mind is that the user can tap, but they can't hold the button down. So on each input we get some lift, but then gravity starts pulling us down again over time until we're no longer going up, but falling down:
My svg animations might be a little bit off, but you get the idea. Given that our Bird doesn't
actually change X values, we don't need to track anything with a full Vector2,
but we can just use the Magnitude of the vector, which directly translates to the vertical
component and then allow the player to set it as needed.
private float lift;

public Player(float x, float y, float width, float height) {
    ...
    this.lift = 0;
}

public void update(float delta, float gravity) {
    this.y -= gravity * delta;
    this.y += lift * delta;
    float decay = 0.25f * delta; // arbitrary constant for now
    this.lift -= decay;
}
Nothing special about this, I've elided the getter/setters as usual, but they're there. And we can use them, but first we need to be able to detect a click! Thankfully, input handling is pretty simple as noted in the wiki pages in it, we can either use some singletons from the library like so
boolean clicked = Gdx.input.isTouched();
Or, if we expect that we'll need to handle more than just a single input type, we can use an actual input adapter to handle things. Given that our stretch goals are going to include a game over screen, scoring, and that sort of thing. It may make sense to go ahead and use an input adapter. This also lets us have control over cooldown timing on the click without having to track those fields directly in the scene, which I like because I'm a fan of not having hundreds of random variables in the same class.
Admittedly, the first option is much faster to code and pretty small:
private void update(float delta) {
    boolean clicked = Gdx.input.isTouched();
    float gravity = 0.5f;
    if (clicked) {
        player.setLift(gravity * 1.8f);
    }
    this.player.update(delta, gravity);
    ...
}
However, I kind of enjoy not referencing a singleton like this. I like input multiplexing so that when it comes time to show a game over screen, we can swap input handlers out from the game's to the menu's and keep the logic related to those seperate. But before I spew out a bunch of code at you, here's what the above code let's us do:
It's slow. But that's just a matter of input tuning. And let me show you another reason why I really like the input handlers. First, we'll define a way to get the input out to the screen:
public interface FlapInputSubscriber {
    public void onFlapInput();
}
And then move that if(clicked) code we wrote before into a
class that implements this:
FlapInputSubscriber subscriber = new FlapInputSubscriber() {
     @Override
     public void onFlapInput() {
         player.setLift(1.2f);
     }
 };
Of course, you can probably see where this is going if you're familiar with the observer pattern. In fact, input adapters are exactly this. But when it comes to defining my game logic, I like making my own explicit ones because it keeps the chain of "who cares about what" clear in the code. We could also introduce a generic queue of commands or similar at the application level, but for the time being, I'm going to not do that. Though I admit, the idea is a fun one to consider, especially for testing purposes…
Holding off, here's the interface of our input adapter:
package spare.peetseater.nb;

import com.badlogic.gdx.InputAdapter;

import java.util.LinkedList;
import java.util.List;

public class FlapInputAdapter extends InputAdapter {

    private final float timeBetweenClicksSeconds;
    private float timer;
    private boolean isOnCooldown;
    private List<FlapInputSubscriber> subscribers;

    public FlapInputAdapter(float timeBetweenClicksSeconds) {
        ...
    }

    public void addSubscriber(FlapInputSubscriber subscriber) {
        subscribers.add(subscriber);
    }

    public void update(float delta) {
        ...
    }

    @Override
    public boolean touchDown(int screenX, int screenY, int pointer, int button) {
        ...
    }

}
Ignoring the constructor, which just sets the fields listed to default values
(or to the one passed as arguments), the update and the touchDown
methods are the important ones here. I admit, it's maybe a bit odd for the input adapter
to have an update method, but it makes sense in context. See?
public void update(float delta) {
    this.timer = Math.max(0, this.timer - delta);
    if (this.timer == 0) {
        this.isOnCooldown = false;
    }
}
Our adapter has a cool down period for how often you can actually click. And so
of course we need to decrement some form of timer in order to tell when we're
ready to go again. But how does the timer get set to something greater than 0 to
begin with? That'd be in the touchDown method we implement as part
of being an InputAdapter:
public boolean touchDown(int screenX, int screenY, int pointer, int button) {
    if (isOnCooldown) {
        return super.touchDown(screenX, screenY, pointer, button);
    }
    this.isOnCooldown = true;
    this.timer = timeBetweenClicksSeconds;
    for (FlapInputSubscriber subscriber : subscribers) {
        subscriber.onFlapInput();
    }
    return true;
}
The only thing that might not be clear here is the fact that we return a true
or false value here. In LibGDX, there's a chain of responsibility pattern being
used between input adapters where each input adapter is responsible for telling
the overall system if it did or did not handle the event. If we return false
from the touchDown method, it means our handler didn't take any actions
that should stop the event from propogating to other handlers. If it returns true
the buck stops with us. This is useful for example when you've got menus overlaying
with each other and multiple input handlers all running at once, but only one should
respond to an input.
Our event needs are pretty simple though, for now, we don't even care if the click was inside of our window or anything. Just that we got one. If we're on cooldown though, then we can't possibly handle the event, so we return false (via the super call) and let LibGDX see if anyone else wants to handle the click. Speaking of, we have to actually tell LibGDX to use our input procesor:
flapInputAdapter = new FlapInputAdapter(0.5f); // arbitrary value for now
flapInputAdapter.addSubscriber(subscriber);
Gdx.input.setInputProcessor(flapInputAdapter);
Alright, now, let me get back that other reason why the extra code to setup the input processor is useful. As you could see before, the world feels a bit floaty. This is probably because gravity is so low, and our lift value isn't doing too much either. So it'd be nice to be able to fine tune these parameters until it feels right. I've been using random arbitrary values or similar up until now, but since we have an input adapter now, I can setup some key event listeners and make it possible for us to tweak gravity or our other constants we've been using up until now.
We could just tweak a value, recompile, run, click, tweak a value, recompile, run, click. Over and over again. But that's not a great feedback loop, and why settle for a slow method like that when we can do much better?
First off, let's round up our constants into an easy to use bundle that we can reference rather than having them scattered around in prototyping code:
public class LevelSettings {
    public float gravity = 0.5f;
    public float flapLift = 1.2f;
    public float decayRate;
    public float spawnObstacleEveryNSeconds = 3f;
    public float obstacleXSpeed = 1f;
}
Then, we just have to tweak the player update method to take in the decay rate:
public void update(float delta, float gravity, float decay) {
    this.y -= gravity * delta;
    this.y += lift * delta;
    float liftDecay = decay * delta;
    this.lift -= liftDecay;
}
Then resolve the error we just caused:
private void update(float delta) {
    this.player.update(delta, levelSettings.gravity, levelSettings.decayRate);
    ...
And while we're doing that, tweak the various references in the code we've written so far to use the level settings that we can construct:
public FirstScreen(NyappyBirdGame game) {
    ...
    levelSettings = new LevelSettings();
    ...
}
Once the compiler has finished guiding this refactor, we can make life easier and add in a nice little debugging tool for our fine tuning experience:
package spare.peetseater.nb;
import com.badlogic.gdx.Gdx;
import com.badlogic.gdx.InputAdapter;
public class LevelTuningInputAdapter extends InputAdapter {
private final LevelSettings levelSettings;
public LevelTuningInputAdapter(LevelSettings levelSettings) {
this.levelSettings = levelSettings;
}
@Override
public boolean keyTyped(char character) {
switch (character) {
case 'g': levelSettings.gravity -= 0.05f; break;
case 'G': levelSettings.gravity += 0.05f; break;
case 'f': levelSettings.flapLift -= 0.05f; break;
case 'F': levelSettings.flapLift += 0.05f; break;
case 'd': levelSettings.decayRate -= 0.05f; break;
case 'D': levelSettings.decayRate += 0.05f; break;
case 's': levelSettings.spawnObstacleEveryNSeconds -= 0.05f; break;
case 'S': levelSettings.spawnObstacleEveryNSeconds += 0.05f; break;
case 'o': levelSettings.obstacleXSpeed -= 0.05f; break;
case 'O': levelSettings.obstacleXSpeed += 0.05f; break;
default:
return false;
}
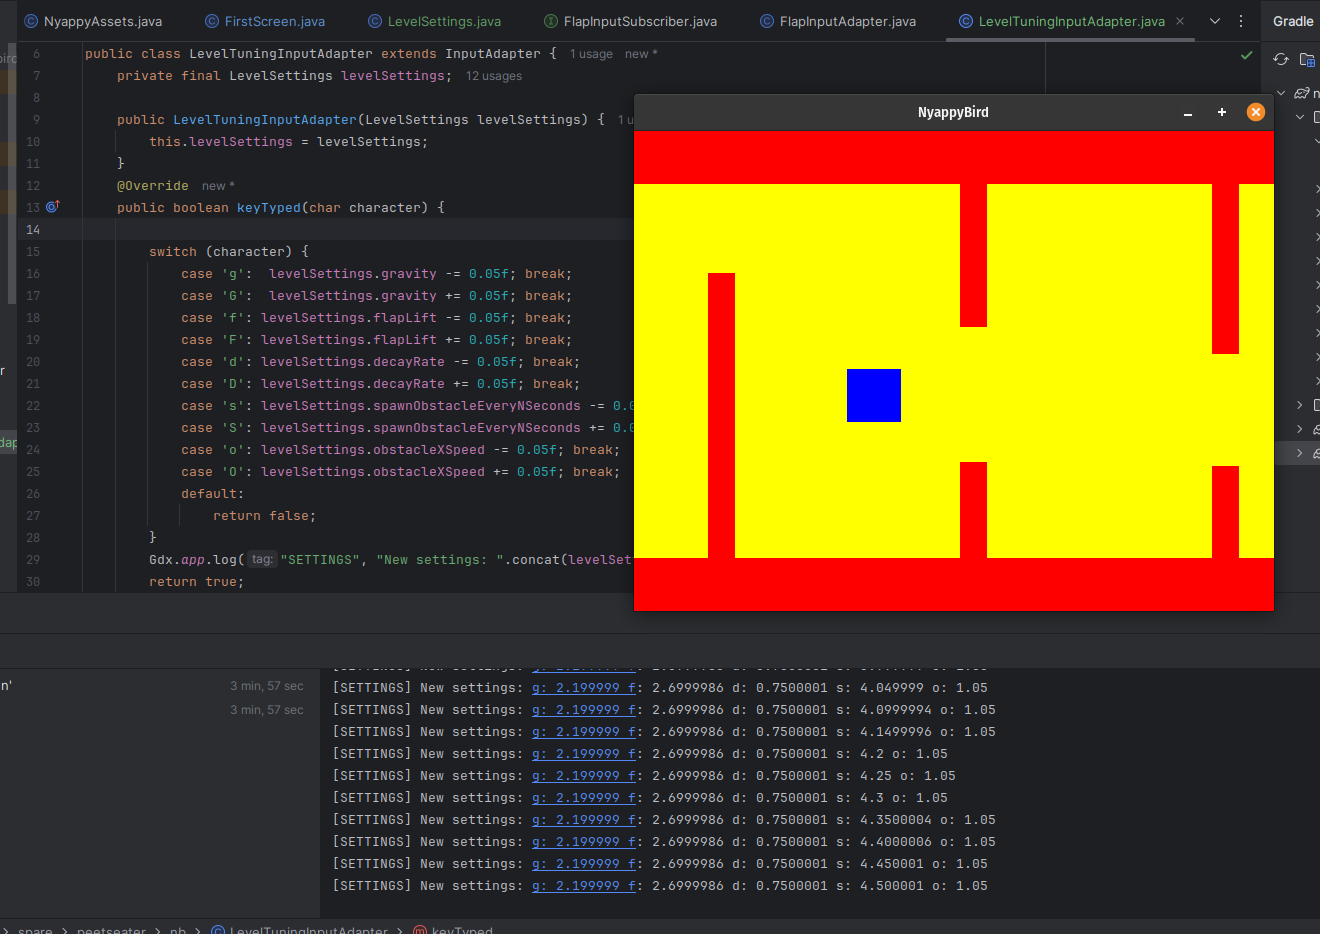
Gdx.app.log("SETTINGS", "New settings: ".concat(levelSettings.toString()));
return true;
}
}
Then, using the power of input multiplexers, set this one up to run alongside our game:
...
InputMultiplexer inputMultiplexer = new InputMultiplexer();
inputMultiplexer.addProcessor(new LevelTuningInputAdapter(levelSettings));
inputMultiplexer.addProcessor(flapInputAdapter);
Gdx.input.setInputProcessor(inputMultiplexer);
I then sat and played the game for a couple minutes, tapping away at my little buttons to tweak the settings as I did:
And while doing this I realized that I had missed a critical parameter to tweak! The amount of delay time between clicks! I definitely found myself wanting the game to be a bit faster on that front, especially when a cliff was looming large in front of my face!
Our input adapter takes the raw float as input right now though:
public FlapInputAdapter(float timeBetweenClicksSeconds) {
    this.timeBetweenClicksSeconds = timeBetweenClicksSeconds;
    this.isOnCooldown = false;
    this.timer = 0;
    this.subscribers = new LinkedList<>();
}
So in order to make it responsive to our global bundle of state, we need to tweak this to take in the object instead. But that's simple enough:
public FlapInputAdapter(LevelSettings levelSettings) {
    this.levelSettings = levelSettings;
...
public boolean touchDown(int screenX, int screenY, int pointer, int button) {
    if (isOnCooldown) {
        return super.touchDown(screenX, screenY, pointer, button);
    }
    this.isOnCooldown = true;
    this.timer = levelSettings.clickDelay;
    ...
}
One of the many nice things about LibGDX is that I don't have to worry too much
about threading. The input adapters and the screen (to my knowledge) all run on
the same thread in the background, so we don't have to get into any sort of
semaphore locking situation or anything like that. Granted, we could also just
toss the volatile keyword in there and call it a day, but given
that we're primarily using this for debugging purposes, I think we're okay unless
the JVM tosses a concurrent modification exception my way.
With that out of the way, an extra tweak to our tuning input adapter to let me control the click rate delay, and then I'm back to playing the game, clicking with one hand, tapping keys with the other.
These were the settings I arrived at that felt good to me:
public float gravity = 2.2f;
public float flapLift = 2.75f;
public float decayRate = 0.75f;
public float spawnObstacleEveryNSeconds = 4.5f;
public float obstacleXSpeed = 1.05f;
public float clickDelay = 0.04f;
In an engine like Unity, you can do this without the extra ceremony of course. It's
got variable setting as part of its pretty powerful entity component system, but in
happy hobby world on this blog. We can write these things ourselves and gain another
idea and benefit! Since I can tweak the settings like this, it would be very very
easy to make our FirstScreen (a class we should rename) to take the
level settings as a parameter, and then we could do all sorts of fun things like
theme a water as underwater and change the gravity and lift, or make something in
space and make it super floaty, add rain where gravity is heavier, etc.
I don't think we need to go too hard here yet though. We don't want to get too ahead of ourselves, and rather than spending time tuning and tweaking and making multiple level types. Let's move along to the next part of our task. 10
Scoring and failing ↩
The thing that makes flappy bird is the flapping, but the goal of flappy bird is to flap through the obstacles without touching them because we lose otherwise. At the moment we've got the obstacle detection triggering, but nothing is happening.
So let's start with that! We've already got this code:
playerMustDie = false;
List<KillPlane> toRemove = new ArrayList<>();
for (KillPlane killPlane : killPlanes) {
    if (killPlane.isOutOfSight()) {
        toRemove.add(killPlane);
    }
    killPlane.update(delta);
    playerMustDie = playerMustDie || killPlane.intersects(player);
}
killPlanes.removeAll(toRemove);
So we have our variable that triggers the game over all set. We just need to do something with it. Well, something else besides what we're doing already:
private void draw(float delta) {
    ScreenUtils.clear(Color.YELLOW);
    if (playerMustDie) {
        ScreenUtils.clear(Color.GREEN);
    }
    ...
We could put in something like a if(playerMustDie) { bunch of draws }
to show some sort of game over screen. But as I noted when we did the input handlers, I like
to try to keep one class to one purpose where I can and not mix state variables. So, let's
make a new screen:
public class GameOverScreen implements Screen {

    private final OrthographicCamera camera;
    private final FitViewport viewport;
    private final int score;
    NyappyBirdGame game;

    public GameOverScreen(NyappyBirdGame game, int score) {
        this.camera = new OrthographicCamera();
        this.viewport = new FitViewport(game.worldWidth, game.worldHeight, camera);
        this.camera.setToOrtho(false, game.worldWidth, game.worldHeight);
        this.game = game;
        this.score = score;
    }

    private void update(float delta) {
        this.camera.update();
    }

    private void draw(float delta) {
        ScreenUtils.clear(Color.BLACK);
    }

    @Override
    public void render(float delta) {
        update(delta);
        draw(delta);
    }

    @Override
    public void resize(int width, int height) {
        if(width <= 0 || height <= 0) return;
        viewport.update(width, height);
    }
    ... empty methods for interface below ...
}
We haven't done anything beyond set up a skeleton, but its enough for us to wire it into the update method for
the other screen:
private void update(float delta) {
    ...
    if (playerMustDie) {
        game.setScreen(new GameOverScreen(game, 1));
    }
    ...
}
And if I play the game poorly:
We'll polish the transition later. The black screen leaves quite a bit to be desired though, we should show the user their score (which is why I included it in the constructor) and give them the ability to restart. To do this, we'll need to be able to render a font. Which, honestly, is always a bit of a pain in the butt. When I was setting up the project, I did select the gdx-freetype extension since I used it in the match 3 game before, so I can re-use some reference code I made for that.
Of course, we're now actually loading a real asset, so we could consider thinking more about if we want to make our little square block into something real or not. But again, as I said before, that way lies the endless graveyard of never-finished games. So let's just limit ourselves to loading a nice font and step back from anything else.
A quick search online found a freeware font called Visitor by Brian Kent that's available for use in personal, commercial or (quote) "whatever". So long as we keep the txt file associated with the fonts with our source and credit him. So, maybe when I finish this blog post I'll shoot him an email and let him know that I'm very thankful for the font. 11 For now, we need to get LibGDX to be thankful too:
private BitmapFont loadFont(float ratioTo1WorldUnit) {
    FreeTypeFontGenerator generator = new FreeTypeFontGenerator(Gdx.files.internal("visitor/visitor1.ttf"));
    FreeTypeFontGenerator.FreeTypeFontParameter parameter = new FreeTypeFontGenerator.FreeTypeFontParameter();

    parameter.size = (int)((1 / worldHeight) * Gdx.graphics.getHeight() * ratioTo1WorldUnit);
    parameter.color = Color.WHITE;
    parameter.borderColor = Color.BLACK;
    parameter.borderWidth = 2;

    BitmapFont font = generator.generateFont(parameter);
    font.getData().setScale(worldWidth / (float)Gdx.graphics.getWidth(), worldHeight / (float)Gdx.graphics.getHeight());
    font.setUseIntegerPositions(false);
    return font;
}
And a quick call to this in our this.visitorFont = this.loadFont(1); game class will
set us up with a bitmap font that we can use to draw in our screen:
private void draw(float delta) {
    ScreenUtils.clear(Color.BLACK);
    game.batch.begin();
    game.visitorFont.draw(
        game.batch,
        "Game over!",
        0,
        game.worldHeight - 2,
        game.worldWidth,
        Align.center,
        false
    );
    game.batch.end();
}
Lovely. Now, before we draw the score in, let's talk really quick about some of the code I just wrote. Because honestly, fonts are a pain in the ass for one very specific reason in my mind:
They're defined by pixel units
Remember how we defined our world in world coordinates? So that we'd be able to work
nicely with the idea of like, "this thing is 1 meter" and not have to think about how
many pixels on whatever screen this runs on that becomes? Yeah. Font's suck in that
everything they do is pixel perfect and the viewport doesn't render them. I really
wish that it did, but unfortunately we have to deal with it manually. That's why we
do a bit of math with the aspect ratio and call setScale after we
generate the font. I'm basically trying to make the font roughly the same height as
our player texture for simplicity in planning the layout.
To be honest, the annoyance of dealing with this makes me want to just go back to the early website days where everyone created buttons in image programs rather than using real fonts. There's a reason we did that (and a reason we stopped). But I digress. I went into more detail about this sort of thing in the match 3 post, so check out the section on fonts there if you'd like a more thorough explanation. That said, we have a game over screen!
Let's display the score and an instruction on how to restart the game:
private void draw(float delta) {
    ScreenUtils.clear(Color.BLACK);
    game.batch.begin();
    game.visitorFont.draw(
        game.batch,
        "Game over!",
        0,
        game.worldHeight - 2,
        game.worldWidth,
        Align.center,
        false
    );
    game.visitorFont.draw(
        game.batch,
        "Score: " + score,
        0,
        game.worldHeight - 4,
        game.worldWidth,
        Align.center,
        false
    );
    game.visitorFont.draw(
        game.batch,
        "SPACE to restart",
        0,
        game.worldHeight - 6,
        game.worldWidth,
        Align.center,
        false
    );
    game.batch.end();
}
Then actually making the instruction a truthful statement, we can use the direct input handler from the GDX singleton to send ourselves back to the other screen:
private void update(float delta) {
    this.camera.update();
    if (Gdx.input.isKeyJustPressed(Input.Keys.SPACE)) {
        // TODO: deal with this nicely.
        game.setScreen(new FirstScreen(game, LevelSettings.createStandardLevelSettings()));
    }
}
And now, we can play forever!
Though, it's a bit boring if the score doesn't actually get calculated. So, let's figure that out real quick. We want to count the number of obstacles passed as the total score for each round. It's easy enough to track the x value of the obstacle, but how do we make sure that once we've passed the obstacle we don't double count it?
One idea that comes to mind is that we only ever remove the kill planes once, so perhaps we should count them as we remove them? That'd certainly solve the problem of over counting, but it also means that if a user passes the obstacle and then hits the ground and dies before the obstacle is removed, they don't get their point. That'd be frustrating for sure. So, instead, let's do this:
HashSet<KillPlane> passedPlanes = new HashSet<>();
...
private void update(float delta) {
    ...
    for (KillPlane killPlane : killPlanes) {
        ...
        // Only count the planes we pass once.
        if (passedPlanes.contains(killPlane)) {
            continue;
        }

        boolean isFloorOrWall = killPlane.getLeftCornerX() == 0;
        if (isFloorOrWall) {
            continue;
        }

        float rightHandSide = killPlane.getLeftCornerX() + killPlane.getWidth();
        if (player.getX() > rightHandSide && !killPlane.isOutOfSight()) {
            passedPlanes.add(killPlane);
            score += 1;
        }
        ...
    }
    ...
    // clean up memory references.
    passedPlanes.removeAll(toRemove);
    killPlanes.removeAll(toRemove);
}
Of note is that we skip the floor and ceiling since those are always "passed" and so you deserve no points for such things. And that we're making sure that when we pass something, that it's still visible. The reason for this is that at the very start of a level, I'm using a negative value for obstacle generations seed point:
obstacleGenerator = new ObstacleGenerator(
    game.worldWidth - 1,
    game.worldHeight / 2,
    2,
    game.worldHeight
);
We're going to change that when we get back to making the obstacle generation smarter, but for the time being we can just ensure we don't count that fake obstacle at all and then we'll see that our score counting works as expected:
Erm. Well almost. Notice how we passed two obstacles but got 4 points? Remember for a moment that it might look like one obstacle, but in actuality, it's two kill planes, one above and one below. So, we should only count one of these as a point! Should we check the y coordinate? The x? Keep track? Sort the obstacles by their x coordinates before looping so we can look back or peak ahead?
Nah, let's just make it easy:
float obstaclesPassed = 0;
List<KillPlane> toRemove = new ArrayList<>();
for (KillPlane killPlane : killPlanes) {
...
    if (player.getX() > rightHandSide && !killPlane.isOutOfSight()) {
        passedPlanes.add(killPlane);
        obstaclesPassed += 1;
    }
}

score += (int) (obstaclesPassed / 2);
And with our top and bottom obstacles dealt with, we officially have a working flappy bird!
Generating do-able levels ↩
Mostly anyway. We still have 1 more requirement, we need to show the score to the player as they play. Which will be trivially easy to do now that we've set up a font already:
// Inside of FirstScreen.java (we really need to rename this)
private void draw(float delta) {
    ...
    this.game.visitorFont.draw(
        this.game.batch,
        "Score: " + score,
        0.25f,
        0.75f,
        game.worldWidth,
        Align.left,
        false
    );
    ...
}
We also have to return to the previous requirement that we glossed over before. The obstacle generation currently produces impossible to deal with scenarios, and that's just no good. The above screenshot is actually one of those, trust me I was clicking as fast as I could and I couldn't quite clear the hurdle.
At the rist of being arrogant, let me qoute myself from a previous section:
The 3 seconds was abitrary by the way, but it does make me think that that should be something that's given to the next function. So that we can compute actual distances from the x velocity and then say "given this much time, give me an obstacle that the player can get to". It would make sense to get that working so that we can be sure the player can play, but the only way I'll be able to test that it feels right is by being able to… well, play!
I think that this is the last thing we need to address before we get into the "polishing" phase of game development here. If the game isn't playable, then why would anyone play it? I also think that past me was onto something here, so let's revisit the code from before.
// This is tmp until we create a proper algo
float accum = 0;
@Override
public void render(float delta) {
    accum += delta;
    if (accum > levelSettings.spawnObstacleEveryNSeconds) {
        generateNewObstacle();
        accum = 0;
    }
    update(delta);
    draw(delta);
}

private void generateNewObstacle() {
    Vector2 obstacleSpeed = new Vector2(levelSettings.obstacleXSpeed, 0);
    List<KillPlane> obstacles = obstacleGenerator.next(
        levelSettings.gravity,
        levelSettings.flapLift,
        obstacleSpeed.x
    );
    killPlanes.addAll(obstacles);
}
Hello past me's tmp note! It's time to remove you! While I think that spawning a new obstacle every N seconds is still a good idea, I want to randomize it, and most importantly, I want to factor it into the placement calculation! Let's update the constructor for the obstacle generator:
public ObstacleGenerator(
    float initialOpeningX,
    float initialOpeningY,
    float minGapSize,
    float maxHeight,
    float minSecondsBetweenObstacles,
    float maxSecondsBetweenObstacles
) {
    this.lastOpeningX = initialOpeningX;
    this.lastOpeningY = initialOpeningY;
    this.minGapSize = minGapSize;
    this.maxHeight = maxHeight;
    this.minSecondsBetweenObstacles = minSecondsBetweenObstacles;
    this.maxSecondsBetweenObstacles = maxSecondsBetweenObstacles;
    this.remainingSecondBeforeNextObstacle = MathUtils.random(
        minSecondsBetweenObstacles, maxSecondsBetweenObstacles
    );
}
That remainingSecondBeforeNextObstacle will become our
accum value from the temporary code. And in order to
pass along the responsibility of generating a new obstacle from the
screen, into the obstacle generator, my inclination would be to push
that into the ObstacleGenerator itself. However, if we
do that, then how will we get the kill plane out into the list the
screen is managing?
These are the sorts of questions that lead to choice paralysis. Do you ask
yourself about design, which pattern makes the most sense? Do you give in
to over-engineering? What about doing simple things like making the update
method no longer a void returning method, but have it return something?
Isn't that not pure? the update method has a different signature to
the other update methods in other classes?! THE HORROR

Let's just have the update method return any new potential
obstacles to add in. The other option I think would be good to do
would be to use the Observer pattern again, and then have the system
emit the obstacles to subscribers. The reason that would be "better"
is if we had more than one thing to do from the update method. However,
since the ObstacleGenerator's one job is pretty well defined, I think
this is okay for the time being. We could revisit if the request to add
two lists together on every frame becomes too much and we'd prefer to
only do the work when we actually need to. We could also revisit if
we became shy of our unclean code and wanted to make it look dogmatically
aligned with the rest of our update-like classes.
To be honest. I'm sort of talking myself into doing this, but we have bigger fish to fry, here's the simpler code:
public List<KillPlane> update(float delta) {
    remainingSecondBeforeNextObstacle = Math.max(
        0, remainingSecondBeforeNextObstacle - delta
    );
    if (remainingSecondBeforeNextObstacle == 0) {
        // TODO: fix this.
        float gravity = LevelSettings.createStandardLevelSettings().gravity;
        float maxUpSpeed = LevelSettings.createStandardLevelSettings().flapLift;
        float xVelocity = LevelSettings.createStandardLevelSettings().obstacleXSpeed;
        return next(gravity, maxUpSpeed, xVelocity);
    }
    return EMPTY_LIST;
}

public List<KillPlane> next(float gravity, float maxUpSpeed, float xVelocity) {
    ...
    this.remainingSecondBeforeNextObstacle = MathUtils.random(
        minSecondsBetweenObstacles, maxSecondsBetweenObstacles
    );
    ...
}
As you can see by my TODO, we're not currently tracking enough information to properly
call the next method from the update function! There are two
fixes to this in my mind:
- Take the level settings in as arguments to the update function
- Take the level settings in as arguments to the class
I like the second option more! Heck, we can even make next take 0 parameters if we want to since everything is now part of the class.
public ObstacleGenerator(
    float initialOpeningX,
    float initialOpeningY,
    float minGapSize,
    float maxHeight,
    float minSecondsBetweenObstacles,
    float maxSecondsBetweenObstacles,
    LevelSettings levelSettings
) {
    ...
}

public List<KillPlane> next() {
    float gravity = levelSettings.gravity;
    float maxUpSpeed = levelSettings.flapLift;
    float xVelocity = levelSettings.obstacleXSpeed;
    ...
Seeing the list of arguments, I'm also starting to think that more of these could be inside of the level settings structure itself. But before I turn my attention towards that, I think it's best if we fix the compilation error that's been sitting in my IDE for the last minute or two.
This isn't too hard to fix up. We can completely remove the generateNewObstacle
function since that's handled by the update function now.
public FirstScreen(NyappyBirdGame game, LevelSettings levelSettings) {
    ...
    obstacleGenerator = new ObstacleGenerator(
        game.worldWidth - 1,  // initial x
        game.worldHeight / 2, // initial y
        2,                    // min gap size (vertical)
        game.worldHeight,     // max height
        2f,                   // min s between obstacle
        5f,                   // max o ^
        levelSettings
    );
}

private void update(float delta) {
    this.player.update(delta, levelSettings.gravity, levelSettings.decayRate);
    this.flapInputAdapter.update(delta);
    List<KillPlane> newObstacles = this.obstacleGenerator.update(delta);
    killPlanes.addAll(newObstacles);
    ...
}
Do I like that we're returning something from an update method?
Honestly no. But part of this challenge is to be time aware, and so this is a good
opportunity to nod our heads and say that this is fine in the interest of shifting
our focus over to the generator function itself. 12
public List<KillPlane> next() {
    float gravity = levelSettings.gravity;
    float maxUpSpeed = levelSettings.flapLift;
    float xVelocity = levelSettings.obstacleXSpeed;
    float x1 = lastOpeningX;
    float y1 = lastOpeningY;

    boolean generateAbove = MathUtils.randomBoolean();
    float maxDeltaY = generateAbove ? maxUpSpeed : gravity;
    float dx = 1 + xVelocity; // + 1 for at least one unit of space between

    float dy = MathUtils.lerp(0, maxDeltaY, MathUtils.random());
    float x2 = x1 + dx;
    float y2 = (dy / dx) * x2 + y1;

    float gapSize = MathUtils.lerp(
        minGapSize, minGapSize * 1.5f, MathUtils.random()
    );
    float combinedHeight = (maxHeight - gapSize);
    float bottomHeight = MathUtils.lerp(0, combinedHeight, MathUtils.random());
    float topHeight = combinedHeight - bottomHeight;

    KillPlane bottom = new KillPlane(
        x2, 0, 0.5f, bottomHeight
    );
    Vector2 obstacleVelocity = new Vector2(xVelocity, 0);
    bottom.setVelocity(obstacleVelocity);
    KillPlane top = new KillPlane(
        x2, bottomHeight + gapSize, 0.5f, topHeight
    );
    top.setVelocity(obstacleVelocity);

    List<KillPlane> newPlanes = new LinkedList<>();
    newPlanes.add(bottom);
    newPlanes.add(top);
    this.lastOpeningY = y2;
    this.lastOpeningX = x1; // this is on purpose.
    this.remainingSecondBeforeNextObstacle = MathUtils.random(
        minSecondsBetweenObstacles, maxSecondsBetweenObstacles
    );
    return newPlanes;
}
I have the sinking suspicion that, now that we've taken full control of the number of seconds to spawn an obstacle, we can simplify this code. Or at least I hope so. For some reason, thinking about mx+b just makes my brain slowly start to melt, so any simplification I can get will help me. 13g
Anyway. Grab your geometrical hats and start thinking about slope intercepts, because we're doing that again:
public List<KillPlane> next() {
    // Desired displacement
    float y1 = this.lastY;
    float t2 = MathUtils.random(minSecondsBetweenObstacles, maxSecondsBetweenObstacles);
    float gapSize = MathUtils.lerp(minGapSize, minGapSize * 1.75f, MathUtils.random());
    this.remainingSecondBeforeNextObstacle = t2;
    float width = 0.5f;

    // Now calculate a reasonable x2, y2 based time constraints to get there.
    float x2 = levelSettings.obstacleXSpeed * t2 - width;

    // We can either generate one above us, or below us, which gives us
    // different slopes since when rising we have to flap and counteract
    // gravity, and for falling we have gravity itself.
    float slopeDown = levelSettings.gravity / levelSettings.obstacleXSpeed;
    float slopeUp = (
        levelSettings.flapLift - levelSettings.gravity
    ) / levelSettings.obstacleXSpeed * -1;
    float slope = MathUtils.randomBoolean() ? slopeUp : slopeDown;

    float y2 = y1 - slope * x2; // y = mx + b
    y2 = Math.max(0, Math.min(y2, ceilingHeight - gapSize)); // keep it in bounds
    this.lastY = y2;

    KillPlane top = new KillPlane(
      xSpawnPoint,
      y2 + gapSize,
      width,
      ceilingHeight
    );
    top.setVelocity(new Vector2(levelSettings.obstacleXSpeed, 0));
    KillPlane bottom = new KillPlane(
      xSpawnPoint,
        0,
      width,
      y2 - gapSize
    );
    bottom.setVelocity(new Vector2(levelSettings.obstacleXSpeed, 0));

    List<KillPlane> newPlanes = new LinkedList<>();
    newPlanes.add(top);
    newPlanes.add(bottom);
    return newPlanes;
}
This is all based around keeping the user in the boundaries of the window, so we need to tweak our floor and ceiling so that we don't run into it if the obstacles are spawned close them:
// The floor and ceiling
killPlanes.add(new KillPlane(0, - 1, game.worldWidth, 1));
killPlanes.add(new KillPlane(0, game.worldHeight - 0.1f, game.worldWidth, 1));
The other thing of note is that not only are we calculating the distance we can travel based on the scrolling speed, but we're also taking the obstacle width into account because if we didn't, I'm pretty sure we'd assume the player could start climbing or falling while they're still at the start of the hole they're passing through. That's definitely not always the case I think. So, better to factor it in.
I left a smidgeon of the kill plane for the ceiling showing to indicate death lurks above, but I figure that most people playing flappy bird understand that the floor is not where the bird belongs, so I think technically it's still possible that we generate an impassable obstacle right at the top area, but I'm doubtful it will actually happen given how we added a bit of extra wiggle room to the gap size.
The game still feels a bit… slow and floaty. But it's playable, even if it doesn't really feel "flappy". I went and found a clone online to play and it definitely feels like the bird really snaps up then falls back really fast when you play the usual game. I think to do that I'd need to use a quadratic function for how the movement is, we don't want just linear motion, it doesn't feel like actual gravity. But. I think tweaking the way the movement feels might fall into the "polishing" section, and I just spent about 4 hours banging my head against the code I just showed you (the wall and floor thing eluded me for quite some time), so I'm very much feeling like a change of pace from doing physics formula would do me a world of good.
Sprites ↩
Alright, it's time to put the "nyaa" in nyappy bird! Or well, Nyappy Cat? Maybe? I'm not an artist by any definition of the word. But I can open up paint, or well, Pinta since I'm on Linux, and do my best to eyeball the rough idea of the cat from the video:
I'm also not an animator. As you can see by the motion of the cat when transformed into Gif form using something like piskel:

I'm going to pretend that the poor thing's limbs aren't horribly contorted and instead say that, because the cat is in space, it's doing its best to swim through the air. Or something. 14 I want to add the rainbow spewing from its rear as well, but let's get the cat loaded in first and then we'll move on to that.
To load the sprite into our game, we can create an Animation class
by breaking up a TextureRegion
private Animation<TextureRegion> loadNyanCat() {
    Texture sheet = new Texture(Gdx.files.internal("sprite/nyankitty.png"));
    TextureRegion[][] frames = TextureRegion.split(sheet, 32, 24);
    Animation<TextureRegion> animation = new Animation<>(0.025f, frames[0]);
    return animation;
}
We're still not using an asset manager, so we're directly loading the texture via
the constructor rather than using something like assetManager.load to
asynchronously load. This isn't really a problem here, but we'll see if this poses
an actual problem later on in life. I'm not sure if the paths handled by texture
are managed in the same way as when one uses the asset manager. But, anyway.
If I replace the block texture we've been using and tie the keyframe to the Y position
of the player, we get a pretty amusing result:
this.game.batch.draw(
    game.playerSprite.getKeyFrame(Math.abs(player.getY()), true), // loop=true
    player.getX(),
    player.getY(),
    1, // world unit width
    1  // world unit height
);
Obviously not perfect, and I could accumulate an actual value to have the animation be a constant loop like in the gif above, but… I think this is better. Having the cat's animation react to the mouse clicks feels good. So I'm keeping it.
Now what about that signature Nyan Cat Rainbow? Well, a quick look at what colors make up the rainbow are, and some math around my last sprite being 24 pixels tall mean that we can stuff the 7 colors in and have 3 pixels for wiggle room. That seems pretty good to me. So we'll just make a single loop moving along those 3 empty space pixels up and down to get that nyan nyan feel:
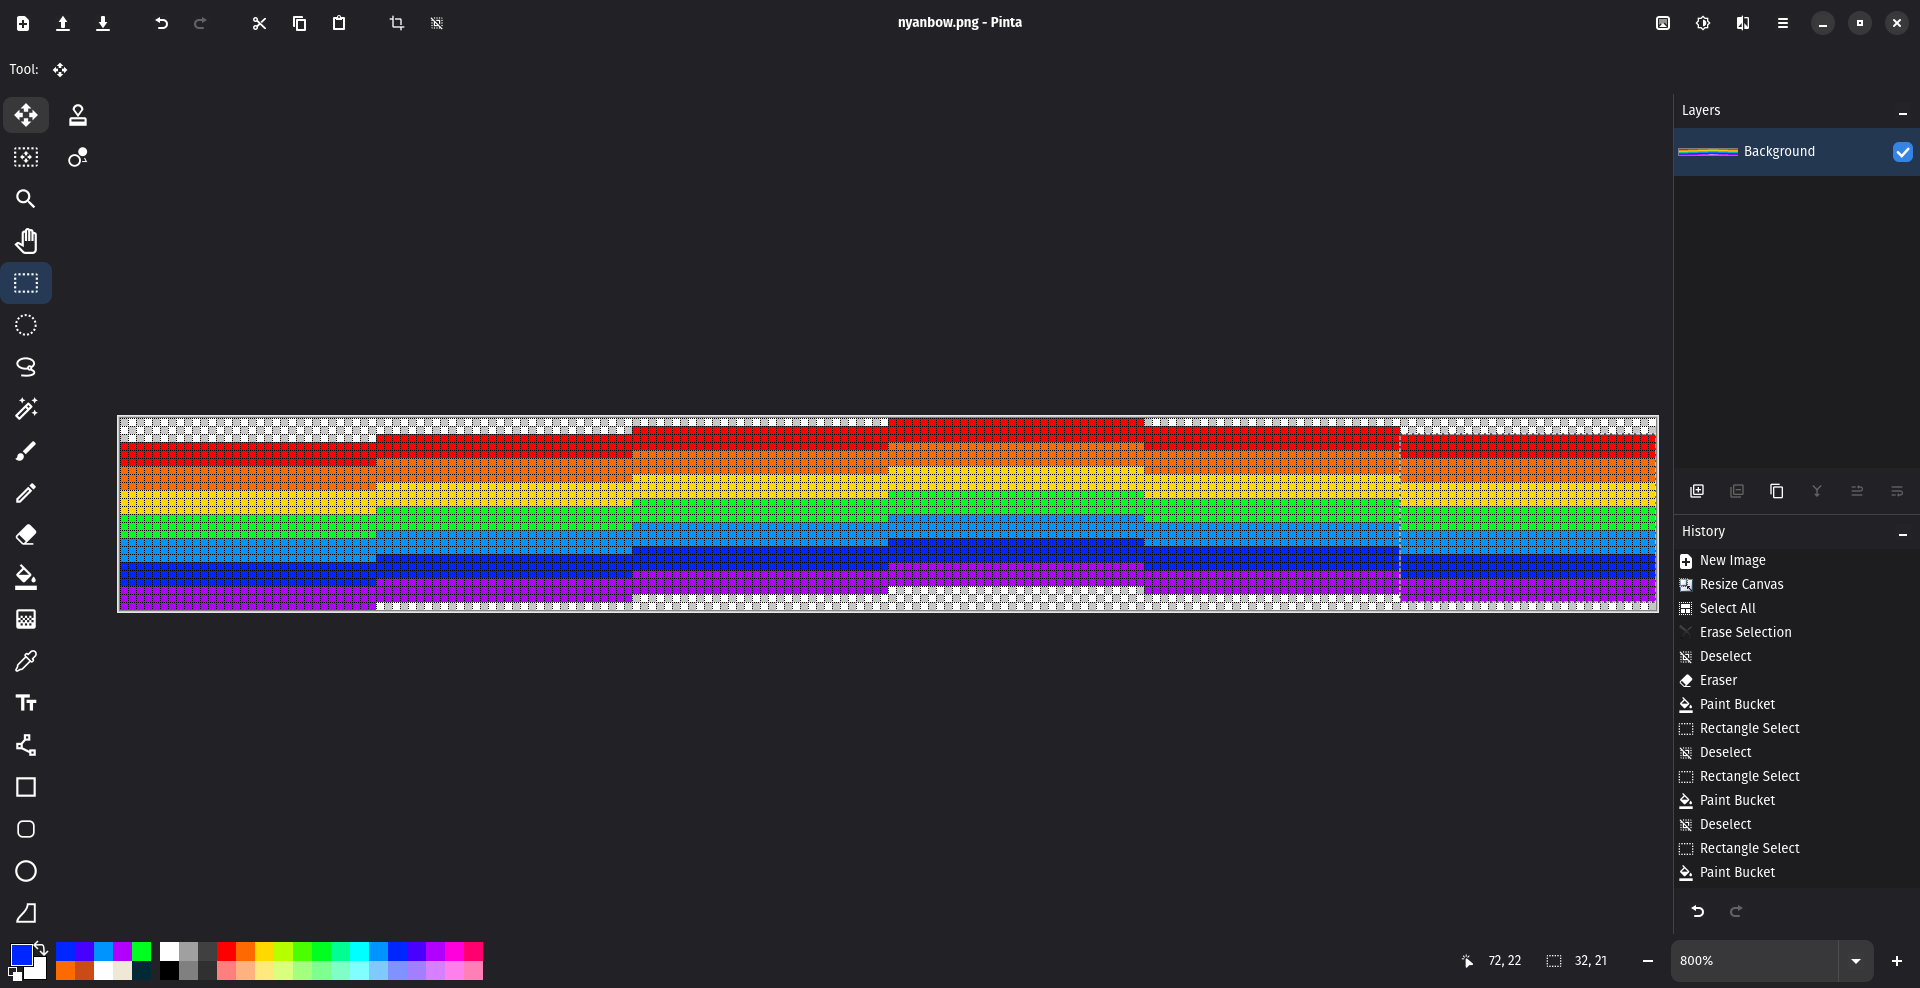
Exported into a Gif for ease of viewing in this blog:

Not that impressive on its own, but let's go ahead and add it to the game and see what the effect looks like. Loading the rainbow is nearly identical to the previous code, but we're not loading enough of these sprites to make me want to write a generic helper method for now:
private Animation<TextureRegion> loadRainbow() {
    Texture sheet = new Texture(Gdx.files.internal("sprite/nyanbow.png"));
    TextureRegion[][] frames = TextureRegion.split(sheet, 32, 24);
    Animation<TextureRegion> animation = new Animation<>(0.025f, frames[0]);
    return animation;
}
We want the rainbow to be flush with the player sprite, so rather than drawing it one whole unit behind the player position, we'll overlap them a little bit and ensure the draw order puts the player on top of the rainbow
float animationFrame = 0;
private void draw(float delta) {
    animationFrame += delta;
    ScreenUtils.clear(Color.YELLOW);
    this.game.batch.begin();
    this.game.batch.draw(
        game.rainbowSprite.getKeyFrame(animationFrame, true),
        player.getX() - 0.65f,
        player.getY(),
        1,
        1
    );
    this.game.batch.draw(
    	game.playerSprite.getKeyFrame(Math.abs(player.getY()), true), // loop=true
    	player.getX(),
    	player.getY(),
    	1, // world unit width
    	1  // world unit height
	);
    ...
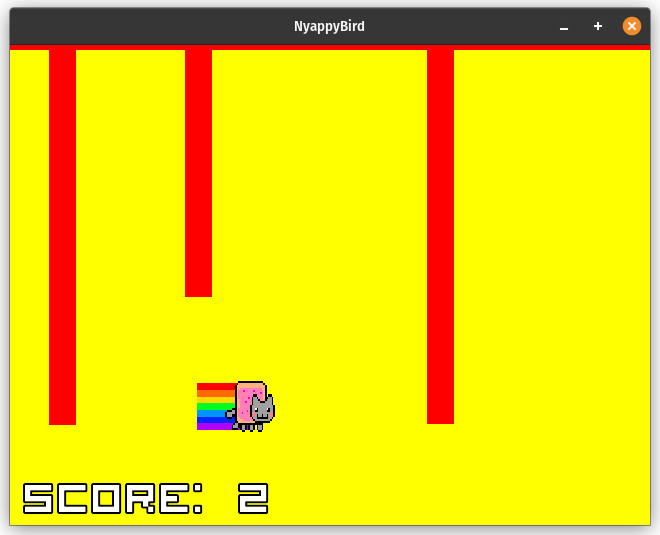
I'm not tying the animation keyframe to the y position this time, because we're moving forward at a constant rate in the X direction, so just having your typical accumulation value seems sensible to me.
The cat is now in a yellow and red void, we should probably do something about this. Since the poptart cat is a poptart. Perhaps the obstacles should be poptarts too? But, unlike the cat and the rainbow, the obstacles are variably sized at runtime. How will we deal with this?
LibGDX allows us to create NinePatch images. Which basically is a sprite that's been cut up so that the parts that are scaleable are split out that way, and the bits that shouldn't scale, are in a separate part of the sprite. That's kind of a bad explanation. So instead, consider the following

The corners of the above 9-box will be kept as is. But the other parts will be stretched as needed in order to match the size that we want to see. This isn't perfect, since details within the center can get a bit screwy here or there. When we construct the 9 box, if we don't want to be highly specific about each patch, we can pass in how far the center piece of the patch is from the left, right, top, and bottom sides:
private NinePatch loadObstacleNinePatch() {
    Texture texture = new Texture(Gdx.files.internal("sprite/obstacle.png"));
    NinePatch ninePatch = new NinePatch(texture, 4, 4, 4, 4);
    ninePatch.scale(
        worldWidth / (float)Gdx.graphics.getWidth(),
        worldHeight / (float)Gdx.graphics.getHeight()
    );
    return ninePatch;
}
What's really important is to remember to call ninePatch.scale and scale it
by your viewport. Or else you'll see some very odd things happening:
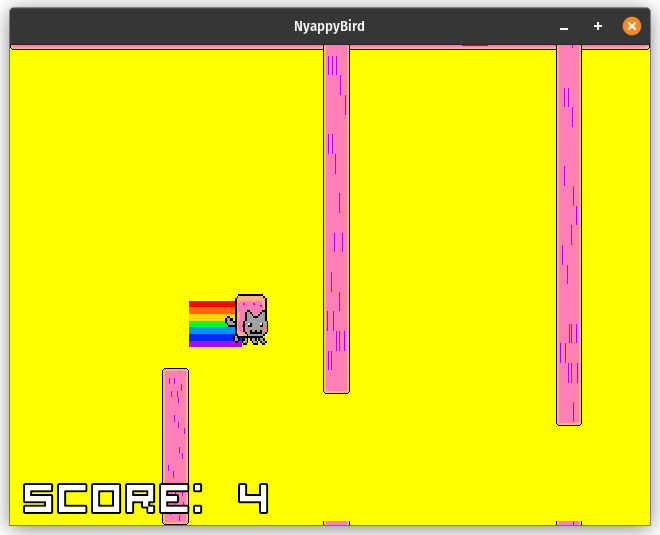
Admittedly, the pop tart sprinkles are a bit, odd looking. So I might remove them from the final texture. But for now, I want to finish the others we need. The yellow background needs to go and I either want to a little bit of parallax, or at the very least, some stars floating by. If I look at the original video, it's a solid blue with simple white stars floating by. The background is easy, and I can pop into piskel again and draw some dots flying around to make a star of sorts:

Then load it up via some simple code in my game class.
public void create() {
    ...
    this.starSprite = this.loadStar();
    this.background = this.loadBackground();
    ...
}

private Animation<TextureRegion> loadStar() {
    Texture sheet = new Texture(Gdx.files.internal("sprite/star.png"));
    TextureRegion[][] frames = TextureRegion.split(sheet, 8, 8);
    Animation<TextureRegion> animation = new Animation<>(0.025f, frames[0]);
    return animation;
}

private Texture loadBackground() {
    Texture texture = new Texture(Gdx.files.internal("sprite/bg.png"));
    return texture;
}
Rendering the background is obvious enough
this.game.batch.draw(game.background, 0, 0, game.worldWidth, game.worldHeight);
But, the stars? We need to actually define where they should be. Since we'll need to track the positions, as well as an animation keyframe to show per star, and so I'd like to separate this out into its own little class:
package spare.peetseater.nb;

import com.badlogic.gdx.math.MathUtils;
import com.badlogic.gdx.math.Vector2;

import java.util.ArrayList;
import java.util.List;

public class ScrollingStars {
    private final float maxX;
    private final float maxY;
    List<Vector2> starPositions;
    float accum;
    float xSpeed;

    public ScrollingStars(float howManyStars, float maxX, float maxY, float xSpeed) {
        this.maxX = maxX;
        this.maxY = maxY;
        starPositions = new ArrayList<>();
        this.xSpeed = xSpeed * -1;
        for (int i = 0; i < howManyStars; i++) {
            float x = MathUtils.random(0, maxX);
            float y = MathUtils.random(0, maxY);
            starPositions.add(new Vector2(x, y));
        }
    }

    void update(float delta) {
        accum += delta;
        for (Vector2 pos : starPositions) {
            pos.add(xSpeed * delta, 0);
            if (pos.x < 0) {
                pos.set(maxX + MathUtils.random(), MathUtils.random(0, maxY));
            }
        }
    }

    void draw(NyappyBirdGame game) {
        for (int i = 0; i < starPositions.size(); i++) {
            Vector2 pos = starPositions.get(i);
            game.batch.draw(
                game.starSprite.getKeyFrame(i + accum, true),
                pos.x,
                pos.y,
                0.25f,
                0.25f
            );
        }
    }
}
This class is a little bit more similar to how I handled a lot of the code in the
match 3 game, where there's a draw method that deals with the logic
of how to draw the specific things. While I've avoided that until now, I think
it just makes sense here to do this. The one thing of note here that may be non-obvious
is getKeyFrame(i + accum, true). The looping parameter set to true is
obvious since we want the star to loop forever. But the keyframe to show isn't just
the time since the last frame, we've also included the index because this ensures
that every star is slightly different, as far as where it is in its keyframe
that's being shown. If we don't do this, then each star will be
in lockstep. Which doesn't look good:
So, we'll stick with that and then toss in some random parameters for the
setup. Then update the update and draw methods to
call down to the scrolling star code to do the same.
... in constructor ...
this.scrollingStars =  new ScrollingStars(
    40,
    game.worldWidth,
    game.worldHeight,
    levelSettings.obstacleXSpeed
);
... in update ...
this.scrollingStars.update(delta);
... in draw ...
this.scrollingStars.draw(game);
40 stars seemed alright to me (and what you see above). So, with that, that's all of our sprites drawn to the screen! We still could spruce up the game over screen a bit, but we're essentially 95% of the way done with the game! All we need now is a bit of music and maybe a title screen and then we're ready to go!
Music! ↩
This will be a short section. LibGDX makes music handling pretty simple:
private Music loadBGM() {
    Music music = Gdx.audio.newMusic(Gdx.files.internal("music/nyancat.mp3"));
    music.setVolume(0.5f);;
    music.setLooping(true);
    return music;
}
And then all we have to do is call music.play() in our game code
before we set the first screen and suddenly life feels more whimsical!
I'm not sure exactly who owns the rights to the nyan cat song, as I think the actual "voice" is Hatsune Miku being used, so it's potentially a fan song's property? According to the youtube video marked original:
Nyan Cat was made on April 2, 2011 during a charity art drive to help Japan after the Tōhoku earthquake. It started as a pixel cat flying through space and quickly went viral, inspiring tons of fan art, remixes, and parodies.
So I doubt anyone is going to come after me for using it in a fun little gaming challenge. But well, if this disappears from the internet or something, then there ya go. Anywho. Let's move on!
A title screen ↩
So what's left to do here before we call the challenge done?
Well, I'll use my IDE's refactoring tool to change FirstScreen
to PlayScreen for one. And then we can set up our actual
first screen:
package spare.peetseater.nb;

import com.badlogic.gdx.Gdx;
import com.badlogic.gdx.Input;
import com.badlogic.gdx.Screen;
import com.badlogic.gdx.graphics.Color;
import com.badlogic.gdx.graphics.OrthographicCamera;
import com.badlogic.gdx.utils.Align;
import com.badlogic.gdx.utils.ScreenUtils;
import com.badlogic.gdx.utils.viewport.FitViewport;

public class TitleScreen implements Screen {

    private final OrthographicCamera camera;
    private final FitViewport viewport;
    private final ScrollingStars stars;
    NyappyBirdGame game;

    public TitleScreen(NyappyBirdGame game) {
        this.camera = new OrthographicCamera();
        this.camera.setToOrtho(false, game.worldWidth, game.worldHeight);
        this.viewport = new FitViewport(game.worldWidth, game.worldHeight, camera);
        this.stars = new ScrollingStars(25, game.worldWidth, game.worldHeight, 0.1f);
        this.game = game;
    }

    @Override
    public void show() {
    }

    private void update(float delta) {
        this.camera.update();
        this.stars.update(delta);
        if (Gdx.input.isKeyJustPressed(Input.Keys.SPACE)) {
            // TODO: deal with this nicely.
            this.game.bgm.play();
            game.setScreen(new PlayScreen(game, LevelSettings.createStandardLevelSettings()));
        }
        if (Gdx.input.isKeyJustPressed(Input.Keys.ESCAPE)) {
            Gdx.app.exit();
        }
    }

    private void draw(float delta) {
        ScreenUtils.clear(Color.BLACK);
        game.batch.begin();
        this.game.batch.setProjectionMatrix(camera.combined);
        game.batch.draw(
            game.background,
            0,0, game.worldWidth, game.worldHeight
        );
        this.stars.draw(game);
        game.visitorFont.draw(
            game.batch,
            "NYAPPY CAT",
            0,
            game.worldHeight - 2,
            game.worldWidth,
            Align.center,
            false
        );
        game.batch.draw(
            game.playerSprite.getKeyFrame(0, false),
            game.worldWidth / 2, game.worldHeight - 4,
            1, 1
        );
        game.visitorFont.draw(
            game.batch,
            "SPACE to start",
            0,
            game.worldHeight - 6,
            game.worldWidth,
            Align.center,
            false
        );
        game.visitorFont.draw(
            game.batch,
            "ESC to quit",
            0,
            game.worldHeight - 8,
            game.worldWidth,
            Align.center,
            false
        );
        game.batch.end();
    }

    @Override
    public void render(float delta) {
        update(delta);
        draw(delta);
    }

    @Override
    public void resize(int width, int height) {
        // If the window is minimized on a desktop (LWJGL3) platform, width and height are 0, which causes problems.
        // In that case, we don't resize anything, and wait for the window to be a normal size before updating.
        if(width <= 0 || height <= 0) return;
        viewport.update(width, height);
    }
    ... empty overrides from screen ...
}
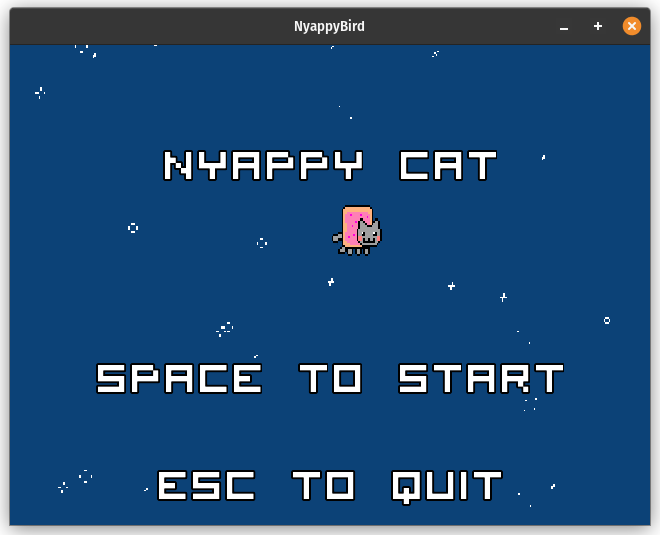
Ah, I suppose I should take care of that TODO I copied over from
the Game Over screen when I made this one. To keep the level settings centralized
and to have one source of truth for that, I'll just make it a class wide field in
the game class, then add helpers to swap screens there:
 <pre>
public void create() {
    ...
    playScreen = new PlayScreen(this, settings);
    titleScreen = new TitleScreen(this);
    showTitleScreen();
}

public void showTitleScreen() {
    setScreen(titleScreen);
}

public void showPlayScreen() {
    if (!this.bgm.isPlaying()) {
        this.bgm.play();
    }
    playScreen = new PlayScreen(this, settings);
    setScreen(playScreen);
}
Because the PlayScreen sets the score to 0 when the instance
is created, I make a new one each time. This isn't really a huge deal since
it just sets up the camera and whatnot, but if I was concerned about performance
between screens, I'd probably abstract that out. Honestly, if I was trying to
make the super-cleanest-possible code with this project, I'd probably want to
try to separate the things responsible for showing stuff as much as I could
from the actual internal game model. But when prototyping and doing a first pass,
sometimes it's fine to get your peas with your carrots as it were. And since
we're willingly constraining ourselves to a time limit. I think we're okay here.
I can address the TODO in the GameOver screen now as well. It will
become the same code as what's in the TitleScreen
private void update(float delta) {
    this.camera.update();
    this.stars.update(delta);
    if (Gdx.input.isKeyJustPressed(Input.Keys.SPACE)) {
        this.game.showPlayScreen();
    }
    if (Gdx.input.isKeyJustPressed(Input.Keys.ESCAPE)) {
        Gdx.app.exit();
    }
}
Nothing special here at all. I haven't refactored to an input adapter either since there wasn't much need. If we were supporting both keyboard and mouse, and had buttons or something more complicated than "press key to start", I would. But this is fine.
One last little tweak is to make the obstacles wider to let their poptart-y-ness show off a little better. And then, we're done and dusted:
Final thoughts ↩
So what's the final product look like?
Is it perfect? No. Clearly, near the end there the obstacle generation failed miserably and generated something we couldn't get by. Is the game fun? No, not really, it's pretty slow and lacks that FLAP! WOOSH! WEEE! Sort of upward bounce and gravitional pull of the actual flappy bird. Linearly movement just isn't the way.
But did I have fun making it? Yes.

Given that we had a list of requirements to start with from the challenge, let's walk through that and see if we hit everything before we claim total victory:
- The game world has a floor
- There must be a main character who is affected by gravity
- There must be obstacles that slide in from the right, they should appear as a pair with a vertical gap between them 15
- Touching the floor or obstacles will result in a game reset
- Each obstacle passed through scores the player 1 point, their score should be displayed
And the stretch goals?
- Add sound effects
- Add a game over screen
- Track high score over sessions and display it and the current score
- Add background art and consider parallax scrolling
A few misses in the stretch goals. We didn't really add anything for sound effects when you score or similar
because I completely forgot about it. We also aren't tracking the high score over the course of the game,
but that would honestly be trivial to add since the NyappyBirdGame class is now taking care of
swapping between screens, and so we could easily add 1 field in and pass it down to whatever screens we
want to show it on.
I'm okay with not doing that for now though. As the last thing I want to touch on in the post is the timeline, since the goal was to do this in under 20 hours. The clock is paused when I'm not working on the code, and I used various compilation videos to try to keep track of how much time I spent. Whenever I had to change music around, I'd note that time and go from there.
On Sunday the 24th I setup the intiial project, and worked for about 8 hours to get the project setup and all the way to the initial algorithm for obstacle generation. The entire time I listened to a nice 10 hour Dwarf Fortress OST compilation that didn't quite make it to the end. Also, I was sad to see it disappear off youtube the day after.
On Tuesday the 28th I had a bit of a late start, around 10:26pm and worked for an hour until I stopped after adding in the input adapter for tweaking the settings while the game ran.
On Thursday I added in the game over screen and loaded up the fonts. The fonts took
an hour to troubleshoot because I was trying to use the same code I had used for the
match 3 game, but the newer version of libgdx didn't appreciate trying to use the
AssetManager with a custom loader, so I think that changed in some way
between versions, so I gave up and followed the example on the wiki to do it without
one.
Friday I created the game over screen using the font from the day before then enjoyed my day off for a while. Then proceded to ruin my Saturday with geometry, banging my head against it for another 4 hours. This was probably the most frustrating part of the project. I felt really stupid, and still do, because it feels like it should work just fine, and yet here I am, with an obstacle generation that causes impossible levels to happen despite doing, from what I can tell, the correct math. It's probably something like not dealing with things beyond single points, but I thought I dealt with that when I took the width into account. 16 Anyway, that took around 5 hours or so of my life off total.
Sunday was a bit easier, though I was a bit more loose on counting the time here because I was working on sprites for a while. Starting around noon and then doing sprites and loading up music before 5pm. I took a break for 3 hours, then came back around 8:30pm to finish writing up the blogpost and add the title screen, which took all of 10 minutes for the screen, and uh... checks clock about 30 minutes to write the words you're hearing now.
So what's that? 8 + 1 + 1 + 5 + 5 = 20ish hours? Holy crap! We're doing rough napkin wishy washy math here, but it actually took us 20 dev hours to do the whole thing! We're on time! And our game is uh... over its bug budget, but hey! We've got something to show for the first game in a 20 game challenge! And I'm okay with using that momentum to keep things rolling in the future.
See ya next time!
 If you'd like to see the source code, you can find it here on github.
You can also download and run the game there too!
If you'd like to see the source code, you can find it here on github.
You can also download and run the game there too!