Requirements ↩
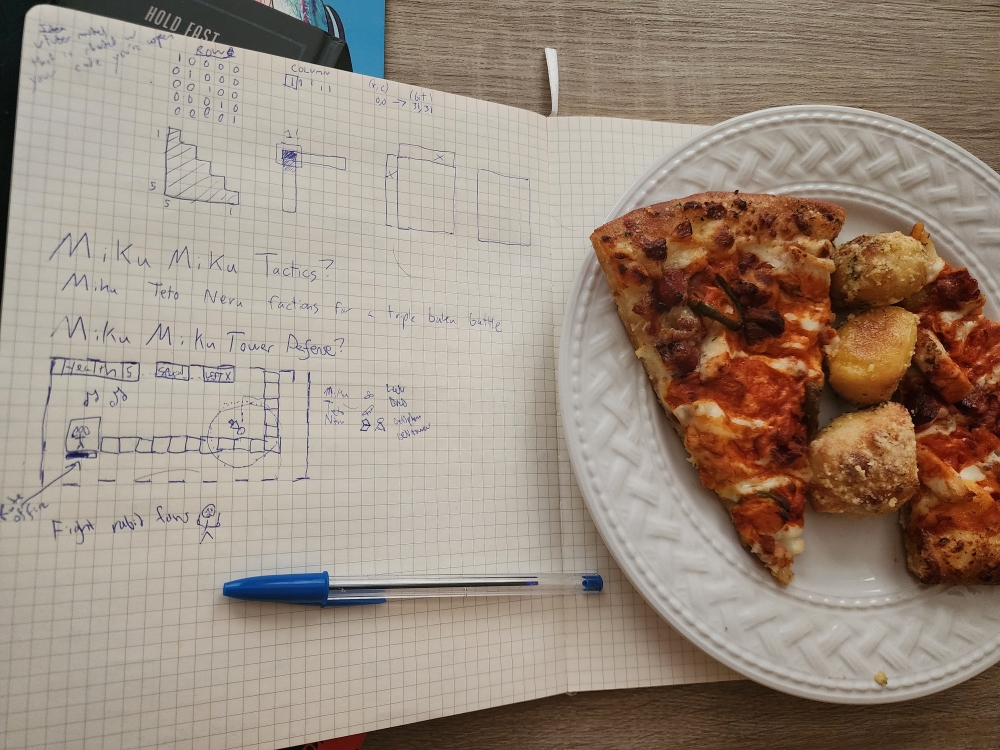
As you can see in the image above, the plan is to create a tower defense game. This feels like a good middle ground between the simplicity of battleship and the complexity of a tactics game. While it's no rhythm game, enemies in these games tend to stream out at a constant rate, and I feel like having good sound effects is pretty important for this type of thing.
Also, somewhat in theme of the previous game's inspirations, making the game Miku themed feels like a good idea. My art abilities lack immensely, and so if I can rely on some pre-established themes for colors, abilities, and other silly themes, then I'll hopefully have an easier time of things. But, before I go biting off too much to chew on at once, let's get to work defining the scope of the project so we can keep this tutorial/devblog within a reasonable length. 3
For you, my dear reader, my goal is the same as always: provide an intermediate level tutorial about how to create something that extends your knowledge beyond tutorial hell. And for myself? An ongoing development blog I can use to collect my thoughts, mull things over, meme around a bit, and hopefully triumphantly smile at the end when I drag and drop the files along to upload this post to the website.
So what then, is our desired requirements for the video game I sketched out on my notepad?
- The game must have audio
- The game must have animation
- The game ends when the tower runs out of health
- Enemies should spawn and attack the tower along a path
- We should try to use a tilemap, maybe we make a level editor again too
I think that this should be plenty of work to do. We could set stretch goals like upgrade systems, special abilities, character selection, and more. But I think this will do fine for now. The last thing we need to decide before we begin, is what library we'll be using.
Which library are we using? ↩
I've been waffling back and forth on this for multiple days now. On the one hand, egor was pretty simple to use and has some new examples in its latest version showing shaders and other tricks which are pretty cool. On the other hand, as I noted in the nonogram post, I've been hearing about SDL3 and something is drawing me towards it. I don't know WHY, I've never used SDL2, but I have played 100% orange juice and it's right there on the home page as an advertisement for what you can make with it:

The only thing that sort of raises my eyebrow is that "simple direct media" sort of sounds like "Direct X" and I had a book way way way back in the day on using directX 8 (I think) and I recall spending an entire afternoon typing out 9 or 10 pages of strange code I didn't understand only to discover that it wouldn't compile on my windows XP computer at the time. But, perhaps the direct in SDL stands for something very different. Or at the very least, I have a little bit more faith in myself nowadays that I'll be able to tackle a compilation problem if it comes up.
Importantly, the SDL3 Language Bindings page links a rust binding! I wouldn't be opposed to writing a game in C I suppose, but I like the comfortable feeling that rust gives me when it comes to compiling on multiple machines. It's all just cargo build for the most part, and that's real neat I think. So, I'd like to at least try to use SDL3 for this, though I admit I was a bit apprehensive when I saw this in the README file
| Library | |
|---|---|
| Dear ImGUI | ❌ Not currently supported |
| RmlUI | ❌ Not currently supported |
| SDL_gfx | 🟨 Waiting on improvements to the C library |
| SDL_image | ✅ Supported |
| SDL_mixer | 🟨 Awaiting a stable C release |
| SDL_sound | 🟨 Awaiting a stable C release |
| SDL_ttf | ✅ Supported |
| SDL_net | 🟨 Awaiting a stable C release |
| SDL_shadercross | ❌ Not currently supported |
| sdl3-main | ✅ Supported |
but I got a little less nervous when I read the libraries page on the SDL3 wiki that noted that these are just optional extensions on top of the existing base code. Which means: just because sdl_mixer says its awaiting a stable release, that doesn't mean I'll be without audio. I think.
I'm procrastinating, let's just jump in and see what we can do. Starting up a new project is simple
cargo new mikumikutower
Then a very slight tweak right away to have both a lib and a main file so that I don't end up with too much of a "jam everything into main" program right away situation:
// in lib.rs
pub fn hello() {
    println!("Hi");
}

// in main.rs
fn main() {
    mikumikutower::hello();
}
And running it of course prints Hi. Adding SDL to the dependencies is simple enough:
[dependencies]
sdl3 = { version = "0", features = [] }
The program keeps running, saying Hi, but we haven't tried to use anything from SDL yet and so I'm suspicious of some form of runtime error happening based on various things I've seen over the course of the last few days of looking at random tutorials. Specifically, I've had this page open and it explicitly says
This crate requires the SDL3 library to link and run.
By default without any of these features enabled, it will try to link a system SDL3 library as a dynamic/shared library using the default library search paths.
Thankfully, it seems like one can get these by using the feature flag build-from-source,
so our Cargo.toml file becomes
sdl3 = { version = "0", features = ["build-from-source"] }
and then attempting to run the program again causes us to get what I expected. An error.
CMake Error at cmake/macros.cmake:415 (message):
SDL could not find X11 or Wayland development libraries on your system.
This means SDL will not be able to create windows on a typical unix
operating system.  Most likely, this is not wanted.

On Linux, install the packages listed at
https://wiki.libsdl.org/SDL3/README-linux#build-dependencies

If you really don't need desktop windows, the documentation tells you how
to skip this check.
https://github.com/libsdl-org/SDL/blob/main/docs/README-cmake.md#cmake-fails-to-build-without-x11-or-wayland-support
Well, isn't that the kindest RTFM you've ever seen.
So I need to apt get libx11-dev at the very least. The build dependencies on the wiki
includes a whole bunch of other things, but I'm not in the habit of copying and pasting a paragraph
of apt installs since my general preference is to install as little as possible so I don't find myself
asking: wait why is this installed, can I delete this, is it safe to do that? A year after today.
sudo apt install libx11-dev
Reading package lists... Done
Building dependency tree... Done
Reading state information... Done
The following additional packages will be installed:
  xtrans-dev
Suggested packages:
  libx11-doc
The following NEW packages will be installed:
  libx11-dev xtrans-dev
0 upgraded, 2 newly installed, 0 to remove and 0 not upgraded.
This sadly isn't enough to get past the error yet, but if I read (a rare skill of mine) the output from the terminal I see that it's no longer complaining about missing the x11 stuff:
-- dynamic libasound -> libasound.so.2
  -- Checking for module 'jack'
  --   No package 'jack' found
  -- Checking for module 'libpipewire-0.3>=0.3.44'
  --   No package 'libpipewire-0.3' found
  -- Checking for module 'libpulse>=0.9.15'
  --   No package 'libpulse' found
  -- Checking for module 'sndio'
  --   No package 'sndio' found
  -- Found X11: /usr/include
  -- Looking for XOpenDisplay in /usr/lib/x86_64-linux-gnu/libX11.so
  -- Looking for XOpenDisplay in /usr/lib/x86_64-linux-gnu/libX11.so - found
  -- Looking for gethostbyname
  -- Looking for gethostbyname - found
  -- dynamic libX11 -> libX11.so.6
  -- Checking for module 'fribidi'
  --   No package 'fribidi' found
  -- Checking for module 'libthai'
  --   No package 'libthai' found
  -- Could NOT find OpenGL (missing: OPENGL_opengl_LIBRARY OPENGL_glx_LIBRARY OPENGL_INCLUDE_DIR)
  -- Checking for module 'libdrm'
  --   No package 'libdrm' found
  -- Checking for modules 'wayland-client>=1.18;wayland-egl;wayland-cursor;egl;xkbcommon>=0.5.0'
  --   No package 'wayland-client' found
  --   No package 'wayland-egl' found
  --   No package 'wayland-cursor' found
  --   No package 'egl' found
  --   No package 'xkbcommon' found
  ...
There's a whole bunch of stuff like this, and man, what a fun name: "fribidi"! I suppose this is why people use docker, nix, and other things like that to abstract environments away. But, I don't really want to install docker or have to spend the time waiting on docker builds and volume mounting and all that other stuff because it's just tiring. So, I ran this:
sudo apt install libpipewire-0.3-dev
And that was fine. All brand new, nothing weird, and then I went ahead and looked at the output of
sudo apt install libjack-dev
Reading package lists... Done
Building dependency tree... Done
Reading state information... Done
The following package was automatically installed and is no longer required:
  libsamplerate0:i386
Use 'sudo apt autoremove' to remove it.
The following additional packages will be installed:
  libjack0
Suggested packages:
  jackd1
The following packages will be REMOVED:
  libasound2-plugins:i386 libjack-jackd2-0 libjack-jackd2-0:i386
The following NEW packages will be installed:
  libjack-dev libjack0
0 upgraded, 2 newly installed, 3 to remove and 1 not upgraded.
Need to get 299 kB of archives.
After this operation, 6,144 B disk space will be freed.
Do you want to continue? [Y/n] n
Abort.
and as you can see, I aborted. What do you mean, REMOVED?

libasound2-plugins is one of many audio plugins that are used by my computer to make sure my video games work. We're not going to break that in the process of trying to make our own! Nah, if I stare at the log output, I see
  -- Enabled backends:
  --   Video drivers: dummy offscreen
  --   Render drivers: gpu ogl_es2 vulkan
  --   GPU drivers: vulkan
  --   Audio drivers: alsa(dynamic) disk dummy pipewire(dynamic)
  --   Joystick drivers: hidapi linux virtual
  --   Camera drivers: dummy pipewire(dynamic) v4l2
That Audio drivers line noting it has alsa and some sort of dummy pipewire I think
means I don't need (jackshit from) jack. So rather, I think maybe I need some headers for pipewire,
and some other video stuff to get past the "dummy" backends and make the build work. At least,
that's my guess anyway. So, since I already have that x11 install, let's try the open gl related
package next, then re-run things
sudo apt install libgl1-mesa-dev
cargo clean && cargo run
...
  -- Performing Test ICONV_IN_LIBICONV
  -- Performing Test ICONV_IN_LIBICONV - Failed
  -- Looking for libudev.h
  -- Looking for libudev.h - not found
  -- Performing Test LIBC_HAS_WORKING_LIBUNWIND
  -- Performing Test LIBC_HAS_WORKING_LIBUNWIND - Failed
  -- Performing Test LIBUNWIND_HAS_WORKINGLIBUNWIND
  -- Performing Test LIBUNWIND_HAS_WORKINGLIBUNWIND - Failed
  -- Checking for modules 'libunwind;libunwind-generic'
  --   No package 'libunwind' found
  --   No package 'libunwind-generic' found
  -- Checking for module 'libusb-1.0>=1.0.16'
  --   No package 'libusb-1.0' found
  -- Could NOT find LibUSB (missing: LibUSB_LIBRARY LibUSB_INCLUDE_PATH) (found version "LibUSB_VERSION-NOTFOUND")
  ...
  -- Found X11: /usr/include
  -- Looking for XOpenDisplay in /usr/lib/x86_64-linux-gnu/libX11.so
  -- Looking for XOpenDisplay in /usr/lib/x86_64-linux-gnu/libX11.so - found
  -- dynamic libX11 -> libX11.so.6
  ...
  --   SDL_X11                     (Wanted: ON): OFF
  --   SDL_X11_SHARED              (Wanted: ON): OFF
  --   SDL_X11_XCURSOR             (Wanted: ON): OFF
  --   SDL_X11_XDBE                (Wanted: ON): OFF
  --   SDL_X11_XFIXES              (Wanted: ON): OFF
  --   SDL_X11_XINPUT              (Wanted: ON): OFF
  --   SDL_X11_XRANDR              (Wanted: ON): OFF
  --   SDL_X11_XSCRNSAVER          (Wanted: ON): OFF
  --   SDL_X11_XSHAPE              (Wanted: ON): OFF
  --   SDL_X11_XSYNC               (Wanted: ON): OFF
  --   SDL_X11_XTEST               (Wanted: ON): OFF
So, this is the confusing part. It has a few complains about libunwind and libUSB, and maybe I can fix that,
but stranger is the fact that we see that it says it "Found X11" but yet down near the bottom of the log, it
still says that it's OFF. Looking at that list there are quite a few libx* libraries that I haven't
installed yet, the best thing about apt is that it has an info command that can give us… you guessed it.
More info:
| libx11-dev | This package provides a client interface to the X Window System, otherwise known as 'Xlib'. It provides a complete API for the basic functions of the window system. |
| libxext-dev | X11 miscellaneous extensions library (development headers) libXext provides an X Window System client interface to several extensions to the X protocol. |
| libxrandr-dev | libXrandr provides an X Window System client interface to the RandR extension to the X protocol. The RandR extension allows for run-time configuration of display attributes such as resolution, rotation, and reflection. |
| libxcursor-dev | Header files and a static version of the X cursor management library are provided by this package. See the libxcursor1 package for further information. |
| libxfixes-dev | libXfixes provides an X Window System client interface to the 'XFIXES' extension to the X protocol. It provides support for Region types, and some cursor functions. |
| libxi-dev | libXi provides an X Window System client interface to the XINPUT extension to the X protocol. The Input extension allows setup and configuration of multiple input devices, and hotplugging of input devices (to be added and removed on the fly). |
| libxss-dev | libXss provides an X Window System client interface to the MIT-SCREEN-SAVER extension to the X protocol. The Screen Saver extension allows clients behaving as screen savers to register themselves with the X server, to better integrate themselves with the running session. |
| libxtst-dev | libXtst provides an X Window System client interface to the Record extension to the X protocol. The Record extension allows X clients to synthesise input events, which is useful for automated testing. |
| libxkbcommon-dev | library interface to the XKB compiler - development files xkbcommon is a library to handle keyboard descriptions, including loading them from disk, parsing them and handling their state. It's mainly meant for client toolkits, window systems, and other system applications; currently that includes Wayland, kmscon, GTK+, Clutter, and more. |
sudo apt install libx11-dev libxext-dev libxrandr-dev libxcursor-dev libxfixes-dev libxi-dev libxss-dev libxtst-dev libxkbcommon-dev
So that all seems pretty reasonble and installable. So, after doing that it was time to do another attempted cargo clean and run, annnnnnnd
-- SDL3_ttf: Using system freetype library
-- Configuring incomplete, errors occurred!
Could NOT find Freetype (missing: FREETYPE_LIBRARY FREETYPE_INCLUDE_DIRS)
Call Stack (most recent call first):
    /usr/share/cmake-3.22/Modules/FindPackageHandleStandardArgs.cmake:594 (_FPHSA_FAILURE_MESSAGE)
    /usr/share/cmake-3.22/Modules/FindFreetype.cmake:162 (find_package_handle_standard_args)
    CMakeLists.txt:359 (find_package)
Hey look! No more SDL error! Just a freetype related one, which is probably because while I was troubleshooting
and looking at my Toml file, I added ttf to the list of features since I figured I'd maybe want
some fonts at some point. Then again, who knows, maybe we'll implement slug
now that it's MIT licensed rather than private. Either way, for the sake of progress here, let's just
tweak the features I have enabled in the build:
[dependencies]
sdl3 = { version = "0", features = ["image", "build-from-source"] }
And then, away we go:
$ cargo clean
     Removed 1022 files, 210.9MiB total
$ cargo run
   Compiling find-msvc-tools v0.1.9
   Compiling shlex v1.3.0
   Compiling rpkg-config v0.1.2
   Compiling sdl3-src v3.4.2
   Compiling sdl3-image-src v3.4.0
   Compiling libc v0.2.183
   Compiling bitflags v2.11.0
   Compiling lazy_static v1.5.0
   Compiling cc v1.2.56
   Compiling cmake v0.1.57
   Compiling sdl3-sys v0.6.1+SDL-3.4.2
   Compiling sdl3-image-sys v0.6.1+SDL-image-3.4.0
   Compiling sdl3 v0.17.3
   Compiling mikumikutower v0.1.0 (/mikumikutower)
    Finished `dev` profile [unoptimized + debuginfo] target(s) in 12.12s
     Running `target/debug/mikumikutower`
Hi
Hello world is working again! And wow, the build files are a fifth of a gig! That's pretty big! But, with that out of the way I can go ahead and copy the clear example but as rust from the getting started section of the library docs.
use sdl3::pixels::Color;
use sdl3::event::Event;
use sdl3::keyboard::Keycode;
use std::time::Duration;

pub fn hello_sdl() {
    let sdl_context = sdl3::init().unwrap();
    let video_subsystem = sdl_context.video().unwrap();

    let window = video_subsystem.window("rust-sdl3 demo", 800, 600)
        .position_centered()
        .build()
        .unwrap();

    let mut canvas = window.into_canvas();

    canvas.set_draw_color(Color::RGB(0, 255, 255));
    canvas.clear();
    canvas.present();
    let mut event_pump = sdl_context.event_pump().unwrap();
    let mut i = 0;
    'running: loop {
        i = (i + 1) % 255;
        canvas.set_draw_color(Color::RGB(i, 64, 255 - i));
        canvas.clear();
        for event in event_pump.poll_iter() {
            match event {
                Event::Quit {..} |
                Event::KeyDown { keycode: Some(Keycode::Escape), .. } => {
                    break 'running
                },
                _ => {}
            }
        }
        // The rest of the game loop goes here...

        canvas.present();
        ::std::thread::sleep(Duration::new(0, 1_000_000_000u32 / 60));
    }
}
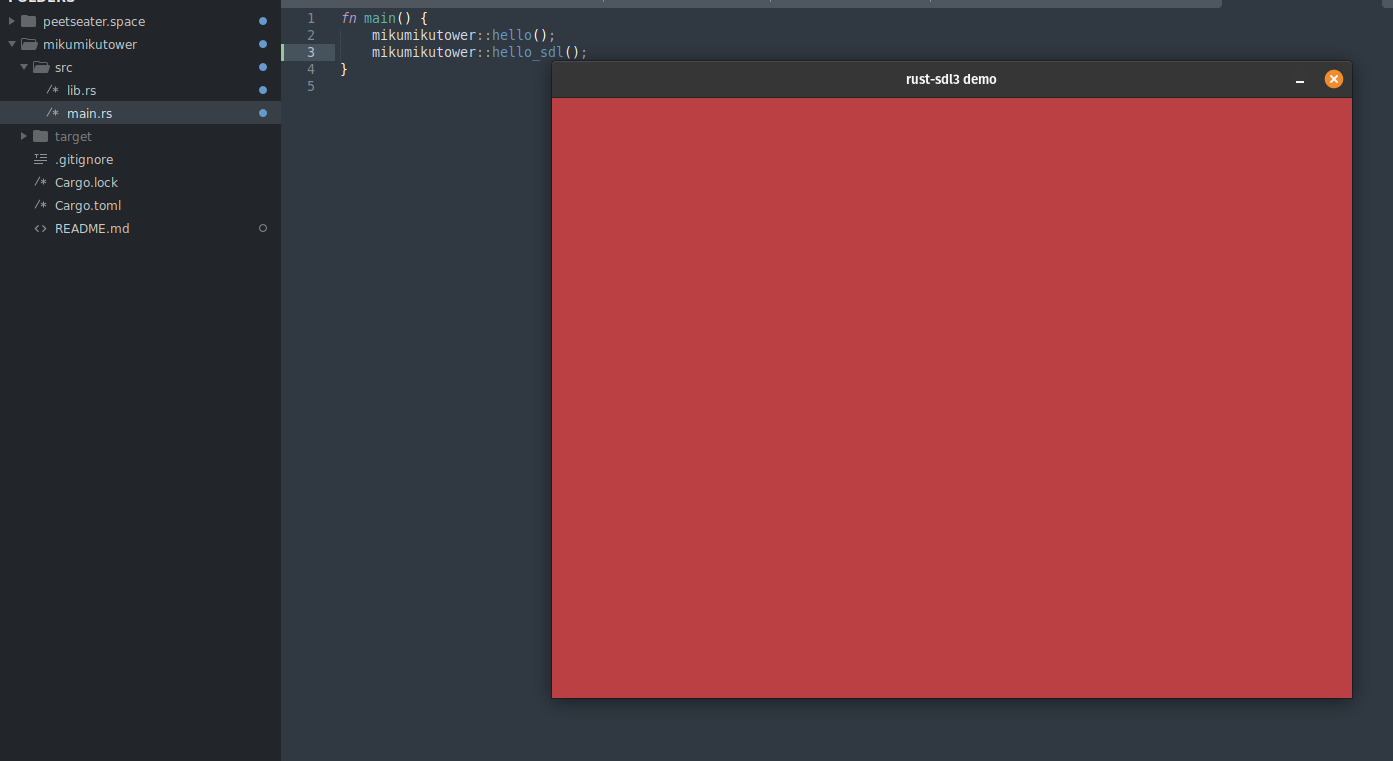
And just like that we've got the screen changing color over time in a basic loop.
There's still a ton of stuff to figure out, but with the hurdle of getting SDL3 up and running on our machine, that's one thing down. Though it does beg the question of how we're going to figure out the github actions to build SDL3 for cross platform builds since that's been something I've really liked having in place so far in all of my 20 games projects. The main question is if we should figure that out now or later.
If I weigh the pros and cons here, I think the potential pro of knowing when I broke the build is a great reason to get the release workflow working before we do anything else. We can consider it part of getting the library setup in general. The trick is that this means I now care not just about building on my computer, but on some remote runner somewhere in the ether of github. Thankfully, we already did a build for something similar with the logic paint game last time, so we can take a good chunk of that out and then construct a workflow that just does the extra SDL stuff:
name: Build Release Bundles

permissions:
  contents: write

on:
  push:
    tags:
      - "v*"

jobs:
  build:
    strategy:
      matrix:
        include:
          - os: ubuntu-latest
            name: linux
            container: ubuntu:20.04 # this and forward should work then.
          - os: macos-latest
            name: macos
          - os: windows-latest
            name: windows

    runs-on: ${{ matrix.os }}
    container: ${{ matrix.container || '' }}

    steps:
      - uses: actions/checkout@v4

      - name: Install dependencies for rust install (Linux container only)
        if: runner.os == 'Linux'
        run: |
          export DEBIAN_FRONTEND=noninteractive
          # why does ubuntu want to configure tzdata in the middle of a build, idk but its annoying as hell:
          ln -fs /usr/share/zoneinfo/Etc/UTC /etc/localtime
          apt-get update
          apt-get install -y curl build-essential pkg-config

      - name: Install Rust
        uses: dtolnay/rust-toolchain@stable

      - name: Speed up repeated builds via rust cache
        uses: Swatinem/rust-cache@v2

      - name: Install dependencies (Linux)
        if: runner.os == 'Linux'
        run: |
          export DEBIAN_FRONTEND=noninteractive
          apt-get update
          apt-get install -y \
            build-essential \
            cmake \
            pkg-config \
            libx11-dev \
            libxext-dev \
            libxrandr-dev \
            libxcursor-dev \
            libxi-dev \
            libxinerama-dev \
            libxxf86vm-dev \
            libxfixes-dev \
            libgl1-mesa-dev \
            libasound2-dev \
            libwayland-dev \
            libxkbcommon-dev \
            libxss-dev \
            libxtst-dev

      - name: Install dependencies (mac)
        if: runner.os == 'macOS'
        run: |
          brew install cmake

      - name: Install dependencies (Microslop)
        if: runner.os == 'Windows'
        run: |
          choco install cmake -y

      - name: Build (mac and Microslop)
        if: runner.os != 'Linux'
        run: cargo build --release --locked

      - name: Build (Linux with rpath)
        if: runner.os == 'Linux'
        run: cargo build --release --locked
        env:
          # since we ship .so next to the binary, tell the linker to tell it to resolve those at runtime
          # and to look within ORIGIN (the directory of the executable)
          RUSTFLAGS: "-C link-args=-Wl,-rpath,$ORIGIN"

      - name: Prepare dist (Linux)
        if: runner.os == 'Linux'
        run: |
          mkdir -p dist
          cp target/release/mikumikutower dist/
          cp target/release/libSDL3* dist/

      - name: Prepare dist (macOS)
        if: runner.os == 'macOS'
        run: |
          mkdir -p dist
          cp target/release/mikumikutower dist/
          cp target/release/libSDL3*.dylib dist/ || true

          install_name_tool -add_rpath @loader_path dist/mikumikutower || true

      - name: Prepare dist (Microslop)
        if: runner.os == 'Windows'
        run: |
          mkdir dist
          copy target\release\mikumikutower.exe dist\
          copy target\release\libSDL3* dist\
          copy target\release\SDL3.dll dist\
          # Note that if we ever need a directory, xcopy target\release\libSDL3* dist\ /Y /I will be the thing to do.

      - name: Archive (Linux)
        if: runner.os == 'Linux'
        run: tar -czf mikumikutower-linux.tar.gz -C dist .

      - name: Archive (macOS)
        if: runner.os == 'macOS'
        run: tar -czf mikumikutower-macos.tar.gz -C dist .

      - name: Archive (Microslop)
        if: runner.os == 'Windows'
        run: powershell Compress-Archive dist mikumikutower-windows.zip

      - name: Upload artifact
        uses: actions/upload-artifact@v4
        with:
          name: mikumikutower-${{ runner.os }}
          path: |
            *.tar.gz
            *.zip

      - name: Upload to GitHub Release
        uses: softprops/action-gh-release@v2
        with:
          files: |
            mikumikutower-linux.tar.gz
            mikumikutower-macos.tar.gz
            mikumikutower-windows.zip
While I normally like to include my debugging steps and refactoring and all that when it comes to code,
I don't think it really helps you to know that I forgot the container part of the yaml file
for a while and had an error that complained about
/lib/x86_64-linux-gnu/libm.so.6: version `GLIBC_2.38' not found (required by libSDL3.so.0),
job code that you set up once then pray to never touch again is one of those things that, well, I just said it.
I hope to not have to touch it again!
The above workflow for github worked most of the time. On random occasion with very little rhyme or reason the windows build would shrug and suddenly no longer have an SDL file to copy and I have no idea why because when I downloaded the zip from a build prior, it was there, and nothing I changed between that version and the one after it touched the path that constructs the windows version. I'm going to put that aside for the time being, and if the issue persists we'll deal with it in the future. For now though, let's move on! We've got a game to make!
Putting the Miku in Miku Miku Tower ↩
If we're calling this game Miku Miku Tower, then we better make sure we've got a cute miku in it. And with that in mind, behold, some really really cute sprites!

These are all part of the Miku n' Pop game, which luckily for me, has a creator who doesn't mind if people use the awesome sprites they put a bunch of love and effort into so long as they credit them.
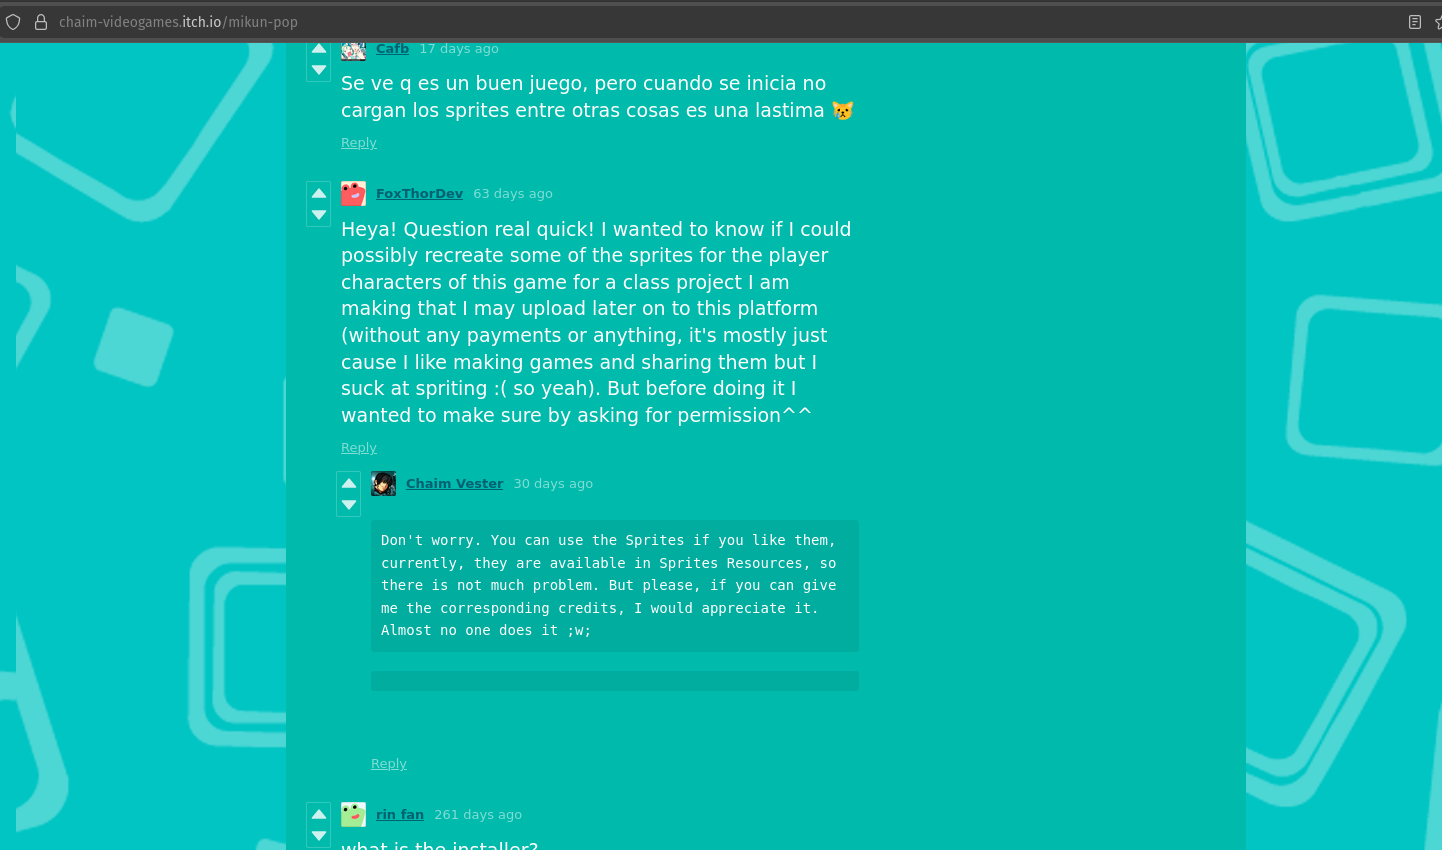
We'll add crediting chaim for the sprites as a todo item for ourselves, I'm thinking probably we should show it right on the title page or something. Maybe have the title and then have a "sprites by Chaim Vester - https://itch.io/profile/chaim-videogames" along the bottom or similar. Before I can do that though, we need to actually properly grab the assets and figure out how to load them.
Let's start simple, we'll figure out how to just display an image as a texture before we figure out how to display an animated sprite. Chaim has some really lovely portraits of the vocaloids, some of them on the slightly ecchi side, but for our purposes Miku, Neru, and Teto are all suitably safe for work for us to use here. 4
The portait spritesheet is 2891x804m which is a somewhat awkward size for 7 columns and two rows. 413 by 402 is a somewhat strange shape as well, but let's just try to figure out how to load the image up to start and then we'll deal with cutting it. Of course, to do this we need to figure out some of the other details about our application. First off, our window size:
pub struct GameOptions {
    pub window_width: u32,
    pub window_height: u32,
    // Eventually we can add log level when we add a real logger in
}

impl Default for GameOptions {
    fn default() -> Self {
        Self{
            window_width: 1280,
            window_height: 720
        }
    }
}
I figure we can go with a 16:9 screen again and that should be ok. Tower defense games that I played when I was younger were often wider than taller after all. And giving room for a runway to put your defensive units down is a good idea I think. Also, keeping track of the window height and width like this will force us to compute scalers for world units and that sort of thing by default, so I think this is a good idea there too as a forcing function for future code.
Moving along to trying to show a texture, I ran into some troubles. Specifically, how the heck do I
load up an image!? I did include image as an extension for SDL3, but I don't
know how to use it. While the c examples
provide some degree of help in that they get me looking around for a LoadPNG sounding method, or
that they tell me I should create a texture from a surface and similar, it doesn't quite help me yet
since I'm quite unfamiliar with the library. That didn't stop me from trying this though above my
main loop of the hello sdl function:
use sdl3::pixels::PixelFormat;
use sdl3::surface::Surface;
let mut test_image = include_bytes!("../assets/chaim-vester/portraits-spritesheet.png").to_vec();
...
let texture_creator = canvas.texture_creator();
let surface = Surface::new(2891, 804, PixelFormat::ARGB8888).unwrap();
let surface = Surface::from_data(&mut test_image[..], 2891, 413, 402, PixelFormat::ARGB8888).unwrap();
let texture = surface.as_texture(&texture_creator).unwrap();
...
canvas.copy(&texture, Rect::new(0, 0, 413, 402), Rect::new(0, 0, 413, 402)).expect("failed t draw texture");
This didn't work though. Yes, I have the bytes of an image, and yes, I looked at the output of file
on the asset to assume that ARGB8888 would work for the pixel format. That told me that the file was full of
PNG image data, 2891 x 804, 8-bit/color RGBA, non-interlaced5
But staring at the parameters for from_data I had 0 clue what "pitch" was. I mean, I sort of got it from looking at the source code and usages like this:
let len = self.raw_ref().pitch as usize * (self.raw_ref().h as usize);
It's the "stride" of the pixels going across its underlying format. Unfortunately, my guesses that it would align to what I might expect were quite wrong, and thus I was faced with:
thread 'main' panicked at src/lib.rs:41:98:
called `Result::unwrap()` on an `Err` value: Error("Parameter 'pitch' is invalid")
note: run with `RUST_BACKTRACE=1` environment variable to display a backtrace
The reason I was using from_data is because I couldn't figure out how to use the dang image library.
Believe me, I tried. At one point I had this:
let surface = {
    let raw_ptr = unsafe { sdl3_image_sys::image::IMG_Load(image.into) };
    if raw_ptr.is_null() {
        Err(sdl3::get_error())
    } else {
        Ok(unsafe { Surface::from_ll(raw_ptr) })
    }
}.unwrap();
Based on staring at the load_bmp_rw function and seeing how it interacted with the underlying
system library. I also stared at how doukutsu-rs loads its textures:
.with_lock(None, |buffer: &mut [u8], pitch: usize| {
    for y in 0..(height as usize) {
        for x in 0..(width as usize) {
            let offset = y * pitch + x * 4;
            let data_offset = (y * width as usize + x) * 4;

            buffer[offset] = data[data_offset];
            buffer[offset + 1] = data[data_offset + 1];
            buffer[offset + 2] = data[data_offset + 2];
            buffer[offset + 3] = data[data_offset + 3];
        }
    }
})
This was also yet another clue about how "pitch" is used as well. Ultimately though, the thing that got me out of this rabbit hole of staring at function signatures was
- Going to bed, it was 3am
- Watching this guy's SDL2 video on textures
He used a load_texture method that I didn't see in the docs. And which I still don't
see in the docs, but when
I tried to use it, rust's compiler had my back:
error[E0599]: no method named `load_texture` found for struct `TextureCreator` in the current scope
       --> src/lib.rs:50:35
        |
     50 |     let texture = texture_creator.load_texture("assets/chaim-vester/portraits-sprites...
        |                                   ^^^^^^^^^^^^
        |
       ::: /home/peetseater/.cargo/registry/src/index.crates.io-1949cf8c6b5b557f/sdl3-0.17.3/src/sdl3/image/mod.rs:103:8
        |
    103 |     fn load_texture<P: AsRef<Path>>(&self, filename: P) -> Result<Texture, Error>;
        |        ------------ the method is available for `TextureCreator<WindowContext>` here
        |
        = help: items from traits can only be used if the trait is in scope
    help: trait `LoadTexture` which provides `load_texture` is implemented but not in scope; perhaps you want to import it
        |
      1 + use crate::sdl3::image::LoadTexture;
        |
    help: there is a method `load_texture_bytes` with a similar name
        |
     50 |     let texture = texture_creator.load_texture_bytes("assets/chaim-vester/portraits-spritesheet.png").unwrap();
Short story, if I import LoadTexture from sdl3::image, then it brings a trait into scope that
implements the load texture trait and then it does the black magic under the hood to work and we land on the
working code:
use sdl3::image::LoadTexture;
...
canvas.set_draw_color(Color::RGB(0, 255, 255));
canvas.clear();
canvas.copy(&texture, Rect::new(0, 0, 413, 402), Rect::new(0, 0, 413, 402)).expect("failed t draw texture");
canvas.present();
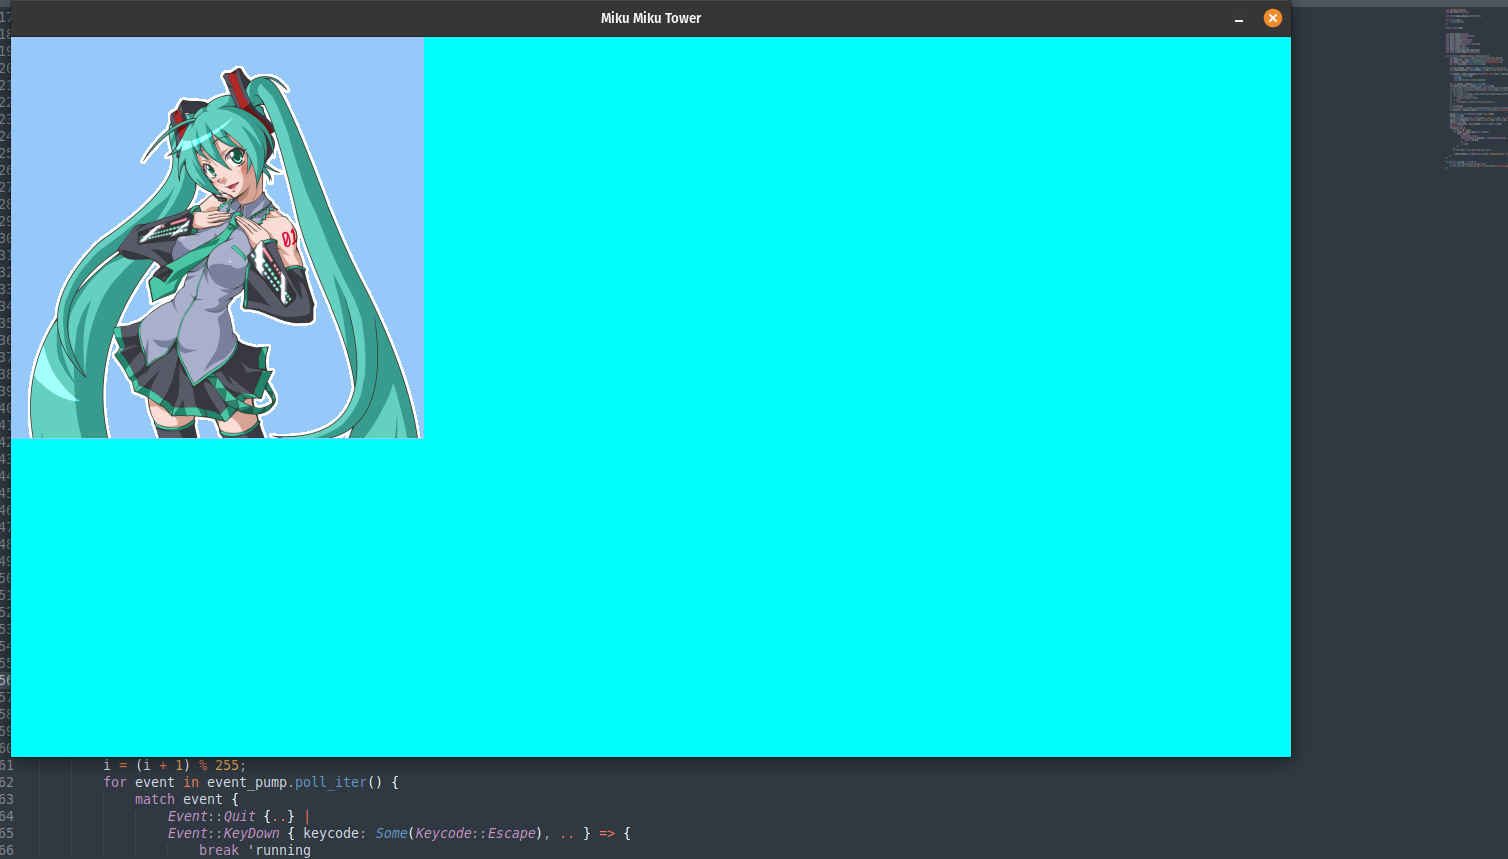
As you can see by the Rects, we're doing some cutting and pasting sort of. Specifically, the first one is
what rectangle from the source data to grab, and then the second is where it goes into the canvas. Meaning, if I do
something like this…
let mut event_pump = sdl_context.event_pump().unwrap();
let mut i = 0;
let mut j = 0;
let texture_sheet_width = texture.width() - texture.width() / 7;
'running: loop {
    i = (i + 1) % game_options.window_width;
    j = (j + 1) % texture_sheet_width;
    for event in event_pump.poll_iter() {
        match event {
            Event::Quit {..} |
            Event::KeyDown { keycode: Some(Keycode::Escape), .. } => {
                break 'running
            },
            _ => {}
        }
    }
    canvas.clear();
    canvas.copy(&texture, Rect::new(j as i32, 0, 413, 402), Rect::new(i as i32, 0, 413, 402)).expect("failed t draw texture");
    canvas.present();
    ::std::thread::sleep(Duration::new(0, 1_000_000_000u32 / 120));
}
Then we can draw a sliding window over the entire sheet!
Now it's not perfect obviously, but I'm also not trying to make a sliding window, I'm just trying to
fiddle around and get a feel for how things work. For example, you can see how we "snap back" at the
end of the loop for i and it's not like we actually wrap a texture around to the other
side when the destination is off the screen. That's kind of obvious that it wouldn't do that, but it's
also good to know that the thing won't panic if I ask it to draw something that wouldn't be visible.
Additionally, that thread sleep? That's basically our frame rate at the moment. If it's 60 then we get an attempted 60 frames per second, if it's 120, that's 120. If I remove it entirely then it goes as fast as it can and sort of looks the inside of a Zoetrope. It's still a terrible idea to sleep like this by the way. And we'll move towards a proper game loop in a little bit, but this is good for exploration purposes for now.
Now these portraits are great, and we can use them on a character select or something similar probably. But I want to experiment a little bit with the other spritesheet, the one with the actual sprite and not a static portrait:
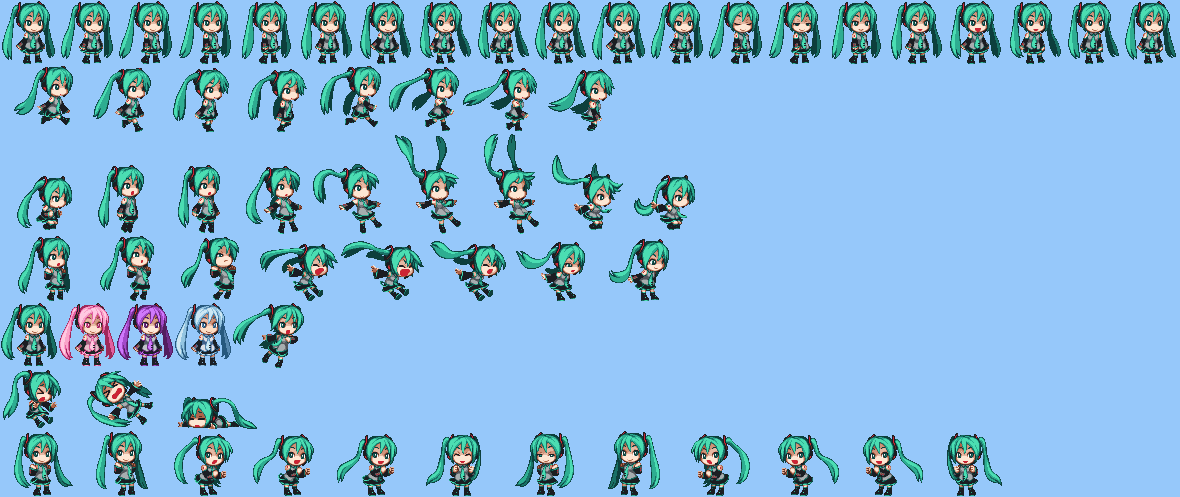
This looks a little bit more nightmarish to work with to be honest. While the portraits did have a big empty slot (which is in the second row and so doesn't appear in the video above), the sizes of the sprites were all consistent as far as I could tell. This sheet? Not so much. Putting aside that not every sprite has the same number of frames, it's also of note that not every sprite even looks like the same size. That's obvious from the first and second rows!
We're lucky that this atlas is so expressive, but we're also lucky that tower defense games involve mostly standing. Which is why we can focus in on the bottom two rows and the top row. The top row is an idle animation, the bottom a little dance that we could use for victory, and then the second to last is a failure state for our purposes. Inspecting the pixels, we can tell that… Well, things are not aligned. If I grab the picture and then ball park the size as 61x64 and insert it into something like piskel I can see that things get wonky quick:
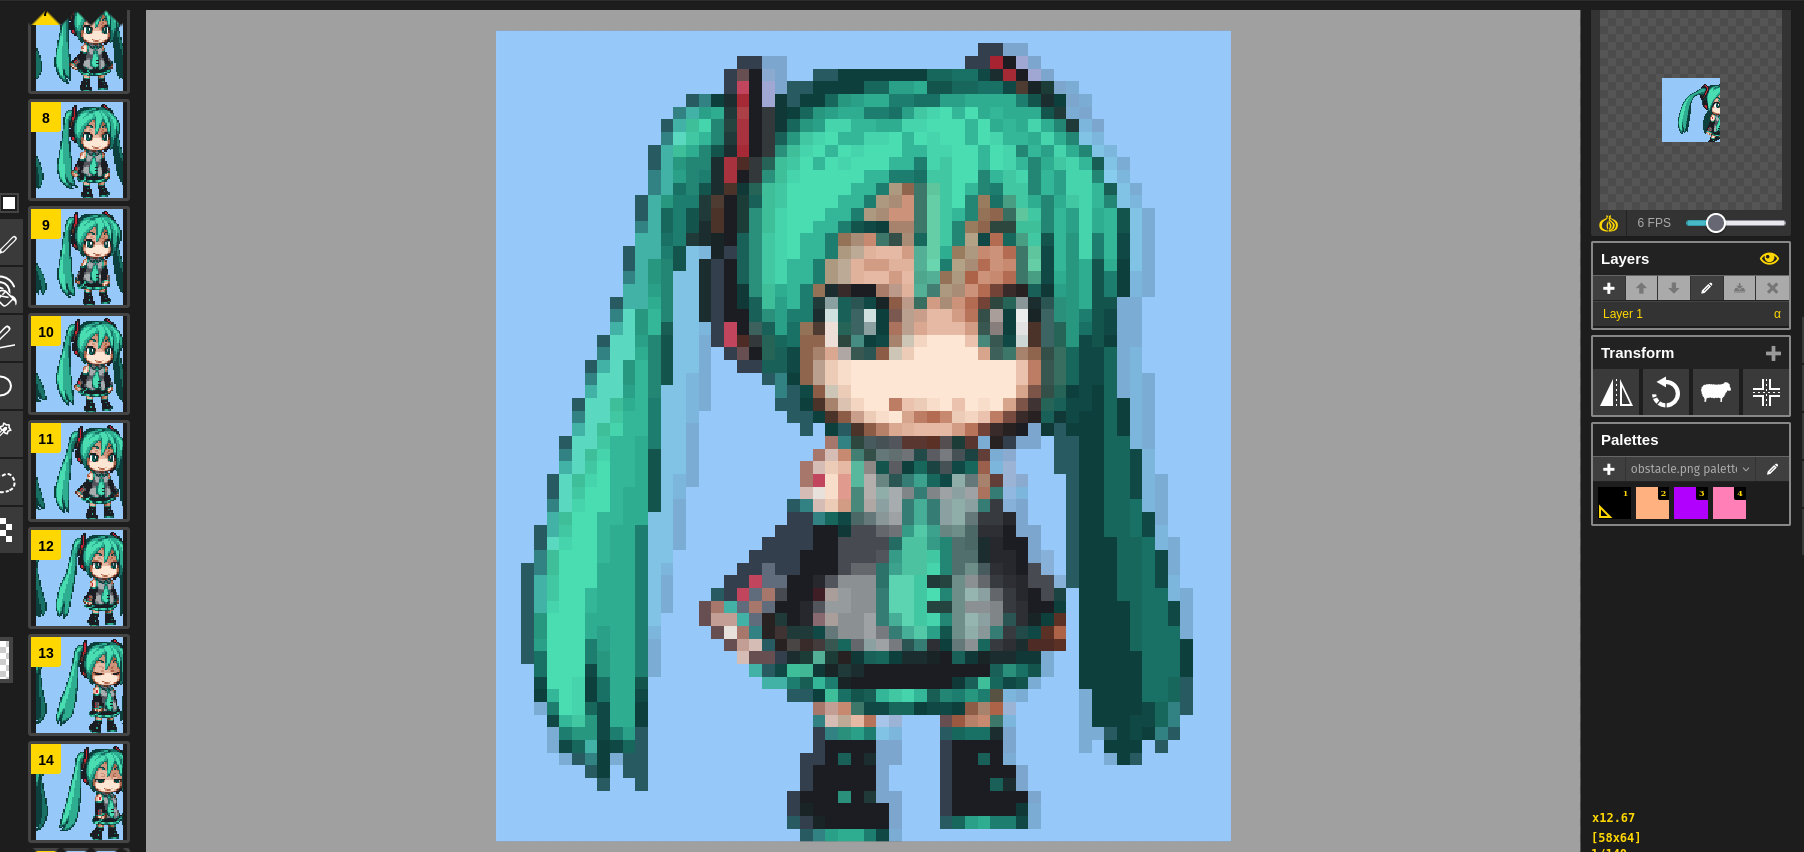
I also found the same sprites in the spritedatabase and while these are all appeared to be aligned for usage, when I attempted to load one up to test I experienced something less than ideal:
Typically, when one has a spritesheet, the cells are uniform so that you can load up the sprite and its properly centered and all that. Obviously not so much with this. So, sadly we need to take a step back. It's possible to find GIFs and such of the original sprites that some people have pain stakingly put together, for example, this sprite with a leek I was able to load up after converting it into a spritesheet via libresprite:
You can see that proper transparency and everything working here too. Which the other asset files didn't have. But the trouble of course with using this is that I grabbed the gif off of deviantart from a random google search, and I can't find the source again to check if there were any notes about usage by the stitcher. And unless I want to spend a bunch of time stitching and fixing and aligning things, I'm going to end up with assets that vary drastically in quality. I'll use the dance image as a placeholder for miku for the time being, but later on we'll need to get our pixel art on.
That said, as evidenced by the video above, I do have a bit of animation code working right now. Though "working" isn't really quite right. More like, hacked in and in need of correction. But, let me show you my silly little struct and then we'll move along to fixing it:
#[derive(Debug)]
struct SpriteInfo {
    start_x: u32,
    start_y: u32,
    width: u32,
    height: u32,
    frames: u32,
    current_frame: u32,
    framerate_per_second: u32,
    delta: u32
}

impl SpriteInfo {
    fn advance(&mut self, delta: u32) {
        self.delta = self.delta.wrapping_add(delta);
        if self.delta > self.framerate_per_second {
            self.current_frame += 1;
            self.delta = 0;
        }
        // Always loop for now.
        if self.current_frame >= self.frames {
            self.current_frame = 0;
        }
    }

    fn get_rect_for(&self) -> [u32; 4] {
        let x_offset = self.start_x + self.width * self.current_frame;
        [x_offset, self.start_y, self.width, self.height]
    }
}
As you can see, the first four parameters are all about the starting position within a spritesheet and how big
each cell is. For the time being, all frames are expected to be in a single row, and to start their animation
on the leftmost one, advancing forward to the right. The rate at which we advanced to the next frame is determined
by the framerate_per_second which is just the amount of time we must accumulate from the ongoing
delta time given to us before we shift forward. This continues until we his the last frame, at which we loop back
by resetting the frame to 0.
The other helper method to get a rectangle is to provide any interested party in the current frame. Assuming that the caller also has a reference to the original spritesheet, they can then use that to slice out the pixels they want and insert them. That code looks like this:
let miku_texture = texture_creator.load_texture(miku).unwrap();
let mut miku_sprite = SpriteInfo {
    start_x: 0,
    start_y: 0,
    width: 71,
    height: 54,
    frames: 6,
    current_frame: 0,
    framerate_per_second: 1_000_000_000u32 / 15,
    delta: 0,
};

let mut delta = 0;

'running: loop {
    miku_sprite.advance(delta);
    let [x, y, w, h] = miku_sprite.get_rect_for();
    canvas.clear();
    canvas
        .copy(
            &miku_texture,
            Rect::new(x as i32, y as i32, w, h),
            Rect::new(200, 600, w, h),
        )
        .expect("failed to draw portrait texture");
        ::std::thread::sleep(Duration::new(0, 1_000_000_000u32 / 60));
        delta = delta.wrapping_add(1_000_000_000u32 / 60);
    }
    ...
    canvas.present();
Not terribly surprising I imagine. For the framerate, I basically ask for a quarter of the current framerate, which is pretty silly and I'd imagine shouldn't really work since we'll potentially sleep for longer as requested by our code. So, not sensible but still makes some stuff happen as you could see in the video from earlier. But it's not really worth fixing right this second either, because those issues are timing issues we'll always have until we create a proper game loop. We've put a miku into the tower game and made her wiggle around, so we can consider the goal of this section done, and we'll return to doing some clever stuff around frames and states once we've sorted that out.
Investigation: Cave Story's game loop ↩
I already linked it once, but I'll link it again: a proper game loop is one which shouldn't necessarily be only time bound. If you read through the game programming patterns, you'll see that it recommends a fixed update step for state, while keeping the rendering steps free. This means that we need to choose a fixed step that makes sense for a machine that might run the game at 30fps, 60fps, or even 120.
You'll also notice that the guide mentions that VSync and that sort of thing are also something to consider, though it doesn't specify how. Luckily for me and you, we've got open source code to examine and learn from. Specifically doukutsu-rs which has a draw loop that can teach us some weird and interesting corner cases, as well as an update method above where I linked that handles ticking the game along.
Also of note, is that SDL3 has a timer as well. Which makes the world feel like our oyster as far as options go. Of course, this only further pushes my transformation into Buridan's donkey further, resulting in the time to write this blog post increasing as I debate in my head about which thing to do and what makes the most sense to me.
Going back to the doukutsu repository though, they ARE doing the fixed update, variable rendering method in addition to handling potentially syncing to the refresh rate of a monitor. Some of the code makes sense to me, while other parts don't quite click yet. Since the best thing to do while procrastinating a decision is to learn more about your options6, let's copy some of the code over here for examination on the table. First up, within the game module, the whole thing bootstraps via in the init method:
pub fn init(mut options: LaunchOptions) -> GameResult {
    ...
    let mut context = Box::pin(Context::new());
    ...
    let mut game = Box::pin(Game::new(&mut context)?);
    ...
    game.state.get_mut().next_scene = Some(Box::new(LoadingScene::new()));
    ...
    context.run(game.as_mut().get_mut())?;
    Ok(())
}
Pretty much every function that can go wrong has a result type in this code, and pretty much everything
passes around a reference to a struct named context. Within the context is the reference to inputs like
the keyboard and gamepad. It also tracks the vsync_mode, as well as a renderer backend and
what the current screen and window size is.
If we step into the run method, we setup our backend of choice and stand up the event loop,
then it runs forever:
pub fn run(&mut self, game: &mut Game) -> GameResult {
    let backend = init_backend(self.headless, self.window)?;
    let mut event_loop = backend.create_event_loop(self)?;
    self.renderer = Some(event_loop.new_renderer(self as *mut Context)?);

    event_loop.run(game, self);

    Ok(())
}
As you might suspect, the backend is based on some feature flags for the compilation itself. And doukutsu can build with "horizon", "glutin", "sdl", or a nullbackend that's probably useful for testing and headless purposes. I don't know what horizon or glutin is, but the sdl backend is an SDL2 renderer and loop, which is really handy because while some stuff will definitely be different, the spirit of it all will be mostly the same or at the very least a good base for me to jump off of for understanding purposes.
So jumping into some of that code, we eventually see the same sort of code we already have:
for event in self.event_pump.poll_iter() {
    imgui_sdl2.handle_event(imgui, &event);

    match event {
        Event::Quit { .. } => {
            state.shutdown();
        }
        Event::KeyDown { scancode: Some(scancode), repeat, keymod, .. } => {
            ...
            ctx.keyboard_context.set_key(drs_scan, true);
    ...
}
You might recognize the pump from elsewhere, and this also usefully teaches us about how the keydown and keyup events work. I've elided some stuff obviously, like the Alt+Enter to enter and exit fullscreen for example. Importantly, nothing happens. Well, I mean, tons of stuff happens, but nothing in the GAME happens here. It's all just data collection and preparation. Once we're out of the event pump though, the run code continues along checking to see if it should shutdown or not and interestingly also handles things when the game is considered suspended:
{
    let mutex = GAME_SUSPENDED.lock().unwrap();
    if *mutex {
        std::thread::sleep(Duration::from_millis(10));
        continue;
    }
}
And no I'm not adding those {} in for flare. The codebase has these and if you recall
from the rustbook chapter on scope,
this is used to trigger the Drop trait for whatever should be going out of business at the end of the
brackets. In other words, we acquire the lock, then when we're about to continue the loop we're inside
of, we unlock it because Mutex's Drop is implemented like this:
#[stable(feature = "rust1", since = "1.0.0")]
impl<T: ?Sized> Drop for MutexGuard<'_, T> {
    #[inline]
    fn drop(&mut self) {
        unsafe {
            self.lock.poison.done(&self.poison);
            self.lock.inner.unlock();
        }
    }
}
I'd point you to documentation on Mutex + Drop = unlock, but I can't remember where I read it in the first place. Just that I recalled it while looking at the code and the source code of the rust language was the easier thing to find. Anyway, I think it's kind of neat that you can see that when doukutsu isn't focused or alt tabbed or whatever, that it's actually checking every 10ms or so technically, so that when you DO bring it back to focus, it becomes responsive quickly. Eventually though, after all that prep and check work we do land on this code:
    ...
    game.update(ctx).unwrap();

    if let Some(_) = &state.next_scene {
        game.scene = mem::take(&mut state.next_scene);
        game.scene.as_mut().unwrap().init(state, ctx).unwrap();
        game.loops = 0;
        state.frame_time = 0.0;
    }

    imgui_sdl2.prepare_frame(
        imgui.io_mut(),
        self.refs.deref().borrow().window.window(),
        &self.event_pump.mouse_state(),
    );

    game.draw(ctx).unwrap();
} // <-- this is the end of the run method itself.
If you've been following along with any of the java projects I've done for the 20 games challenge, you might see why this bit of code excites me. An update and a draw method! Woohoo! In LibGDX code you're tied to the frame rate and the rest of the engine code handles things, but that also means your code only ever runs inside of the render loop and is tied to that for the most part. So, I often would write both an update and render method myself to keep things separate conceptually. Considering that our plans for the game loop are to keep them apart more than just structurally within the code, it's great to have an example on hand. The interesting part of course is in their implementations. Let's look at the simpler of the two first:
pub(crate) fn update(&mut self, ctx: &mut Context) -> GameResult {
    ...
    let state_ref = unsafe { &mut *self.state.get() };

    let speed =
        if state_ref.textscript_vm.mode == ScriptMode::Map && state_ref.textscript_vm.flags.cutscene_skip() {
            4.0 * state_ref.settings.speed
        } else {
            1.0 * state_ref.settings.speed
        };

    match state_ref.settings.timing_mode {
        TimingMode::_50Hz | TimingMode::_60Hz => {
            ... important but we'll touch it in a moment...
        }
        TimingMode::FrameSynchronized => {
            scene.tick(state_ref, ctx)?;
        }
    }
    ...
The code above only happens if there is an active scene, and the method is a no-op if it's not. Interestly, there's a handy speed variable being computed based on if someone is skipping a cut scene or not. I've never actually played the game, but it's neat to see. More importantly for game loop purposes, we've got a check against the timing modes we could potentially be updating the state in. In the simple case of being synced that a single frame is a single tick, the scene updates as you'd expect. But in the other cases?
let last_tick = self.next_tick;

while self.start_time.elapsed().as_nanos() >= self.next_tick && self.loops < 10 {
    if (speed - 1.0).abs() < 0.01 {
        self.next_tick += state_ref.settings.timing_mode.get_delta() as u128;
    } else {
        self.next_tick += (state_ref.settings.timing_mode.get_delta() as f64 / speed) as u128;
    }
    self.loops += 1;
}

if self.loops == 10 {
    log::warn!("Frame skip is way too high, a long system lag occurred?");
    self.last_tick = self.start_time.elapsed().as_nanos();
    self.next_tick =
        self.last_tick + (state_ref.settings.timing_mode.get_delta() as f64 / speed) as u128;
    self.loops = 0;
}

if self.loops != 0 {
    scene.draw_tick(state_ref)?;
    self.last_tick = last_tick;
}

for _ in 0..self.loops {
    scene.tick(state_ref, ctx)?;
}
self.fps.tick_count = self.fps.tick_count.saturating_add(self.loops as u32);
This is the code I fell asleep to the other day, not because it's boring, but because it takes a bit of chewing I think to get it and how it relates to some of the other code. Reminder again, that I have never played the game of the code I'm looking at, so I'm making estimated guesses and sort of piecing it all together in my head like Tank & Dozer watching Neo learn how to punch in the Matrix.

Anyway, it helps to know that the Game struct has these fields:
pub struct Game {
    pub(crate) scene: Option<Box<dyn Scene>>,
    pub(crate) state: UnsafeCell<SharedGameState>,
    ui: UI,
    start_time: Instant,
    last_tick: u128,
    next_tick: u128,
    pub(crate) loops: u32,
    next_tick_draw: u128,
    present: bool,
    fps: Fps,
}
Specifically because last_tick and next_tick are u128's which matches the
return type of the Duration
struct counting the time. I find it useful to know what the types are when staring at code for extended
periods of time. In this code:
while self.start_time.elapsed().as_nanos() >= self.next_tick && self.loops < 10 {
    if (speed - 1.0).abs() < 0.01 {
        self.next_tick += state_ref.settings.timing_mode.get_delta() as u128;
    } else {
        self.next_tick += (state_ref.settings.timing_mode.get_delta() as f64 / speed) as u128;
    }
    self.loops += 1;
}
We basically handle any potential weird lag in the game by looping until we catch up and incrementing the timing ticks forward by a given amount. What amount? That's set by the speed and timing modes:
impl TimingMode {
    pub fn get_delta(self) -> usize {
        match self {
            TimingMode::_50Hz => 1000000000 / 50,
            TimingMode::_60Hz => 1000000000 / 60,
            TimingMode::FrameSynchronized => 0,
        }
    }
If the numbers are giving you deja vou, then congrats! The 1_000_000_00 being divided is indeed the same sort of thing we had in our loop before too! Interestigly, if your screen goes at 50hz you get 50, and if you get 60hz, you get 60. Weirdly if you go at "FrameSynchronized" it's 0. Which uh. Feels weird but I have yet to fully grasp if that's a problem or not. Either way though, this results in the game playing the same with respect to the number of game ticks per second, and the game updates aren't tied to the draw rate at least. I found a forum thread that went into a bit more detail when I was searching up "tps" to confirm that it was ticks per second and not something your boss asks you to report on before you break a printer in half. 7
Anyway, the next tick will be to either 50 or 60 large than what it currently is, and if that's still behind the current time elapsed, we'll spin to catch up unless we hit 10 attempts to catch up. If that happens then we do a BIG skip to not be stuck in a frozen state:
if self.loops == 10 {
    log::warn!("Frame skip is way too high, a long system lag occurred?");
    self.last_tick = self.start_time.elapsed().as_nanos();
    self.next_tick =
        self.last_tick + (state_ref.settings.timing_mode.get_delta() as f64 / speed) as u128;
    self.loops = 0;
}
It basically says "fuck it, right NOW is the last tick and we're resetting to an okay state to pick things up from right here, no playing catch up the player's system is already too far behind!" If it is possible for us to play catch up though, we do something kind of interesting:
if self.loops != 0 {
    scene.draw_tick(state_ref)?;
    self.last_tick = last_tick;
}
Besides setting last_tick to the original value of next_tick (if you look
above at the full code snippet there's a let last_tick = self.next_tick) for bookkeeping
later in the draw function, we call draw_tick for the scene, which is separate
from the normal draw method. Which certainly makes one curious about what that does exactly. Luckily,
the trait for Scene actually documents its purpose so we don't have to guess:
/// Called before draws between two ticks to update previous positions used for interpolation.
/// DO NOT perform updates of the game state there. (added in this commit)
fn draw_tick(&mut self, _state: &mut SharedGameState) -> GameResult {
    Ok(())
}
In the game_scene file that we're actually calling we do much much more than return Ok(()).
But not too much more, basically everything's state shifts over from where it was to where it should be:
self.frame.prev_x = self.frame.x;
self.frame.prev_y = self.frame.y;
self.player1.prev_x = self.player1.x;
self.player1.prev_y = self.player1.y;
...
self.npc_list.for_each_alive_mut(&mut self.npc_token, |mut npc| {
    ...
for npc in self.boss.parts.iter_mut() {
    ...
for bullet in self.bullet_manager.bullets.iter_mut() {
    ...
for caret in state.carets.iter_mut() {
    ...
self.whimsical_star.set_prev();
self.tilemap.set_prev()?;
...
That's a deep dive all on its own, but yeah, there's not really a "draw" happening here. It's more that we're just updating the places things should be drawn. At least that's what I'm getting from this. Anyway, back to the update code, if we've got at least 1 loops to do then we go forth and advance the game by a single tick:
for _ in 0..self.loops {
    scene.tick(state_ref, ctx)?;
}
self.fps.tick_count = self.fps.tick_count.saturating_add(self.loops as u32);
And ticking within the game scene is where we do updates like the player pausing it, skipping a cutscene, and all sorts of things. For example,
self.player1.controller.update(state, ctx)?;
takes the state we pulled from the event pump earlier and then applies it to the game's specific mnemonics
impl PlayerController for KeyboardController {
    fn update(&mut self, state: &mut SharedGameState, ctx: &mut Context) -> GameResult {
        let keymap = match self.target {
            TargetPlayer::Player1 => &state.settings.player1_key_map,
            TargetPlayer::Player2 => &state.settings.player2_key_map,
        };

        self.state.set_left(keyboard::is_key_pressed(ctx, keymap.left));
        self.state.set_up(keyboard::is_key_pressed(ctx, keymap.up));
        self.state.set_right(keyboard::is_key_pressed(ctx, keymap.right));
        self.state.set_down(keyboard::is_key_pressed(ctx, keymap.down));
        self.state.set_map(keyboard::is_key_pressed(ctx, keymap.map));
        self.state.set_inventory(keyboard::is_key_pressed(ctx, keymap.inventory));
        self.state.set_jump(keyboard::is_key_pressed(ctx, keymap.jump));
        self.state.set_shoot(keyboard::is_key_pressed(ctx, keymap.shoot));
        self.state.set_skip(keyboard::is_key_pressed(ctx, keymap.skip));
        self.state.set_prev_weapon(keyboard::is_key_pressed(ctx, keymap.prev_weapon));
        self.state.set_next_weapon(keyboard::is_key_pressed(ctx, keymap.next_weapon));
        self.state.set_enter(keyboard::is_key_pressed(ctx, ScanCode::Return));
        self.state.set_escape(keyboard::is_key_pressed(ctx, ScanCode::Escape));
        self.state.set_strafe(keyboard::is_key_pressed(ctx, keymap.strafe));
        self.state.set_menu_ok(keyboard::is_key_pressed(ctx, keymap.menu_ok));
        self.state.set_menu_back(keyboard::is_key_pressed(ctx, keymap.menu_back));

        Ok(())
    }
    ...
In other words, the event pump might say "the A button is pressed!" and then this controller code
looks and says, hey they pressed the A button and that was mapping to the left button, so set the
player states "left state" to true! There's also an update_trigger method which basically
keeps track of the prior state to this one and diffs between them. If there are differences then a
quick little self.state.0 ^ self.old_state.0; sets those via bitwise XOR and then the
rest of the code just checks things out from there.
It's kind of neat, basically the controller code is a unsigned 16 bit number and there's some neat
macro use of the bitfield library to track
the entire player's input state via a single number. And it's developer friendly because rather than
having to write something like 1 << 3 & state to pull out a specific bit, you get to
write state.down instead.
Ahem. Where were we? Ah right. So that's what the ticking does. Each scene is responsible for ticking
the right things, and all of that seems pretty sensible to me. So then, the other important code for
us to study before we write our own game loop is the way the draw method works!8
game.draw(ctx).unwrap();
Underneath that lovely little call is some timing related code again that we need to admire and understand:
pub(crate) fn draw(&mut self, ctx: &mut Context) -> GameResult {
    let state_ref = unsafe { &mut *self.state.get() };

    match ctx.vsync_mode {
        VSyncMode::Uncapped | VSyncMode::VSync => {
            self.present = true;
        }
        _ => unsafe {
            self.present = false;

            let divisor = match ctx.vsync_mode {
                VSyncMode::VRRTickSync1x => 1,
                VSyncMode::VRRTickSync2x => 2,
                VSyncMode::VRRTickSync3x => 3,
                _ => std::hint::unreachable_unchecked(),
            };

            let delta = (state_ref.settings.timing_mode.get_delta() / divisor) as u64;

            let now = self.start_time.elapsed().as_nanos();
            if now > self.next_tick_draw + delta as u128 * 4 {
                self.next_tick_draw = now;
            }

            while self.start_time.elapsed().as_nanos() >= self.next_tick_draw {
                self.next_tick_draw += delta as u128;
                self.present = true;
            }
        },
    }
    ...
This handy check is what decides if we're actually going to tell the graphics to present on the screen
or not. By setting self.present we exit early after this code runs, or we move along to
actually calling scene.draw after computing the "frame time". More on that in a bit, for
now, let's stare at that unsafe code that we handle if we're not aligning to the refresh rate via the VSync.
let delta = (state_ref.settings.timing_mode.get_delta() / divisor) as u64;
interestingly, this is how we handle variable refresh rates, by synchronizing to 1, 2, or 3 times
the game tick interval. I don't really understand why we multiply it by 4 to figure out if the
next time to draw is right now, it's a bit too magic number-y and out of my depth, but at the
very least I can see that the decision to present the graphics comes from if the current time has
managed to move past the time we're supposed to draw our next tick. If it's not, then present
remains false and we bail out for another loop. But if it is time, then we add the delta time
to set up the next loop before moving along to the next part:
if !self.present {
    std::thread::sleep(Duration::from_millis(2));
    self.loops = 0;
    return Ok(());
}

if ctx.headless {
    self.loops = 0;
    state_ref.frame_time = 1.0;
    return Ok(());
}
This is obvious what it's doing, though I don't know what the headless frame time is doing. But that's not
important. Assuming we make it past this because present is true, then we can do the work to
actually render a frame out.
if state_ref.settings.timing_mode != TimingMode::FrameSynchronized {
    let mut elapsed = self.start_time.elapsed().as_nanos();

    // Even with the non-monotonic Instant mitigation at the start of the event loop, there's still a chance of it not working.
    // This check here should trigger if that happens and makes sure there's no panic from an underflow.
    if elapsed < self.last_tick {
        elapsed = self.last_tick;
    }

    let n1 = (elapsed - self.last_tick) as f64;
    let n2 = (self.next_tick - self.last_tick) as f64;
    state_ref.frame_time = if state_ref.settings.motion_interpolation { n1 / n2 } else { 1.0 };
}
This sort of explains what frame_time is at least. If you read the game programming patterns
book section stuck in the middle
you'll see that it's typical to pass in a lag value that explains how far into the current frame we are, which will be
between 0.0 and 1.0. Somewhat interesting, this can be shut off in the settings! Kind of neat, I'm sure
it makes a difference in gameplay but well, I won't repeat myself a third time.
Either way, we've got that frame_time computed, and there's one last bit of setup code before we get to drawing. We set some funny constants that are used elsewhere during drawing and reset the loops counter for the next iteration.
unsafe {
    G_MAG = if state_ref.settings.subpixel_coords { state_ref.scale } else { 1.0 };
    I_MAG = state_ref.scale;
}
self.loops = 0;
The best I can tell from context is that the "G_MAG" is a magnifier that's used in the fix9_scale
helper method which is used within interpolating coordinates in various places. I think maybe the G stands for
game since it seems like it impacts game calculations of x and y state mostly. And then looking at the "I_MAG"
value and that it references a scale and then it used like this:
impl SpriteBatch for SubBatch {
    ...
    fn add(&mut self, x: f32, y: f32) {
        let mag = unsafe { I_MAG };

        self.batch.add(SpriteBatchCommand::DrawRect(
            Rect { left: 0 as f32, top: 0 as f32, right: self.real_width as f32, bottom: self.real_height as f32 },
            Rect {
                left: x * mag,
                top: y * mag,
                right: (x + self.width() as f32) * mag,
                bottom: (y + self.height() as f32) * mag,
            },
        ));
    }
I want to say that it's safe to say that it makes everything bigger or smaller by a fixed scale. The value
it's set to is pulled from the SharedGameState struct, though I confusingly see it used in a
few other places like drawing a background color for the whole screen. Which doesn't make sense to me since
if the sprite batch magnifies when you add it, doesn't it also cause problems if you do it again? But eh,
I don't know this code that well, we're just trying to get a grip on the basics of it. Or at least enough
to understand to use it as a reference for our own game loop code. Speaking of, let's move on:
graphics::prepare_draw(ctx)?;
graphics::clear(ctx, [0.0, 0.0, 0.0, 1.0].into());

if let Some(scene) = &mut self.scene {
    scene.draw(state_ref, ctx)?;
    ...
    if state_ref.settings.fps_counter {
        self.fps.act(state_ref, ctx, self.start_time.elapsed().as_nanos())?;
    }

    self.ui.draw(state_ref, ctx, scene)?;
}

graphics::present(ctx)?;

Ok(())
And there's the code you probably expected to show up. The code to clear the screen, draw the scene, the ui, and then finally signal to SDL to present the new frame to the user before we call it a day. There's also some code I cut which just draws the touch controls, but it's noisy and distracting from the meat of things. Of course, there's not much to touch on here since the actual drawing is obviously tucked away inside of the scene and ui code. But it feels nice to finally find the place where the SDL calls to do the usual things are hidden in. Somewhat interesting is that even if there wasn't a scene, we'd still clear the screen and present it as a new frame.
Also somewhat interesting, is that reading this code suggests that really, you could have a "null backend" like doukutsu does and write all the game loop code without ever giving two craps about what the actual backend is. In which case, you could set up a proper abstraction between yourself and say SDL3, egor, opengl or whatever you'd like and everything would happily work as desired. Seems like a great way to target multiple platforms to me!
Alright. I think that's enough research for now, so let's actually write a real game loop!

Creating our game loop ↩
First things first we know which values we'll need to track thanks to Doukutsu, so we can define a game struct to capture these:
use std::time::Instant;

pub struct Game {
    start_time: Instant,
    // counters to track game updates on a fixed interval with catch up
    prev_tick: u128,
    next_tick: u128,
    pub tick_loops: u32,
    lag: u128,
    // counters to track if we should render anything when drawing (variable rendering)
    next_draw_tick: u128,
    should_draw: bool,
    // TODO: current scene and state when we make em
}
These are all our counters that the game needs to keep track of as far as I can tell, and none of the state. Translating the basic loop from the game programming book site over to rust is mostly straightforward besides one important thing, we're only doing one iteration of the loop itself here:
impl Game {
    pub fn update(&mut self) {
        // For now let's just do 60hz, we can swap this to vsync mode later on in life.
        let ns_per_update = 1_000_000_000 / 60;
        let current = self.start_time.elapsed().as_nanos();
        let elapsed = current - self.prev_tick;
        self.prev_tick = current;
        self.next_tick = current + ns_per_update;
        self.lag += elapsed;
        self.tick_loops = 0;
        while self.lag >= ns_per_update {
            self.lag -= ns_per_update;
            self.tick_loops += 1;
        }
        println!(
            "Frame time: {:?} {:?}",
            self.lag,
            self.lag as f32 / ns_per_update as f32
        );
        println!(
            "elapsed: {:?} prev: {}, next: {}, time_is_not_warped: {} loops {}",
            elapsed,
            self.prev_tick,
            self.next_tick,
            self.prev_tick < self.next_tick,
            self.tick_loops
        );
    }
}
The println are there for us to verify that this is behaving as expected. Which we can do
by calling the update function from our main loop and varying the sleep rate to see how the output changes.
'running: loop {
    ...
    game.update();
    ::std::thread::sleep(Duration::new(0, 1_000_000_000u32 / 60));
}
When we sleep for 60, which matches the nanoseconds per update, the output looks like this:
Frame time: 5181352 0.31088114
elapsed: 16774812 prev: 855181318, next: 871847984, time_is_not_warped: true loops 1
Frame time: 5289457 0.31736743
elapsed: 16774771 prev: 871956089, next: 888622755, time_is_not_warped: true loops 1
You can see our lag time differs slightly between frames, but the timer is always increasing as expected
and that we're only looping once per update call. This makes sense, if our computer is playing along well
with the sleeps, than we'll sleep once and wake up on each tick nearly exactly, so there's just a bit of
correction which is what we see. If I swap to 1_000_000_000u32 / 30?
Frame time: 9435218 0.5661131
elapsed: 33459030 prev: 1642768486, next: 1659435152, time_is_not_warped: true loops 2
Frame time: 9558381 0.5735029
elapsed: 33456495 prev: 1676224981, next: 1692891647, time_is_not_warped: true loops 2
Given that something/30 is twice as large as something/60, this makes sense. We have twice as much time to fill in, and so we loop twice to tick the game forward between the update calls. Lastly, if we were to look at something/120? Think about it for a moment, then move your mouse into the code box to see the output:
					Hover to reveal!
Frame time: 6299243 0.3779546
elapsed: 8430968 prev: 1922965833, next: 1939632499, time_is_not_warped: true loops 1
Frame time: 14738328 0.8842997
elapsed: 8439085 prev: 1931404918, next: 1948071584, time_is_not_warped: true loops 0
Frame time: 6530724 0.39184347
elapsed: 8459062 prev: 1939863980, next: 1956530646, time_is_not_warped: true loops 1
Frame time: 14970199 0.89821196
elapsed: 8439475 prev: 1948303455, next: 1964970121, time_is_not_warped: true loops 0
Neat, right? And this probably helps feed the intuition around when we'll need to be able to draw a frame or if we should not bother. If the refresh rate is faster than our actual speed of update, then there will be frames that simply don't update because it's not time yet. This is the trade off of choosing an arbitrary time step like we've got hard-coded above. Though perhaps you could say that it's a bit more fair in some ways, since if this was a multiplayer game, a faster monitor wouldn't necessarily give an advantage to one player over the other since the game logic would update at the same speed regardless.
Anyway, it's cool that our ticking timer is working, but it doesn't really help us if we can't tie it to actually controlling something. So, let's look at our too fast sprite of Miku and her little leek. Right now she goes WAY too fast:
The above video shows our little buddy walkin at 30, 60, and 120 as our divisor for our million nanoseconds per frame sleep we're caring about. You can see she speeds up! The slowest is on 30 frames per second, while she speeds up incredibly fast if we're in the 60 or 120 frames per second. That's because her sprite code is tied to the render rate, not the game ticking rate. But what if…
let mut miku_sprite = SpriteInfo {
    ...
   -framerate_per_second: 1_000_000_000u32 / 15,
   +framerate_per_second: 10,
    ...
};
...
game.update();
-miku_sprite.advance(delta);
+miku_sprite.advance(game.tick_loops);
If instead of trying to do math, we tied the animation to the number of game ticks, then since we know that there are 60 ticks per second in the game, and there are 6 frames in the miku sprite, then to display her full animation loop once per second we just set the "frame" rate (which is now a tick rate actually) to 10, then lo and behold:
Maybe a bit too slow honestly, but the most important thing is that code that was varying the sleep timer like in the fast, too fast, and too fastest video above? I didn't change that at all. So if the console outputs on the frame timing weren't enough to convince you, hopefully miku's little walk cycle does. We now have a way to animate our sprites that is independent of the refresh rate of your browser or whatever else potentially calls into SDL's event pump loop to make it go.
That Miku is just referring to the tick_loops directly is a result of this code being
prototyping code, I'd like to move towards a "scene" or screen sort of abstraction like we did in
the logicpaint game and like how doukutsu does it since it makes managing things better. But before we
do that (and if we do that), we should whip up the code that actually determines if we should draw or not,
at the moment we've only got the game ticks updating. Within my game struct, we can add a method:
pub fn draw(&mut self) {
    self.should_draw = false;
    // Since game update ticks are independent from render ticks
    // we need to compute the proper amount of lag time for what
    // to show to the user.

    // TODO: Move to shared state assuming we'd update game and render per update
    // the same.
    let ns_per_update = 1_000_000_000 / 60;

    let current = self.start_time.elapsed().as_nanos();

    // If we're already past the time to draw, then align the next tick to the
    // current time. doukutsu-rs has a grace period built in here with an arbitrary * 4,
    // but let's hold off on doing something similar for now.
    if current > self.next_draw_tick + ns_per_update {
        self.next_draw_tick = current;
    }

    // if we're not past the time to draw, advance by update rate until
    // it's time to render.
    while self.start_time.elapsed().as_nanos() >= self.next_draw_tick {
        self.next_draw_tick += ns_per_update;
        self.should_draw = true;
    }

    if !self.should_draw {
        // Arbitrary constant for now.
        ::std::thread::sleep(Duration::from_millis(2));
        return;
    }

    // Draw the current scene... we need SDL here now
}
As you can see, we've got a number of arbitary constants for now, and I do want to unify the per_update into the game struct or maybe a constant somewhere, but the thing that's pressing on my mind isn't so much those small tidyings but rather how to deal with the last bit. The actual drawing parts. Looking at the doukutsu-rs code, thinking about interfaces, and the general method of refactoring by pushing things downward into a place beyond an interface gate, I'm struggling a little with figuring out exactly how to deal with textures. So far, I've got this in my head:
pub struct Color {
    pub r: f32,
    pub g: f32,
    pub b: f32,
    pub a: f32,
}
pub trait Renderer {
    fn name(&self) -> String;
    fn clear(&mut self, color: Color);
    fn present(&mut self);
}
Because I don't want to leak the SDL types out into the rest of the program, it makes sense to me to define a color struct. We can do the same for the rectangle struct as well probably. But looking at our current test code doing the drawing:
let [x, y, w, h] = miku_sprite.get_rect_for();
canvas.clear();
canvas
    .copy(
        &miku_texture,
        Rect::new(x as i32, y as i32, w, h),
        Rect::new(200, 600, w, h),
    )
    .expect("failed to draw portrait texture");
canvas
    .copy(
        &portraits_texture,
        Rect::new(0, 0, texture_sheet_width, texture_sheet_height),
        Rect::new(0, 0, texture_sheet_width, texture_sheet_height),
    )
    .expect("failed to draw portrait texture");
canvas.present();
We've got the clear and present covered, as well as a simple name method that would be for
debugging that if we had more than one renderer to choose from, we'd log out the right one was selected.
But the actual draw the texture to the canvas, and also the general creation of the textures
themselves resists my meager understanding of these things on how to properly push it to down.
It sort of feels like maybe what I should do is have an ID for a given texture, and then my game code can reference this as what it would like drawn, but like, does that mean I have to load all the textures up front within the backend of the renderer? A simple tower defense game like this certainly can do that without a problem assuming I don't bloat my assets I guess. But flipping things around, what does my game track for this? Just the x and y location? What about scaling, should width and height be only a matter for the renderer side of things? Should the game ticks be tracked in game and control more than just frame to show? Is it only a frame concern?
So many questions spring to mind!

I could also do stuff like I did in LibGDX, when I had code that would have an asset manager and
you could just ask it like assetManager.getFooTexture() and it would do that, but that
also leaked out the texture class, which was fine feeling in LibGDX since we were locked in. But here,
in rust world? It feels like it'd be fun and interesting to study the doukutsu code in more depth and
understand how to have a multi-backend rendering system.
Then again, YAGNI. For the sake of progress, it would probably be best to push the SDL stuff into one place as much as possible and then just accept a couple pipes dripping water on the floor. The sogginess will only rot the wood after many many years from now, so when the project is bitrotting in the cloud or on my harddrive, it won't really be too much of a problem. Besides, we could also save that for a future blogpost for cleaning up or if we re-use a lot of our core mechanics here in the next game then it could be a point of refactoring to do then!
Actually, looking at our hello sdl function, there's actually more than just the clear and present stuff. There's also the whole event loop itself which is SDL3 specific. This prompted me to look further at the doukutsu code and observe that they split this out like this:
pub trait Backend {
    fn create_event_loop(&self, ctx: &Context) -> GameResult<Box<dyn BackendEventLoop>>;
    fn as_any(&self) -> &dyn Any;
}

pub trait BackendEventLoop {
    fn run(&mut self, game: &mut Game, ctx: &mut Context);
    fn new_renderer(&self, ctx: *mut Context) -> GameResult<Box<dyn BackendRenderer>>;
    fn as_any(&self) -> &dyn Any;
}

pub trait BackendRenderer {
    ...
}
It's interesting to see, and does seem decently sensible to split things out a little bit
since the concerns are different. One loops and manages event reading and chatting to the
appropriate bits of input tracking, while the other is entirely concerns with dealing with
textures, drawing, spritebatches, and all that other fun stuff. I feel like I'm pilfering
the treasure of the caves of this source code, but open source is there to be read. So I
don't feel too bad about stealing the concepts of a "Backend" and flattering the devs with
imitation. No idea why they have as_any yet though…
But enough talk! Let's write some code and see how far along we get pushed into the cave!
The hard part in explaining this was that I started off with one trait, then went into a
circle in order to figure out what to properly include in it. We already have our Renderer
trait defined from before, so we know that we'll need something to make that, and
we can work backwards from there.
struct RendererSDL3 {
    context: Rc<RefCell<SDL3Context>>,
}

impl Renderer for RendererSDL3 {
    fn name(&self) -> String {
        "SDL3 Renderer".to_string()
    }

    fn clear(&mut self, color: Color) {
        // color conversion is a TODO
        let mut ctx = self.context.borrow_mut();
        ctx.window_canvas
            .set_draw_color(sdl3::pixels::Color::RGB(0, 255, 255));
        ctx.window_canvas.clear();
    }

    fn present(&mut self) {
        let mut ctx = self.context.borrow_mut();
        ctx.window_canvas.present();
    }
}
If I'm looking at our code from the hello world, we know we need to get a reference to a canvas,
and we'll expect to need to be able to access other subsystems from SDL3, these get initialized once
so we'll need to have a reference to it that both us and other bits of the backend can refer to, thus
we need an Rc to track the reference counts to it, and because we need to do a lot
of &mut in almost all those calls, we also need to use a
RefCell.
Beside my TODO to write a conversion for our generic non-SDL Color struct, all we need to track is the canvas for now, so we'll have the struct to do that be called our context:
use sdl3::VideoSubsystem;
use sdl3::render::WindowCanvas;
pub struct SDL3Context {
    video: VideoSubsystem,
    window_canvas: WindowCanvas,
}
We'll definitely add more things to this over time, but having it in one place is useful. Especially
the WindowCanvas, as that's the handle we need to create a texture_creator
and those two lifetimes are tied to each other, so we'll probably tweak things a bit in a bit to bind
those together into a tuple in some way. For now though, it's enough to be able to define our backend
event loop. If we peak at our current code we can see there is an event loop system to be used:
let mut event_pump = sdl_context.event_pump().unwrap()
...
for event in event_pump.poll_iter() {
    ...
}
And just like before we can define a struct to carry it and the other context we need around:
pub struct EventLoopSDL3 {
    event_pump: EventPump,
    context: Rc<RefCell<SDL3Context>>, // in a rc + refcell because we need to be able to pass around &mut for shared stuff.
}
Of course, it's not an actual event loop unless it implements the trait:
pub trait BackendEventLoop {
    fn run(&mut self, game: &mut Game, game_context: &mut GameContext);
    fn new_renderer(&self, game_options: &GameOptions) -> Box<dyn Renderer>;
}

impl BackendEventLoop for EventLoopSDL3 {
    fn run(&mut self, game: &mut Game, game_context: &mut GameContext) {
        'running: loop {
            // TODO: merge events into state tracking system that doesn't exist yet
            for event in self.event_pump.poll_iter() {
                match event {
                    Event::Quit { .. }
                    | Event::KeyDown {
                        keycode: Some(Keycode::Escape),
                        ..
                    } => break 'running,
                    _ => {}
                }
            }
            game.update(game_context);

            game.draw(game_context);
        }
    }

    fn new_renderer(&self, game_options: &GameOptions) -> Box<dyn Renderer> {
        let r = RendererSDL3 {
            context: self.context.clone(),
        };
        Box::new(r)
    }
}
The new_renderer method isn't anything special. And you can see I lifted out most, but
not all of our hello world code into the event loop to run. This would be the run things forever section of
the code. So maybe a never would be the right return rather than unit, but probably in the near
future, once we get our ducks in a row around all of the code, we'll add in a result type so that we can have
good errors and not do so many .expect("the worst"); in so many places.
Speaking of ducks in a row, the GameContext is a new struct to our code. But it's a simple one,
it's just a reference to the renderer:
pub struct GameContext {
    pub renderer: Option<Box<dyn Renderer>>,
}
Why? Because I don't want to put it into the Game struct. In my mind, the Game is the
state of the game world or a container for it. So theoretically, in a world where we save a game file or similar,
we'd save the Game state down. For the stuff at runtime that's just about holding onto a reference
to stuff we'll interact with in order to handle input and output from the user, a separate GameContext
seems like a good place. We'll put the renderer in there, and when we start to add stuff about the keyboard or mouse,
then this will probably also be the place we insert that. In the case of unit testing, we won't be firing up a full
SDL window every time, so being able to have a None renderer will be handy.
Following our chain of this needs that which needs that, we need something to create the actual event loop struct! Looking again at the test code so far:
let sdl_context = sdl3::init().expect("failed to init SDL");
let mut event_pump = sdl_context.event_pump().unwrap();
We just need something to hold onto an sdl context! Well that's easy then
use sdl3::EventPump;
use sdl3::Sdl;

pub trait Backend {
    fn create_event_loop(&self, game_options: &GameOptions) -> Box<dyn BackendEventLoop>;
}

pub struct BackendSDL3 {
    sdl: Sdl,
}
impl BackendSDL3 {
    pub fn new(game_options: &GameOptions) -> Self {
        let sdl_handle = sdl3::init().expect("failed to init SDL");
        BackendSDL3 { sdl: sdl_handle }
    }
}

impl Backend for BackendSDL3 {
    fn create_event_loop(&self, game_options: &GameOptions) -> Box<dyn BackendEventLoop> {
        let mut event_pump = self.sdl.event_pump().expect("failed to make event pump");

        let video_subsystem = self.sdl.video().expect("failed to get video context");
        let window = video_subsystem
            .window(
                &game_options.name,
                game_options.window_width,
                game_options.window_height,
            )
            .position_centered()
            .build()
            .expect("failed to build window");

        let e = EventLoopSDL3 {
            event_pump,
            context: Rc::new(RefCell::new(SDL3Context {
                video: video_subsystem,
                window_canvas: window.into_canvas(),
            })),
        };
        Box::new(e)
    }
}
This is coming along pretty well. A little initialization function is all we need to actually tie the interface to the implementation for use by the rest of the program:
pub fn init_backend(game_options: &GameOptions) -> Box<dyn Backend> {
    // There is only one backend to init right now but this is where we could
    // do fun #if(config) type things in the future if need be!
    use crate::renderer::BackendSDL3;
    Box::new(BackendSDL3::new(game_options))
}
and once we have that, our setup code for actually running the game would start to look something like this:
let backend = init_backend(&game_options);
let mut event_loop = backend.create_event_loop(&game_options);
let mut game_context = crate::game::GameContext::default();
let renderer = event_loop.new_renderer(game_options);
game_context.renderer = Some(renderer);
event_loop.run(game, &mut game_context);
However, we now run into the last and trickiest part of the "we want an abstract game loop" versus the reality of the test code so far of "we need to make things and use them in a concrete way". Let's look at the remainder of the test code that we haven't moved behind an interface. This might look a little disjointed since I'm omitting what we've already moved, but you can see the gist of what we need to tackle next:
let base = get_current_directory().expect("cant get base path");
let chaim_dir = base.join("assets").join("chaim-vester");
let portraits = chaim_dir.join("portraits-spritesheet.png");
let miku = base.join("assets").join("dance.png");
...
let texture_creator = canvas.texture_creator();
let portraits_texture = texture_creator.load_texture(portraits).unwrap();
let miku_texture = texture_creator.load_texture(miku).unwrap();
let mut miku_sprite = SpriteInfo {
    start_x: 0,
    start_y: 0,
    width: 71,
    height: 54,
    frames: 6,
    current_frame: 0,
    framerate_per_second: 10,
    delta: 0,
};

... later in the game loop ...

miku_sprite.advance(game.tick_loops);
let [x, y, w, h] = miku_sprite.get_rect_for();
canvas.clear();
canvas
    .copy(
        &miku_texture,
        Rect::new(x as i32, y as i32, w, h),
        Rect::new(200, 600, w, h),
    )
    .expect("failed to draw portrait texture");
canvas
    .copy(
        &portraits_texture,
        Rect::new(0, 0, texture_sheet_width, texture_sheet_height),
        Rect::new(0, 0, texture_sheet_width, texture_sheet_height),
    )
    .expect("failed to draw portrait texture");
The code above implies at least 3 different things we need to tackle before we've got all the basic building blocks in place for us to get working on the game properly9.
- A way to manage and load assets
- A way to track game entities
- A way to tie those entities to an asset to be drawn
So, how do we do all of that in a way that doesn't bleed SDL textures out everywhere? At times like this I always fall back onto a strategy that tends to keep the ball rolling:

We work backwards. Just like we did with the renderer, we can walk backwards from what we want the interface to be like in order to figure out what it should be. So, how do I want the code to read? In pseudo code, I suppose I want something like this:
... in update ...
for some optional scene: tick(game_state)
... in draw ...
for some optional scene: draw(game_state, game_context)
Where game_state is the overall state for the game, maybe including ticks I guess? The scene
itself should be the container that knows what sort of entities or things exist within it. For example, a
menu or a list of incoming enemies. Ammo for special abilities… or maybe that's just in Game.
So I suppose maybe the textures we need to track would be… Hm. Let's keep brainstorming:
impl Scene {
    // game_state would have the lag in it which could be important
    fn tick(&mut self, game_state) {
        for each thing {
            // For things, how do they know they interacted with anything else?
            // Bullets in our tower defense hitting enemies and all that. Maybe
            // different lists or manager objects to deal with all that
            thing.tick(game_state) // miku.advance(ticks)
        }
    }
}
The ticking isn't that bad I think, big global context object and smaller lists of thing we
care about to loop over, check for collisions or what have ya and then move along. But what about draw?
fn draw(&mut self, game_state, game_context) {
    let my_textures = self.textures; // we load it on an init maybe?
    if game_state.player.something {
        my_textures.player_texture.draw(game_state.player, game_context)
    }
}

// or maybe

if let Some (t) = self.textures.get("miku") {
    draw_miku(t, game_state.whatever)
}
Hm... Wait a minute. What about my favorite pattern that I hopelessly abused when I made the match 3 game? What about something like this?
self.renderer.queue_cmd(RendererCommand::DrawRectTo(TextureId, Rect, Rect))
Or maybe something like
self.sprite_batch.add(Command::DrawRectTo(TextureId, Rect, Rect))
If we abstract the actual drawing into just "this rectangle source to destination for this texture" then we can push all the things that care about the SDL texture stuff into an implementation of the renderer that's SDL specific! Then, we can keep the game logic pure beyond enums and some knowledge about where certain source frames are for the spritesheets which we'd need anyway. I've been waffling on how to do this all day, and finally, after watching the last episode of Season 1 of Fate Strange/Fake, my subconscious finally rubbed the two correct neurons together!

Though this does mean we need to define a rectangle class ourselves I suppose if we want to be completely agnostic to SDL3 leakages. It's interesting to see the generic Rect struct in the doukutsu codebase as well, they define it agnostically as well:
#[derive(Debug, Clone, Copy)]
#[repr(C)]
pub struct Rect<T: Num + PartialOrd + Copy = isize> {
    pub left: T,
    pub top: T,
    pub right: T,
    pub bottom: T,
}
Most curiously, they use a repr(C) in the code as well. I first thought that perhaps they did this
because they were literally passing the Rect struct in for some C calls within the SDL code, but exploring around
the code I don't actually see this happening at all. I mostly see things like this:
.draw_rect(sdl2::rect::Rect::new(
    rect.left as i32,
    rect.top as i32,
    rect.width() as u32,
    rect.height() as u32,
))
Where rect is their struct. It could also be related to some serialization or something else somewhere?
But I'm not sure! So, for the sake of simplicity, I'll copy what I like and ignore what I don't need for now. The biggest
change to me is that I find it more natural to define a rectangle in terms of a corner and width and height than by two
points { (x1, y1), (x2, y2) }, so that's what I'll do:
#[derive(Debug, Clone, Copy)]
pub struct Rect<T: PartialOrd + Copy + Add<Output = T> + Sub<Output = T> = isize> {
    pub x: T,
    pub y: T,
    pub width: T,
    pub height: T,
}

impl<T: PartialOrd + Copy + Add<Output = T> + Sub<Output = T>> Rect<T> {
    // (x, y) are the corner from which width and height expand from (x + width = x2, similar for y)
    // so its the bottom left corner in a positive coordinate space and the top left in a quadrant 4 space (like most images)
    #[inline(always)]
    pub fn new(x: T, y: T, width: T, height: T) -> Rect<T> {
        Rect {
            x,
            y,
            width,
            height,
        }
    }
}
It seems useful to me to define the Type to have addition, subtraction, and basic comparisons because then we can define helper functions later like, give me (x2, y2) if there's an algorithm that needs it, or returning the left or right side of the rectangle and all that. Until we need them we won't make them, but importantly the trait bounds should help us avoid using any types that would prevent that from happening in general.
Importantly, we can now define those render commands in a way that lets us continue translating our helper code along. For now, since the lib code really only did a "draw part of the texture to the screen at X" we can represent that easily enough with an enum:
pub enum RenderCommand {
    DrawRect {
        texture_id: usize,
        source: Rect,
        destination: Rect,
    },
}
Then our generic trait will accept these into an internal queue as desired by this simple method:
pub trait Renderer {
    ...
    fn send_command(&mut self, cmd: RenderCommand);
}
And now comes the hard part. Conceptually, it's not hard to understand that we want to keep track of the textures internally to the SDL3 backends, after all, load once, use over and over again! Easy! But uh. Not really. It will become more clear as we implement the new method. Tracking the commands is just a new vector field:
struct RendererSDL3 {
    context: Rc<RefCell<SDL3Context>>,
    commands: Vec<RenderCommand>,
}
Then, we can implement it. Simple so far:
impl Renderer for RendererSDL3 {
    fn send_command(&mut self, cmd: RenderCommand) {
        self.commands.push(cmd);
    }
}
But once you have the commands you need to do something with them! So we can implement a processing method that interacts with the context to do whatever it is we need it to do.
impl Renderer for RendererSDL3 {
    fn present(&mut self) {
        self.process_commands();
        let mut ctx = self.context.borrow_mut();
        ctx.window_canvas.present();
    }
}

impl RendererSDL3 {
    fn process_commands(&mut self) {
        for cmd in self.commands.drain(..) {
            match cmd {
                RenderCommand::DrawRect {
                    texture_id,
                    source,
                    destination,
                } => {
                    let ctx = &mut *self.context.borrow_mut();
                    if let Some(texture) = ctx.textures.get_texture(texture_id) {
                        let src: sdl3::rect::Rect = source.into();
                        let dst: sdl3::rect::Rect = destination.into();
                        ctx.window_canvas
                            .copy(texture, src, dst)
                            .expect(&format!("failed to draw texture {}", texture_id));
                    }
                }
            }
        }
    }
}
Notice that highlighted bit? That doesn't exist yet. So we need to make it, and while we make it we have to
commit crimes against rust's borrow checker. So, what is textures that I've added to
the SDL3Context?
pub struct SDL3Context {
    // Note: textures MUST be declared ABOVE window_canvas because
    // drop order is top to bottom and all textures need to be dropped
    // BEFORE the canvas is dropped
    textures: SDL3Textures,
    window_canvas: WindowCanvas,
    video: VideoSubsystem,
}
It's another struct! But as you can see in my big note, we're being very intentional with the struct here. While I don't typically think too much about the order of the fields in my structs, they do sometimes really really matter. And this is one of those cases, because the textures is this:
pub struct SDL3Textures {
    // ORDER OF STRUCT IS IMPORTANT BECAUSE OF DROP ORDER
    // WE DROP THE TEXTURES PRIOR TO THE CREATOR GOING AWAY
    texture_by_id: HashMap<usize, Texture<'static>>,
    texture_creator: TextureCreator<WindowContext>,
}
Notice anything? Not the giant comment, you already know why we're doing that. But something else.
That's right. A lifetime. And specifically a static lifetime. This might raise your eyebrow
a little bit, but trust me, I have a good reason. The code that actually handles loading and fetching
the textures has to have a life time unless you use the unsafe_textures feature
of the library. Observe:
impl SDL3Textures {
    fn from(texture_creator: TextureCreator<WindowContext>) -> Self {
        SDL3Textures {
            texture_creator,
            texture_by_id: HashMap::new(),
        }
    }

    fn get_texture(&self, texture_id: usize) -> Option<&Texture<'static>> {
        self.texture_by_id.get(&texture_id)
    }

    fn load(&mut self, id: usize, path: PathBuf) {
        let tex = self.texture_creator.load_texture(path).unwrap();
        let tex = make_static(tex);
        self.texture_by_id.insert(id, tex);
    }
}
But you see that make_static? That's the crime against the borrow checker I mentioned
earlier. Well, not really crime, this is the right thing to do here, because the alternative
is pure hell. But, by the power of alchemy, we can convert a Texture with a lifetime tied to the texture_creator into one which we manage ourselves:
fn make_static(t: Texture) -> Texture<'static> {
    unsafe { std::mem::transmute(t) }
}
Why? Because there isn't really a good way to do something like this:
pub struct SDL3Textures<'a> {
    texture_by_id: HashMap<usize, Texture<'a>,
    // ORDER OF STRUCT IS IMPORTANT BECAUSE OF DROP ORDER
    // WE DROP THE TEXTURES PRIOR TO THE CREATOR GOING AWAY
    texture_creator: &'a mut TextureCreator<WindowContext>,
}
Not without infecting everything holding it with a lifetime that doesn't even really properly handle
things right. Trust me I tried at first, but having to type and add 'a to everything and
anything that even sneezes in the direction of the SDL3 backend is just… it's no good. Because
we're fighting the borrow checker because the authors of the SDL3 library purposefully chose to remove
the lifetimes from the texture creator:
Creates Textures that cannot outlive the creator
The TextureCreator does not hold a lifetime to its Canvas by design choice.
Any Texture created here can only be drawn onto the original Canvas. A Texture used in a Canvas must come from a TextureCreator coming from that same Canvas. Using a Texture to render to a Canvas not being the parent of the Texture’s TextureCreator is undefined behavior.
In our libary test code we didn't run into this before because everything was in one place, up front, and then used. But in our code that wants to use a hashmap to properly encapsulate SDL3's nonsense away from the rest of our code? We've suddenly got an object that needs to take ownership over the texture, but we don't have a way to express (with lifetimes in rust) that that HashMap may only live as long as the texture creator's internal renderer. So instead, we end up with what I've got here, a struct that holds both, and a drop order that will guarantee that we drop the textures when we're done with them and the creator.
The confusing thing about this of course is that 'static is often seen as meaning "til the end of time",
but that's not actually what's happening. Static means it can live til the end of the program. Not that it
will. If the borrow checkers rules circle back and say "hey it's time to drop this static lifetime object",
then it will. Which is what we want, and why we use transmute. If we instead used Box::leak we'd leak memory. And not just any memory, VRAM memory!!! That'd be bad.
I still consider myself a novice in rust (if that) and this sort of stuff is quite confusing, but I ended up chatting
for over an hour with a really smart person 10 who went
on about invariants, covariants and the troubles of such things as I showed him my code and talked about it and the
intentions on what I was doing. This is just one of those cases where the borrow checker is more strict than we need,
and it's partially on the library for doing what they're doing, and partially on me for not knowing how to better
design the API to avoid having to write out a million lifetimes if I don't just slap an unsafe down
and say "I know what I'm doing, trust me compiler".

It's worth digesting a bit. Maybe fiddling around with lifetimes yourself if this is confusing. I'm still working on making this all click for me, but maybe it'll click for you too if you fiddle around with it. The alternative to lifetimes everywhere is to use the "unsafe_textures" feature of the lbrary and manage the destruction of the lifetimes ourselves by hand. I don't want to do that, I like that rust's borrow checker can auto-call drop for me where needed and I'd like to keep it that way.
Lifetime nonsense aside, we're very close to wrapping up transfering our hello world code to a proper framework! The remaining code to move over is actually loading the textures, and then tracking the state of the sprites we're displaying in a way that sets us up to flexibily change out which set of sprites we're using later on. Amongst other things we'll want to do. For now, since I want to call this "game loop" section done, we're going to be a bit dirty with how we implement the texture loading and just do everything up front before we start the event loop itself.
In order to know where to look for those textures though, we'll need to track the base path we want to load and I think a decent place for this is in the game options. Mainly because if we do that, then potentially we could do entire palette swaps by changing out one folder for another and that seems like it'd be kind of fun:
pub struct GameOptions {
    pub name: String,
    pub window_width: u32,
    pub window_height: u32,
    pub assets_path: PathBuf,
}
Since we're keeping things specific to the SDL stuff in the SDL backend, let's do the texture loading there too for now. I think it might make sense to move it out later once our assets get a little more complicate, but for now this will get us to the point where we can start the hello world program from before with minimal fuss:
impl SDL3Textures {
    ...
    fn init(&mut self, game_options: &GameOptions) {
        let base = get_current_directory().expect("cant get base path");
        let base = base.join(game_options.assets_path.clone());
        let chaim_dir = base.join("chaim-vester");
        let portraits = chaim_dir.join("portraits-spritesheet.png");
        let miku = base.join("dance.png");

        // TODO: move constants out somewhere re-useable and referenceable
        self.load(0, miku);
        self.load(1, portraits);
    }
}
And, like I said before, we'll call this before the event loop starts in create_event_loop so that
the SDL3Context has everything it needs to actually follow our commands we send. I definitely want
to move the constants out into their own module, but am waffling around with ideas in my head about if we ought
to do something like an enum that can give you back the constant as well as the relative path to it and all that.
The part I'm going back and forth about is if we should have it be something like a hard coded enum and whatnot,
or if we should have the option to load things more dynamically. This is very much a YAGNA situation for this game,
but I'm already thinking I'd like to re-use a lot of the work so far here in the next game too, so planning for
that is on my mind.
Anyway, what's not in dispute as I write this is that I definitely want a scene struct! And it looks really similar to a lot of our other interfaces so far:
pub trait Scene {
    fn init(&mut self, game_context: &mut GameContext) {}
    fn update(&mut self, ticks: u32, game_context: &mut GameContext) {}
    fn draw(&mut self, game_context: &mut GameContext) {}
}
Perhaps if we need to not load all the textures for the game up front we can do that in the init at some point,
but for now we can implement a TestScene which sets up that SpriteInfo information
we used to animate our little walking miku:
pub struct TestScene {
    sprites: Vec<(usize, SpriteInfo)>,
}
impl Scene for TestScene {
    fn init(&mut self, game_context: &mut GameContext) {
        // TODO: we'll move the texture ids out to constants to match up
        // with the backend renderer load calls in renderer in real code
        let miku = SpriteInfo {
            start_x: 0,
            start_y: 0,
            width: 71,
            height: 54,
            frames: 6,
            current_frame: 0,
            framerate_per_second: 10,
            delta: 0,
        };
        self.sprites.push((0, miku));

        let portrait = SpriteInfo {
            start_x: 0,
            start_y: 0,
            width: 2478,
            height: 402,
            frames: 1,
            current_frame: 0,
            framerate_per_second: 60,
            delta: 0,
        };
        self.sprites.push((1, portrait));
    }
    ...
This is the same SpriteInfo we had before, though I've made an extra one for the portrait information
since I don't feel like tracking its rectangles and all that separately. It's easier if it's uniform in this case,
though I'm not opposed to a scene having one off things like "here is my background info" and that sort of thing.
Anyway, as you can probably guess, the update code is super simple:
	...
	fn update(&mut self, ticks: u32, game_context: &mut GameContext) {
    	for (_, sprite) in self.sprites.iter_mut() {
        	sprite.advance(ticks);
    	}
	}
	...
When we're updating, the sprite id isn't important, so we can _ it out. But it is important when
it comes time to use all that hard work we did above to figure out how to make textures do what we want without
having to refer to SDL3 directly:
...
fn draw(&mut self, game_context: &mut GameContext) {
    let Some(ref mut renderer) = game_context.renderer else {
        return;
    };

    for (id, sprite) in self.sprites.iter() {
        let (x, y) = match id {
            0 => (200, 600),
            _ => (0, 0),
        };
        let src = sprite.get_rect();
        renderer.send_command(RenderCommand::DrawRect {
            texture_id: *id,
            source: src,
            destination: Rect::new(x, y, src.width, src.height),
        });
    }
}
...
And just like that, the test scene is ready to go again! Our hello_sdl function now
becomes some simple setup code and then a kickoff:
pub fn hello_sdl(game_options: &GameOptions, game: &mut Game) {
    let backend = init_backend(&game_options);
    let mut event_loop = backend.create_event_loop(&game_options);
    let mut game_context = crate::game::GameContext::default();
    let renderer = event_loop.new_renderer(game_options);
    game_context.renderer = Some(renderer);
    game.scene = Some(Box::new(TestScene::default()));
    event_loop.run(game, &mut game_context);
}
Sort of nice right? Oh, sorry, forgot to mention that we updated the Game to keep track
of the current scene:
pub struct Game {
    start_time: Instant,
    prev_tick: u128,
    next_tick: u128,
    pub tick_loops: u32,
    lag: u128,
    next_draw_tick: u128,
    should_draw: bool,
    pub scene: Option<Box<dyn Scene>>,
}
Since it's normal for scenes to be vastly different sizes, underneath the hood it's just a pointer to that data on the heap, so a box is the way to go. And, like all good refactoring work, when we run the code again we see the same thing again (clear color making a black background notwithstanding):
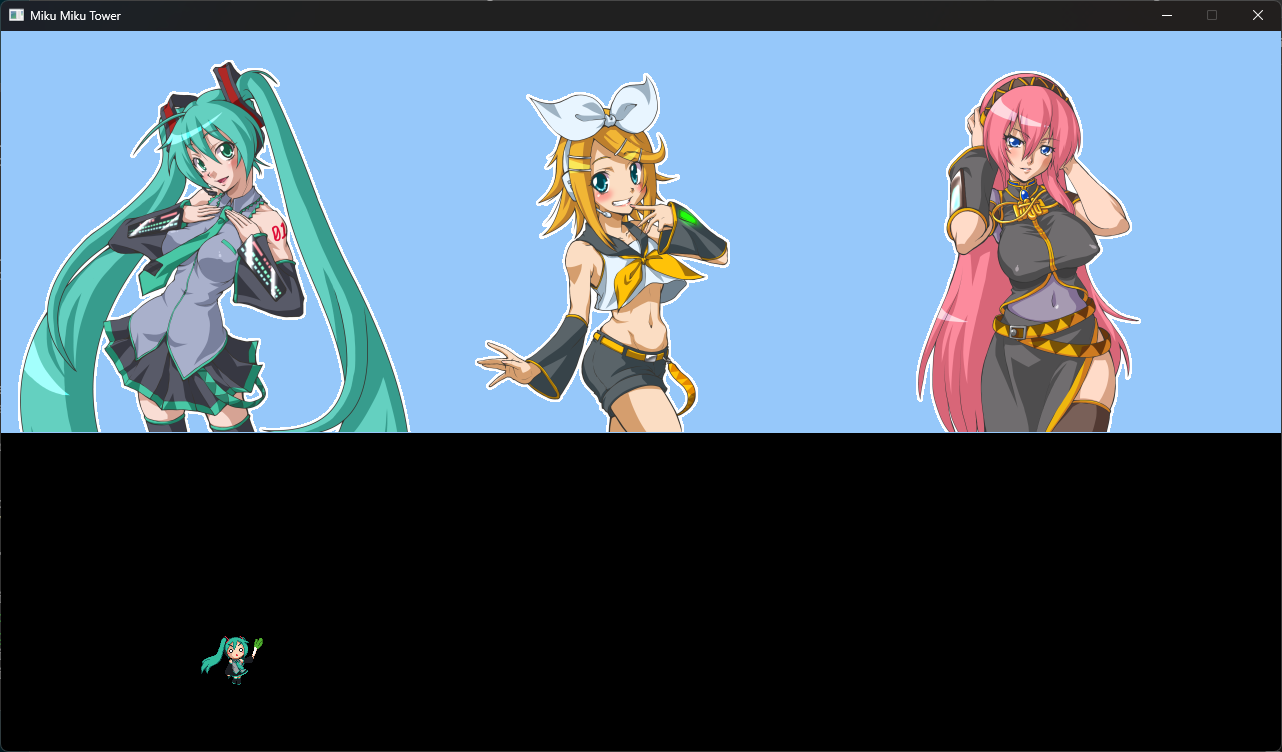
Laying out a test level ↩
Now that we can load up assets, it might be tempting to go through and make a bunch of sprites for use in the game. I think this path is likely to lead me to hours upon hours spent trying to make pixel art that looks good and has a consistent feel. Which means, hours spent not actually getting a working game mechanic! We're already 2800 lines into this blog post (which apparently is about 1.5 hours), and we haven't even made a single struct that relates to the actual core game code! Sure, we've got a game loop, but that's more framework/engine than game.
Let's chat about what makes a tower defense game a tower defense game and what that entails for us. We already outlined that our tower will shoot, enemies will walk along a path, and we want to have audio, animation, and tile maps. The first is where I want to concentrate our efforts in this section. Putting aside the troubles of special abilities and all that fun stuff implied by my sketched out idea at the start of the post, we can start with a basic enum that keeps track of our towers current state:
#[derive(Debug, Clone)]
enum TowerState {
    Ready,
    Cooldown { wait_for: u8, ticks_waited: u8},
}
Towers in games like this always have some sort of cooldown between shots, and can otherwise fire. I remember playing a Tower Defense game called Onslaught back in the day. It was a lot of fun, and is sort of what I'd like to make. Though simpler obviously, onslaught had a few different tower types and it'd be nice to have more than one, but we've spent so much time getting our framework code going that I'm probably going to end up cutting a few bits for the sake of time.
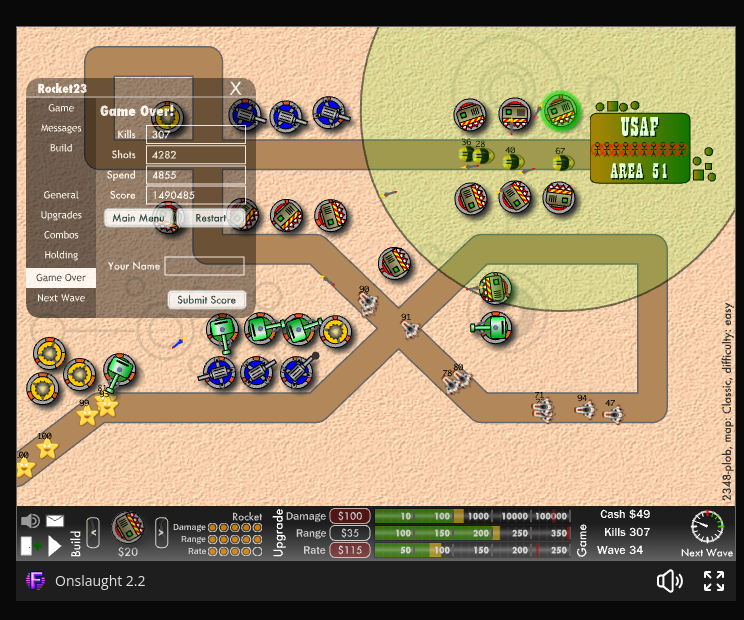
So, with the assumption that we'll just stick to one type of tower for the time being to get a prototype working, here's my struct so far:
#[derive(Debug, Clone)]
struct Tower {
    position: Rect,
    state: TowerState,
    range: u16, // 65535 should be enough
}
Initially, I also included some health, but then I remembered that it's not that enemies destroy towers in tower
defense games (or at least not in ours): but that bases have a health, and towers just do their thing. Which makes
things a little easier. I figure that our position can be represented by a rectangle since that gives us both an
x,y coordinate to be placed at, and a width and height to take up all in one go. Lastly, the range
is a simple u16. I mulled over a few options, like a cone using an angle and radius, or using a Rect
to describe a bounding box. But in the end, I decided to just stick with a range that will represent the Manhattan distance
from wherever our tower is placed in a grid off a certain number of squares. That way we'll get a sort of diamond pattern
around each.
Speaking of, we haven't really decided how big our level areas are going to be. A grid will work just fine obviously, but how big should the grid be? We'll probably need to experiment a little bit before deciding, though if I stare at that onslaught map I was playing, it looks sort of like you could fit roughly 20 turrets across it. So we can certainly use that as a starting point. On the topic of starting points… I think we'll hard code the level for the time being in order to verify that everything works as expected.
This means we need sprites to display. While we can support animated frames, let's avoid the graphics time trap and just have a single frame per sprite for now:

Also, we're missing an important part of our struct for the tower. The sprite related information! I waffled around on this for a while but eventually decided that I'd toss the sprite info into the same struct as what's using it in order to avoid having an extra lookup table somewhere that could be a point of failure. So, our tower struct gets one more field added:
#[derive(Debug, Clone)]
struct Tower {
    position: Rect,
    state: TowerState,
    range: u16,
    sprite_info: SpriteInfo, // a leek sprite for now
}
A comment doesn't do anything to define what the sprite is though, we can do that with a function meant for creating new towers:
impl Tower {
    fn basic(position: Rect) -> Self {
        Self {
            position,
            state: TowerState::Ready,
            range: 5, // random number for now, we'll tweak later
            sprite_info: sprite_info_leek(),
        }
    }
}
If you remember from when we setup our test scene, we hardcoded all the values for the SpriteInfo
information for each thing we were showing. Random magic numbers are a great way to add extra work later, so
it's best to push those into one place so that we don't have to play hide and seek with our codebase. I made
a constants.rs file for both a set of texture ids and for the sprite info that correlates to them:
pub const TEXTURE_ID_MIKU: usize = 0;
pub const TEXTURE_ID_PORTRAIT: usize = 1;
pub const TEXTURE_ID_LEEKSHEET: usize = 2;

pub const fn sprite_info_leek() -> SpriteInfo {
    SpriteInfo {
        start_x: 0,
        start_y: 0,
        width: 32,
        height: 32,
        frames: 1,
        current_frame: 0,
        framerate_per_second: 60,
        delta: 0,
    }
}

pub const fn sprite_info_grass() -> SpriteInfo {
    SpriteInfo {
        start_x: 64,
        ... // same as above
    }
}

pub const fn sprite_info_road() -> SpriteInfo {
    SpriteInfo {
        start_x: 32,
        ... // save as above
    }
}
I have two thoughts about this as well. One being that this is a good stopgap and we'll let it sit here
like this for now (winning currently), and the other thought that there should be some kind of enum or
something binding the TEXTURE_ID_* to the sprite info function that's associated to it.
We could do something like this
sprite_info_for_id(texture_id: usize)
but then we'll need to panic or something when the id doesn't match any of the expected constants. We could make an enum for the ids, but then that means all assets are baked during compilation and there's no room for tweaking later via file configurations. I don't think I'm going to make a sprite atlas as part of this game (a big JSON file that tracks all this sprite info and such), but if I want to re-use a lot of the code later, I also don't want to make game-specific enums here that kill that idea off either if it turns out to be a useful one.
So with all those thoughts weighing on my mind about "the future", the best option I can think of is to ignore most of them and continue on with adding sprite info to the structs we care about rendering in the level scene. The towers need to protect a base after all, so a base struct will need some idea of health:
#[derive(Debug, Clone)]
struct Health {
    current: u8,
    max: u8,
}

impl Health {
    fn damage(&mut self, amount: u8) {
        self.current = self.current.saturating_sub(amount);
    }
}

impl Default for Health {
    fn default() -> Health {
        let max = 10;
        Health { current: max, max }
    }
}
Maybe we'll add in some sort of is_alive or is_dead boolean method later that
tells us if we've hit 0, but until we have enemies that's not really a concern so it can wait. For the
base, I'm going to use the leeky walking gif since it's on hand and I think it's cuter if you're defending
Miku in a game called Miku Miku Tower than a building.
#[derive(Debug)]
struct Base {
    position: Rect,
    health: Health,
    sprite_info: SpriteInfo, // a miku sprite
}

impl Default for Base {
    fn default() -> Base {
        Base {
            position: Rect::new(3, 16, 32, 32)
            health: Health::default(),
            sprite_info: sprite_info_miku(),
        }
    }
}
The sprite_info_miku is just another constant function like the others, populated with the
exact same SpriteInfo code we used before so I won't show it again here. The one thing of note
here though is that I want you to mostly ignore the Rect for now. It is important, but
it's also confusing until we get to some more code. So, just nod along and say: "ah yes, x and y and width and
height, nothing strange here". Thanks.
Funnily enough, for the sake of making the scene from my sketch, this is almost all of what we need! We'll need to track some other stuff once we start making the game into an actual, uh, game. But for what we're tracking? Just this is fine to get something that feels like progress:
pub struct LevelScene {
    base: Base,
    towers: Vec<Tower>,
    grass: SpriteInfo,
    road: SpriteInfo,
}

impl Default for LevelScene {
    fn default() -> LevelScene {
        let initial_towers = vec![Tower::basic(Rect::new(26, 15, 32, 32))];
        LevelScene {
            base: Base::default(),
            towers: initial_towers,
            grass: sprite_info_grass(),
            road: sprite_info_road(),
        }
    }
}
We've got a base location, a tower to draw, and then sprite information for the background itself. Now we can actually start implementing the scene. I'm going to just call it "level" because I can feel that this project is similar to the battleship game I put aside in that I want to get it done, but I also don't think I want to spend much time polishing because the concepts itself don't excite me as much as some other ideas I have. So, if we end up with just one level and that's all, that's fine by me and feels like it's still a valuable resource for someone out there who might want to make more things themselves… but of course, a struct can be filled up many ways, so multiple levels are possible…
Ahem. We need to implement the scene trait now. I'm not really doing anything yet for
initializing scenes since we load all the assets up front, but we can very easily
write our update function since we just need to tick everything that can
be ticked!
impl Scene for LevelScene {
    fn init(&mut self, game_context: &mut GameContext) {}

    fn update(&mut self, ticks: u32, game_context: &mut GameContext) {
        self.grass.advance(ticks);
        self.road.advance(ticks);
        self.base.sprite_info.advance(ticks);
        for mut tower in &mut self.towers {
            tower.sprite_info.advance(ticks);
        }
    }

    fn draw(&mut self, game_context: &mut GameContext) {}
}
Even though we only have one frame for most of the sprites, I think it's still a good idea to tick them now so that when we do add animation to them that they'll all just work without having to revisit the update code. To actually see this work as expected though, we need to address the big elephant in the room.

That's right…


Our coordinate system is all sorts of nonexistent and funny and weird. Remember those Rects
I told you to ignore?
Base {
    position: Rect::new(3, 16, 32, 32)
    ...
}
...
Tower::basic(Rect::new(26, 15, 32, 32))
Recalling that our window is a 16x9 aspect ratio and is 1280x720, those numbers certainly look a little suspect. Don't they? And they're still suspect even if I tell you that the (x, y) pair is a grid based world coordinate and not tied to pixels. Why? The 3rd and 4th numbers… The width and height. Those aren't tied to world coordinates at all. I just set them to the same size as the pixels and I'm now actually really using them for anything at all. Yet. We'll need to revisit them when we handle collisions, but that's a problem for future us, not the current us who just wants to get the scene displayed.
That said! We don't have to worry! In our work on the nonogram solver and level creator we refactored and created a really useful construct that we can leverage to get what we want without having to think too hard. Ladies and Gentlemen, the draw function:
fn draw(&mut self, game_context: &mut GameContext) {
    let Some(ref mut renderer) = game_context.renderer else {
        return;
    };

    let layout = GridLayout {
        area: Rect::new(0, 0, 1280, 720),
        rows: 18,
        columns: 32,
        cell_gap: 0,
    };
    for (r, c, cell) in layout.iter_cells() {
        let src = match (r, c) {
            (16, c) if c > 3 && c < 28 => self.road.get_rect(),
            (r, 27) if r < 16 => self.road.get_rect(),
            _ => self.grass.get_rect(),
        };
        renderer.send_command(RenderCommand::DrawRect {
            texture_id: TEXTURE_ID_LEEKSHEET,
            source: src,
            destination: cell,
        });
    }
    let cell = layout.cell_rect(self.base.position.y as usize, self.base.position.x as usize);
    let src = self.base.sprite_info.get_rect();
    renderer.send_command(RenderCommand::DrawRect {
        texture_id: TEXTURE_ID_MIKU,
        source: src,
        destination: cell,
    });

    for tower in self.towers.iter() {
        let cell = layout.cell_rect(tower.position.y as usize, tower.position.x as usize);
        let src = tower.sprite_info.get_rect();
        renderer.send_command(RenderCommand::DrawRect {
            texture_id: TEXTURE_ID_LEEKSHEET,
            source: src,
            destination: cell,
        });
    }
}
There's still a fair bit of hardcoding going on here we'll want to tweak later, but for the most part this structure allows us to very easily render a real version of my sketch:
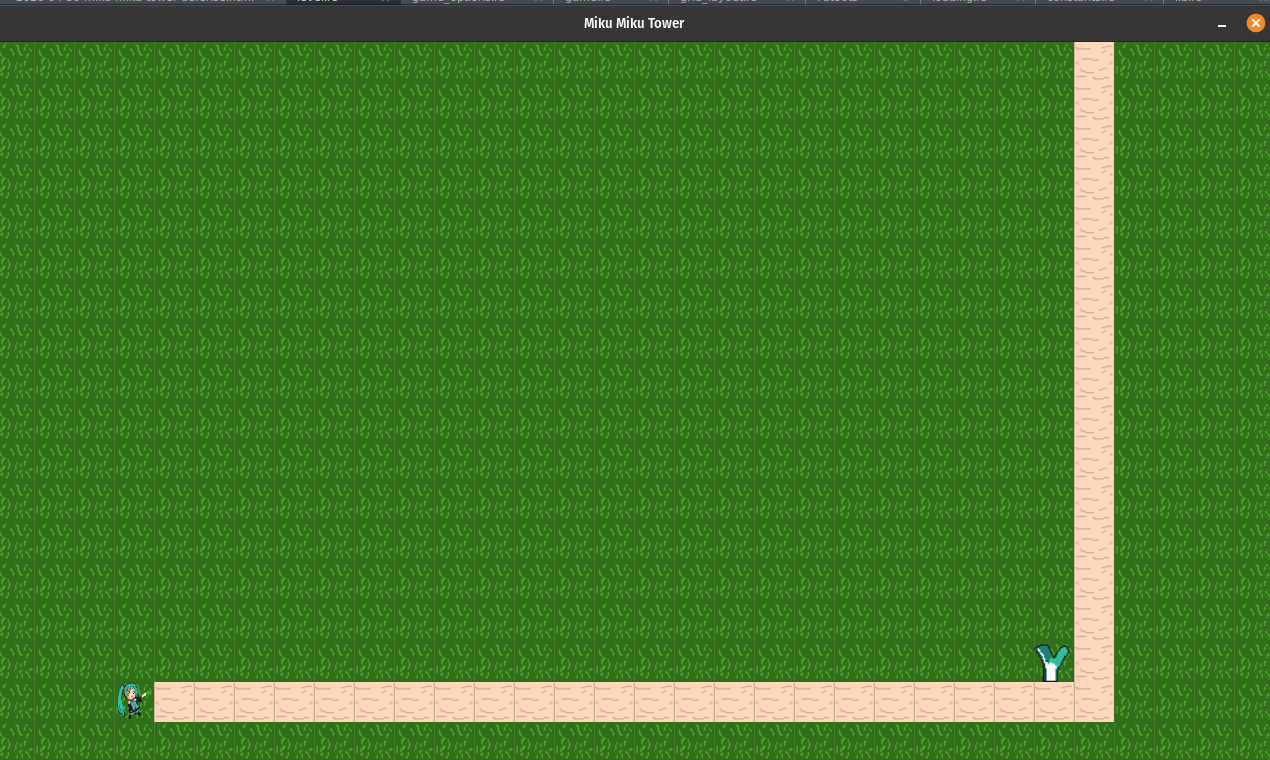
So backing up a second for those who didn't read the logic paint post. "What's going on here" is perhaps a question going on in your mind. The important part to focus in on is this struct we're making and iterating over:
let layout = GridLayout {
    area: Rect::new(0, 0, 1280, 720),
    rows: 18,
    columns: 32,
    cell_gap: 0,
};
for (r, c, cell) in layout.iter_cells() {
    ...
}
... layout.cell_rect(row, column) calls ...
This is saying that we'll have a large rectangle from 0,0 to 1280, 720, and within
that space we want to have 18 rows and 32 columns. Between each cell within the grid, there will be no space,
so everything will be flush if you were to draw something into every cell. And when we call iter_cells
we're given an iterator that will provide us with the row and column index, as well as a Rect for
the cell we're in. So, the first cell would be a rectangle with corners of 0,0 to 40,40, and so on across the
grid.
Since it's annoying to do that (16, c) if c > 3 && c < 28 => stuff within the loop,
it's much nicer to be able to fetch any rectangle at any time if we know the grid indices we'd like. That's what
cell_rect is for! Which we use to draw the base and tower within the grid at the positions we specified
them at. The only real difference between the GridLayout struct in our game here, versus the struct
of the same name in the LogicPaint game is that I had to tweak the code to no longer use a vec2 struct
that egor provided us. Thankfully I wasn't really doing anything beyond using it to do shorthand math, so the change
was pretty mechanical. Here's the cell_size for reference:
pub fn cell_size(&self) -> (isize, isize) {
    let total = (self.area.width, self.area.height);

    // [gap [cell] gap [cell] gap ]
    let gaps = (
        (self.columns as isize + 1) * self.cell_gap,
        (self.rows as isize + 1) * self.cell_gap,
    );

    // avoid negative space
    let space_for_cells = ((total.0 - gaps.0).max(0), (total.1 - gaps.1).max(0));

    (
        space_for_cells.0 / self.columns as isize,
        space_for_cells.1 / self.rows as isize,
    )
}
Basically, wherever you see a tuple and .0 and .1 access used to be
the simpler to read vec2 + some other vec2 type code. The useful iteration function
uses this as well as an origin function that handles the gap offset from the anchor point given
to the struct to create its tuples that we use:
// For me in 3 months: '_ is an anonymous lifetime tied to self.
// it just means the caller can't let the iterator last longer than this layout
pub fn iter_cells(&self) -> impl Iterator<Item = (usize, usize, Rect)> + '_ {
    let cell_size = self.cell_size();
    let origin = self.origin();
    let step = (cell_size.0 + self.cell_gap, cell_size.1 + self.cell_gap);

    (0..self.rows).flat_map(move |r| {
        (0..self.columns).map(move |c| {
            let top_left_x = origin.0 + c as isize * step.0;
            let top_left_y = origin.1 + r as isize * step.1;
            let cell = Rect {
                x: top_left_x,
                y: top_left_y,
                width: cell_size.0,
                height: cell_size.1,
            };
            (r, c, cell)
        })
    })
}
And yeah, that's basically it! Easy to use (or re-use in this case) and get a simple way to not have to calculate a bunch of pixel coordinates by hand. Though we still have a bit of a problem with hardcoding the screen size that we'll need to address.
I suppose there's quite a few things we need to address in order to continue making progress on making our towers do things. We could certainly start working on an update function to make the tower fire whenever its cooldown is up and swap states. But we don't actually have anything to "fire" yet do we. We also don't have anything to fire at, either. Third, we only have one tower that I hardcoded, as we don't have any way to actually place towers yet. Placing towers implies other things we need too! So, let's shift our focus to making something we can actually interact with next.
User Inputs ↩
We've successfully pushed SDL3 to the edge with our backend_sdl3 code, and just like with
the other parts of it, we want to do the same for the mouse inputs. So there's two things for us to
figure out first:
- How the mouse coordinates work
- How to get the mouse coordinates in sdl3's rust bindings
Looking at the wiki, there's an entire category dedicated to the mouse. And at a high level, reading that we can see that the event pump will produce events that indicate that the mouse has moved. Specifically there's SDL_EVENT_MOUSE_MOTION and SDL_EVENT_MOUSE_BUTTON_DOWN. The SDL_GetMouseStatedocumentation states
... SDL-cursor's x|y-position from the focused window's top left corner ...
Which is useful to know. Top left is the expected default for most graphical applications, so that all seems about right. So then, how do we figure out how to get at this in the rust bindings?
cargo doc
Running the above generates local documentation for us to look at. This is useful, maybe even more useful than looking it up online because the version of the all the functions and whatnot are based on the version we've mentioned in our cargo file. Super handy to avoid a "function not found" type compiler error if we accidentally end up on the wrong page11.
Within that documentation lies both the mouse module, and the event module. The stuff mentioned in the wiki all have a corresponding event here that we can use. And so, if I tweak the event loop to look around for that event and print it out like this:
for event in self.event_pump.poll_iter() {
    match event {
        ...
        Event::MouseMotion {mousestate, x, y, xrel, yrel, ..} => {
            eprintln!("{:?} {} {} {} {}", mousestate, x, y, xrel, yrel);
        }
        ...
Then I end up with a lovely amount of data dumped out to me as I wiggle my mouse around the running application:
...
MouseState { mouse_state: 0, x: 0.0, y: 0.0 } 458.58618 150.31448 1.2210693 0
MouseState { mouse_state: 0, x: 0.0, y: 0.0 } 458.58618 151.52948 0 1.2149963
MouseState { mouse_state: 0, x: 0.0, y: 0.0 } 459.58618 151.52948 1 0
MouseState { mouse_state: 0, x: 0.0, y: 0.0 } 459.58618 152.52948 0 1
MouseState { mouse_state: 0, x: 0.0, y: 0.0 } 459.58618 153.5239 0 0.9944153
MouseState { mouse_state: 0, x: 0.0, y: 0.0 } 460.58057 153.5239 0.99438477 0
...
Interestingly, the mousestate's x and y never changed but the first number did respond to clicking
the mouse buttons. I wasn't planning on digging into that mousestate too much so I'll happily ignore
that x,y behavior for now since the other values do change over time. Looking through the documentation, I also
see this code sample:
use sdl3::mouse::MouseButton;

fn is_left_pressed(e: &sdl3::EventPump) -> bool {
    e.mouse_state().left()
}
So we're intended to use the mouse_state methods to see stuff like that. But all of this is highly
connected to SDL3, and as you know, the OOP blood inside me screams for interfaces, proclaims loudly the joy of
separation, and beams upon a well formed dynamic dispatch.

So, thinking about what operations we'll care about from the mouse. Do I care about both left and right click? I could potentially see right click acting as a back button of sorts, like a cancel pop-up or go to the previous screen type thing. If we have a way to select which tower to choose later that involves a modal dialog of sorts, then that would be handy. Or maybe you click it from a menu, and can cancel with right click. All of which sounds good to me for us to throw together a struct to hold our input state:
pub struct MouseContext {
    pub left_clicked: bool,
    pub right_clicked: bool,
    pub position: Option<(f32, f32)>,
}

impl Default for MouseContext {
    fn default() -> Self {
        Self {
            left_clicked: false,
            right_clicked: false,
            position: None,
        }
    }
}
Pretty simple. We'll see if I regret the option or not around the position of the mouse. I figure that if someone deactivated their mouth then potentially I wouldn't have anything to read data from and set it with, so why not represent that with an option? At the very least, it also means that I don't have to set an arbitrary starting value for the mouse's x and y coordinate. What we do need to set though is the actual values for the above context. Also, we need to store this context somewhere… perhaps in the overall game context itself?
pub struct GameContext {
    pub renderer: Option<Box<dyn Renderer>>,
    pub mouse_context: MouseContext,
    pub screen_size: (u32, u32),
}

impl Default for GameContext {
    fn default() -> Self {
        GameContext {
            renderer: None,
            mouse_context: MouseContext::default(),
            screen_size: (1280, 720),
        }
    }
}
I am arbitrarily setting the screen size here, but I think I can probably declare a couple constants and then have
both this default area, and the GameOptions struct use that starting size for consistent results. We
can also just assign the screen size when we create the context too:
pub fn hello_sdl(game_options: &GameOptions, game: &mut Game) {
    ...
    let mut game_context = crate::game::GameContext::default();
    game_context.screen_size = (game_options.window_width, game_options.window_height);
    ...
}
Making this consistent should be useful, because now that the screen size is available in the context, we can update the level drawing code to no longer hardcode those values:
fn draw(&mut self, game_context: &mut GameContext) {
    ...
    let (screen_width, screen_height) = game_context.screen_size;
    let layout = GridLayout {
        area: Rect::new(0, 0, screen_width as isize, screen_height as isize),
        rows: 18,
        columns: 32,
        cell_gap: 0,
    };
    ...
Now, if we declare the window as resizable() when we construct it, and then update the window
resize event handling to set the context as needed, then the screen stays spread across the window as we
maximize or drag the window to increase its size.
When changing the size over to something that doesn't fit into a 16:9 ratio we end up with black borders along the bottom and right edge. We could probably work around that by insetting everything we draw to the next nearest 16:9 value, but that seems like extra work that I'm not terribly interested in doing right now. I'm mainly happy that maximizing, which does typically stick to a 16:9 aspect ratio given most people's monitor settings, looks decent. So, that's a major plus.
With that out of the way, the other component of being able to easily use the mouse is checking for overlap.
Specifically, we have a Rect struct that would be a perfect place to have a contained_in
or contains method that could check if the mouse is currently inside. Potentially, we could also
do the reverse with the grid layout, pass it a coordinate and then it could hand you back the row and column index
and the rect.
That would be useful, so let's experiment with that idea. Going to our draw method, let's just draw a leak where the mouse is:
// for testing we'll just use the leak
if let Some((r, c, cell)) = layout.cell_for_mouse(game_context.mouse_context.position) {
    let src = sprite_info_leek().get_rect();
    renderer.send_command(RenderCommand::DrawRect {
        texture_id: TEXTURE_ID_LEEKSHEET,
        source: src,
        destination: cell,
    });
}
The cell_for_mouse maybe should be cell for position or something, but it doesn't exist yet and we're
thinking about the mouse so let's keep that name for now. Our mouse position is a f32 tuple, while our
columns are usizes, so we'll need to do a bit of conversion. Experimenting with the simple idea of just dividing
by the number of rows after truncating gets us this code:
pub fn cell_for_mouse(&self, mouse_position: Option<(f32, f32)>) -> Option<(usize, usize, Rect)> {
    if mouse_position.is_none() {
        return None;
    }

    let (x, y) = mouse_position.unwrap();
    let x_index = x.trunc() as usize / self.columns;
    let y_index =  y.trunc() as usize / self.rows;
    let rect = self.cell_rect(y_index, x_index);
    Some((y_index, x_index, rect))
}
And this behavior:
Doesn't work. I was thinking if you have a mouse position of 10 and then you divide it by the 32 columns, then you end up with a floored 0 and that should have worked. And it does work in the corner, but the moment you go around the 3rd column over, it starts skewing further out. The y direction is worst Our screen size is 1280x720, so each cell is 40x40. So then, why do things start going crazy? As a sort of test, I went ahead and did the brute force check against every rectangle to see what would happen:
pub fn cell_for_mouse(&self, mouse_position: Option<(f32, f32)>) -> Option<(usize, usize, Rect)> {
    if mouse_position.is_none() {
        return None;
    }

    let (x, y) = mouse_position.unwrap();
    for (r, c, rect) in self.iter_cells() {
        if rect.contains(x.round_ties_even() as isize, y.round_ties_even() as isize) {
            eprintln!("{} {} in {} {}", x, y, r, c);
            return Some((r, c, rect));
        }
    }
    return None;
}

... elsewhere in the Rect struct ...

pub fn contains(&self, x2: T, y2: T) -> bool {
    let in_x = self.x > x2 && x2 < self.x + self.width;
    let in_y = self.y < y2 && y2 < self.y + self.height;
    in_x && in_y
}
This behaves better… but not as well as I would have thought:
But the x value is off by one. I experimented a little with using self.x >= x2; and
similar to see if it was because I wasn't counting the edge, but that didn't fix it either. Using
floor rather than round_ties_even didn't work either. And then I realized
I was a dummy because this:
let in_x = self.x > x2 && x2 < self.x + self.width;
should be
let in_x = self.x < x2 && x2 < self.x + self.width;
And then it starts behaving with the inefficient brute force scan for which cell the mouse is in:
So, assuming I don't screw up comparisons, we can definitely draw things where the mouse is. But then, what did I forget to do in the simpler division? Oh. OH.

Diving by the number of columns is going to divide by 32 along the horizontal axis. But each cell is actually 1280 divided by 32, which is 40 like I said before. So obviously, we should divide by the cell's width! Luckily, the layout has a method to grab that easily that takes any gaps into account we can use! So we're back to a couple of divisions and no more iteration:
pub fn cell_for_mouse(&self, mouse_position: Option<(f32, f32)>) -> Option<(usize, usize, Rect)> {
    if mouse_position.is_none() {
        return None;
    }

    let (x, y) = mouse_position.unwrap();

    let (dx, dy) = self.cell_size();
    let col_idx = x.floor() as isize / dx;
    let col_idx = col_idx as usize;
    let row_idx = y.floor() as isize / dy;
    let row_idx = row_idx as usize;
    let rect = self.cell_rect(row_idx, col_idx);
    Some((row_idx, col_idx, rect))
}
And that works just fine. To avoid confusion with towers, I think it's best we swap out our test sprite for a simple square highlight. So just a box with a transparent center and another load method:
pub const fn sprite_info_highlight() -> SpriteInfo {
    SpriteInfo {
        start_x: 96,
        start_y: 0,
        width: 32,
        height: 32,
        frames: 4,
        current_frame: 0,
        framerate_per_second: 4,
        delta: 0,
    }
}
Since I'm being lazy, I just added the box to the same "leeksheet" as before for simplicity. Though, an unmoving
square didn't really feel like a "select" to me, and more like a debug line. So I added the highlight as a
pulsing sprite and I like the effect. Animating is simple too, just add the SpriteInfo to the Level
struct, update the update method, and then use it instead of the leak via self.highlight.get_rect():
Awesome. So, we've got the ability to highlight where the mouse is, I could probably tweak the SDL3 startup settings to not
show the mouse via self.sdl.mouse().show_cursor(false) within the backend sdl code, but I think I'll hold
off until after we finish doing all the scenes to decide that. I'm not 100% sure the pulse will be the cursor we always want
or if we'll want the normal system mouse for other interactions. Like, if I show you a button to click, the small pulse
probably won't work unless we're pretty clever with how we make the buttons and whatnot.
That said, we've got the mouse cursor working and I did get a contains method up and running so we can use that for our purposes. Specifically, we can do one of the most important aspects of a tower defense game, placing towers!

Placing towers ↩
While our towers can't shoot yet, and they have nothing to shoot either, we can at least figure out how to put them on the map. Specifically, what we need to do is make it possible for the user to select a tower, then place it wherever it's legal to do so. The rules are pretty simple, you can't place a tower where one already is, and you can't place it on the "road" as that would get in the way of enemies taking said path. Lastly, you don't have unlimited towers, there'd be no challenge!
Placing the towers requires intent from the player. I'm thinking that we should put the buttons for them to select which tower they want in an easy to reach place, such as along the top or bottom of the screen like this:
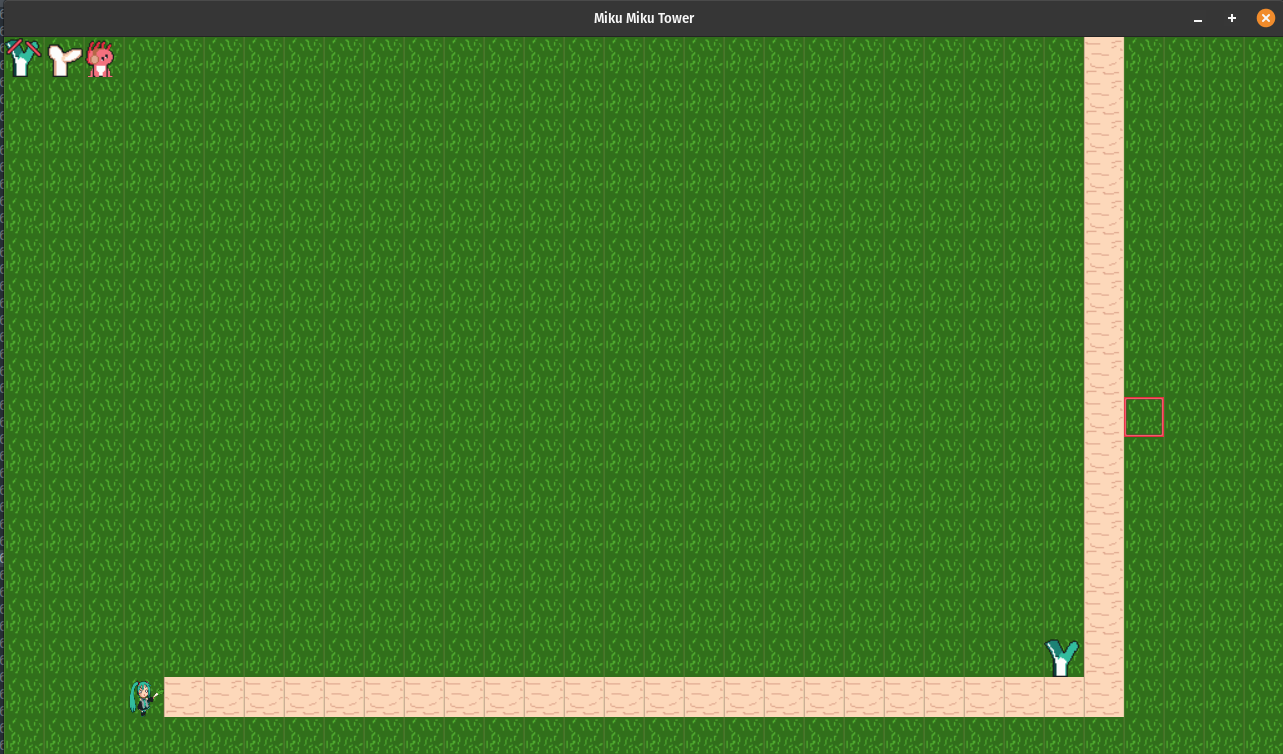
We'll want to put some sort of background behind them, and some help text and whatnot about what each tower does. But first, I want to try to establish some sort of pattern for taking actions within the UI. We only have one action right now:
#[derive(Debug, Clone)]
enum PlayerAction {
    PlaceTower(Tower),
    // more later as desired.
}
But later on, maybe we'll have bombs, or heals, or all sorts of things!12
Keeping our appetites in check though, lets just be simple and declare each tower into the top bar, as well as
what the current action is. Rather than having a "none" option, we can just use an Option to encode
whether or not the user has selected something from the top bar menu themselves.
pub struct TopBar {
    miku_tower: Tower, // average useful tower
    rin_tower: Tower,  // speedy but less damage
    luka_tower: Tower, // slow but strong
    current_action: Option<PlayerAction>,
}
As you can see, I have some rough ideas about what each tower should do. We'll see if our final product has that in it or not, but all things in good time. For now, the default implementation is what you'd expect. I've declared a few more constant functions for the sprites I've made and wired things up appropriately:
impl Default for TopBar {
    fn default() -> TopBar {
        TopBar {
            miku_tower: Tower::miku(Rect::new(0, 0, 32, 32)),
            rin_tower: Tower::rin(Rect::new(1, 0, 32, 32)),
            luka_tower: Tower::luka(Rect::new(2, 0, 32, 32)),
            current_action: None,
        }
    }
}
One of the reasons we're using a new struct, rather than just appending more fields onto the existing one, is
that keeping the update and draw logic a bit separated should make things a little easier to reason
about. The LevelScene can gain an instance of the top bar struct rather than 4 new fields and I
imagine our lives should be easier to think about:
pub struct LevelScene {
    ...
    top_bar: TopBar,
}
...
impl Scene for LevelScene {
    fn update(&mut self, ticks: u32, game_context: &mut GameContext) {
        ...
        self.top_bar.update(ticks, game_context, &layout); // we now must create a layout here too
    }

    fn draw(&mut self, game_context: &mut GameContext) {
        ...
        self.top_bar.draw(game_context, &layout);
    }
}
First, the update method. In the same way we experimented with drawing the mouse on the grid, we can do the same sort of logic to find out if the user has their mouse over any of the towers in the top grid:
impl TopBar {
    fn update(&mut self, ticks: u32, game_context: &mut GameContext, layout: &GridLayout) {
        let Some((r, c, rect)) = layout.cell_for_mouse(game_context.mouse_context.position) else {
            return;
        };

        for tower in vec![
            &mut self.miku_tower,
            &mut self.rin_tower,
            &mut self.luka_tower,
        ] {
            let tower_cell = layout.cell_rect(tower.position.y as usize, tower.position.x as usize);
            if tower_cell.contains(rect.x + 1, rect.y + 1) {
                tower.sprite_info.advance(ticks);
                if game_context.mouse_context.left_clicked && self.current_action.is_none() {
                    self.current_action = Some(PlayerAction::PlaceTower(tower.clone()));
                }
            }
        }

        if game_context.mouse_context.right_clicked {
            self.current_action = None;
        }
    }
}
As you can see, we only advance the ticking for the sprite if the mouse is currently over it. This makes the UI feel interactive since it responds to the user hovering. If they happen to click, then we also take a clone of whatever the prototypical tower we're over is. Since we now have a reference to the tower, it's simple enough to update our highlighting code to draw the currently selected tower:
if let Some((r, c, cell)) = layout.cell_for_mouse(game_context.mouse_context.position) {
    if let Some(PlayerAction::PlaceTower(tower_to_place)) = &self.top_bar.current_action {
        let src = tower_to_place.sprite_info.get_rect();
        renderer.send_command(RenderCommand::DrawRect {
            texture_id: TEXTURE_ID_LEEKSHEET,
            source: src,
            destination: cell,
        });
    }

    let src = self.highlight.get_rect();
    renderer.send_command(RenderCommand::DrawRect {
        texture_id: TEXTURE_ID_LEEKSHEET,
        source: src,
        destination: cell,
    });
}
I imagine there's a way to draw that particular sprite with some opacity to indicate its not final
until the user is done. But let's come back to that. The actual top bar isn't drawing yet after all.
Adding in a draw method can fix that:
fn draw(&mut self, game_context: &mut GameContext, layout: &GridLayout)  {
    let Some(ref mut renderer) = game_context.renderer else {
        return;
    };

    for tower in vec![&self.miku_tower, &self.rin_tower, &self.luka_tower] {
        let cell = layout.cell_rect(tower.position.y as usize, tower.position.x as usize);
        let src = tower.sprite_info.get_rect();
        renderer.send_command(RenderCommand::DrawRect {
            texture_id: TEXTURE_ID_LEEKSHEET,
            source: src,
            destination: cell,
        });
    }
}
Shouldn't be anything surprising here. We're using the tower positions as the row and column indices
just like we did before, grab the sprite and ask SDL3 to draw it in the usual way. And with that in
place, the image I had above now comes to life. That said, clicking the mouse doesn't actually work.
if you click and hold it does though. It seems like the Event::MouseMotion from
before has a mousestate but it doesn't seem to respond instantly to clicks very well.
Not to worry though. A quick look through the documentation finds a MouseButtonDown and
its companion for going up easily enough. If we update our event pump to process those in a similar
way as the other, then things will work out.
Event::MouseButtonDown {
    mouse_btn, x, y, ..
} => {
    game_context.mouse_context.update(
        mouse_btn == MouseButton::Left,
        mouse_btn == MouseButton::Right,
        Some((x, y)),
    );
}
We're able to click any of the menu towers, and then our mouse "holds" onto one and we can move it
around. Right clicking cancels the action and the tower disappears with a simple None
assignmemt tucked away in the update method of the TopBar. We're halfway
to placing a tower! If we ignore the idea of money and cost, then we could simply add the tower
to our list of towers in the Level struct annnd
if let Some(PlayerAction::PlaceTower(tower_to_place)) = &self.top_bar.current_action {
    let src = tower_to_place.sprite_info.get_rect();
    renderer.send_command(RenderCommand::DrawRect {
        texture_id: TEXTURE_ID_LEEKSHEET,
        source: src,
        destination: cell,
    });

    // TODO: and we have the money for it...
    if game_context.mouse_context.left_clicked {
        let action = self.top_bar.current_action.take();
        let Some(PlayerAction::PlaceTower(mut tower)) = action else { unreachable!(); };
        tower.position.x = c as isize;
        tower.position.y = r as isize;
        self.towers.push(tower);
    }
}
And it looks mostly ok and works as you'd expect it to:
Except, if you pay attention to the corner, you'll see that even though we're not hovering over the menu icon anymore, there's still animation! I'm pretty sure that the reason for this is that that initial click gets counted both as something to use to select the tower, and then also to place it, and then select it again. To confirm, if I print out the tower list:
...
h: 32, height: 32, frames: 2, current_frame: 0, framerate_per_second: 8, delta: 7 } },
Tower { position: Rect { x: 0, y: 0, width: 32, height: 32 }, state: Ready, range: 5, sprite_info: SpriteInfo { start_x: 224, start_y: 0, width: 32, height: 32, frames: 2, current_frame: 0, framerate_per_second: 8, delta: 7 } },
Tower { position: Rect { x: 0, y: 0, width: 32, height: 32 }, state: Ready, range: 5, sprite_info: SpriteInfo { start_x: 224, start_y: 0, width: 32, height: 32, frames: 2, current_frame: 0, framerate_per_second: 8, delta: 7 } },
Tower { position: Rect { x: 0, y: 0, width: 32, height: 32 }, state: Ready, range: 5, sprite_info: SpriteInfo { start_x: 224, start_y: 0, width: 32, height: 32, frames: 2, current_frame: 0, framerate_per_second: 8, delta: 7 } },
Tower { position: Rect { x: 0, y: 0, width: 32, height: 32 }, state: Ready, range: 5, sprite_info: SpriteInfo { start_x: 224, start_y: 0, width: 32, height: 32, frames: 2, current_frame: 0, framerate_per_second: 8, delta: 7 } },
Tower { position: Rect { x: 0, y: 0, width: 32, height: 32 }, state: Ready, range: 5, sprite_info: SpriteInfo { start_x: 224, start_y: 0, width: 32, height: 32, frames: 2, current_frame: 0, framerate_per_second: 8, delta: 7 } },
Tower { position: Rect { x: 0, y: 0, width: 32, height: 32 }, state: Ready, range: 5, sprite_info: SpriteInfo { start_x: 224, start_y: 0, width: 32, height: 32, frames: 2, current_frame: 0, framerate_per_second: 8, delta: 7 } },
Tower { position: Rect { x: 0, y: 0, width: 32, height: 32 }, state: Ready, range: 5, sprite_info: SpriteInfo { start_x: 224, start_y: 0, width: 32, height: 32, frames: 2, current_frame: 0, framerate_per_second: 8, delta: 7 } },
Tower { position: Rect { x: 0, y: 0, width: 32, height: 32 }, state: Ready, range: 5, sprite_info: SpriteInfo { start_x: 224, start_y: 0, width: 32, height: 32, frames: 2, current_frame: 0, framerate_per_second: 8, delta: 7 } },
Tower { position: Rect { x: 0, y: 0, width: 32, height: 32 }, state: Ready, range: 5, sprite_info: SpriteInfo { start_x: 224, start_y: 0, width: 32, height: 32, frames: 2, current_frame: 0, framerate_per_second: 8, delta: 7 } },
Tower { position: Rect { x: 0, y: 0, width: 32, height: 32 }, state: Ready, range: 5, sprite_info: SpriteInfo { start_x: 224, start_y: 0, width: 32, height: 32, frames: 2, current_frame: 0, framerate_per_second: 8, delta: 7 } },
Tower { position: Rect { x: 0, y: 0, width: 32, height: 32 }, state: Ready, range: 5, sprite_info: SpriteInfo { start_x: 224, start_y: 0, width: 32, height: 32, frames: 2, current_frame: 0, framerate_per_second: 8, delta: 7 } },
Tower { position: Rect { x: 0, y: 0, width: 32, height: 32 }, state: Ready, range: 5, sprite_info: SpriteInfo { start_x: 224, start_y: 0, width: 32, height: 32, frames: 2, current_frame: 0, framerate_per_second: 8, delta: 7 } },
Tower { position: Rect { x: 0, y: 0, width: 32, height: 32 }, state: Ready, range: 5, sprite_info: SpriteInfo { start_x: 224, st
...repeated 250+ more times...

Yup. Clicking "once" really triggers a bunch of actions because a single clack lasts a pretty long time from the perspective of the game loop. Thankfully, there's a pretty stupid simple way to fix this:
if game_context.mouse_context.left_clicked && self.current_action.is_none() {
    self.current_action = Some(PlayerAction::PlaceTower(tower.clone()));
    game_context.mouse_context.left_clicked = false;
}
By consuming the click and changing the mouse context from true to false, we prevent it from being used again within the same frame over the course of multiple game ticks. Easy. Though, I like the idea of naming this operation so its more explicit as to what we're doing.
pub fn consume_left_click(&mut self) {
    self.left_clicked = false;
}
And that will do it. Well, almost. We can place as many towers as we want right now, so we should try to limit that in some way. There's two options, either we get money from defeating enemies and spend them, or we do an RTS style supply type thing. As much fun as it would be to tell people to construct additional pylons, I think money is the easier thing to implement, except for the fact that we haven't done anything involving fonts yet.
But ignoring the need to display money is fine for now, let's just track it and use it as a constraint:
pub struct TopBar {
    miku_tower: Tower, // average useful tower
    rin_tower: Tower,  // speedy but less damage
    luka_tower: Tower, // slow but strong
    current_action: Option<PlayerAction>,
    money: u32,
}
Since I'd want to display the money in the top bar, this seems like an OK place to put it for now. I think we could also consider putting it into the overall game context if one wanted to preserve money between levels. But since I'm only planning on making the one level, I'll ignore that idea for now. Unlike real life, this world has no debt, so money can never be negative. There's also no taxes, so no cents or funny fractional bits required. A world of pure integral glory…
Towers still cost money though. How much money? Since I'm basically planing on fast, average, slow with
power varying between them, it probably makes sense to make things priced in a similar way. Completely
arbitrarily, once a cost field exists on the tower, we can hardcode it for now:
fn miku(position: Rect) -> Self {
    let mut base = Self::basic(position);
    base.sprite_info = sprite_info_miku_tower();
    base.cost = 20;
    base
}

fn rin(position: Rect) -> Self {
    let mut base = Self::basic(position);
    base.sprite_info = sprite_info_rin_tower();
    base.cost = 15;
    base
}

fn luka(position: Rect) -> Self {
    let mut base = Self::basic(position);
    base.sprite_info = sprite_info_luka_tower();
    base.cost  = 30;
    base
}
I have 0 idea if these are good prices or not, and we'll probably need to balance things out with how much damage each tower can do, rate of fire, and trying to ensure that the game is balanced enough that whatever initial money you have can be used to buy a combo of towers that doesn't result in instant game over. Though, if a player puts a tower where it can't hit any enemies, that's on them not me.
When a user buys a tower, we'll decrement the money we have, and if we don't have enough money then we don't have to do anything. We could do with a simple early return, like this:
impl TopBar {
    fn buy_tower(&mut self, tower: &Tower) {
        if tower.cost > self.money {
            return;
        }
        self.money = self.money.saturating_sub(tower.cost);
    }
    ...
and to see it working, updating the code we have that consumed the PlaceTower action
could work out alright to test it real quick:
if game_context.mouse_context.left_clicked {
    let action = self.top_bar.current_action.take();
    let Some(PlayerAction::PlaceTower(mut tower)) = action else {
        unreachable!();
    };
    if tower.cost <= self.top_bar.money {
        self.top_bar.buy_tower(&tower);
        eprintln!("buying a tower for {}, {} left", tower.cost, self.top_bar.money);
        tower.position.x = c as isize;
        tower.position.y = r as isize;
        self.towers.push(tower);
    } else {
        // TOOD: pop up something to let the user know they didnt have enough money maybe?
        eprintln!("not enough money");
    }
}
and trying to buy three leek towers gets us the expected console logs:
buying a tower for 20, 30 left
buying a tower for 20, 10 left
not enough money
But, is this actually how we want to handle this? On the one hand, subtracting at the point of action here means that if a user doesn't have the money, it will just "cancel" the action automatically when they click and nothing happens. The tower disappears from their hand and nothing is placed. As the comment suggests in the above code, we could also queue up some form of message to show the user to let 'em know that we couldn't place it because they didn't have enough money.
But why bother letting the user even set up the action if they don't have the money for it? The only argument I can think of that relates to this causing us more problems than not, is that if we allow a user to cancel a placement, but we already subtracted the money from their account for us to queue up the place action, we'll need to make sure they get that money back. So there's a little bit more overhead in some of the bookkeeping we'll need to take care of.
For example, we have two places to handle canceling with that approach. Within the top bar update method:
fn update(&mut self, ticks: u32, game_context: &mut GameContext, layout: &GridLayout) {
    ...
    for tower in vec![
        &mut self.miku_tower,
        &mut self.rin_tower,
        &mut self.luka_tower,
    ] {
        let tower_cell = layout.cell_rect(tower.position.y as usize, tower.position.x as usize);
        if tower_cell.contains(rect.x + 1, rect.y + 1) {
            tower.sprite_info.advance(ticks);
            if game_context.mouse_context.left_clicked && self.current_action.is_none() && self.money >= tower.cost {
                self.current_action = Some(PlayerAction::PlaceTower(tower.clone()));
                game_context.mouse_context.consume_left_click();
                // annoyingly, we cant call self.buy_tower without the borrow checker bitching.
                // because it can't understand that only the money field will be mutated within that call.
                self.money = self.money.saturating_sub(tower.cost);
                eprintln!("Buy tower {}", self.money);
            }
        }
    }

    if game_context.mouse_context.right_clicked {
        match &self.current_action {
            None => {},
            Some(PlayerAction::PlaceTower(tower)) => {
                self.money = self.money.saturating_add(tower.cost);
                eprintln!("Refund tower {}", self.money);
                game_context.mouse_context.consume_right_click();
                self.current_action = None;
            }
        }
    }
}
and, unpurely, within the draw method for the level
...
    if let Some(PlayerAction::PlaceTower(tower_to_place)) = &self.top_bar.current_action {
        let src = tower_to_place.sprite_info.get_rect();
        renderer.send_command(RenderCommand::DrawRect {
            texture_id: TEXTURE_ID_LEEKSHEET,
            source: src,
            destination: cell,
        });

        if game_context.mouse_context.left_clicked {
            let action = self.top_bar.current_action.take();
            let Some(PlayerAction::PlaceTower(mut tower)) = action else {
                unreachable!();
            };
            tower.position.x = c as isize;
            tower.position.y = r as isize;
            self.towers.push(tower);
        }

        if game_context.mouse_context.right_clicked {
            let action = self.top_bar.current_action.take();
            let Some(PlayerAction::PlaceTower(mut tower)) = action else {
                unreachable!();
            };
            self.top_bar.refund_tower(&tower)
        }
    }
 ...
I call this unpure, because it would be nice if the drawing method didn't do any sort of update to the state. Having that separation in place would make reasoning about the logic easier for us now and later when we forget half the codebase. But, for a quick check that this does work and we don't accidentally lose money? It works as a fast and dirty check. And this does work, so, we can quickly refactor the code to meet our standards:
impl Scene for LevelScene {
    fn update(&mut self, ticks: u32, game_context: &mut GameContext) {
        let (screen_width, screen_height) = game_context.screen_size;
        let layout = GridLayout {
            area: Rect::new(0, 0, screen_width as isize, screen_height as isize),
            rows: 18,
            columns: 32,
            cell_gap: 0,
        };

        ...
        self.top_bar.update(ticks, game_context, &layout);
        self.check_action(&layout, game_context);
    }
    ...
And then the implementation of check_action can be made as a simple helper. We can also
reverse the conditions a little to flatten out the structure and avoid some of the nesting for easier
reading.
impl LevelScene {
    fn check_action(&mut self, layout: &GridLayout, game_context: &mut GameContext) {
        let Some(PlayerAction::PlaceTower(tower_to_place)) = &self.top_bar.current_action else {
            return;
        };

        let Some((r, c, cell)) = layout.cell_for_mouse(game_context.mouse_context.position) else {
            return;
        };

        let legal_placement = {
            let not_in_menu = r > 0;
            let not_on_other_tower = !self
                .towers
                .iter()
                .any(|t| t.position.x == c as isize && t.position.y == r as isize);
            not_in_menu && not_on_other_tower
        };
        if game_context.mouse_context.left_clicked && legal_placement {
            let action = self.top_bar.current_action.take();
            let Some(PlayerAction::PlaceTower(mut tower)) = action else {
                unreachable!();
            };
            tower.position.x = c as isize;
            tower.position.y = r as isize;
            self.towers.push(tower);
            game_context.mouse_context.consume_left_click();
        }

        if game_context.mouse_context.right_clicked {
            let action = self.top_bar.current_action.take();
            let Some(PlayerAction::PlaceTower(mut tower)) = action else {
                unreachable!();
            };
            self.top_bar.refund_tower(&tower);
            game_context.mouse_context.consume_right_click();
        }
    }
}
A nice trick in rust is the fact that let pattern matching allows you to else
the result of said match. And in this case, if we fall into that, then it means we can jump out. Leaving
the rest of the code after the early return and simple to know that we definitely have matched our function's
preconditions.
You might also notice that I've added in legal_placement to the picture too. Nothing wrong with
improving the code as we massage and move it around. The movement of most of the code was entirely mechnical,
and so tidying things up, never nesting, and then
enhancing is a pleasant way to get the dopamine flowing. Though, we're still not really able to raise any sort
of note to the user about if they had a bad move, didn't have money, or anything like that yet. But that will
come in time.
Also, my "legal" placement doesn't actually follow the rules we defined at the start of the section either. We said that we wouldn't allow the user to place a tower down onto the "road" either. But since the road is just a display thing right now, and not an actual tracked value for the level, I can't check it. We'll put a pin in that one and come back to it in a bit. It won't be too long though, we just need one last tweak to the towers to prepare ourselves for the next step of making this defense game!

The towers need to track how much damage they do! Also, since our TowerState allows cooldown,
then we need to track the initial cooldown for each tower so that the various types can, well, vary!
struct Tower {
    position: Rect,
    state: TowerState,
    range: u16, // 65535 should be enough
    sprite_info: SpriteInfo, // a leek sprite for now
    cost: u32,
    damage: u32,
    cooldown: u32,
}
The cooldown's units are game ticks, which means we get 60 per second assuming no skipping occurs, so that makes it relatively easy to throw around numbers like
| Miku | Rin | Luka | |
| Cooldown | 30 | 15 | 60 |
| Damage | 5 | 3 | 15 |
Which technically make Luka's tower the strongest damage per second. But also remember that when a tower is defending, there tend to be multiple enemies! So being able to fire off multiple smaller shots at different enemies as they die off potentially makes Rin's damage output of 12 per second have more utility. And a good middle ground? Miku of course.
While I'm sure I'll have to adjust things once we start adding enemies, for now this feels like a reasonable starting point. And so the last thing we need to do is make an update function for the tower that can handle ensuring we come off of cooldown once we fire:
fn advance_ready_state(ready_state: ReadyState, ticks: u32) -> ReadyState {
    match ready_state {
        ReadyState::Ready => ready_state,
        ReadyState::Cooldown {
            wait_for,
            ticks_waited,
        } => {
            let ticks_waited = ticks_waited.saturating_add(ticks);
            if ticks_waited >= wait_for {
                ReadyState::Ready
            } else {
                ReadyState::Cooldown {
                    wait_for,
                    ticks_waited,
                }
            }
        }
    }
}

impl Tower {
    fn update(&mut self, ticks: u32) {
        self.state = advance_ready_state(self.state, ticks);
    }
Not too tricky. The ready state doesn't really have much to do right now because we dont have any enemies to shoot at yet. So, let's move onto dealing with that, shall we?

Enemies and targeting ↩
The struct for an enemy isn't overly complex, but we will need to do a quick little refactor.
Our enemies are going to have a position, health, and their sprite information just like towers
do. But they also need to be able to move! We could create some kind of speed field
or something like that, but I have an idea that I think is a good one.
Why don't we rename TowerState to ReadyState and use that as the control
for the speed? That way, when an enemy is "ready" after a certain number of ticks, they can move
forward along a path. We'll be able to have slow or fast enemies by varying the cooldown rate, and
just like everything else, it will be measured in game ticks. 13
With that rename in place, we can then write the struct:
#[derive(Debug, Clone)]
struct Enemy {
    position: Rect,
    health: Health,
    sprite_info: SpriteInfo,
    ready_state: ReadyState
}
Granted, unless we just use a random sprite we've made so far, I don't have anything to use to represent an enemy. So, that begs the question of what would towers models after Miku, Rin, and Luka be defending against? I thought about this for a while, slept on it, then mulled it over while staring at my various miku manga on my shelf for inspiration.
There's also Hachune Miku, who we have that gif of already, as a potential enemy. She even has a walking animation too. Though, like I said before, I'm not really sure if the person who made the gif would want me to re-use it or not since I can't find the original source again. There's the Tako Luka from the Item War event, who has tentacles and monsters with tentacles are pretty good enemies. But, we have a Luka tower, so that sort of seems wrong, as I was actually thinking our bullets would be inspired by some of those items.
So, what's left that's still fits our theme and makes some degree of nonsensical sense? How about...

An Utauloid like Teto? She fits the theme. There's some degree of silliness around Vocaloid vs Utauloid that makes sense. There are plenty of songs about jealousy between Miku and Teto, and I think this works. Most importantly, Teto has a pretty simple design and my meager pixel skills might be able to come up with an enemy form inspired by her that works. For example, this:

Though, given that she's an enemy sprite...

Perfect. The usual song and dance will get her up and ready to be loaded into the game. We update our constants file with some new sprite info:
pub const fn sprite_info_teto() -> SpriteInfo {
    SpriteInfo {
        start_x: 32 * 13,
        start_y: 0,
        width: 32,
        height: 32,
        frames: 1,
        current_frame: 0,
        framerate_per_second: 16,
        delta: 0,
    }
}
pub const fn sprite_info_teto_walking() -> SpriteInfo {
    SpriteInfo {
        start_x: 32 * 14,
        start_y: 0,
        width: 32,
        height: 32,
        frames: 2,
        current_frame: 0,
        framerate_per_second: 16,
        delta: 0,
    }
}
And then we can add a list of the Enemy structs to the level
pub struct LevelScene {
    ...
    enemies: Vec<Enemy>,
}
and in our update and draw methods call down to the enemy struct's
versions of those as well.
fn update(&mut self, ticks: u32, game_context: &mut GameContext) {
    ...
    for enemy in &mut self.enemies {
        enemy.update(ticks);
    }
    self.check_action(&layout, game_context);
}

fn draw(&mut self, game_context: &mut GameContext) {
    ...
    for enemy in self.enemies.iter() {
        let cell = layout.cell_rect(enemy.position.y as usize, enemy.position.x as usize);
        let src = enemy.get_rect();
        renderer.send_command(RenderCommand::DrawRect {
            texture_id: TEXTURE_ID_LEEKSHEET,
            source: src,
            destination: cell
        });
    }
    ...
}
We can easily get a test enemy up and running by implementing the update and get_rect
methods, the get_rect is just a callthrough to the sprite, so no need to make a note of it. But,
our update method is probably going to change over time as we figure things out.
fn update(&mut self, ticks: u32) {
    self.ready_state = advance_ready_state(self.ready_state, ticks);
    self.sprite_info.advance(ticks);
}
Specifically, when it comes time to actually make the enemy move we'll probably need to do some destination settings and interpolation of positions based on whether or not our state is ready or cooling down. But at the moment I'm thinking we could potentially queue up the directions to take on the road for an enemy with some kind of run length encoding thing or something like that, but I was thinking our first objective should be to be able to tell if an enemy is within range of a tower or not.
Given that the enemies and the towers are stored within the level, it falls to the level to be the one to orchestrate this type of thing. While we've kept the grid pretty small, it sort of feels to me that we ought to be at least a little clever while doing this. Specifically, I think we should cache the results of our computation until an enemy moves because if you had a tower on nearly every tile and a whole bunch of enemies along all of the road, then we'd be doing a lot of calculation every frame. This is basically an N2 operation with respect to the number of towers to loop over each tower and check it against each enemy, which is expensive. But, each tower potentially has overlap with other towers, and so I kind of wonder if it would make sense to use an intermediary to avoid this.
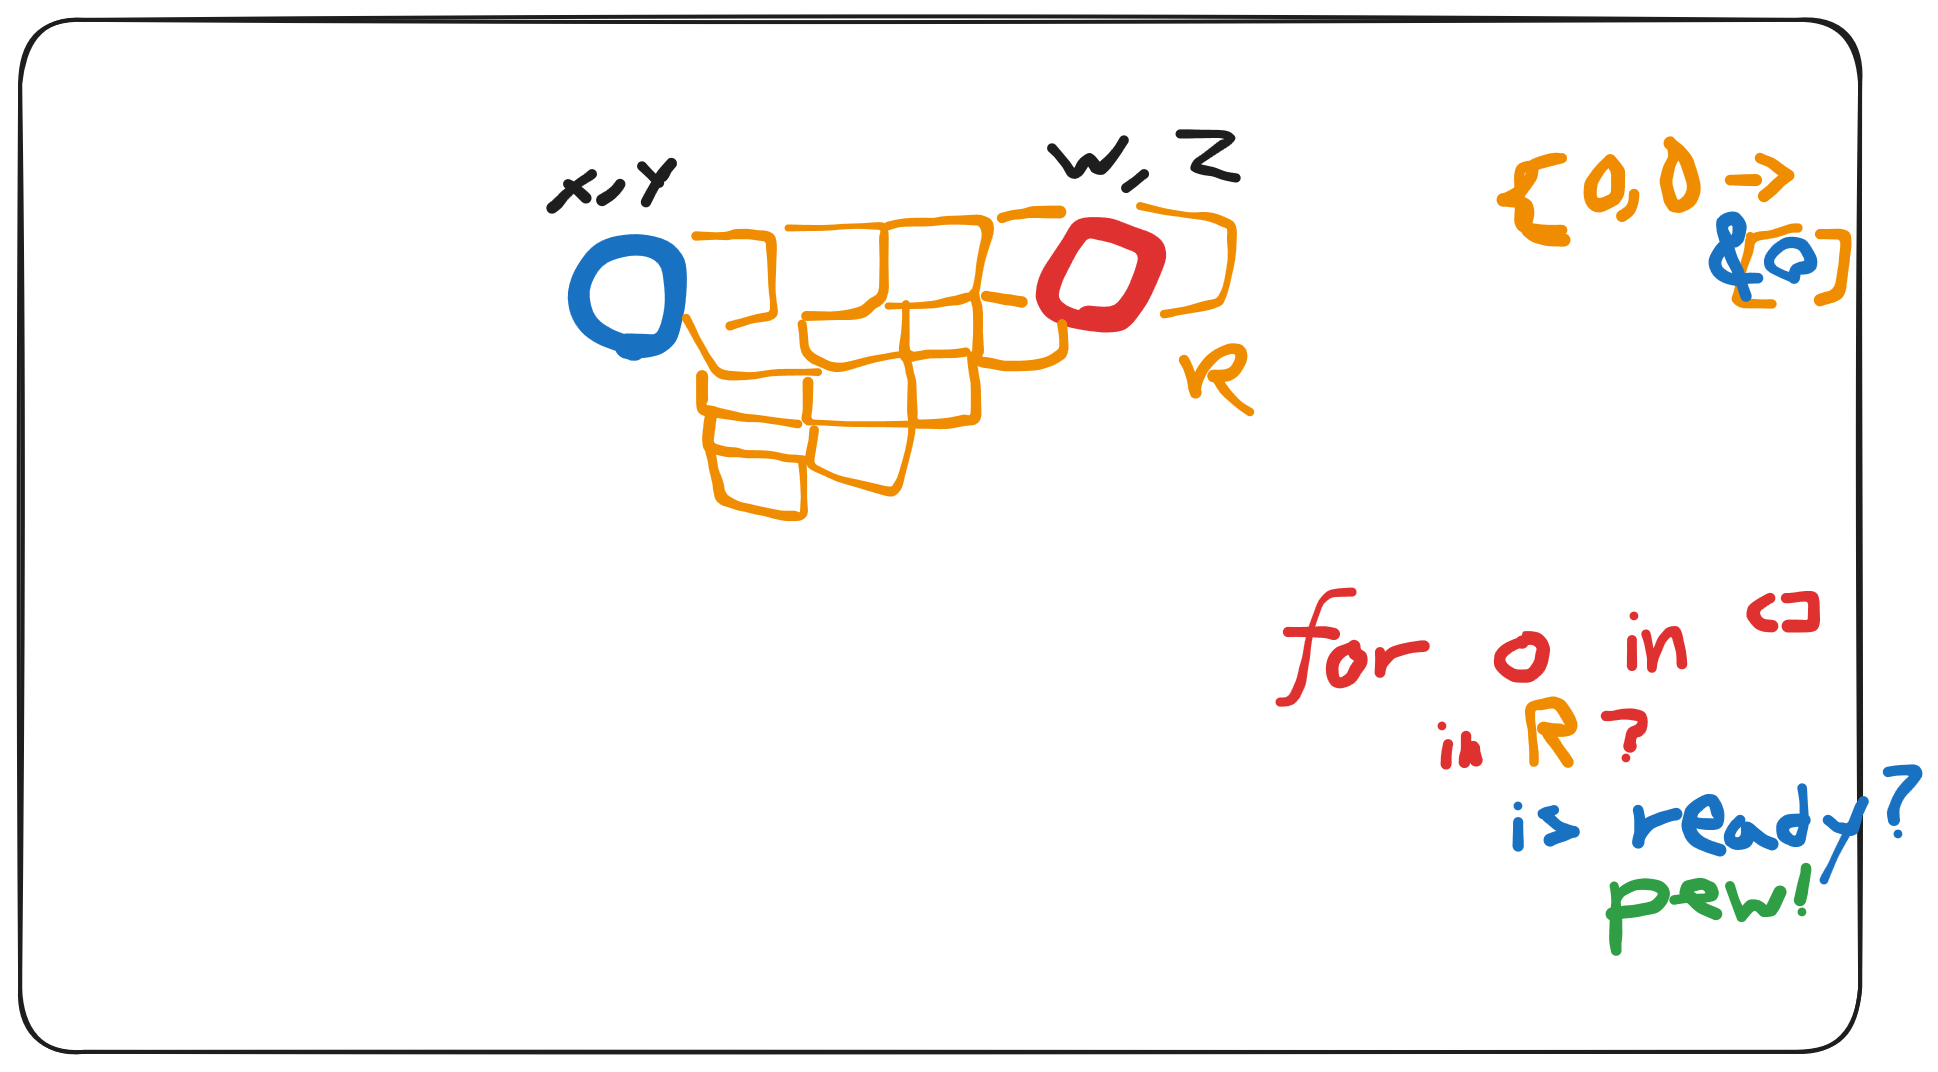
As you can see in the doodle, the basic idea is that we precompute the ranges which the turrets can hit,
then ask the turret to look itself up to determine which turret can actually shoot it right now. If
there's a turret that's not on cooldown, then we could make it fire. Handwaving away the "make it fire"
part for now, lets focus in on the range part. Like I said before, a square is lame. We'd want to do a
diamond pattern based on the range outward. Luckily, we can create a simple iterator to do this with a
bit of abs_diff magic:
fn turret_range_iter(
    center_r: usize,
    center_c: usize,
    range: usize,
    max_rows: usize,
    max_columns: usize,
) -> impl Iterator<Item = (usize, usize)> {
    let cr = center_r;
    let cc = center_c;
    (cr.saturating_sub(range)..=(cr + range).min(max_rows)).flat_map(move |r| {
        (cc.saturating_sub(range)..=(cc + range).min(max_columns)).filter_map(move |c| {
            let key = (r as usize, c as usize);
            let x = cc.abs_diff(c);
            let y = cr.abs_diff(r);
            if x + y <= range { Some(key) } else { None }
        })
    })
}
This is pretty similar to what we did before with the GridLayout conceptually. Rather than
write this potentially error-prone loop anywhere we want to compute the cells within a turret's range,
if we make it into a function that returns an iterator the caller owns, then life gets less buggy and
more fun. For example, with just the above method in hand we can draw the range a turret will have when
we select one to place:
let src = self.highlight.get_rect();
for key in turret_range_iter(
    r,
    c,
    tower_to_place.range as usize, // From the PlayerAction::PlaceTower extraction
    layout.rows,
    layout.columns,
) {
    let cell = layout.cell_rect(key.0, key.1);
    renderer.send_command(RenderCommand::DrawRect {
        texture_id: TEXTURE_ID_LEEKSHEET,
        source: src,
        destination: cell,
    });
}
Then, when I click on a turret and it follows my mouse for placement purposes:
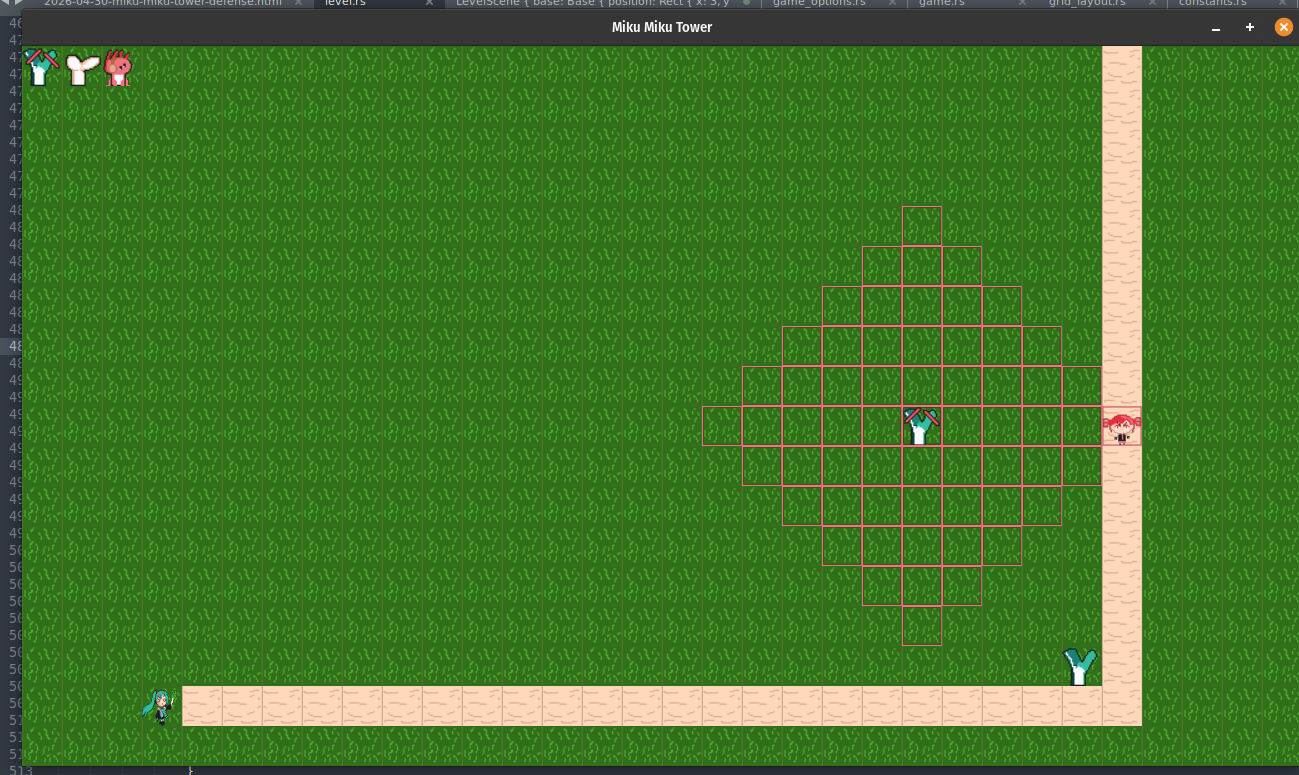
I'm not sure if the highlight is the right sprite to use here, but its what I've got on hand at the moment, so it will do. Getting back to the idea here though. Since I don't want to compute the range every frame for our list of turrets, the sensible thing would be to cache it into the level data:
#[derive(Debug)]
pub struct LevelScene {
    ...
    cell_to_turrets: HashMap<(usize, usize), Vec<usize>>,
}

impl LevelScene {
    fn add_tower(&mut self, tower: Tower) {
        let idx = self.towers.len();
        let cr = tower.position.y as usize;
        let cc = tower.position.x as usize;
        let range = tower.range as usize;
        for key in turret_range_iter(cr, cc, range, 18, 32) {
            self.cell_to_turrets
                .entry(key)
                .and_modify(|towers| {
                    towers.push(idx);
                })
                .or_insert(vec![idx]);
        }
        self.towers.push(tower);
    }
    ...
}
Putting aside the hard coded maximum rows and columns for now 14,
The logic is pretty simple! What position is the turret? That's the center, add the index to the hash map for later use.
You might be wondering why I'm using the index if my little diagram had &Tower written in its sketch. Well.
Lifetimes is why. It's really really annoying to store something like &Tower into a structure without
having to infect the entire area with a bunch of 'a annotations. I was talking to some folks about it and they
suggested a general rule of thumb to avoid treating references as data, and that seemed pretty sensible to me. Because we don't
lose towers, the index doesn't change either! Which we can't say about the enemies, so our construction here is doubly sensible.
Of course, since we now need to compute things on add, we won't be doing raw calls to level_scene.towers.push anymore.
We need to be sure to sync the usage of the towers and the map up, for example, in the default the change affects both the
initial_towers vector and the creation of the instance we're making:
impl Default for LevelScene {
    fn default() -> LevelScene {
        let initial_towers = vec![];
        let cell_to_turrets = HashMap::new();
        let mut level_scene = LevelScene {
            ...
            cell_to_turrets,
        };
        level_scene.add_tower(Tower::basic(Rect::new(26, 15, 32, 32)));
        level_scene
    }
}
Ignore that hardcoded tower, it's just there to save me a few clicks when testing things. The point is that we now call the helper to insert the tower. Which means we always have the hashmap populated with targetable locations, and we could tweak the enemy update logic to check this. To make that area a little more readable though, we can add a couple helpers to the tower first:
fn can_shoot(&self) -> bool {
    match self.state {
        ReadyState::Ready => true,
        _ => false
    }
}

fn cooldown(&mut self) {
    self.state = ReadyState::Cooldown {
        wait_for: self.cooldown, ticks_waited: 0,
    };
}
We still don't have any real action to take when we're able to shoot, but for testing purposes,
we can just print to the terminal for now. The LevelScene's update loop is the
right place for this since it has access to both the towers and enemies:
impl Scene for LevelScene {
    ...
    fn update(&mut self, ticks: u32, game_context: &mut GameContext) {
        ...
        for enemy in &mut self.enemies {
            enemy.update(ticks);

            // The towers that are in range
            if let Some(tower_indices) = self
                .cell_to_turrets
                .get(&(enemy.position.y as usize, enemy.position.x as usize))
            {
                // The towers that can shoot:
                for tidx in tower_indices.iter() {
                    let tower = &mut self.towers[*tidx];
                    if tower.can_shoot() {
                        eprintln!("Pew pew!");
                        tower.cooldown();
                    }
                }
            }
        }
    }
}
The nice thing is that since we already programmed the function to call advance_ready_state
for our towers, the cooldown will work and we wont' get flooded with a bunch of printlns, but
rather we'll see them pop up as the towers cool off which is a nice bit of validation. It'd be neat to
show some kind of cooldown indicator, but that sounds like polishing work, not getting the dang thing
working work.
Let's talk about the next tricky part. When we're able to shoot, we can create some kind of bullet struct and track it similar to how we have before. But for the bullet to "work" we'll need to make it move across the screen, and the biggest question is how do we set the destination for the bullet in such a way that we don't appear to miss an enemy that's moving along the path?

Now, I know that the enemies aren't actually moving yet. But it's still something worth considering before we write the bullet flying towards a stationary enemy! Do we just make the bullet fast enough that it hits almost immediately and we hope for the best? Do we store an enemy index and hope we don't kill it and remove the enemy from the list when there's a bullet trying to fly towards it? Do we fire towards the grid coordinate and actually miss if there's nothing there? Heck, should we try to make the turrets smart enough to avoid targeting the same enemy if its already going to die from whatever's been fired at it so far?
So many questions. Indirection might help us here again though. Similar to how the enemies check to see if they're in turret range, if we want to track bullets coming towards an enemy, should we store the incoming projectiles on the enemy itself? That would certainly avoid the stale target location problem. Though it'd also make every projectile into a homing projectile. I suppose if we just set a target and fire and then let the bullet fly until it hits the edge of the range, maybe that'd be fine too? That sounds like the most reasonable thing to do, so lets figure out our projectile struct next.
#[derive(Debug, Clone)]
struct Projectile {
    position: Rect,
    start: (isize, isize),
    end: (isize, isize),
    damage: u32,
    hit_when_ready: ReadyState,
    sprite_info: SpriteInfo,
}
We'll need to track the current position of the rectangle, and if we're to interpolate between its starting
point and ending point, then we could do so by using the cooldown + ready state combo to determine when the
projectile should hit the target point we choose. Rather than holding onto a reference to the tower that shot
it, I think it will probably make things easier if we track the damage on the projectile itself. Similar, to
keep life simple at first, lets use isize for the source and sinks of our flying friend since
that will line up with how we use the grid at the moment. 15
Of course, we need an actual sprite for this too. I want to make each tower fire its own type of projectile of course, but for testing purposes let's doodle up a simple energy ball since that takes all of 10 seconds and will feel good enough for a while.
pub const fn sprite_info_energy() -> SpriteInfo {
    SpriteInfo {
        start_x: 32 * 16,
        start_y: 0,
        width: 32,
        height: 32,
        frames: 1,
        current_frame: 0,
        framerate_per_second: 60,
        delta: 0,
    }
}
since these are short lived and a sort of temporary asset, I won't bother making it animated at all since we probably wouldn't even notice it with how short of a time these things are going to last. When we need to make one of these, we'll just default the sprite info for now.
impl Projectile {
    fn new(start: (isize, isize), end: (isize, isize), damage: u32, ticks_until_hit: u32) -> Self {
        Projectile {
            position: Rect::new(start.0 as isize, start.1 as isize, 32, 32),
            start,
            end,
            damage,
            hit_when_ready: ReadyState::Cooldown {
                wait_for: ticks_until_hit,
                ticks_waited: 0,
            },
            sprite_info: sprite_info_energy(),
        }
    }
    ...
Now, about the movement. We have all the pieces we need to do some interpolation besides an actual function to do the operation. Luckily, that's not too hard to write up. Since progress is normally a decimal between 0 and 1, we'll temporarily swap our isize's to floats for the calculation and then back to isize again:
// z0 - z0 * alpha + z1 * alpha
fn interpolate(z0: isize, z1: isize, alpha: f32) -> isize {
    let i = z0 as f32 - z0 as f32 * alpha + z1 as f32 * alpha;
    i as isize
}
Then we can use this helper to make both the x and y coordinate "smoothly" trend from start
to end, or at least make it do so so long as we haven't arrived at our destination.
fn update(&mut self, ticks: u32) {
    self.hit_when_ready = advance_ready_state(self.hit_when_ready, ticks);
    self.sprite_info.advance(ticks);

    match self.hit_when_ready {
        ReadyState::Ready => {
            self.position.x = self.end.0;
            self.position.y = self.end.1;
        }
        ReadyState::Cooldown {
            wait_for,
            ticks_waited,
        } => {
            let progress = ticks_waited as f32 / wait_for as f32;
            self.position.x = interpolate(self.start.0, self.end.0, progress);
            self.position.y = interpolate(self.start.1, self.end.1, progress);
        }
    }
}
Once the countdown is over, we just want to be at the end. I suppose I could probably do nothing too, since technically the final tick should land me at the right place, but I don't think we can guarantee that the ticks taken by the game loop won't skip ever, so it's better to be safe than sorry I think. And since I don't like writing out match statements within loops that relate to internal struct state if I can help it, let's make a handily named method for the projectile:
fn has_arrived(&self) -> bool {
    match self.hit_when_ready {
        ReadyState::Ready => true,
        _ => false,
    }
}
Lastly, each turret should apply its own damage values and start location to the projectile its making.
So it makes sense to have our factory method for those on the Turret itself.
impl Tower {
    fn projectile(&self, to: (isize, isize)) -> Projectile {
        let start = self.position.clone();
        let ticks_until_hit = 60 / self.range as u32; // for now 1s is fine
        Projectile::new((start.x, start.y), to, self.damage, ticks_until_hit)
    }
    ...
With all of that setup, it's another round of updating the LevelScene struct with a list,
tweaking the draw method to draw each one, and then we can get into the actual spawning code within the
update method:
fn update(&mut self, ticks: u32, game_context: &mut GameContext) {
    ...
    for enemy in &mut self.enemies {
        enemy.update(ticks);

        // The towers that are in range
        if let Some(tower_indices) = self
            .cell_to_turrets
            .get(&(enemy.position.y as usize, enemy.position.x as usize))
        {
            // The towers that can shoot:
            for tidx in tower_indices.iter() {
                let tower = &mut self.towers[*tidx];
                if tower.can_shoot() {
                    self.projectiles
                        .push(tower.projectile((enemy.position.x, enemy.position.y)));
                    tower.cooldown();
                }
            }
        }
    }
    ...
There's no intelligent selection of targets here or anything like that, we just fire if we've got something that can do so. Though, this projectile list is ever-growing, which is a bad idea. so let's trim it based on whether or not the projectile's has entered its ready to be applied as damage state:
self.projectiles.retain_mut(|projectile| {
    projectile.update(ticks);
    !projectile.has_arrived()
});
This doesn't actually apply any damage at all, we'll need to work harder for that. But with the code as is, we can at least see what's starting to look like the skeleton of a tower defense game coming alive:

Well dang, it works, but the grid rounding of the location looks a lot worse than I expected it
to. It's going to be hard to resist changing the positioning code over to using f32s instead of isizes to
get a straighter shot. Especially because in order to do the collision check when we reach the end, we'll need to
convert back to grid coordinates. Well. We might as well get it over with, though there's one little snag.
It's easy enough to swap from using grid coordinates to cell coordinates. Within the drawing loop we skip
the cell calculation and use position directly:
 for projectile in self.projectiles.iter() {
-   let cell = layout.cell_rect(
-       projectile.position.y as usize,
-       projectile.position.x as usize,
-   );
    let src = projectile.get_rect();
+// Note: projectile position is in screen space, not in world space
+//       we do this in order to have a smooth line from tower to target
+//       and without it we'd have bullets aligned to the grid which looks bad.
 renderer.send_command(RenderCommand::DrawRect {
     texture_id: TEXTURE_ID_LEEKSHEET,
     source: src,
-    destination: cell,
+    destination: projectile.position,
 });
Note that this does mean that the size of our Rect is in screenspace too.
Thankfully, I already had a number in there that worked ok (32x32) but technically it should be 40x40
if we wanted it to actually match the grid. So, we should fix the projection creation to handle that
better. I don't really like the fact that I have to pass the layout all the way down, but it's better
than someone resizing their screen and new projectiles being miniscule. So, a tweak it is:
-fn new(start: (isize, isize), end: (isize, isize), damage: u32, ticks_until_hit: u32) -> Self {
+fn new(start: (isize, isize), end: (isize, isize), damage: u32, ticks_until_hit: u32, layout: &GridLayout) -> Self {
+    let cell_size = layout.cell_size();
     Projectile {
-        position: Rect::new(start.0 as isize, start.1 as isize, 32, 32),
+        position: Rect::new(start.0 as isize, start.1 as isize, cell_size.0, cell_size.1),
 ...
Requiring the layout as an argument to new means that the compiler breaks and guides our next action,
so we end up popping over to the projectile function:
-fn projectile(&self, to: (isize, isize)) -> Projectile {
+fn projectile(&self, layout: &GridLayout, to: (isize, isize)) -> Projectile {
-    let start = self.position.clone(); // TODO adjust start to be centered
+    let screen_coordinates =
+        layout.cell_rect(self.position.y as usize, self.position.x as usize);
+    let (x, y) = screen_coordinates.center();
     let ticks_until_hit = 60 / self.range as u32; // TODO tweak as neede
-    Projectile::new((start.x, start.y), to, self.damage, ticks_until_hit)
+    Projectile::new((x, y), to, self.damage, ticks_until_hit, layout)
 }
The center function does not exist yet. But we'll get there. For now, let's finish flipping
the position from world space to screen space all along the chain:
 ...within LevelScene update enemy loop ...
 if tower.can_shoot() {
+    let target =
+        layout.cell_rect(enemy.position.y as usize, enemy.position.x as usize);
     self.projectiles
-        .push(tower.projectile((enemy.position.x, enemy.position.y)));
+        .push(tower.projectile(&layout, target.center()));
     tower.cooldown();
 }
The chain's complete! The compiler is broken. Implementing the center method for Rect
poses one main challenge. Rect is generic over T and right now, well…
The trait bounds only allow for addition and substraction, which means that I can't actually write something
like this:
fn center(&self) -> (T, T) {
    (
      self.x + self.width / 2,
      self.y + self.height / 2,
    )
}
Attempting to do this will get you an error similar to
|let cx = self.x + (self.width /2 );
|                   ----------  ^ expected type parameter `T`, found integer
|                  |
|                  expected because this is `T`
Because 2 is not a T. So, then, how do we divide by 2? By being clever that's how!

If we say that our T must have the bounds of Div, then we can do a
funny little trick. What is one, but a T divided by itself? And what is two, if not two ones added
together?
pub fn center(&self) -> (T, T) {
    let one = (self.x / self.x);
    let two = one + one;
    let cx = self.x + self.width / two;
    let cy = self.y + self.height / two;
    (cx, cy)
}
And with that, we have a much more appropriate looking projectile path:
Though it's not quite right. For some reason the projectile is popping out of the corner of
the cell, rather than the middle… Oh. Ha. Well, here I was feeling clever about our center
code but it was because my mental model of our situation drifted a bit off. When we ask our renderer to draw
something, it draws from the top left and so if I suddenly say that someones position is the center,
then of course the actual center of the image being drawn is going to end up in the bottom corner.
I suppose this is what you get when you write your code while keeping an eye on Tomodachi life Miis and chatting
with folks in IRC.
So, if we just ditch the calls to .center() then we'll land with centered projectiles flying around.
Since that was the only code using it, I suppose I could ditch it but I've grown fond of it, so until it becomes
a problem, I'll keep it for the target, but re-align the starting point. This also has the benefit that when we
convert from screen coordinates back to the grid, we won't be directly on a border and will be thoroughly inside
the cell. Although, it does still look bad when firing in a "straight" line of cells since rather than the ball
flying towards the center it flies towards the corner… Sigh. I suppose I'll remove the centers in both places
and make sure our contains code checks its edges properly. 16
But anyway, now that the projectile is flying towards our enemy smoothly, we need to apply damage to it on hit! so turning our attention to that again, I can think of a few different ways to implement this off the rip:
- Store the index of the enemy into the projectile that is targeting it.
- Store the index or an ID of the projectile in the enemy.
- Store the grid location of each enemy into a map, check for hit when projectile lands at destination.
- Store the projectile grid location into a map and check if an enemy is hitting it.
Not all of these ideas are good. Thinking about the lifetime of our objects, both the enemies and projectiles aren't long lived, so there is a very real possibility that by the time a projectile arrives, the enemy it wanted to kill is dead already. We could let the projectile simply die as a miss, but in those cases, what choice would favor the player? Probably to hit a different enemy within that space if possible. This leans me towards the last idea, as that allows for any enemy to be hit by one projectile, however, it also allows for a bullet to miss as well if the enemy has moved off the space.
We could try to combine the ideas perhaps, if we miss on the grid point we targeted, we could then do a scan of which enemy we were targeting to find out if it was still alive or not and apply the damage to it. This is, quite literally, a corner case. If the enemy is alive but not on the cell, and also wasn't along the path to said cell, then the enemy must have followed the path around a corner and "dodged" the bullet. Note that I said wasn't along the path because if we use the last idea, we could keep the map of grid coordinate to projectile up to date not just for when the bullet hits, but as it travels. Though this also raises the cost of bookkeeping a bit, since we not only have to store where the projectile is, but also ensure we remove it from the previous location as it moves.
The idea to store a reference (index or id type thing, not a &) to an enemy on the projectile does dodge
the issue of an enemy dodging. But it doesn't avoid the problem of "unfairness" or "unrealistic-ness" in that a bullet
will fly past a different enemy without hitting it and smack only one enemy ever. So, no happy little accidents in favor
of the player. I suppose we could combine ideas here again though, if the enemy dies before the damage can be applied,
then we could check to see if there's a different enemy we could apply it to within the same space. That'd perhaps be nicer,
and would only require the extra work to re-target for each extraneous projectile. Though, we'd still need to do some enemy
book keeping in that case.
It seems like each idea I've come up with so far has trade offs, some in favor of the player, some not. Some with a computational cost, some with a memory one. Ultimately, this is more of a question of game design than not. Projectiles are very short lived (each only lasts a second right now), and so doing book keeping on where they are sounds expensive and wasteful. Enemies are potentially the longer lived and if I were to be somewhat clever, might be able to offset some of the re-calculations if we store them in some form of spacial ordering so that enemies that are closer together physically are close together within the list. Though, if we consider that the enemies will be generated one after the other, and will always follow the same path (if we don't have "Flying" enemies or that sort of thing), then I suppose the next enemy is always the most likely to be on the same grid space, aren't they?
Assuming it's simple to hop from a dead enemy to a live one, This makes the idea of an enemy storing a reference to the projectile that's targeting it appealing. With the one downside being that we don't have a stable id for each projectile, so we'd need to come up with that. It can't just be the index into the projectile list because that will be invalidated pretty quickly as we remove projectiles, and then recalculating new indices for each would be expensive and happen too often. So…

Let's just brute force it for now!
No really, it's all good to think of various ideas of what we could do, but we're also falling into the pit of premature optimization. Our lists should have decent cache locality and the projectile list potentially is also small enough to fit into RAM pretty easily. Which means doing scans on it might actually not be worth the trouble of hashing and looking up something in a hashmap. The best way to find out is to just toss it in and see if we notice anything horrendous happen. We can always profile later to figure out where to spend our efforts. So, disregarding all the fun and interesting ideas from before, we can just use a loop:
self.projectiles.retain_mut(|projectile| {
    projectile.update(ticks);
    if !projectile.has_arrived() {
        return true;
    }

    // Optimize later if needed. we have a projectile that has arrived somewhere. Did it hit anything?
    // Potential optimize could use path and if its ever increasing in one direction to stop the list
    // traversal once we make it past the cell in some way assuming enemy list is sorted by said dimension
    let cell = layout.cell_for_mouse(Some((projectile.position.x as f32, projectile.position.y as f32)));
    let Some((r, c, _)) = cell else { return false; };

    let mut done = false;
    self.enemies.retain_mut(|enemy| {
        if done {
            return true;
        }
        if enemy.position.y as usize != r || enemy.position.x as usize != c {
            return true;
        }
        enemy.health.damage(projectile.damage);
        if enemy.health.current != 0 {
            return true;
        }
        done = true;
        return false;
    });
    false
});
Since we don't want a single bullet to hit every enemy (though if we did, we could get splash damage!) we need
to use the sentinel value done to ignore the loop once we've found and removed an enemy. Besides that,
the logic is pretty simple. If there's no match, then move on to the next enemy to check, if there is a match for
the location, then decrement health via the damage method, and if we're dead then let the retain loop
filter the enemy out. Otherwise, we keep it. The somewhat amusing thing is that we're in a retain loop here too, so
that last false is simply indicating that we should drop the projectile we just spent damaging an enemy.
With this in place in the update method, enemies will now disappear when they're killed. The towers stop shooting, and the game slams to a halt. So this leads naturally to the next thing we need to do.
Spawning and moving enemies ↩
The ReadyState is basically our generic game tick timer that we can easily use to setup the
interval to spawn enemies at. It would be simple to pick a formula that ramps up over time as well to
make them come in faster over time to provide some challenge. And, of course, it would eventually bring
the player into a game over state.
What we don't have, that's sort of the obvious thing, is that if we were to spawn an enemy. It won't move anywhere. We've drawn a path, but we haven't actually made anything fall the path because it's all just smoke and mirrors. While thinking about the enemy and projectile collision ideas, it occurred to me that there could be a sort of simple way to make an enemy follow a path without having to duplicate a bunch of commands over and over again between each instance.
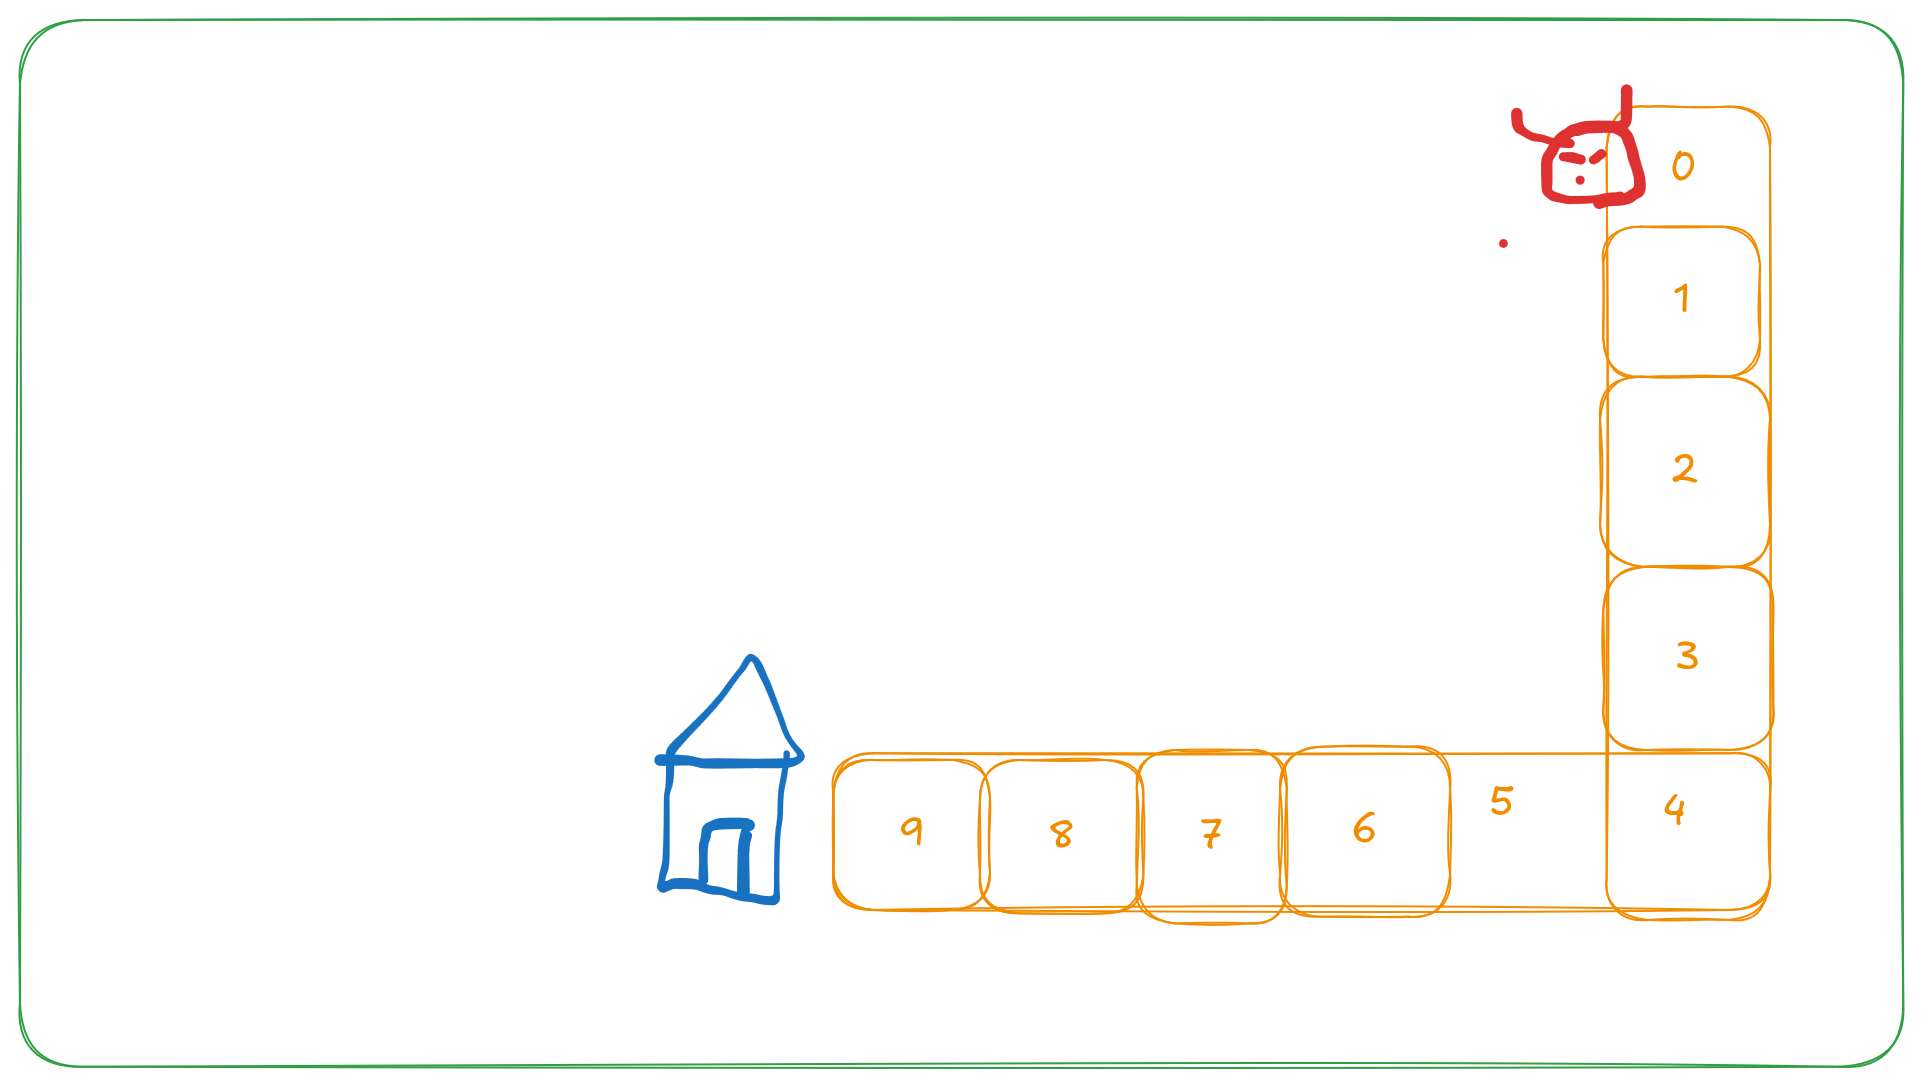
If we define the road that the enemies will take as a list of tuples or Rects and store that in the level struct, then we can have each enemy start at 0, then on a cooldown timer, bump it up. Each enemy can independently advance forward along the road without having to track where they are there. Of course, figuring out how to make an enemy move along the path smoothly is sort of an open question there too. But I like this idea, and you might be thinking:

what happens when we run out of road? Well. That means we're at the base! And so if an enemy reaches the end,
then they can start doing damage to our base! So we also sort of end up with an easy way to find out if the
base should be damaged, which can help lead us to a game over state for the whole game! This idea is just
getting better and better! I imagine there's a snag in here somewhere, but let's start implementing things
to find out what's what. We can re-use the Rect struct since I like being able to refer to .x
rather than .0 and it makes it easier to remember which is which:
struct LevelScene {
    ...
    path: Vec<Rect>,
}
Recreating the path we have can be done with the existing loop, we just need to tweak things a bit. For reference, the code in the draw method is this:
for (r, c, cell) in layout.iter_cells() {
    let src = match (r, c) {
        (16, c) if c > 3 && c < 28 => self.road.get_rect(),
        (r, 27) if r < 16 => self.road.get_rect(),
        _ => self.grass.get_rect(),
    };
    ...
We don't need the grass part obviously, but the other parts we can convert into a mapping operation:
fn initial_path() -> Vec<Rect> {
    (0..32).rev()
        .flat_map(move |c| {
            (0..18).filter_map(move |r| {
                if r == 16 && c > 3 && c < 28 {
                    Some(Rect::new(c, r, 40, 40))
                } else if r < 16 && c == 27 {
                    Some(Rect::new(c, r, 40, 40))
                } else {
                    None
                }
            })
        })
        .collect()
}
We could also just constrain the range to the values we care about, but transferring what we had before over quickly is a decent way to make sure this whole idea works before we consider optimization. Now, obviously, the rectangles "size" doesn't mean anything since we're just using these as named tuples because I'm too lazy to declare a new enum right now. Moving right along though, there's actually not too many changes to do to make the enemies walk along our new path!
The enemy needs both the path index we talked about, as well as the speed which the cooldown takes before they take another step:
struct Enemy {
    ...
    path_index: usize,
    speed: u32,
}
We can define the default for the path_index to start at 0 obviously, and an arbitrary amount
for how many game ticks to take per step could be 120 (2 seconds). We can always tweak the amount as we go,
or assign random values if we felt like it. Taking our new values into account in the update method is pretty
straightforward:
fn update(&mut self, ticks: u32) {
    self.ready_state = advance_ready_state(self.ready_state, ticks);
    match self.ready_state {
        ReadyState::Ready => {
            self.path_index = self.path_index.saturating_add(1);
            self.ready_state = ReadyState::Cooldown {
                wait_for: self.speed,
                ticks_waited: 0,
            };
        }
        _ => {}
    }
    self.sprite_info.advance(ticks);
}
All that really changes is we update our index every time the cooldown swaps back to ready, and then to make sure we take more than one step, we reset the state to a cooldown based on our speed. Simple. Then, when we're updating the enemy, and BEFORE we check if any projectiles have hit the enemy yet, we assign the position based on the path to the enemy:
for enemy in &mut self.enemies {
    enemy.update(ticks);
    let tile = self.path[enemy.path_index.min(self.path.len() - 1)];
    enemy.position.y = tile.y;
    enemy.position.x = tile.x;
    ...
And that's all we need to do to make our little teto walk along the road:
I was originally going to tweak the enemy to linearly move, similar to the projectiles with the slight difference that I was thinking that we could use the cooldown ticks as a linear interpolation progress value to shift the enemy within the cell. But I kind of like the walky walky walky, poof on the next tile! feeling of how it works right now. We'll see if that feeling holds when there's more than one enemy on the screen.
Let's chat about spawning the enemies now. The simplest thing I can think of is that the difficult setting is just a number, and it either increases and the cooldown timer for spawning an enemy goes down based on a formula, or we do something like tetris where there's distinct cooldown between spawns associated with an overall level for a while. I think that one makes sense, we can say that something like every 10 enemies is a round, and each round the spawn timer gets a bit faster until the whole world is lagged to hell and there's no way the player can hope to finish the game.

Okay maybe we wont' be that evil and we'll cap it. I guess. Having a constant spawn rate of every game tick sure does sound like a great way to lag the game and make it or your computer crash I suppose. So let's not, instead, let's just add in a new counter to the top bar for how many enemies you've defeated so far and then go from there.
pub struct TopBar {
    ...
    money: u32,
    defeated: u32,
}
... later on, in LevelScene update ...
self.projectiles.retain_mut(|projectile| {
    ...
    self.enemies.retain_mut(|enemy| {
        ...
        if enemy.health.current != 0 {
            return true;
        }
        self.top_bar.defeated = self.top_bar.defeated.saturating_add(1);
        eprintln!("Enemy defeated");
        done = true;
That gives us our counter! Continuing to think, we could use the "difficulty" of a round as a chance of spawning maybe to add some variety instead of just something that's monotonic, but I don't know. Flipping a coin each ready state to decide to spawn something versus just saying "it's been X ticks, spawn!" feels like a way for some degenerate case of 0 spawns for a very long time happening and making players think the game is busted. I think I'll encapsulate our decision making process for the spawning into a struct to make it easily changeable by me, you, or anyone else:
#[derive(Debug)]
struct EnemySpawner {
    ready_state: ReadyState,
    enemies_per_round: u32,
    spawn_in_ticks: u32,
    round: u32,
    spawned: u32,
}
For the time being, let's ignore the round and focus on getting the logic to spawn figured out.
Since I'm not really sure what the right settings are, lets just take those in as the new
instance method:
impl EnemySpawner {
    fn new(enemies_in_starting_round: u32, spawn_in_ticks: u32) -> Self {
        Self {
            ready_state: ReadyState::Cooldown {
                wait_for: spawn_in_ticks,
                ticks_waited: 0,
            },
            enemies_per_round: enemies_in_starting_round,
            spawn_in_ticks,
            round: 0,
            spawned: 0,
        }
    }
And then the update method should just move the ready state forward. It should eventually handle doing something about the round, but for now it's just a simple thing:
    fn update(&mut self, ticks: u32) {
        self.ready_state = advance_ready_state(self.ready_state, ticks);
        // TODO handle advancing round and whatnot
    }
You might have been thinking: hey how come you're not spawning an enemy in the update method? Well, I'm doing it in the spawn, and also, we're not holding onto it, but rather handing it off to the caller to deal with:
    fn spawn(&mut self) -> Option<Enemy> {
        if self.spawned >= self.enemies_per_round {
            return None;
        }

        match self.ready_state {
            ReadyState::Ready => {
                eprintln!("Enemy spawn");
                let enemy = Enemy::teto(Rect::new(27, 9, 40, 40));
                self.spawned = self.spawned.saturating_add(1);
                Some(enemy)
            }
            _ => {
                None
            }
        }
    }
}
Initially, I wanted to pass in the level struct and then just tell it to add the enemy to the list directly. But, perhaps unsurprisingly, rust didn't like that. Sure, you can do it, but then the moment you try to do something like:
self.enemy_spawner.spawn(&mut self);
the borrow checker starts complaining about the self being used and moved and all that usual stuff. But, if we just pass the enemy up to the caller? No borrow issues and things are happy. Which is what we do:
struct LevelScene {
    ...
    enemy_spawner: EnemySpawner,
}
and then we can update the update method of the level scene to call those two:
self.highlight.advance(ticks);
self.enemy_spawner.update(ticks);
if let Some(new_enemy) = self.enemy_spawner.spawn() {
    self.enemies.push(new_enemy);
}
for tower in &mut self.towers {
    tower.update(ticks);
}
Surprisingly, it's that simple to get more enemies spawning in:
Considering that that's 10 tetos all on top of each other. Maybe unsurprisingly, it's not actually that simple. You see, there's one little bug that becomes more obvious if we log the enemy spawning in addition to the number of ticks we're advancing by:
advance enemy_spawner by 1
Enemy spawn
advance enemy_spawner by 0
Enemy spawn
advance enemy_spawner by 0
Enemy spawn
advance enemy_spawner by 0
Enemy spawn
advance enemy_spawner by 0
Enemy spawn
advance enemy_spawner by 0
Enemy spawn
advance enemy_spawner by 0
Enemy spawn
advance enemy_spawner by 0
Enemy spawn
advance enemy_spawner by 0
Enemy spawn
advance enemy_spawner by 1
Enemy spawn
advance enemy_spawner by 0
advance enemy_spawner by 0
When the game is waiting for the next tick, but still calling the update method with a 0 tick count, the ready state is apparently still ready, and we end up triggering the spawn quite a bit. So, that's an easy fix. We need to make sure that when we spawn, we go back to cooldown mode:
self.enemy_spawner.update(ticks);
if let Some(new_enemy) = self.enemy_spawner.spawn() {
    self.enemy_spawner.cooldown();
    self.enemies.push(new_enemy);
}
and of course the cooldown method is pretty simple:
fn cooldown(&mut self) {
    self.ready_state = ReadyState::Cooldown {
        wait_for: self.spawn_in_ticks,
        ticks_waited: 0,
    };
}
And most importantly, it's fixed now! As you can see by the fact that there's tetos on different blocks and they're not all bundled up together. Our ever onward marching Tetos are off to attack the base!
Speaking of that though, we haven't actually dealt with what happens when the Teto crosses the road, as it were.
When she reaches the end of her rope road and flips out starts causing damage to our base.
Like I said before, we can detect this when Teto reaches the maximum value of the index in the path, and
so our ideal code could look like this:
for enemy in &mut self.enemies {
    ...
    let tile = self.path[enemy.path_index.min(self.path.len() - 1)];
    enemy.position.y = tile.y;
    enemy.position.x = tile.x;

    if enemy.can_attack(self.path.len()) {
        let damage = enemy.attack();
        self.base.health.damage(damage);
    }
    ...
The red methods don't exist yet, but they will soon! Or, well. Maybe. I started to implement them, getting as far as this
fn can_attack(&self, path_length: usize) -> bool {
    if path_index > self.path_index {
        return false;
    }

    // I think we need to refactor update to not immediately cooldown
}

fn attack(&mut self) {
    self.ready_state =  ReadyState::Cooldown {

    }
}
then realized. We are spinning two cherry stems in our mouth. Intertwining them into an impressive looking knot, but not one that we need to in order to enjoy their bountiful sweetness. Why, oh why, am I trying to use the ready state for both the walk and the attack? Reduce, Reuse, Recycle is all well and good in the world of sustainability, but that doesn't really apply to code. See, the problem is that right now we advance to cooling down when we hit the ready state right away in our update method:
fn update(&mut self, ticks: u32) {
    self.ready_state = advance_ready_state(self.ready_state, ticks);
    match self.ready_state {
        ReadyState::Ready => {
            self.path_index = self.path_index.saturating_add(1);
            self.ready_state = ReadyState::Cooldown {
                wait_for: self.speed,
                ticks_waited: 0,
            };
        }
        _ => {}
    }
    self.sprite_info.advance(ticks);
}
That wasn't a problem when we were walking since everything was nicely contained. But when it comes to
attacking, "can_attack" needs both our path index to be greater than the length of the path and for us
to be ready. But as you can see, when we advance to the ready state, we also instantly enter cooldown
after bumping the path index. So the current state counter is only useful for walking. If we
want to use it for both walking and attacking, then we need to let it stay ready until it is
consumed. Much like the projectiles and how we explicitly call tower.cooldown();
So I see two paths forward here. One, we keep the walking as is, and we add in a new countdown for the attacking. This is sensible, for example, when you play a shooter game you can run and shoot, you can throw a grenade and fire a gun and you have to wait for a cooldown before you can do it again (even if it's a small one). So a separate counter makes sense.
On the other hand, If we move the update out and instead make some kind of walk method that
checks if the path has road ahead and we're ready, then consumes it, then we can also have a attack
method that does something similar. This would share the ready state, but also require us to be explicit about
when the enemy does what action from the perspective of the LevelScene update. I think that
this is also a good option, because we already do explicit action consumption there, so we'd be aligning
our ducks in a row and making the codebase more internally consistent in its usage of ReadyState
I like option two more than one since consistency across usage feels like I'll remember things better in a month or two when looking at the code again. So, the call site changes to:
for enemy in &mut self.enemies {
    enemy.update(ticks);
    enemy.walk(&self.path);
    if let Some(damage) = enemy.attack(&self.path) {
        self.base.health.damage(damage);
        eprintln!("Damage base by {:?}, health {:?}", damage, self.base.health);
    }
I suppose if we updated the update method to take the path in, we could combine all the
logic, but I like having it split out like:
fn walk(&mut self, path: &Vec<Rect>) {
    let last_index = path.len() - 1;
    if self.path_index >= last_index {
        // Do not consume ready state if we cannot walk
        return;
    }
    match self.ready_state {
        ReadyState::Ready => {
            self.path_index = self.path_index.saturating_add(1);
            let tile = path[self.path_index.min(last_index)];
            self.position.y = tile.y;
            self.position.x = tile.x;
            self.ready_state = ReadyState::Cooldown {
                wait_for: self.speed,
                ticks_waited: 0,
            };
        }
        _ => {}
    }
}

fn attack(&mut self, path: &Vec<Rect>) -> Option<u8> {
    let last_index = path.len() - 1;
    if self.path_index < last_index {
        return None;
    }
    match self.ready_state {
        ReadyState::Ready => {
            self.ready_state = ReadyState::Cooldown {
                wait_for: self.speed,
                ticks_waited: 0,
            };
            let damage = 10; // TODO store it per enemy かしら.
            Some(damage)
        },
        _ => None,
    }
}
As even though I'm duplicating that match, the intention is really clear. We're consuming the ready state
so that we don't do anything funny with applying the damage repeatedly, though I suppose attack
having a side effect like this isn't as intentional as a separate cooldown method, but eehhh.
I like this enough that for the moment, I'll skirt away from my idea of consistency to take this path for the
time being. If I get the itch later to DRY things up, I suppose making a closure taking method could wrap the
match + cooldown stuff up, but that's polish for the future.
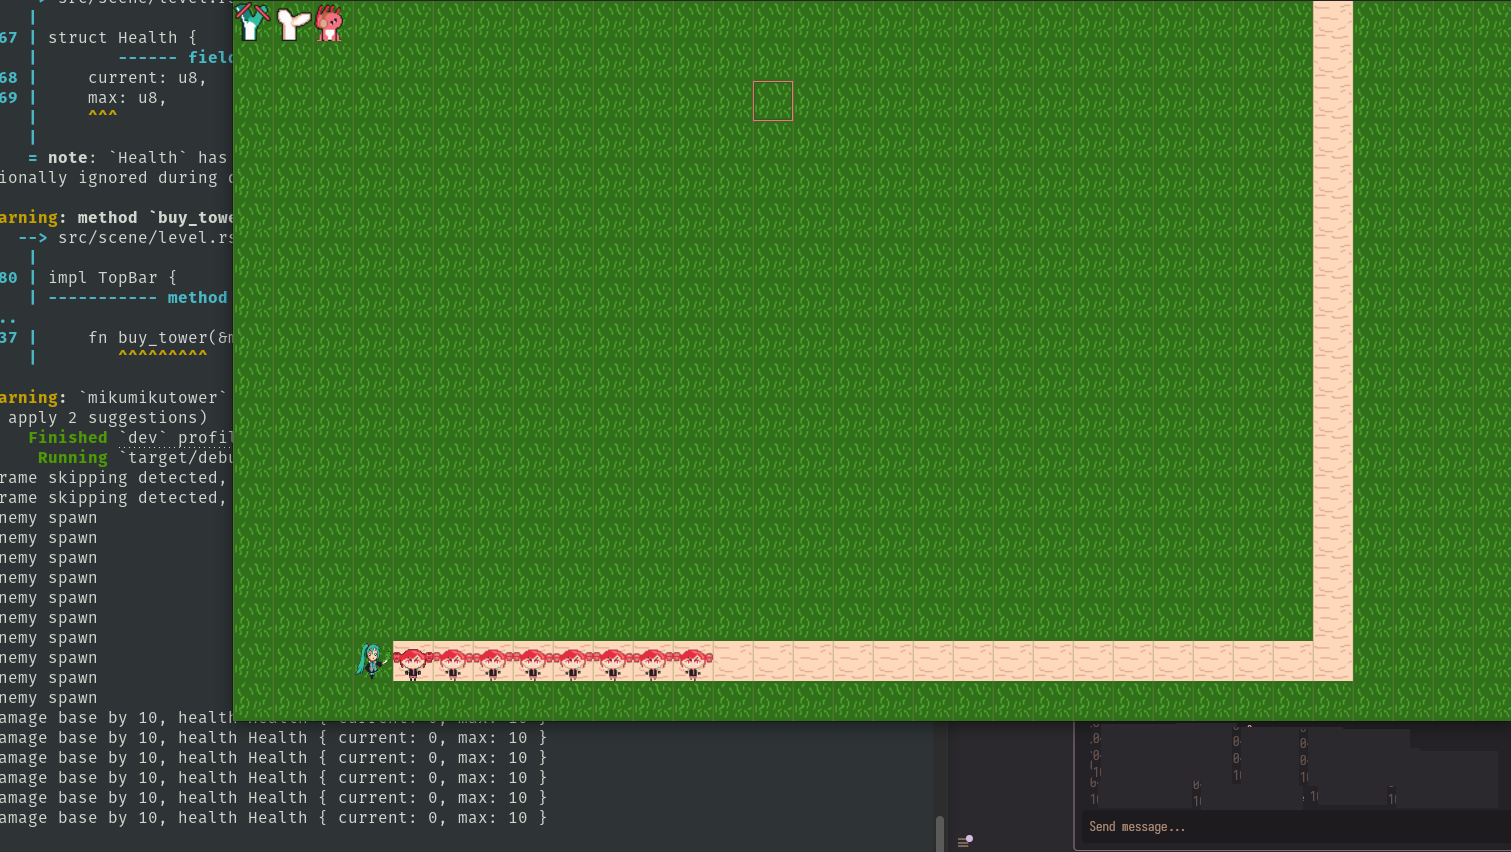
Right now, it's thankfully working and we're getting the damage on the base. We can probably drop the damage down to 1, rather than 10, but besides that we just have one last thing to handle before we can call this section done. We spawn 10 enemies, and that's it! We need to implement the rounds idea! One gameplay question we should decide is if a round can start while the enemies from the previous round are alive or not. Given that we want to generally lean in favor of the player, I'd think not.
So then that means that advancing to the next round would be done explicitly from the update method of the
level scene. This isn't terribly hard to program in as long as we keep the ready state in mind as part of
our trigger to avoid the same spawn issue we had with the enemies being triggered multiple times within a short
period of time. Within the EnemySpawner we can make a new method to start a new round:
fn start_next_round(&mut self) {
    match self.ready_state {
        ReadyState::Ready => {
            self.round = self.round.saturating_add(1);
            self.spawned = 0;
            self.enemies_per_round = self.enemies_per_round.saturating_add(self.enemies_per_round / 3);
            self.spawn_in_ticks = (self.spawn_in_ticks - 5).max(10);
            eprintln!("New round {:?} ", self);
            // TODO maybe increase damage by 1 per every 5 or so rounds?
            // TODO maybe increase speed by ? per every 5 rounds or so?
            // TODO maybe increase health by ? per every 5 rounds or so?
            self.cooldown();
        },
        _ => {}
    }
}
There's a lot of questions of balancing here. Initially, I tried out a /2 for the additional
enemies and also a -1 for the increase in spawning time, but that really wasn't enough. It
was still trivially easy to block every Teto with a simple two Luka tower setup.
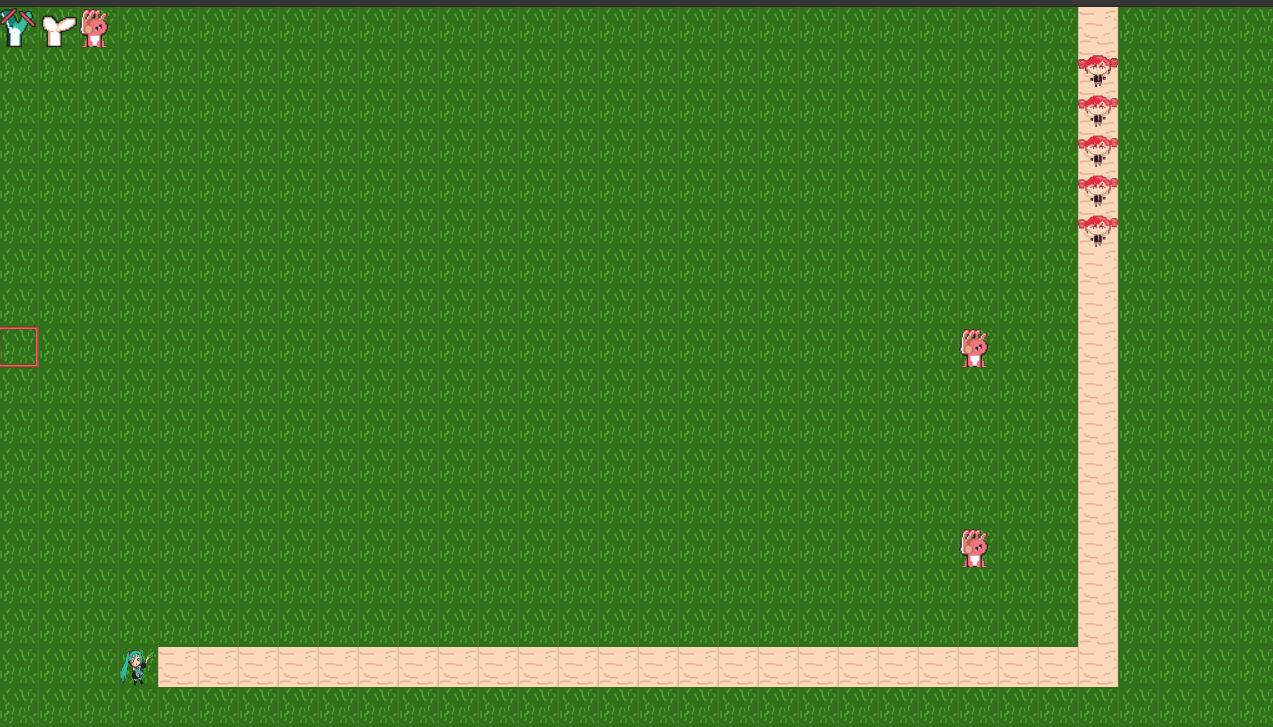
So before we call this game "done" we'll need to further refine the balance of the game in order to make it actually interesting to play. But that can come later when we polish, for now, we just need to actually call the function to start the round:
if self.enemies.len() == 0 {
    self.enemy_spawner.start_next_round();
}
Yup. That's it. Nice and simple. This code is in our LevelScene's update method,
after we process all the projectiles and kills and all that. That way if we beat all the enemies, we can start
up the next round right away. So I suppose one can sort of play the game now. Emphasis on sort of.
Let's move on to our next (scary) task17.

Fonts and flyouts ↩
There are two ways to do fonts that we know of. Three if you want to consider doing fonts entirely from scratch like Sebastian Lague did. But two that we've used in our projects so far. The first is to use some form of library to render a TTF or bitmap font based on a file. Egor used cosmic-text to do this.
The other method, which we used when we made the slot machine, is to have a spritesheet for the characters we care about. At the moment, I don't really have the desire to learn how to properly integrate cosmic text with SDL, or figure out how that SDL font extension works, and I really just want to do something simple and easy that I understand without having to learn an entirely new domain about glyphs, kerning, and all that fun stuff.
As per usual, I found some free assets on itch.io! And was lucky enough that a monospace font that seemed promising happened to include a PNG sheet for its font! The BoldPixels font by YukiPixels is creative commons licensed, and so long as we give credit, we're good to use it and even redistribute it. Which means I don't have to worry about any sort of infringement by committing the fontsheet to my git repo. Always nice when we can keep everything together in one place.
The only troublesome thing is that the map includes padding space and white background:
The white background is actually a bigger problem than the padding, as we've got a handy dandy trick to deal with that. The padding issue is a programmatic problem, with a programmatic solution. Remember how we already have a way to define cells in a layout? A grid layout?
const FONTSHEET_LAYOUT: GridLayout = {
    GridLayout {
        area: Rect {
            x: 0,
            y: 0,
            width: 145,
            height: 1412
        },
        rows: 83,
        columns: 16,
        cell_gap: 1,
    }
};
Lucky for us, the PNG is in a spritesheet, and our grid layout can handle the padding with the cell gap defined as one. The PNG's sheet does start at the space character though. Which in ASCII is 32. So, if you think about the cells as being a big array of data, and our incoming strings we want to draw as being ASCII characters in a list. It becomes pretty simple to define a function that can convert from a string, to a list of rectangles where the glyphs are that need to be drawn:
pub fn get_rects_for_str(str: &str) -> Vec<Rect> {
    // font sheet starts at space, so -32 from the character's ascii value
    // to get the index. Then we need to convert that index into
    // This is horrifically inefficient, but for testing it should be okay:
    let cells: Vec<Rect> = FONTSHEET_LAYOUT.iter_cells().map(|(_, _, r)| r).collect();
    str.chars()
        .map(|c| {
            let ascii = c as u32;
            if ascii > 127 {
                cells[0].clone()
            } else {
                cells[ascii as usize - 32].clone()
            }
        })
        .collect()
}
The above code is inefficient, as noted by the comment. But you can assume that if it does pose a problem
for us, that we could compute the row and column based on the character value and request the Rect
for it directly from the layout. For now, because this is dead simple and it's not causing any slowdown in our
game when I run it, I'll leave it as is.
Using the source cells for the spritesheet is much the same as usual. For example, if I wanted to quote the wonderful song Anamanaguchi then I could use the following code:
// FONT TEST
let rects = get_rects_for_str("MIKU MIKU OO EE UU");
let mut font_cells = rects.into_iter();
let r = 14;
for c in 9..=27 {
    let Some(src) = font_cells.next() else {
        continue;
    };
    let cell = layout.cell_rect(r, c);
    renderer.send_command(RenderCommand::DrawRect {
        texture_id: TEXTURE_ID_FONTSHEET,
        source: src,
        destination: cell,
    });
}
Which, somewhat blurrily, displays the expected text:
That this works first try doesn't surprise me, but this usefulness does mean that we need to
deal with a bug I've been putting off in the grid layout function. Or, well, we don't have to
deal with it right now, but the moment we want to put font into a "button" and do something
when the mouse is over that grid, we have to resolve an issue in the cell_for_mouse
method.
But before we do that, the white background is a problem. Thankfully, since the license says we're free to edit the file, all I need to do is replace the white background with transparency and lo and behold:
Singing a lyric to the tune of the screen is all dandy, and I do really get a kick out of being able to re-use the grid layout for something again, but let's use our new ability to make the top bar something that's actually informative for users. Specifically, we have money in the background! We've got the current round! Each turret cost a certain amount! All of this info should be displayed on the screen and now that we've got a font and a way to render it, we can do just that!
I think it will look nice if we center the font in the middle of a cell, so we can define a handy helper to do that. Since we'll be processing glyph by glpyh, we'll need to take in an index about the x offset, but besides that, it's just basic "give me the center of this box" type stuff:
fn center_font_in_tile(anchor: Rect, font_cell: Rect, str_index: isize) -> Rect {
    let (cx, cy) = anchor.center();
    Rect {
        x: cx + str_index * font_cell.width,
        y: cy - font_cell.height/2,
        width: font_cell.width,
        height: font_cell.height,
    }
}
Then, if I update our TopBars draw method to borrow our base struct, we can display
the health information easily enough:
fn draw(&mut self, game_context: &mut GameContext, layout: &GridLayout, base: &Base) {
    let rects = get_rects_for_str(&format!("Base Health {}/{}", base.health.current, base.health.max));
    let mut x_offset = 0;
    let font_cells = rects.into_iter();
    let start = layout.cell_rect(0, 1);
    let (tile_cx, tile_cy) = start.center();
    for (c, src) in font_cells.enumerate() {
        let cell = center_font_in_tile(start, src, c as isize);
        x_offset = cell.x + cell.width;
        renderer.send_command(RenderCommand::DrawRect {
            texture_id: TEXTURE_ID_FONTSHEET,
            source: src,
            destination: cell,
        });
    }
We define our anchor point in terms of the overall grid space, but then for drawing the fonts I can keep the
font a bit more clear if I don't scale it, and keep it within the font size it expected. Since the font I
grabbed is 16px tall, this is smallish but it's still readable. This is the limitation of the spritesheet
approach for fonts unfortunately, and while I'd love to implement slug
to have constant crisp font at any size, that's not something for me to explore today. Because I don't know how
much space the font is taking up until I render it, we can keep track an x_offset between the parts
of the top bar ui to push things along dynamically. So, once we're done rendering the base health we can render
the money on its right:
    let (_, _, start) = layout.cell_for_mouse(Some(((x_offset + start.width * 2) as f32, (start.y + 1) as f32))).expect("todo remove this");
    let rects = get_rects_for_str(&format!("Money ${}", self.money));
    let font_cells = rects.into_iter();
    let (tile_cx, tile_cy) = start.center();
    for (c, src) in font_cells.enumerate() {
        let cell = center_font_in_tile(start, src, c as isize);
        x_offset = cell.x + cell.width;
        renderer.send_command(RenderCommand::DrawRect {
            texture_id: TEXTURE_ID_FONTSHEET,
            source: src,
            destination: cell,
        });
    }
However, the turret selection is a little bit more tangled. Not the text or the offset, that's easy:
    let (_, _, start) = layout
        .cell_for_mouse(Some((
            (x_offset + start.width * 2) as f32,
            (start.y + 1) as f32,
        )))
        .expect("todo remove this 2");
    let rects = get_rects_for_str(&format!("Turret Select:"));
    let font_cells = rects.into_iter();
    let (tile_cx, tile_cy) = start.center();
    for (c, src) in font_cells.enumerate() {
        let cell = center_font_in_tile(start, src, c as isize);
        x_offset = cell.x + cell.width;
        renderer.send_command(RenderCommand::DrawRect {
            texture_id: TEXTURE_ID_FONTSHEET,
            source: src,
            destination: cell,
        });
    }
No, the tangled part is the fact that the drawing of the fonts and top bar is now dynamic, which means the turret positions aren't fixed. Which means that it makes life a little bit annoying because we need to detect (in the update method) that the user has clicked on one of these. We can't just draw it wherever, since then the numbers wouldn't line up, so instead, I've got a small hack:
    let tower_offset = x_offset + start.width;
    // This is a one time shift and unpure state modification within the draw because
    // tower positioning needs to align with the above text, but also needs to be accurate
    // for hover detection and such.
    let (r, c, start) = layout
        .cell_for_mouse(Some(((tower_offset) as f32, (start.y + 1) as f32)))
        .expect("todo remove this 2");
    if c > self.miku_tower.position.x as usize {
        for (idx, tower) in vec![
            &mut self.miku_tower,
            &mut self.rin_tower,
            &mut self.luka_tower,
        ]
        .into_iter()
        .enumerate()
        {
            tower.position.x = tower.position.x + c as isize;
        }
    }
I don't likechanging the state from a draw call. It feels wrong. And if I was going to be a purist about this, I'd say we should bite the bullet and calculate the font sizes and positions and all that jazz in the update method. But I don't like that very much. "Put the text on the screen" feels very much like a draw screen concern. I could definitely compute the text in the update method, then iterate and display it in the draw method, and if we have performance issues calculating the same font glyphs over and over without caching them every time, then yes, sure, we should do that. But this works and I'm not looking to do a deep dive into laying out glyphs in this post. That feels like it could be its own thing and we'd probably end up studying the inner workings of cosmic-text like we studying the doukutsu codebase.
With the hack in place to shift the grid cells over the one time we need to though, the old code to render the turrets remains entirely unchanged, and the towers line themselves up (and are clickable for placement) in the way one would expect them to be:
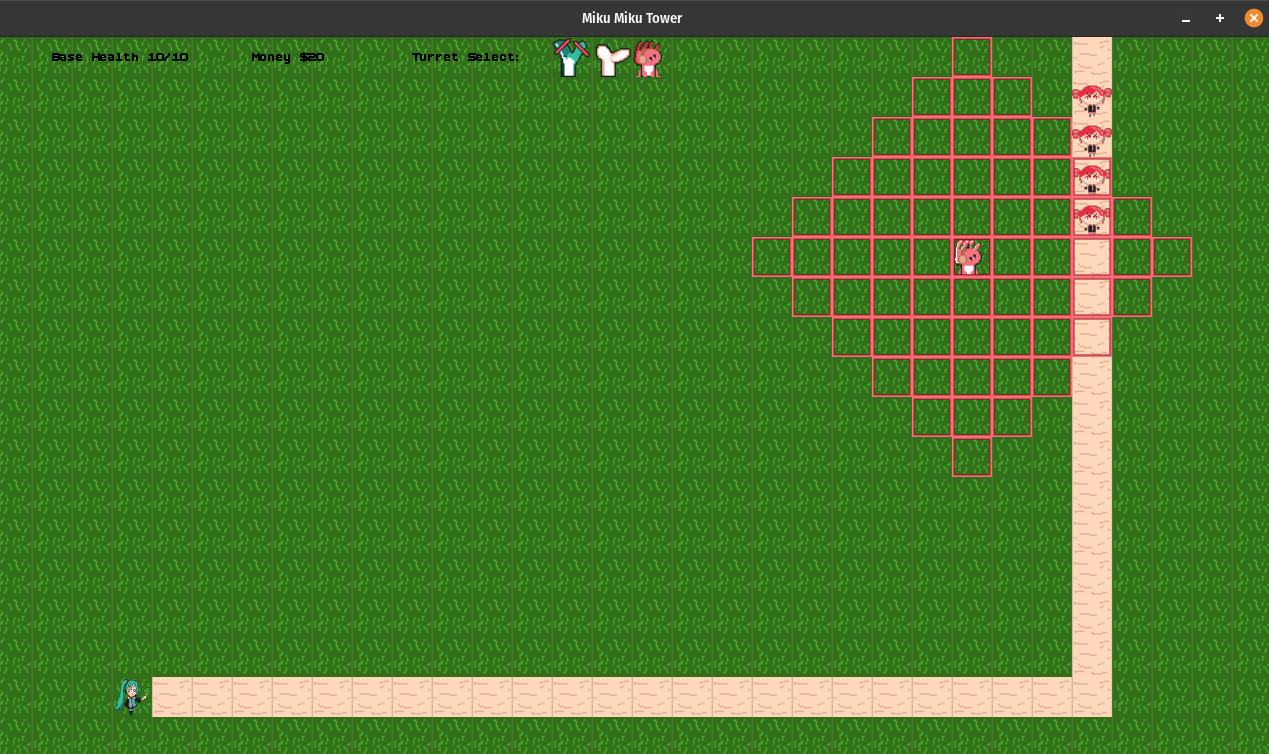
Is the black on green hard to read? Yes. Yes it is. But we needed to run something along the top anyway, so that's just a texture away! Well, assuming I can manage to draw a background that doesn't feel crappy and that tiles well.
... in our constants file ...
pub const fn sprite_info_topbar_bg() -> SpriteInfo {
SpriteInfo {
start_x: 32 * 17,
start_y: 0,
width: 32,
height: 32,
frames: 1,
current_frame: 0,
framerate_per_second: 60,
delta: 0,
}
}
... and in our drawing method ...
for (r, c, cell) in layout.iter_cells() {
if r > 0 || c > 19{
break;
}
let src = self.bg.get_rect();
renderer.send_command(RenderCommand::DrawRect {
texture_id: TEXTURE_ID_LEEKSHEET,
source: src,
destination: cell,
});
}

That looks pretty good. You might be asking "okay but how does the user know how much each tower costs? Or how much damage it does?"
That's a good question you've just popped up, and therein lies our answer too. I think if I put the cost next to each tower, we'd run out of room kind of fast if we add more towers and stuff. I'm not planning on adding more towers, mind you, but I like the idea that when you hover over it it flies out a pop up to show you the information. That said, I'd like to fix a bug that we have in our grid layout code before we implement that.
Remember our cell_for_mouse method? Of course you do, we just used it to convert screen coordinates
to grid ones! Well, upon reflection of the code, I've realized we've missed something in it that renders the use
case of the GridLayout, like a pop up. difficult. This is our current code:
pub fn cell_for_mouse(
&self,
mouse_position: Option<(f32, f32)>,
) -> Option<(usize, usize, Rect)> {
if mouse_position.is_none() {
return None;
}
let (x, y) = mouse_position.unwrap();
let (dx, dy) = self.cell_size();
let x_idx = x.floor() as isize / dx;
let x_idx = x_idx as usize;
let y_idx = y.floor() as isize / dy;
let y_idx = y_idx as usize;
let rect = self.cell_rect(y_idx, x_idx);
Some((y_idx, x_idx, rect))
}
Can you spot the bug? I'll give you a hint, it's not something we're doing. It's something we're not doing. The corrected code is:
...
let (mouse_x, mouse_y) = mouse_position.unwrap();
let (origin_x, origin_y) = self.origin();
let (cell_width, cell_height) = self.cell_size();
let step_x = cell_width + self.cell_gap;
let step_y = cell_height + self.cell_gap;
let relative_x = mouse_x as f64 - origin_x as f64;
let relative_y = mouse_y as f64 - origin_y as f64;
let c = (relative_x / step_x as f64).floor() as isize;
let r = (relative_y / step_y as f64).floor() as isize;
if r < 0 || c < 0 {
return None;
}
let r = r as usize;
let c = c as usize;
if r >= self.rows || c >= self.columns {
return None;
}
Some((r, c, self.cell_rect(r, c)))
As you've probably gleaned from the names of the variables, we weren't taking the relative position of the potential grid into account. If the origin of our grid wasn't 0,0 and the cell padding was something greater than 0, our world to cell positioning would be slightly off. Potentially causing problems if we were to use a different grid layout in some way.
What's that you say? Why are we chatting about the grid layout again? Because! If we use a smaller grid, that's offset near to the turret you're hovering over, or even at your current mouse position, we can position help text to the user in a clear way that will move with their point. We could also make "buttons" with text in them using a grid layout this way! And, if we make a button, we definitely want our mouse to cell type behavior to work as expected18!
Also, the function name has been bothering me, so while we'll keep the "mouse" method in place, I'm going to delegate it out to a helper that does the work. Why? Because it feels wrong to use something that says "mouse" for generic screen to cell changes like we did in the font offset calculations. It's better to call it what it is:
pub fn cell_for_mouse(
&self,
mouse_position: Option<(f32, f32)>,
) -> Option<(usize, usize, Rect)> {
if mouse_position.is_none() {
return None;
}
let (x, y) = mouse_position.unwrap();
self.screen_to_cell(x, y)
}
screen_to_cell is much more explicit, and we can drop the Option from it so that we don't
have to make extra Somes at those call sites.
Shifting our attention back to the flyout. I think doing something similar to the player action is a good idea. We used
it successfully to do the placement logic, let's use the same kind of idea for the pop up displaying tower-specific information.
If we define hover_action on the struct as another Option<PlayerAction>
// TODO: maybe move to a helper if the borrow checker will let us
let Some(PlayerAction::PlaceTower(tower)) = self.hover_action.take() else {
return;
};
// If there's an on hover going on, display turrent information at the mouse:
// todo: swap to screen_to_cell
let Some((r, c, rect)) = layout.cell_for_mouse(game_context.mouse_context.position) else {
return;
};
let anchor = layout.cell_rect(r + 1, c);
let (csx, cxy) = layout.cell_size();
let popup_layout = GridLayout {
area: Rect::new(anchor.x, anchor.y, csx * 4, cxy * 4),
rows: 4,
columns: 1,
cell_gap: 4,
};
than displaying it isn't too hard. We use the main grid (layout) to find some open cells
near where our mouse is hovering. But then we swap over to defining out own popup layout that's just
suited to our needs. There's only one column, and that makes it mostly easy to add about 25% padding
to the left side to get a nicely centered look and feel for the text.
for (r, c, mut cell) in popup_layout.iter_cells() {
let src = self.bg.get_rect();
renderer.send_command(RenderCommand::DrawRect {
texture_id: TEXTURE_ID_LEEKSHEET,
source: src,
destination: cell,
});
let glyphs = match r {
0 => get_rects_for_str(&format!("Damage {}", tower.damage)),
1 => get_rects_for_str(&format!("Cost {}", tower.cost)),
2 => get_rects_for_str(&format!("Cooldown {}", tower.cooldown)),
3 => get_rects_for_str(&format!("Range {}", tower.range)),
_ => get_rects_for_str(&format!("...")),
};
let font_cells = glyphs.into_iter();
let (tile_cx, tile_cy) = cell.center();
cell.x = cell.x - cell.width / 4;
for (c, src) in font_cells.enumerate() {
let mut cell = center_font_in_tile(cell, src, c as isize);
renderer.send_command(RenderCommand::DrawRect {
texture_id: TEXTURE_ID_FONTSHEET,
source: src,
destination: cell,
});
}
}
Putting aside the fact that units are in ticks at the moment. This looks pretty good:
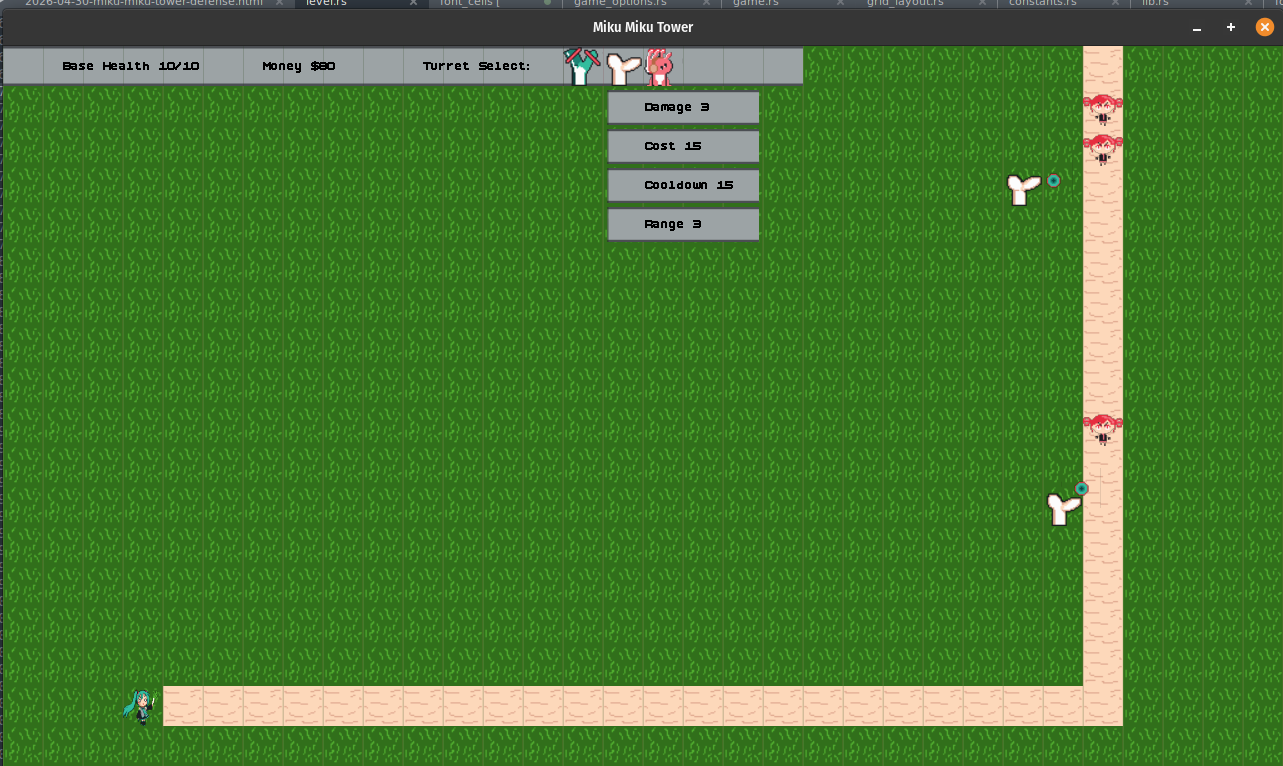
And is supported by a pretty minor update to the update method for the top bar:
+let mut not_hovering_on_tower = true; for tower in vec![ &mut self.miku_tower, &mut self.rin_tower, &mut self.luka_tower, ] { let tower_cell = layout.cell_rect(tower.position.y as usize, tower.position.x as usize); if tower_cell.contains(rect.x + 1, rect.y + 1) { +not_hovering_on_tower = false; tower.sprite_info.advance(ticks); if game_context.mouse_context.left_clicked && self.current_action.is_none() && self.money >= tower.cost { ... +} else if !game_context.mouse_context.right_clicked { + // We are currently hovering over a tower. + self.hover_action = Some(PlayerAction::PlaceTower(tower.clone())); +} } } +if not_hovering_on_tower { + self.hover_action = None; +}
I think if we wanted to make a generic pop up type thing we could. Though it would likely need to own its own copy of the data it wanted to display to appease the borrow checker. And I'd probably run into the weird sort of errors passing it the renderer or game context that I've already seen a few times. So it may the case that I shouldn't try to do that for now. It might better to focus our attention over to the big elephant in the room.
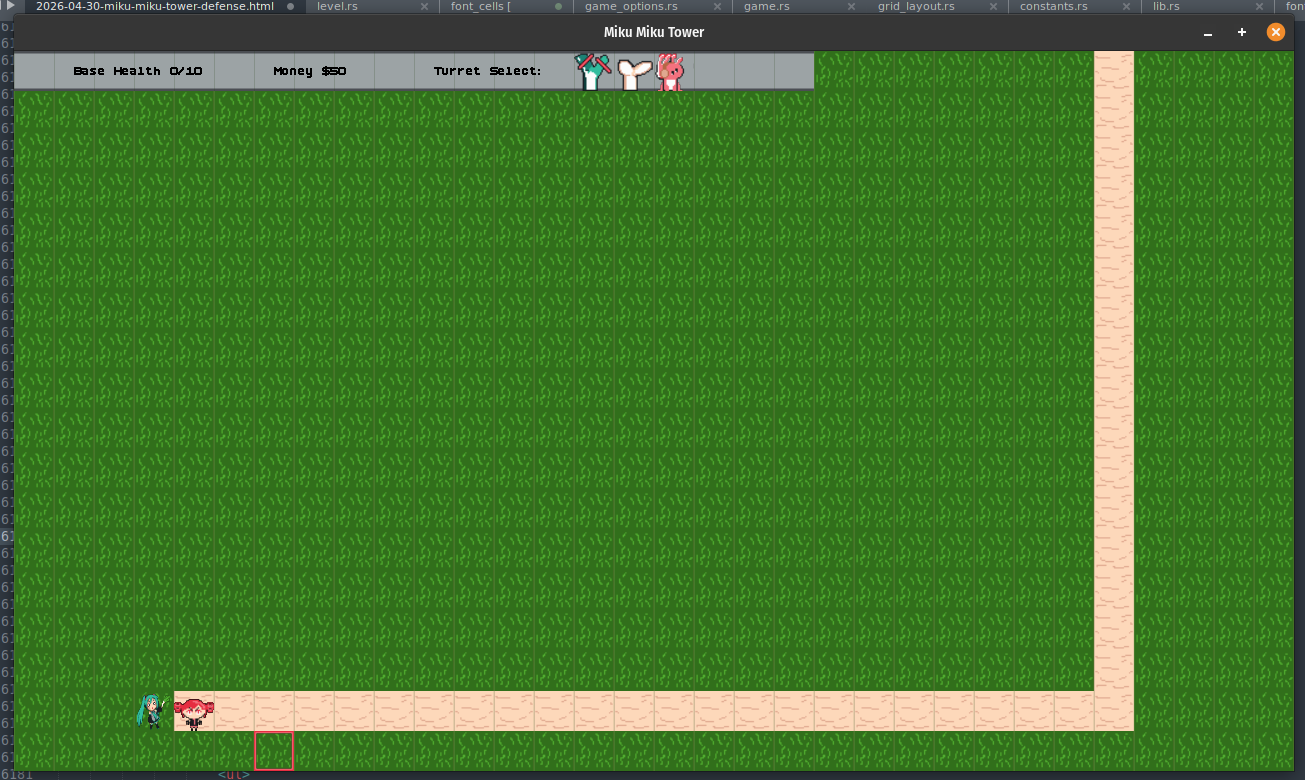
Changing scenes ↩
As you can see in the above screenshot our health is at 0, and while I could tell you this is the moment right before something amazing happens. I can't. I try not to lie. No, this is a screenshot of the game after I let it run without placing any towers and went off to go get a drink of water. 19 We currently don't do anything when the player's health runs out. And while you have to very purposefully fail right now (did I mention the game balance is WAY off?), we should get a proper game over in for when we do balance the game and make it possible for the enemy to defeat you.
We have a few hurdles to jump over before we can do this though. For one, what do we do when it happens? Obviously, we can pop up some text that says "game over", but the user should probably be able to choose to retry or quit. Should this interaction occur within our level, or outside of it? And poignantly if it's outside of it, how are we going to change the scene? We don't have the machinations to do so built into our game loop yet. Heck, if that game over scene needed to load up a new asset that wasn't used in the level previously, how would it do it?
It could be tempting to say "eh, just use a pop up and do that thing you were just talking about", and while that would push the scene issue out of the way for now, we'll still have to circle back to it when we want a title screen. Won't we? Better to get this all done today, rather than tomorrow I think. So let's dive into creating the title screen. And, while I normally advice against making assets first, this time, I've got a funny little idea and I want to make it a reality:
Ok, ok, I've shown my hand a bit soon. But you have to understand that when I started drawing the initial sprite I was laughing a good amount because it was silly, and on top of that I had to pause to go to work. And of course, while I paused, poor Miku was in the worst possible state:
Which made me laugh every time I wandered back into the room throughout the day. After getting the initial frame done, pivoting to adding the bucket of tears the poor girl is sobbing out worked great. Too well even. I was giggling at the transition between the initial sad to sobbing state each click in libresprite. A little bit of effort later and I had the image of her starting to stand and that look in her eyes. Especially when I added in her eyebrows, got me laughing again.


Now, obviously the work to setup the constants isn't anything new to load up a sprite.
pub const TEXTURE_ID_GAMEOVER: usize = 4;
...
pub const fn sprite_info_gameover_miku() -> SpriteInfo {
SpriteInfo {
start_x: 0,
start_y: 0,
width: 480,
height: 320,
frames: 3,
current_frame: 0,
framerate_per_second: 60,
delta: 0,
}
}
Rather than add onto the existing spritesheet, I made a separate file since I wanted to give myself the space to have something that was a bit bigger, and chose 480x320 since it would give us room to draw, be big enough to stretch across the screen without needing to be full 1280x720, and has multiples of 16 in it. That last point is semi-important for later.
Since this is a separate scene we need to actually set up a struct to hold the data it needs for display
purposes. The sprite for the funny miku is just another SpriteInfo, but what about the buttons
to navigate to or from the scene? Well, What we just did with the grid layout and chatted about
with the way the font glyphs work is sitting in my stomach as not good enough. And so, with our new scene,
a new opportunity arises! To test new ideas! To boldly go where we've, sort of gone before!
pub struct GameOverScene {
miku: SpriteInfo,
try_again_btn: Button,
give_up_btn: Button,
}
As you can see. We will have a Button! But to set up some context, let's ignore that for the moment
and continue going on with the scene's definition. Before we get to the trait definition to enable this to be
wired in, I'm tired of copying and pasting the layout with the same magic numbers in it. So, helper function!
impl GameOverScene {
fn layout(game_context: &GameContext) -> GridLayout {
let (screen_width, screen_height) = game_context.screen_size;
GridLayout {
area: Rect::new(0, 0, screen_width as isize, screen_height as isize),
rows: 10,
columns: 15,
cell_gap: 0,
}
}
}
For the game over scene, we're going to shift our aspect ratio a bit. Rather than 16:9, we'll go to a 3:2
ratio because that will avoid stretching our miku sprite out too much. it will probably still get a little
stretched since 3:2 and 16:9 aren't the same. But a little bit of squish and sqoosh enhances the goofy look
of the plea to keep playing the game. Since this is the layout of the overall window, it has 0 cell gap just
like the one we used in LevelScene.
I'll skip over the definition of the Default trait for the scene for now, the miku sprite info
is loaded up via the constant function we defined, and the buttons are initialized to their places with the
text they want to display, but I'll show you those when we go over the button struct. For now, the Scene
struct is really simple (probably because we don't have scene swapping figured out yet). The init method currently
does nothing:
impl Scene for GameOverScene {
fn init(&mut self, _game_context: &mut GameContext) {}
once we get around to making an asset or texture loader, we'll probably have something to do in init, but for now the meat of the trait is in the update and draw method. Looking at the update method, you might notice something similar to when we worked with the immediate mode UI library Egor:
fn update(&mut self, ticks: u32, game_context: &mut GameContext) {
let layout = GameOverScene::layout(&game_context);
self.give_up_btn.update(ticks, game_context, &layout);
self.try_again_btn.update(ticks, game_context, &layout);
if self.give_up_btn.hovered {
self.miku.current_frame = 1;
} else if self.try_again_btn.hovered {
self.miku.current_frame = 2;
} else {
self.miku.current_frame = 0;
}
}
No, it's not my poor hygiene around using some magic numbers for frame selection silly. It's the fact that this is very much an immediate mode paradigm rather than a retained mode for tracking state like if the mouse is hovering over a particular button. This obviously relies on us not having the buttons overlap, but putting that aside, the draw method is also pretty simple to follow too:
fn draw(&mut self, game_context: &mut GameContext) {
let layout = GameOverScene::layout(&game_context);
self.give_up_btn.draw(game_context, &layout);
self.try_again_btn.draw(game_context, &layout);
let Some(ref mut renderer) = game_context.renderer else {
return;
};
let cell = layout.cell_rect(0, 0);
let src = self.miku.get_rect();
renderer.send_command(RenderCommand::DrawRect {
texture_id: TEXTURE_ID_GAMEOVER,
source: src,
destination: Rect::new(cell.x, cell.y, layout.area.width, layout.area.height),
});
}
}
You might be wondering why the early return check of the renderer isn't the first thing in the method. It was when I started, but then
error[E0502]: cannot borrow `game_context` as immutable because it is also borrowed as mutable
--> src/scene/game_over.rs:181:44
|
178 | let Some(ref mut renderer) = game_context.renderer else {
| ---------------- mutable borrow occurs here
...
181 | let layout = GameOverScene::layout(&game_context);
| ^^^^^^^^^^^^^ immutable borrow occurs here
...
188 | renderer.send_command(RenderCommand::DrawRect {
| -------- mutable borrow later used here
The borrow checker doesn't like it if I pass the game context down to someone else when we're already borrowing
it as mutable. Which sure, makes sense. I could probably rewrite the early return to do an is_none check
instead of pattern matching but eh, let's just call my rust style "fluid" right now as I learn the language more and
get a feel for what seems idiomatic and what seems amusing to do. The joy of a personal project is that you can write
it in any style you want day to day and the only person who has to approve of the code is you!
Surprisingly, I didn't get too many other issues with passing things down to the buttons. Though I do sort of wonder
if when you run into this kind of thing if you're supposed to swap to an Rc or something to let
your code have flexibility? Then again, reference counting probably has a bit of overhead I suspect, and so being forced
to write your code a certain way to take advantage of not having to do that, but still doing it safely, is also
maybe the point? Anyway. Let's talk about the button struct now:
struct Button {
text: String,
rect: Rect,
hovered: bool,
clicked: bool,
bg: SpriteInfo,
highlight: SpriteInfo,
}
Sometimes I'm a little lazy with the naming. rect being the thing I'm noting here. It's the position and
the area where the button is going to be drawn. Whenever I'm throwing code together quickly to test something, meaningful names
are the first thing to go. And when they go, I tend to fall back onto the Java habits of what I was taught in college
of just naming things after their class, or in this case, struct. Then again, I don't actually think this name is that
bad since I mean, what else would a Rect in a button be for?
Anyway, the button has two state related fields and two sprites to make the button pop a bit. A background is all you need at first, but the moment you hover over a button with your mouse and nothing happens… it makes the game feel noninteractable. So, we can grab and stretch out our highlight we used elsewhere to make something respond and then everything feels more game like again. If there were other textures to use, or if I felt like making some, we could use those, but for now, that's what gets used in the defaults when we make a new button:
impl Button {
fn new(text: String, rect: Rect) -> Self {
Self {
text,
rect,
hovered: false,
clicked: false,
bg: sprite_info_topbar_bg(),
highlight: sprite_info_highlight(),
}
}
I waffled back and forth a little bit about if text should be a String or a &str but
ultimately decided that since the Button is the real owner of that text, that it should own it in memory as well.
While it owns everything here, the button doesn't exist in a vacuum and I want to tell you a bit more about that rectangle of
ours as well. Up until now, every sprite we've had has only taken up a single grid space. But the buttons are meant to span a
few more since it's not like we can fit all those font glyphs comfortably into one cell. That's fine, and the way we're going
to accomplish this is by making an internal layout for the button!
fn relative_layout(&self, parent_layout: &GridLayout) -> GridLayout {
let anchor = parent_layout.cell_rect(self.rect.y as usize, self.rect.x as usize);
let width = anchor.width * self.rect.width;
let height = anchor.height * self.rect.height;
GridLayout {
area: Rect {
x: anchor.x,
y: anchor.y,
width,
height,
},
rows: 1,
columns: 1,
cell_gap: 0,
}
}
The internal layout considers itself to be one simple block. But the coordinate space its in is still the parents, and
so we take in the parent layout to find out where our anchor point is for the top left, and then we can compute our total
width based on the parent cell size and what width our own rect has said we have. So the units all line up
so far, but we're now able to position things within the button as needed. The reason I'm using a single cell here is that
I only really want one big blob of background highlight, so it suits my needs. But technically we could do a fancy
ninepatch or something if we wanted to.
But I don't want to, and so, on to the update function. We compute our current layout (if a window is resized it might have changed between frames!) and then check to see if the mouse is within our area. If it is then great, we're currently hovering over it! And of course, if ya click, then we're clicking. So that translates into code easily enough:
fn update(&mut self, ticks: u32, game_context: &GameContext, parent_layout: &GridLayout) {
let layout = self.relative_layout(parent_layout);
let Some(_) = layout.cell_for_mouse(game_context.mouse_context.position) else {
self.hovered = false;
self.clicked = false;
return;
};
self.hovered = true;
self.highlight.advance(ticks);
if game_context.mouse_context.left_clicked {
self.clicked = true;
}
}
And unsurprisingly, the draw method is where the only real complexity is for this struct.
Drawing the background is easy, we can use our relative layout for that, and similar, if we're currently
being hovered, drawing the highlight is simple:
fn draw(&mut self, game_context: &mut GameContext, parent_layout: &GridLayout) {
let Some(ref mut renderer) = game_context.renderer else {
return;
};
let layout = self.relative_layout(parent_layout);
let mut col = 2;
let src = self.bg.get_rect();
let anchor = layout.cell_rect(0, 0);
renderer.send_command(RenderCommand::DrawRect {
texture_id: TEXTURE_ID_LEEKSHEET,
source: src,
destination: anchor,
});
if self.hovered {
let src = self.highlight.get_rect();
renderer.send_command(RenderCommand::DrawRect {
texture_id: TEXTURE_ID_LEEKSHEET,
source: src,
destination: anchor,
});
}
but the second half of the function dealing with the fonts is where there's a bit of tomfoolery that might be a bit brittle:
let glyphs = get_rects_for_str(&self.text);
let (cx, cy) = anchor.center();
for (c, src) in glyphs.iter().enumerate() {
// leave room for a glpyh on either side
let glyph_display_width = anchor.width / (glyphs.len() as isize + 2);
// mono font is same height as width (16x16 native)
let glyph_display_height = glyph_display_width;
let start_offset = anchor.x + glyph_display_width;
let cell = Rect {
x: start_offset + c as isize * glyph_display_width as isize,
y: cy - glyph_display_height as isize / 2,
width: glyph_display_width,
height: glyph_display_height,
};
renderer.send_command(RenderCommand::DrawRect {
texture_id: TEXTURE_ID_FONTSHEET,
source: *src,
destination: cell,
});
}
}
Rather than use the center_font_in_tile function, I'd like to scale the font up a little
bit and also fix it to have one glyph of padding on each side. I should technically probably
scale the glyph by the aspect ratio to accommodate the screen. But it looks fine at the moment, and if I
do something like
let glyph_display_height = (glyph_display_width as f32 * 1.5)as isize;it doesn't really change much. The kerning being off in the give up side of things is still crap looking so that's not a result of this at least.

I could probably spend hours trying to figure out what's up with that. But I don't think it's worth doing, It'd probably be better to focus the effort into something more sensible, like figuring out how to swap the scenes. In our last rust game, we did stuff like this:
enum Screens {
GameScreen,
WinScreen,
}
enum ScreenAction {
ChangeScreen { to: Screens },
NoAction,
}
And that worked decently well. But also felt sort of, hard to tweak and clunky to use. Like, yes it worked, but also that change screen guy ballooned out a little bit and I don't know. I'm curious about other ideas beyond enums and stacks. So, I looked at our favorite open source code and saw this:
game.state.get_mut().next_scene = Some(Box::new(LoadingScene::new()));
log::info!("Starting main loop...");
context.run(game.as_mut().get_mut())?;
Well. That's kind of interesting. A "next scene" variable? I wonder how this works…
pub struct Game {
pub(crate) scene: Option<Box<dyn Scene>>,
pub(crate) state: UnsafeCell<SharedGameState>,
...
It's interested to see that we've got the scene, and then the shared game state. I wonder how the loading screen that was loaded by the above code (which is at the start of the game loop initialization) ends up selecting which scene its supposed to actually load?
pub fn start_intro(&mut self, ctx: &mut Context) -> GameResult {
let start_stage_id = self.constants.game.intro_stage as usize;
if self.stages.len() < start_stage_id {
log::warn!("Intro scene out of bounds in stage table, skipping to title...");
self.next_scene = Some(Box::new(TitleScene::new()));
return Ok(());
}
let mut next_scene = GameScene::new(self, ctx, start_stage_id)?;
next_scene.stage.data.background_color = self.constants.intro_background_color;
next_scene.player1.cond.set_hidden(true);
let (pos_x, pos_y) = self.constants.game.intro_player_pos;
next_scene.player1.x = pos_x as i32 * next_scene.stage.map.tile_size.as_int() * 0x200;
next_scene.player1.y = pos_y as i32 * next_scene.stage.map.tile_size.as_int() * 0x200;
next_scene.intro_mode = true;
Interesting early return there. So that gets them to the title screen if nothing else is set.
But also, does that stages length end up with a bunch of stuff in it to track? That's
different than the next_scene guy, is this how the loading screen works? Hm. No?
impl Scene for LoadingScene {
fn tick(&mut self, state: &mut SharedGameState, ctx: &mut Context) -> GameResult {
// deferred to let the loading image draw
if self.tick == 1 {
if let Err(err) = self.load_stuff(state, ctx) {
log::error!("Failed to load game data: {}", err);
state.next_scene = Some(Box::new(NoDataScene::new(err)));
}
}
self.tick += 1;
Ok(())
}
Or at least, not unless load_stuff is doing something there. It's sort of interesting, that
tick == 1 bit means that we wait for a single game tick before trying to "load stuff" or to
start loading stuff. And it it fails then we show an error. So all assets have to load within a single tick
or else the game vomits. In SharedGameState::new, there's a whole bunch of initialization to
grab paths for textures, sounds, fonts, and other things, but it doesn't actually load the textures. It
just makes a new empty set.
pub struct TextureSet {
pub tex_map: HashMap<String, Box<dyn SpriteBatch>>,
dummy_batch: Box<dyn SpriteBatch>,
}
The texture set is pretty similar to what we're doing right now. Basically a hash of a key to a sprite that can be used. And it loads things up via various load methods, and exposes them like this:
pub fn get_or_load_batch(
&mut self,
ctx: &mut Context,
constants: &EngineConstants,
name: &str,
) -> GameResult<&mut Box<dyn SpriteBatch>> {
if ctx.headless {
return Ok(&mut self.dummy_batch);
}
if !self.tex_map.contains_key(name) {
let batch = self.load_texture(ctx, constants, name)?;
self.tex_map.insert(name.to_owned(), batch);
}
Ok(self.tex_map.get_mut(name).unwrap())
}
It's nice to see that we've got similar mechanics in our game as what I'm finding in here. Makes the ideas feel
like I'm not just flying by the seat of my pants. Putting aside the texture distraction though and returning to
the question at hand. If I look around in the shared game state files and search for usages of next_scene, I find
the answer we've been looking for. There's methods like start_intro and load_or_start_game
that all explicitly setup the next scene variable and then it lets the game loop deal with it.
There's also a scripting language that allows for scene loading by ID, as you can see here:
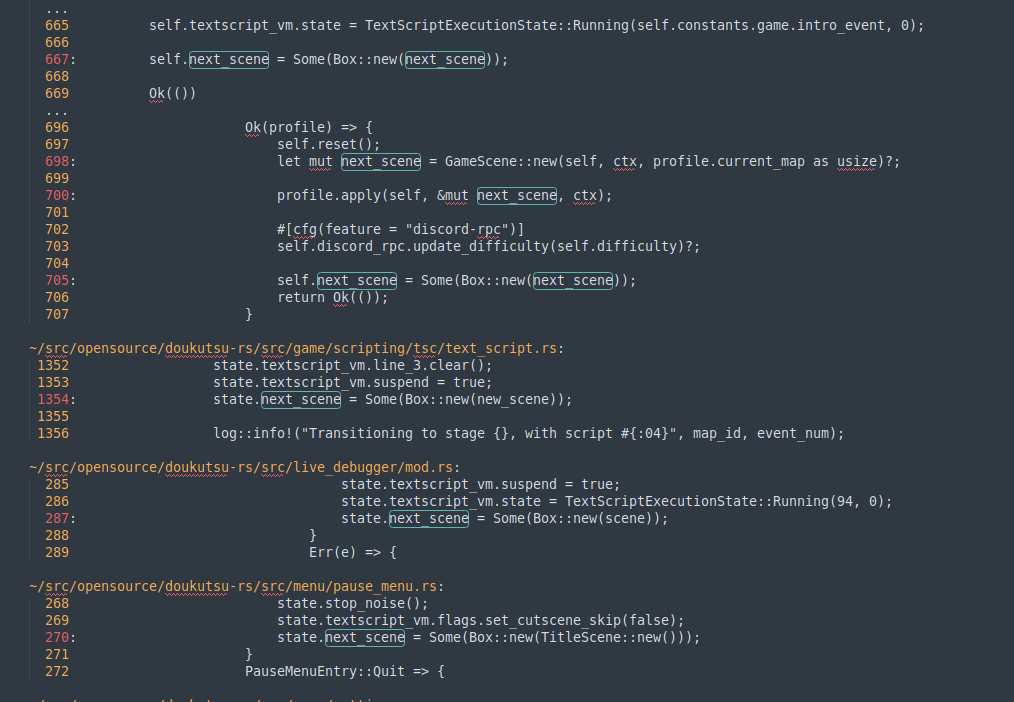
So there's a few places it's hardcoded in to go from place to place, and a few places where it's more dynamic based
on whatever is happening in the game. Neat. I'm still a little surprised that there's only a single game tick offered
to load up all the textures a scene might need, but maybe my lack of familiarity with the actual cave story game is
showing and that's not actually surprising. The LoadingScene seems to actually be something that only
happens once at the start of the game, and not so much in-between scenes while playing.
I have one more question for the doukutsu codebase. When does it happen? When do we handle the next_scene
in the code itself? Is it in update? In draw? Outside of it? Before? After? Around? Over?!
impl BackendEventLoop for SDL2EventLoop {
fn run(&mut self, game: &mut Game, ctx: &mut Context) {
...
loop {
...
game.update(ctx).unwrap();
if let Some(_) = &state.next_scene {
game.scene = mem::take(&mut state.next_scene);
game.scene.as_mut().unwrap().init(state, ctx).unwrap();
game.loops = 0;
state.frame_time = 0.0;
}
imgui_sdl2.prepare_frame(
imgui.io_mut(),
self.refs.deref().borrow().window.window(),
&self.event_pump.mouse_state(),
);
game.draw(ctx).unwrap();
}
}
...
}
It makes sense to me that you would handle the next scene after the call to update
since that's where something potentially set it. But it somewhat surprises me that the draw is immediately
after. Though maybe that shouldn't? If you've got the next scene, and you call "init" on it to prepare it,
then you should be able to draw it right away. Right? Let's give it a shot to see if anything
explodes if we try to do that. First, we should update our game context
pub struct GameContext {
pub renderer: Option<Box<dyn Renderer>>,
pub mouse_context: MouseContext,
pub screen_size: (u32, u32),
pub next_scene: Option<Box<dyn Scene>>,
}
And of course it starts as none, but now let's have the game over scene set it when we click to try again.
fn update(&mut self, ticks: u32, game_context: &mut GameContext) {
...
if self.try_again_btn.clicked && game_context.next_scene.is_none() {
game_context.queue_level();
self.try_again_btn.clicked = false;
}
if self.give_up_btn.clicked && game_context.next_scene.is_none() {
game_context.shutdown();
self.give_up_btn.clicked = false;
}
}
Just like we have in the past, and how we just saw in Doukutsu, we'll make some helper functions.
The reason why I'm also checking that the next_scene is null, is that we process a
lot of game ticks per second. The mouse context holds onto that "left button is clicked" for a while.
With the top bar, we used the current_action to guard against spammy actions, and similar,
we can use the game context itself here to guard since we know that we'll be swapping scenes as part
of this interaction. Implementing the two helper methods in GameContext are really just one
liners since it's not like we've got anything more complicated going right now:
impl GameContext {
pub fn queue_level(&mut self) {
self.next_scene = Some(Box::new(LevelScene::default()));
}
pub fn shutdown(&mut self) {
// TODO: Signal to shutdown the application. I guess.
eprintln!("I want to shut down please");
self.next_scene = Some(Box::new(TestScene::default()));
}
}
We can circle back to the shutdown method in a moment. For now, it's fine to load our previous loading
running Miku image we had as a test scene before I think. The doukutsu code had a good callout, we should
probably reset the number of ticks that have been computed when we swap the scene. That way nothing gets
told to update a bunch of times when it's only existed for a few milliseconds at most. Since we track those
things on the Game struct, we can just make a simple helper for it:
pub fn reset_for_next_scene(&mut self) {
self.tick_loops = 0;
self.next_draw_tick = 0;
}
And then, within the SDL backend loop, in-between the update and draw method we can add in the scene swapping code between update and draw:
game.update(game_context);
if let Some(mut next_scene) = game_context.next_scene.take() {
next_scene.init(game_context);
game.scene = Some(next_scene);
game.reset_for_next_scene();
}
game.draw(game_context);
This should work! But as a confidence booster (or dramatic stock crash otherwise) let's add a helper to queue up the game over screen and wire it into the game for when our health hits 0.
pub fn queue_game_over(&mut self) {
self.next_scene = Some(Box::new(GameOverScene::default()));
}
and the tweak where the enemies attack the base is simple:
...
for enemy in &mut self.enemies {
enemy.update(ticks);
enemy.walk(&self.path);
if let Some(damage) = enemy.attack(&self.path) {
self.base.health.damage(damage);
if self.base.health.is_dead() && game_context.next_scene.is_none() {
game_context.queue_game_over();
}
}
...
And does it work?
Why yes. Yes it does! It's a bit slow, but let's just pretend that dramatic build up had you on the edge
of your seat and smile together. We did it! It works! Hooray! We're not done yet though. It's cool that the
next scene process calls init on the scenes, but uh, that doesn't do anything yet since:
fn init(&mut self, _game_context: &mut GameContext) {}
Every one of our initializations looks like this. And they look like this because out backend SDL3 init function is doing all the heavy lifting:
fn init(&mut self, game_options: &GameOptions) {
// TODO: should probably move this out somewhere else
let base = get_current_directory().expect("cant get base path");
let base = base.join(game_options.assets_path.clone());
let chaim_dir = base.join("chaim-vester");
let portraits = chaim_dir.join("portraits-spritesheet.png");
let miku = base.join("dance.png");
let my_assets = base.join("made-by-me");
let leeksheet = my_assets.join("leek-bg1-bg2.png");
let fontsheet = base
.join("webfontkit-BoldPixels")
.join("BoldPixels-edit.png");
let gameover = my_assets.join("GameOver.png");
// TODO: move constants out somewhere re-useable and referenceable
// TODO: make a load texture command to decouple backend_sdl3 from game details
self.load(TEXTURE_ID_MIKU, miku);
self.load(TEXTURE_ID_PORTRAIT, portraits);
self.load(TEXTURE_ID_LEEKSHEET, leeksheet);
self.load(TEXTURE_ID_FONTSHEET, fontsheet);
self.load(TEXTURE_ID_GAMEOVER, gameover);
}
We wrote this code back in section 5, and the TODO here has been with us the whole time. Let's get
it TODONE! The big question though is, where does it go? Obviously, I feel like the init
method of a scene should be able to signal to the backend "hey make sure X is loaded for me, thanks!",
but how do we want to facilitate that interaction? I was thinking about something like an EnsureLoaded
command we could send via the renderer, but then I was hummning, hawwing, and yeehawwing to myself on the
idea a bit more

It doesn't really seem like a good idea to tell a renderer to queue something up for loading. You're just supposed to tell it to render things. Conceptually speaking I don't think it's too bad, but still, one should want to have assets loaded, and then you do things with said assets. The other thing that makes me think it might be a good idea to avoid it is that when we add sound to the game, what then? Do we do something like the renderer loads things and the sound manager loads things too? Or would it be nicer to have a single asset manager type guy and then you just make calls for that?
In past games I've had an asset manager class and done nice things like having little bundles for each scene
to queue up easily and all that. I don't necessarily want to do that here, but being able to write something
like assets.ensure(ASSET_ID) sounds kind of nice to me. And it's general enough that it could
work for either an image or an audio file. Though I suppose maybe we should do something like assets.ensure_audio
and assets.ensure_texture since the code would likely need to follow different paths, though a
giant match statement would also work fine… as always when waffling, let's work backwards from our ideal
until we run into gritty reality!
impl Scene for GameOverScene {
fn init(&mut self, game_context: &mut GameContext) {
if let Some(asset_loader) = game_context.asset_loader else {
return;
}
asset_loader.ensure_texture_spritesheet_loaded(TEXTURE_ID_GAMEOVER);
asset_loader.ensure_texture_spritesheet_loaded(TEXTURE_ID_LEEKSHEET);
asset_loader.ensure_texture_spritesheet_loaded(TEXTURE_ID_FONTSHEET);
}
This gets us the simple error that you'd expect:
error[E0405]: cannot find trait `AssetLoader` in this scope
--> src/game.rs:61:38
|
61 | pub asset_loader: Option<Box<dyn AssetLoader>>
| ^^^^^^^^^^^ not found in this scope
And so then creating that trait we want:
pub trait AssetLoader {
fn ensure_texture_spritesheet_loaded(&mut self, sheet_id: usize);
}
morphs the error into ^^^^^^^^^^^ missing `asset_loader` on the
GameContext struct I added it to. After all, in the init method all
we really have is that and I don't feel like changing that sort of thing. Once we set the default
the program will compile though:
pub struct GameContext {
...
pub asset_loader: Option<Box<dyn AssetLoader>>,
}
impl Default for GameContext {
fn default() -> Self {
GameContext {
...
asset_loader: None,
}
}
}
But it does us no good to have a None, but even without the compiler to guide us, I know
where we should implement this! In the backend of course! To make life slightly easier though, let's
define a function that we can use to replace a bunch of the stuff going on in the init method that
we're moving out:
pub fn id_to_relative_path(id: usize) -> PathBuf {
match id {
TEXTURE_ID_LEEKSHEET => PathBuf::new().join("made-by-me").join("leek-bg1-bg2.png"),
TEXTURE_ID_GAMEOVER => PathBuf::new().join("made-by-me").join("GameOver.png"),
TEXTURE_ID_PORTRAIT => PathBuf::new().join("chaim-vester").join("portraits-spritesheet.png"),
TEXTURE_ID_MIKU => PathBuf::new().join("dance.png"),
TEXTURE_ID_FONTSHEET => PathBuf::new().join("webfontkit-BoldPixels").join("BoldPixels-edit.png"),
_ => PathBuf::new(), // could maybe panic here, or turn to a Result type in the future
}
}
Defining this in the constants.rs file next to the IDs feels nice since it implies to the next person who comes along that if they want to define a new id, they should also update the pathing method here to ensure it loads. I think I'm going to give up on the idea of dynamically selecting paths and loading and whatnot for this project, we can do that next game maybe. Anyway, taking hints from our existing init method we can create an SDL3 focused struct for this:
struct AssetLoaderSDL3 {
context: Rc<RefCell<SDL3Context>>,
base_path: PathBuf,
}
impl AssetLoaderSDL3 {
fn new(context: Rc<RefCell<SDL3Context>>, game_options: &GameOptions) -> Self {
let base = get_current_directory().expect("cant get base path");
let base = base.join(game_options.assets_path.clone());
Self {
context,
base_path: base,
}
}
}
impl AssetLoader for AssetLoaderSDL3 {
fn ensure_texture_spritesheet_loaded(&mut self, id: usize) {
let ctx = &mut *self.context.borrow_mut();
if !ctx.textures.get_texture(id).is_none() {
return;
}
let asset_path = id_to_relative_path(id);
let asset_path = self.base_path.join(asset_path);
ctx.textures.load(id, asset_path);
}
}
As a reminder, the get_current_directory method is SDL specific, but we're tracking
the assets folder path in the game options. For that inexplicable case in my head of "someone could
swap the game option to a different folder and load up a totally new spritesheet set! Woah!" kind of
YAGNI type thing that I just don't want to let go of. Beyond this, there's not much different going
on here. We need the handle to the texture map through the SDL3Context struct we made,
and we're doing an optimization to avoid constructing file paths if we've already loaded a texture
being ensured.
The idea here is to load this into the GameContext just like the renderer, and so I'm
going to setup the same sort of pattern as we did to get that created. Namely, the backend trait
will get a small update:
pub trait BackendEventLoop {
fn run(&mut self, game: &mut Game, game_context: &mut GameContext);
fn new_renderer(&self, game_options: &GameOptions) -> Box<dyn Renderer>;
fn create_asset_loader(&self, game_options: &GameOptions) -> Box<dyn AssetLoader>;
}
And then we'll implement it!
fn create_asset_loader(&self, game_options: &GameOptions) -> Box<dyn AssetLoader> {
let a = AssetLoaderSDL3::new(self.context.clone(), game_options);
Box::new(a)
}
I'm not 100% sure if this is really the best way to go about it. But it felt sort of odd to make the
asset loader in the run method of the backend loop before it kicked off the game loop.
So I figured I'd just follow the same sort pattern we stole for the renderer and nod sagely in the
direction of where I imagine those maintainers live.

With that in place I can now setup the actual loader in our janky setup code in the lib file 20
pub fn hello_sdl(game_options: &GameOptions, game: &mut Game) {
let backend = init_backend(&game_options);
let mut event_loop = backend.create_event_loop(&game_options);
let mut game_context = crate::game::GameContext::default();
game_context.screen_size = (game_options.window_width, game_options.window_height);
let renderer = event_loop.new_renderer(game_options);
game_context.renderer = Some(renderer);
let asset_loader = event_loop.create_asset_loader(game_options);
game_context.asset_loader = Some(asset_loader);
game.scene = Some(Box::new(TestScene::default()));
game.scene = Some(Box::new(LevelScene::default()));
game.scene = Some(Box::new(GameOverScene::default()));
event_loop.run(game, &mut game_context);
}
I suppose I should rename "hello_sdl" to something like "run_the_damn_game" or something. But anyway, this won't actually do anything yet, so let's setup the other scene init methods before we nuke the sdl3 code that's loading all the assets up front. This isn't a hard process at all, all I need to do is go into each scene, look at the draw method or even just the imports from constants and then ensure things are loaded like so:
// For LevelScene
fn init(&mut self, game_context: &mut GameContext) {
let Some(ref mut asset_loader) = game_context.asset_loader else {
return;
};
asset_loader.ensure_texture_spritesheet_loaded(TEXTURE_ID_MIKU);
asset_loader.ensure_texture_spritesheet_loaded(TEXTURE_ID_LEEKSHEET);
asset_loader.ensure_texture_spritesheet_loaded(TEXTURE_ID_FONTSHEET);
}
// For TestScene (we really gotta rename that)
fn init(&mut self, game_context: &mut GameContext) {
let miku = sprite_info_miku();
let portrait = sprite_info_portrait();
self.sprites.push((TEXTURE_ID_MIKU, miku));
self.sprites.push((TEXTURE_ID_PORTRAIT, portrait));
let Some(ref mut asset_loader) = game_context.asset_loader else {
return;
};
asset_loader.ensure_texture_spritesheet_loaded(TEXTURE_ID_MIKU);
asset_loader.ensure_texture_spritesheet_loaded(TEXTURE_ID_PORTRAIT);
}
Of note here is that I am purposefully creating the sprite related structs
before the bail out of the function. If we have no asset loader or renderer (such as if
we setup a test harness) then I still want the update function to be able to do whatever
it wants to do with the given sprites in the scene. I suppose I could also just move those
up to the implementation of Default for that scene too, but I like to make
minimal changes as I move and so since I had the sprites initialized there, I'm keeping
them there for the time being.
What I will clean up though, is that init method in the SDL3 backend that's currently
still calling the self.load in the SDL3Textures struct. We don't
need it anymore and the bad taste of the backend being the one doing all the loading rather
than the individual scenes can be thoroughly washed away.
@@ -157,7 +134,6 @@ impl Backend for BackendSDL3 {
let canvas = window.into_canvas();
let mut textures = SDL3Textures::from(canvas.texture_creator());
- textures.init(game_options);
// If we end up having some custom form of cursor for each scene then we can do this
// self.sdl.mouse().show_cursor(false);
(2/2) Stage this hunk [y,n,q,a,d,K,g,/,e,?]? y
Poof. Gone! So now we've got a world where each scene declares what it wants and then the backend makes it so! Everything still works when I run the program, the Tetos triumphantly trollop towards the turrets and the scenes load up in their single game tick way quickly without trouble. So we've got our infrastructure around scene loading and swapping all figured out. Let's implement the last couple of scenes we need:
Loading, Title and Goodbye scenes ↩
Since its now easy to swap scenes and set them up to load whatever they feel like. Let's wrap up the scene creation process by making a title screen to start the game on and an ending scene to show before we break out of the game loop. We'll start with the ending scene because I actually have an idea for what that should be. Quite simply: Miku should wave goodbye and then the program will exit.
Since we'll have one sprite, I'll just use our wiggly little lady as a placeholder for a moment and we can construct the struct and get the shutdown working first:
pub struct ShuttingDownScene {
miku: SpriteInfo,
countdown: ReadyState,
}
impl Default for ShuttingDownScene {
fn default() -> Self {
Self {
miku: sprite_info_miku(),
countdown: ReadyState::Cooldown {
ticks_waited: 0,
wait_for: 120,
},
}
}
}
Just like with the game over scene, I thnk it'd be nice to use a simple layout for placement purposes. I want our miku dead center in the screen, so the easier way to accomplish that is probably to just make a simple grid:
impl ShuttingDownScene {
fn layout(game_context: &GameContext) -> GridLayout {
let (screen_width, screen_height) = game_context.screen_size;
GridLayout {
area: Rect::new(0, 0, screen_width as isize, screen_height as isize),
rows: 3,
columns: 3,
cell_gap: 0,
}
}
}
I suppose I might end up stretching things a bit funny again since it won't be an even fit into
a 16:9 window, but we'll adjust later. For now this gets us roughly what we want and lets us
continue making good progress. Before we write the Scene implementation, there's
one small tweak to the GameContext I want to make:
pub struct GameContext {
...
pub shutdown_flag: bool,
}
We'll have a flag (starting at false) in the context that we can use to break the event loop. This is probably the simplest way to do this shutdown activity I think. And so, the scene implementation is simple. Initialize the texture, advance the countdown, and draw the scene:
impl Scene for ShuttingDownScene {
fn init(&mut self, game_context: &mut GameContext) {
let Some(ref mut asset_loader) = game_context.asset_loader else {
return;
};
asset_loader.ensure_texture_spritesheet_loaded(TEXTURE_ID_MIKU);
}
fn update(&mut self, ticks: u32, game_context: &mut GameContext) {
self.miku.advance(ticks);
self.countdown = advance_ready_state(self.countdown, ticks);
let ReadyState::Ready = self.countdown else {
return;
};
game_context.shutdown_flag = true;
}
fn draw(&mut self, game_context: &mut GameContext) {
let layout = ShuttingDownScene::layout(game_context);
let Some(ref mut renderer) = game_context.renderer else {
return;
};
let destination = layout.cell_rect(1, 1);
let src = self.miku.get_rect();
renderer.send_command(RenderCommand::DrawRect {
texture_id: TEXTURE_ID_MIKU,
source: src,
destination,
});
}
}
Then we just need to update the backend event loop. Looking through SDL's documentation,
if we were writing the code in C we'd need to call SDL_Quit ourselves as
documented here, but the rust
bindings call it automatically for us when the sdl_context is dropped. So
our change in the event loop is super simple:
fn run(&mut self, game: &mut Game, game_context: &mut GameContext) {
...
'running: loop {
...
game.update(game_context);
if let Some(mut next_scene) = game_context.next_scene.take() {
next_scene.init(game_context);
game.scene = Some(next_scene);
game.reset_for_next_scene();
}
game.draw(game_context);
if game_context.shutdown_flag {
break;
}
}
}
and it works too. If I set my scene to the shutdown one, then let it wait 2 seconds, the application closes. For those two seconds
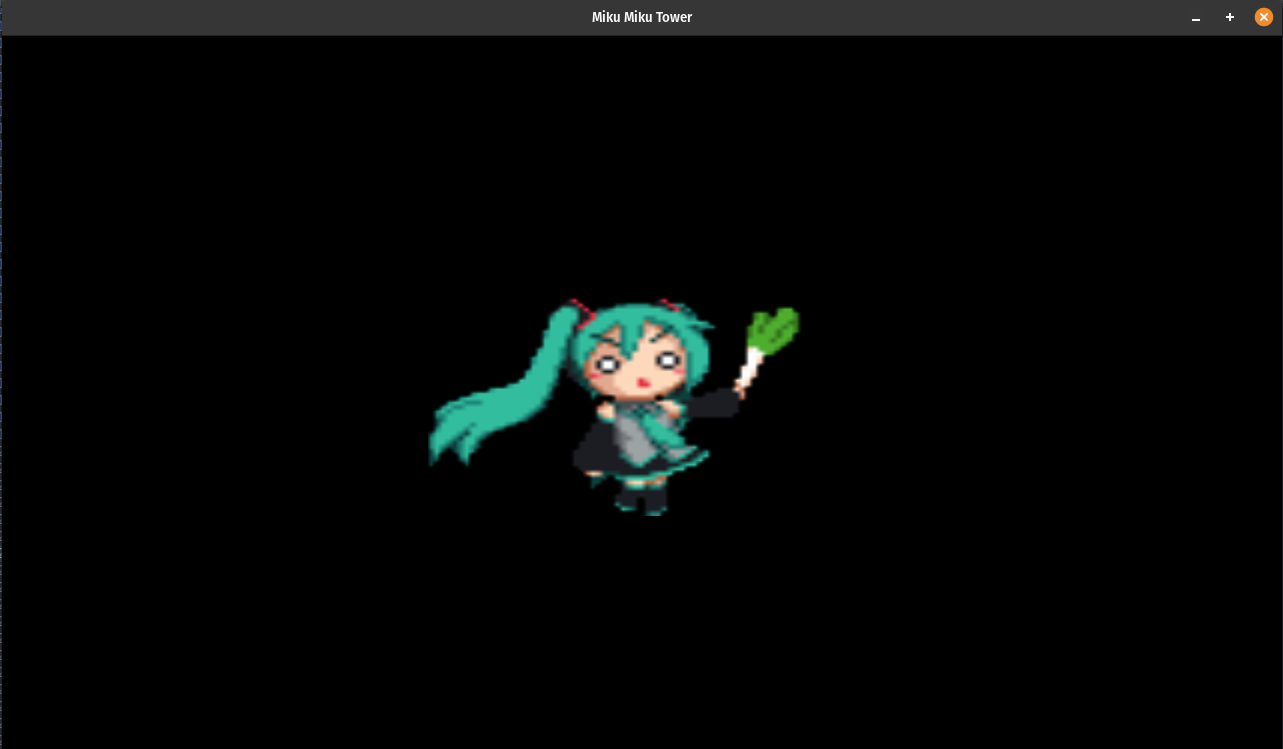
Now that this exists, we can address the TODO from the shutdown method of GameContext:
impl GameContext {
...
pub fn shutdown(&mut self) {
-// TODO: Signal to shutdown the application. I guess.
-self.next_scene = Some(Box::new(TestScene::default()));
+self.next_scene = Some(Box::new(ShuttingDownScene::default()));
}
}
Then the hard part. We need to draw miku waving goodbye.
I once again re-iterate. I am not an artist. This isn't a particularly good miku, and I could probably go hunting for a better one online somewhere, but eh, it's my game and I suppose I should create as many of the assets as I can. I think if I shrunk her body a bit and made her more chibi-like that it'd be a little cuter, but it is what it is and we've got more important things to do than adjust each pixel of something that is most definitely "programmer art".
Speaking of programmer art. I suppose maybe we should make something for the title screen.
...
TEXTURE_ID_TITLE_BG => PathBuf::new().join("made-by-me").join("titlescreen.png"),
...
pub const fn sprite_info_title() -> SpriteInfo {
SpriteInfo {
start_x: 0,
start_y: 0,
width: 480,
height: 270,
frames: 1,
current_frame: 0,
framerate_per_second: 30,
delta: 0,
}
}
This time I'm matching the 16:9 aspect ratio, and then we've got to make a new scene struct. We'll have two buttons here, one to quit and one to play. Funnily enough, it's basically the same set of actions as the game over screen, just a different background and placement.
pub struct TitleScene {
bg: SpriteInfo,
start_game_btn: Button,
quit_btn: Button,
}
impl Default for TitleScene {
fn default() -> TitleScene {
TitleScene {
bg: sprite_info_title(),
start_game_btn: Button::new(
"Start".to_string(),
Rect {
x: 32,
y: 15,
width: 10,
height: 2,
},
),
quit_btn: Button::new(
"Quit".to_string(),
Rect {
x: 32,
y: 18,
width: 10,
height: 2,
},
),
}
}
}
We can re-use the button struct from before, but I'll use a slightly different grid to make things easy to lay out.
impl TitleScene {
fn layout(game_context: &GameContext) -> GridLayout {
let (screen_width, screen_height) = game_context.screen_size;
GridLayout {
area: Rect::new(0, 0, screen_width as isize, screen_height as isize),
rows: 27,
columns: 48,
cell_gap: 0,
}
}
}
then the scene is really nothing special at this point. It's basically the exact same code as the other scene, but with slightly different texture ids being loaded and displayed.
impl Scene for TitleScene {
fn init(&mut self, game_context: &mut GameContext) {
let Some(ref mut asset_loader) = game_context.asset_loader else {
return;
};
asset_loader.ensure_texture_spritesheet_loaded(TEXTURE_ID_TITLE_BG);
asset_loader.ensure_texture_spritesheet_loaded(TEXTURE_ID_LEEKSHEET);
asset_loader.ensure_texture_spritesheet_loaded(TEXTURE_ID_FONTSHEET);
}
fn update(&mut self, ticks: u32, game_context: &mut GameContext) {
let layout = TitleScene::layout(&game_context);
self.quit_btn.update(ticks, game_context, &layout);
self.start_game_btn.update(ticks, game_context, &layout);
if self.start_game_btn.clicked && game_context.next_scene.is_none() {
game_context.queue_level();
self.start_game_btn.clicked = false;
}
if self.quit_btn.clicked && game_context.next_scene.is_none() {
game_context.shutdown();
self.quit_btn.clicked = false;
}
}
fn draw(&mut self, game_context: &mut GameContext) {
let layout = TitleScene::layout(&game_context);
let Some(ref mut renderer) = game_context.renderer else {
return;
};
let src = self.bg.get_rect();
renderer.send_command(RenderCommand::DrawRect {
texture_id: TEXTURE_ID_TITLE_BG,
source: src,
destination: Rect::new(0, 0, layout.area.width, layout.area.height),
});
self.quit_btn.draw(game_context, &layout);
self.start_game_btn.draw(game_context, &layout);
}
}
And now the moment you've been waiting for, what weird sprite did I draw this time?
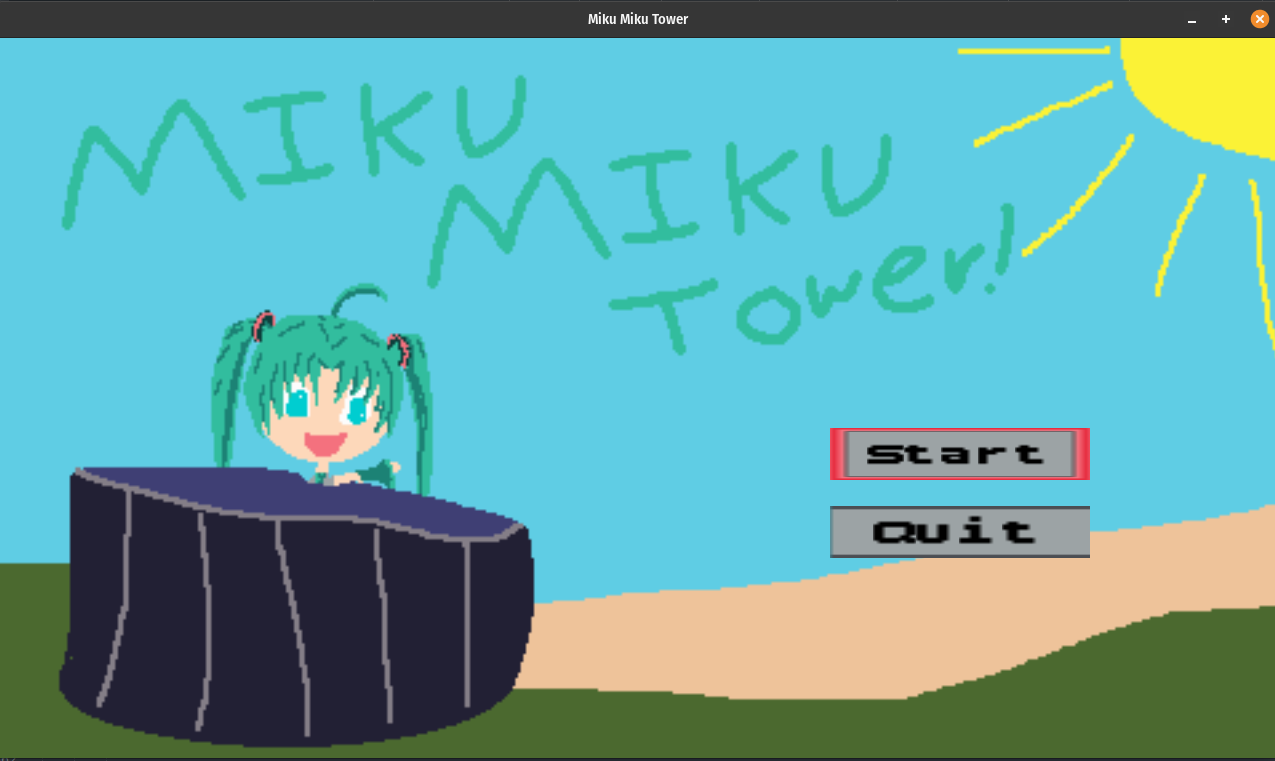
See? It's Miku! In a tower! I've got this art thing down! Ok, joking aside. There's not a lot to say here besides the fact that I don't think we really need the "loading" screen anymore. I should probably tweak the goodbye image to have a decent background and maybe also actually make a tower for us to defend rather than the placeholder miku we have right now. There's also a lot of game balancing to do as well. But technically speaking, we've got a game that can go from title, to level, to game over, to goodbye.
But before we get to polishing, balancing, and wrapping up our first SDL experiment. There's a very critical component that we're missing in the game that we said we would do at the start. So, let's get to it.

Sound ↩
Last game we decided that audio was out of scope for the project, and made a promise that we'd have it in the next one. Well, here we are! I was laying in bed thinking about this, wondering what sort of libraries I should use, thinking about pilfering LCOLONQ's github for clues on what sort of stuff is going on in his engine or looking at the doukutsu code, but then I remembered! We're making an SDL3 backend! It has audio!
Looking at the audio subsytem example was a bit daunting feeling they define callbacks, specs, waves...
use sdl3::audio::{AudioCallback, AudioFormat, AudioSpec, AudioStream};
use std::time::Duration;
struct SquareWave {
phase_inc: f32,
phase: f32,
volume: f32
}
impl AudioCallback<f32> for SquareWave {
fn callback(&mut self, stream: &mut AudioStream, requested: i32) {
let mut out = Vec::<f32>::with_capacity(requested as usize);
// Generate a square wave
for _ in 0..requested {
out.push(if self.phase <= 0.5 {
self.volume
} else {
-self.volume
});
self.phase = (self.phase + self.phase_inc) % 1.0;
}
stream.put_data_f32(&out);
}
}
let sdl_context = sdl3::init().unwrap();
let audio_subsystem = sdl_context.audio().unwrap();
let source_freq = 44100;
let source_spec = AudioSpec {
freq: Some(source_freq),
channels: Some(1), // mono
format: Some(AudioFormat::f32_sys()) // floating 32 bit samples
};
// Initialize the audio callback
let device = audio_subsystem.open_playback_stream(&source_spec, SquareWave {
phase_inc: 440.0 / source_freq as f32,
phase: 0.0,
volume: 0.25
}).unwrap();
// Start playback
device.resume().expect("Failed to start playback");
// Play for 2 seconds
std::thread::sleep(Duration::from_millis(2000));
It's a lot to take in at once. I don't want to create my own wave form though, I think. I'd rather load a wav that I could make with sfxr and play that. Looking at the SDL wiki, I spotted SDL_LoadWAV and went looking for the rust binding:
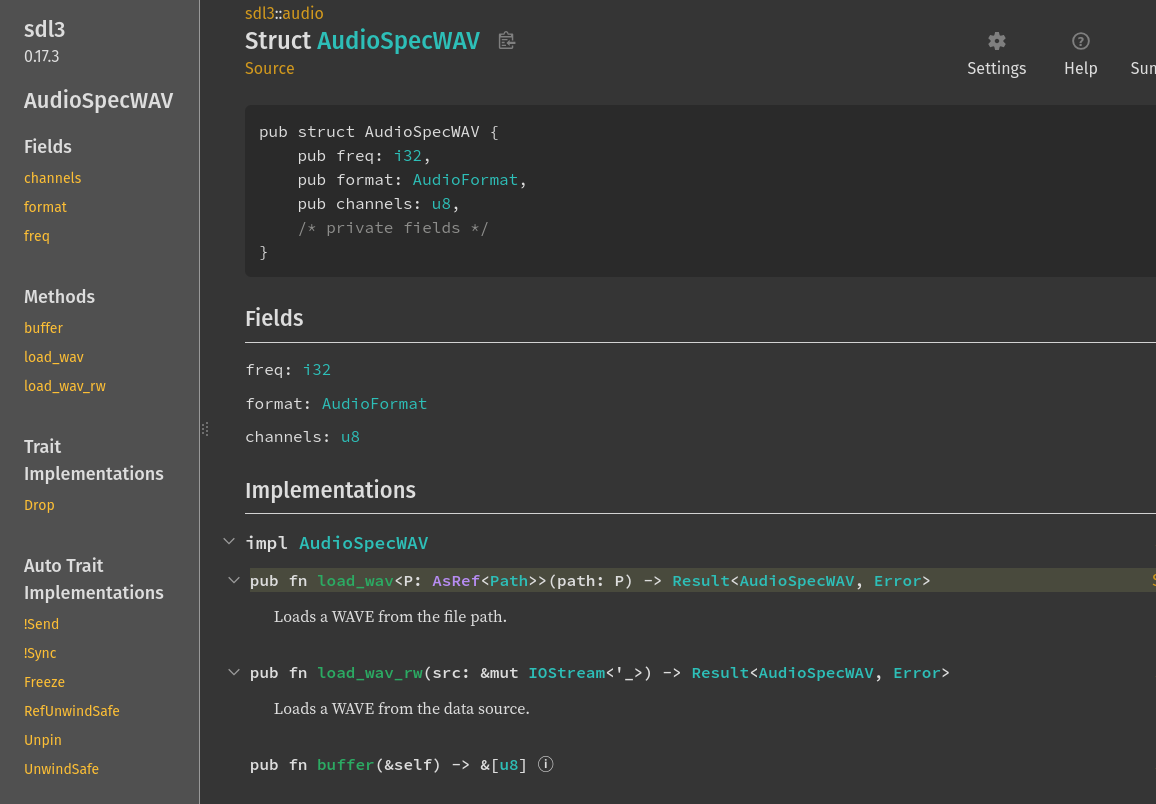
It exist! So how do I use it? Well, that first page mentioned a "simplified" device that just grabs the system's current default. That sounds good enough for our purposes
As a simplified model for when a single source of audio is all that's needed, an app can use SDL_OpenAudioDeviceStream, which is a single function to open an audio device, create an audio stream, bind that stream to the newly-opened device, and (optionally) provide a callback for obtaining audio data. When using this function, the primary interface is the SDL_AudioStream and the device handle is mostly hidden away; destroying a stream created through this function will also close the device, stream bindings cannot be changed, etc. One other quirk of this is that the device is started in a paused state and must be explicitly resumed; this is partially to offer a clean migration for SDL2 apps and partially because the app might have to do more setup before playback begins; in the non-simplified form, nothing will play until a stream is bound to a device, so they start unpaused.
Alright then. Given that these things disappear when they're dropped, I know that we'll definitely need the audio system to hang around, so for testing, I'm going to just toss it into the context we already made:
use sdl3::AudioSubsystem;
...
pub struct SDL3Context {
...
audio: AudioSubsystem,
}
Not sure if it will stay here or not, but my guess is yes it will. Rather than try to figure out what sort of backend interface we'll hide it behind, for testing, let's just declare a bunch of stuff where we boot up the game loop and see if it'll play a noise. I downloaded a random wav sound from the jsfxr site and tossed it into an audio folder, then it was time to stare at the API and get some code together. First off, what is my driver?
let ctx = self.context.clone();
{
eprint!("{}", ctx.borrow_mut().audio.current_audio_driver());
}
This printed pipewire. Makes sense. That is indeed what I've got on my computer. I guess. I suppose it's the default on PopOS, this is one of those things that I try my best to be blissfully unaware of as much as I can be. I've got flashbacks to audio on linux of a decade ago being very very annoying to deal with. Anyway, that wav loading method is simple enough, and then that simplified call with no callbacks should be useable...
let wavspec = sdl3::audio::AudioSpecWAV::load_wav(
get_current_directory()
.expect("no base")
.join("assets")
.join("audio")
.join("blipSelect.wav"),
)
.unwrap();
let audio_stream_owner = default_playback_device.open_device_stream(Some(&wavspec)).unwrap();
188 | ...vice_stream(Some(&wavspec)).unwrap();
| ---- ^^^^^^^^ expected `&AudioSpec`, found `&AudioSpecWAV`
| |
| arguments to this enum variant are incorrect
|
= note: expected reference `&AudioSpec`
found reference `&AudioSpecWAV`
Ah. Alright then… Well, they both have the exact same fields besides their channel type, so uh, how about this?
let default_playback_device = ctx.borrow_mut().audio.default_playback_device();
let spec = sdl3::audio::AudioSpec::new(
Some(wavspec.freq),
Some(wavspec.channels.into()),
Some(wavspec.format),
);
let audio_stream_owner = default_playback_device.open_device_stream(Some(&spec)).unwrap();
let foo = audio_stream_owner.resume().unwrap();
Well hey, that compiles! Putting aside the painful feeling unwraps littered through here,
that should do the trick right? Nope. I tried adding in a thread sleep, thinking maybe it needed some
time to play and perhaps it was getting dropped before doing its work. Nope. The audio stream owner has
a few methods on it to provide us with info about how many bytes its going to display, what its audio
levels are at, that sort of thing, so how about that…
let foo = audio_stream_owner.resume().unwrap();
eprintln!(
"{:?}",
(
foo,
audio_stream_owner.get_format(),
audio_stream_owner.device_name(),
audio_stream_owner.get_gain(),
audio_stream_owner.available_bytes(),
audio_stream_owner.queued_bytes()
)
);
(
Ok(
(
Some(AudioSpec {
freq: Some(44100),
channels: Some(1),
format: Some(U8) }
),
Some(AudioSpec {
freq: Some(44100),
channels: Some(2),
format: Some(S16LE)
})
)
),
Some("Family 17h (Models 10h-1fh) HD Audio Controller Analog Stereo"),
Ok(1.0),
Ok(0),
Ok(0)
)
Ok, well those last two numbers sure are indicative that I'm missing something important here.
If there are no bytes queued up, then there's nothing to play! So is something off with the
wav I'm loading somehow? Or maybe, do I need to this AudioCallback I see in the docs?
Provide data to the audio stream that way or something…
I stared at it for a bit, then went to the github examples for the sdl3-rs project and noticed an important thing I needed to add:
let _ = audio_stream_owner.put_data(wavspec.buffer());
Ah. That'd do it. So, putting this above the resume call, I went ahead and toss it in
above the main game loop. I should see a boop on startup…
The blip of victory! Now, out of curiousity. I assume that since this is an audio stream, that one puts data onto the buffer, it gets played, and then if you want to do that again, you repeat the process. So, if I were to say, do this:
'running: loop {
for event in self.event_pump.poll_iter() {
match event {
...
Event::MouseButtonDown {
mouse_btn, x, y, ..
} => {
audio_stream_owner.put_data(wavspec.buffer());
game_context.mouse_context.update(
mouse_btn == MouseButton::Left,
mouse_btn == MouseButton::Right,
Some((x, y)),
);
}
Then click a bunch…
Awesome. Spamming the click didn't even add a bunch of amplitudes together like I thought it might! Whether or not putting multiple data sources onto the same device override each other is something we'll need to figure out though. For example, if you put a blip while you're playing some background music, does it cut out the music for a moment? We'll need to figure out if we can just put data in randomly, or if we'll need to use SDL_MixAudio.
I suppose we could test that if I have a wav sitting around...
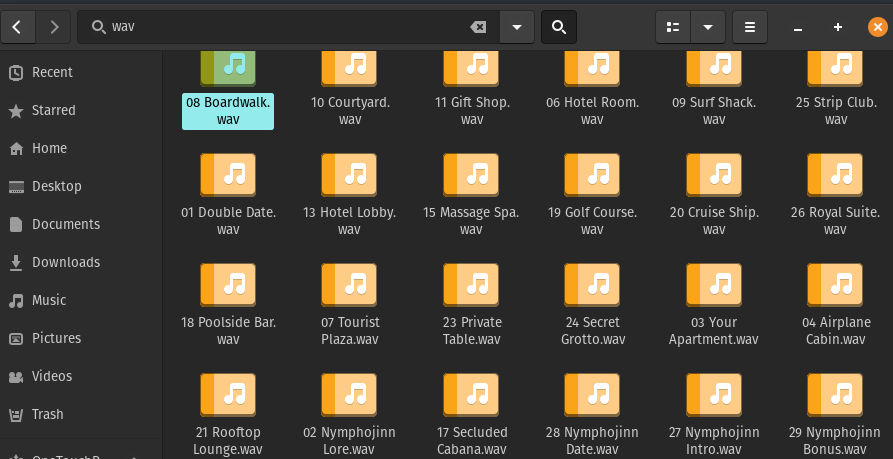
Ah, that'll do for now. I won't commit these of course, I'm pretty sure Huniepop 2's soundtrack is not open for creative reuse. I doubt this will work, as I'd expect the audio rates and whatnot to be different cause weird audio problems, but heck, let's load it up and call put data anyway…
let bgmusic = sdl3::audio::AudioSpecWAV::load_wav(
get_current_directory()
.expect("no base")
.join("assets")
.join("audio")
.join("08 Boardwalk.wav"),
)
And then if I just alternate playing that and the existing sound when I click my mouse…

I'll spare you the recording. Let's just say that 32 bit samples do NOT like going into a 16 bit stream at all. Like glass being broken perpetually amidst a horde of hissing insects. Simply awful. That said, if I just don't use the same stream? Does it keep playing both at once?
... other audio loading above ...
let bgmusic = sdl3::audio::AudioSpecWAV::load_wav(
get_current_directory()
.expect("no base")
.join("assets")
.join("audio")
.join("08 Boardwalk.wav"),
)
.unwrap();
let bgspec = sdl3::audio::AudioSpec::new(
Some(bgmusic.freq),
Some(bgmusic.channels.into()),
Some(bgmusic.format),
);
let default_playback_device2 = ctx.borrow_mut().audio.default_playback_device();
let audio_stream_owner2 = default_playback_device2
.open_device_stream(Some(&bgspec))
.unwrap();
let _ = audio_stream_owner2.put_data(bgmusic.buffer());
let _ = audio_stream_owner2.resume().unwrap();
... loop where we click to call put_data below ...
Would you look at that. No interference!
Well that's helpful for our planning purposes. It seems to me like we'd probably want to separate
what we consider background music versus sound effects in whatever interface we expose to the game
to queue up audio sounds. That seems simple enough I suppose. Also, while we've been using usize
as an id for the image assets and loading them, if we do the same for music and sound effects, I'm a
tad worried that I might screw something up somewhere.
Rust has a way to deal with that fear though. New Types! If we wanted to pay the cost of not having any method calls on the instances of the numeric type, then we can easily get compile time safety about passing a usize to a method which is specifically intended as an id for a specific purpose. Best part is that this doesn't even really change much existing code either. Sort of. Technically speaking, I get 41 errors when I do this:
#[derive(PartialEq, Copy, Debug, Clone, Hash, Eq)]
pub struct TextureId(pub usize);
pub const TEXTURE_ID_MIKU: TextureId = TextureId(0);
pub const TEXTURE_ID_PORTRAIT: TextureId = TextureId(1);
pub const TEXTURE_ID_LEEKSHEET: TextureId = TextureId(2);
pub const TEXTURE_ID_FONTSHEET: TextureId = TextureId(3);
pub const TEXTURE_ID_GAMEOVER: TextureId = TextureId(4);
pub const TEXTURE_ID_MIKU_WAVE: TextureId = TextureId(5);
pub const TEXTURE_ID_TITLE_BG: TextureId = TextureId(6);
pub fn id_to_relative_path(id: TextureId) -> PathBuf {
But hey! 16 of those are from the need to change the DrawRect's field for texture id to
the new type! Then another 19 are from the AssetLoader's ensure sheet method taking a usize.
The remaining are from some other minor hashmap bits and bobs like SDL3Textures . Really,
there were only 8 or so places I had to actually change a usize to a TextureId.
So not a hard refactor by any means.
Now, I can be a bit more expressive with how our sound effects will work, and similar, we can define our public interface I think. Really, I just want to expose a simple interface like this to our game code:
pub trait Audio {
fn play_sfx(&mut self, id: SfxId);
fn play_music(&mut self, id: MusicId);
}
And this audio player will end up existing inside of our GameContext as a boxed dynamic trait,
just like the renderer. However, we actually need two more methods here as much as I dislike it. You see,
I've gone ahead and implemented a couple different ideas over the course of the last couple days since I
wrote the last sentence. While I feel like, conceptually, it would be really nice to have the AssetLoader
be the one to hold onto things like load_sfx and load_music, figuring out the complicated
dance to do that in a way that doesn't make me feel like I'm contorting the computer to do what I
want, rather than how the computer wants it, is very… gross.
So rather than fight 'em, we'll join them. Maybe some day I'll be a wizard and smarter, but for now, for the sake of my sanity. Let's just define the trait as:
pub trait Audio {
fn play_sfx(&mut self, id: SfxId);
fn load_sfx(&mut self, id: SfxId);
fn play_music(&mut self, id: MusicId);
fn load_music(&mut self, id: MusicId);
}
I'll also note that for a while I was naming this trait AudioPlayer which further led to the feeling
of "aw man it shouldn't do this, come on its a player!!!" and so changing the name helped soothe the mental beasts
running circles in my head around my brain stem. We're not done with problems though. So, here's the rough
sketch of what I experimented with, in picture form before we get into code form because I think you'll understand
things better if I explain it like this:
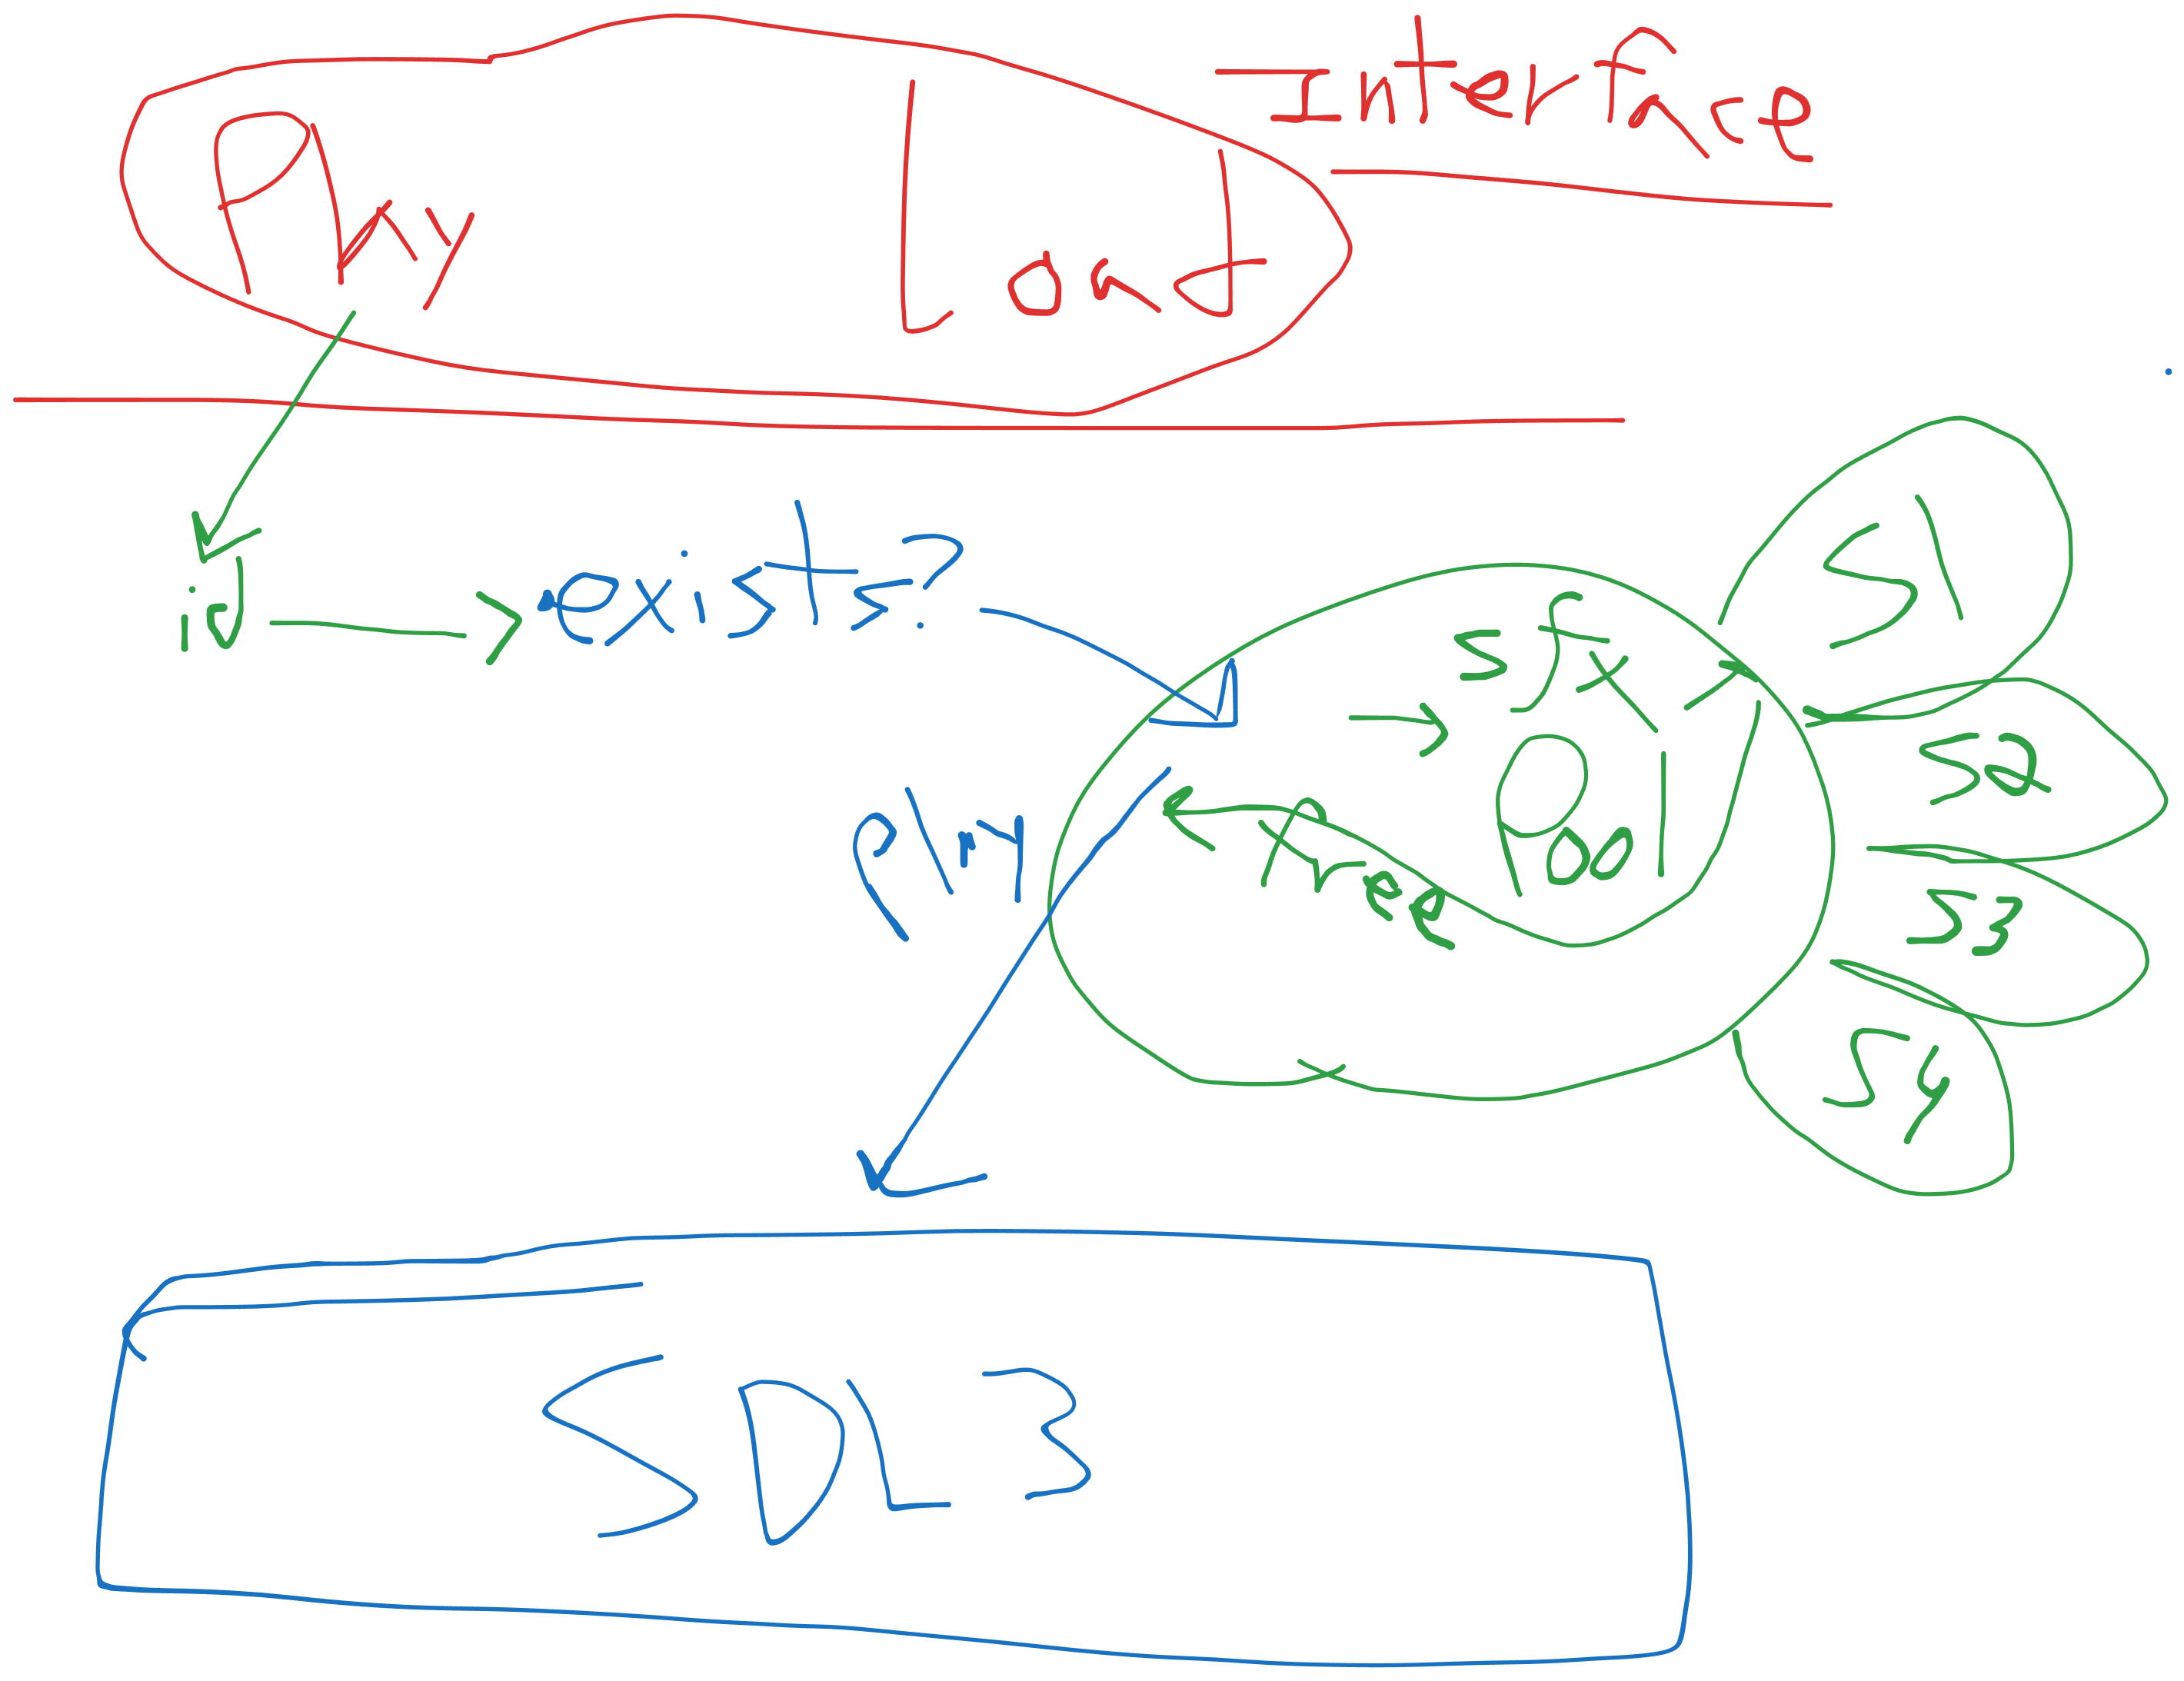
So, the general idea of exposing the Audio through a public interface that has 0 references to SDL3
is the top red part here. And that exists, just like we did before, through the GameContext,
and through the call to the backend event loop to create it for us
pub struct GameContext {
...
pub audio: Option<Box<dyn Audio>>,
}
... inside of BackendEventLoop ...
fn create_audio(&self, game_options: &GameOptions) -> Box<dyn Audio> {
// TODO: take number of sfx at once from game options?
let s = SDL3Sounds::new(self.context.clone(), 8, game_options);
Box::new(s)
}
If you follow the blue line, there's an "exists?" check and then inside of the green flower bubble we're doing something with an "SFX pool", finding a free one, and then asking SDL3 to actually play the sound we had the ID of. We basically have a collection of potential streams which we can ask to play sound with, that way we can limit how many sounds play at once and avoid a wave amplitude getting huge and blowing out your speakers.
There's just one problem.

If you recall from our testing code, we had to write this
let default_playback_device = ctx.borrow_mut().audio.default_playback_device();
let spec = sdl3::audio::AudioSpec::new(
Some(wavspec.freq),
Some(wavspec.channels.into()),
Some(wavspec.format),
);
let audio_stream_owner = default_playback_device.open_device_stream(Some(&spec)).unwrap();
let foo = audio_stream_owner.resume().unwrap();
You see that &spec bit? Yeah… Roughly speaking, we've got a playback device
and that's opened up with some spec internally that matches our hardware. But that open_device_stream
is opening a stream which is specifying the input spec. Which means its dependent on the sound file we're loading
itself. Maybe you see where this is going to cause a problem, but in case it didn't click yet because you're
not the one who's been staring at this code for several days, it's a little hard to have a pool of re-useable
streams if you have to deal with the fact that an audio file might not be in the same format
as another one.
Now, I'm making all my sounds with that sfxer program, so they ARE going to all be the same spec. So I could hardcode it. But I don't like that very much because it means if someone wanted to drop in their own funny file to the assets folder, it might blow their ears out or do something crazy. I see a couple potential solutions for this:
- Stop caring about your fictional players that dont exist and just hard code the damn thing
- Store the pool by format, so you can have pooled audio devices that you fetch per format
- Don't bother pooling at all, create the audio device on the fly and pray that SDL3's logical devices are cheap
- Pool the streams, but select by format when searching for a free one and create them on the fly if no format matches
I never said these were all good ideas. Just that they came to mind. You can mull over which one you'd choose if you were making this, while you (and me) consider thinking about it, we can at least define some of the useful structs we can use for this stuff. First off, as we saw before, the audio data is loaded up and the buffer is exposed via the spec, so if we want to cache that data once and then re-use it, we'll end up tossing it into a hashmap just like we did for the textures. One thing that's useful that we don't immediately have computed for us is a duration of how long that data is. But I want to know because when it comes to pooling, being able to partially handle cache invalidation through the duration of the playback audio feels like a cheap win to me:
struct SoundData {
spec: AudioSpecWAV,
duration: Duration,
}
The nice thing about this is that both music and sound effects can use this. So our wrapper around a hash map can just track two differently keyed guys:
sound_by_id: HashMap<SfxId, SoundData>, music_by_id: HashMap<MusicId, SoundData>,
Which is —

Wait a minute. Wait a minute
Wait a minute!
I just had a great idea! What if we have a pool, of buckets? And we do some sort of recalculate
or rebuild during scene init that introspects the existing specs available to us in the sound
data that a scene has loaded, and then we just ensure we've got enough streams setup to handle those? We'd
dodge the whole "make a new logical device per play" type thing, we'd only do the expensive bits during scene
transition when a player might anticipate some load time anyway, and the case I was worried about, where a
user tosses their own music in, is handled even if some of the original stuff is still around.
I think this will work pretty well! We just need to actually get this bucket-y fun stuff together!
struct SfxStream {
stream: AudioStreamOwner,
free_at: Option<Instant>,
}
struct Bucket {
spec: Spec,
streams: Vec<SfxStream>
}
// This hack brought to you by AudioSpec not implementing Hash.
#[derive(Hash, Eq, PartialEq, Copy, Clone, Debug)]
struct Spec {
freq: i32,
channels: i32,
format: AudioFormat
}
As you can see by my comment here, the fact that we use "Spec" and not AudioSpec
here is entirely because, despite AudioFormat (from sdl3::audio::)
implementing hash, for whatever reason, AudioSpec does not. I can understand why
AudioSpecWAV doesn't since it has a buffer of u8s for the wav data itself and that's
loaded and ready to go. But the plain old AudioSpec doesn't have that at all! And
all the field types are totally hashable. So. Weird.
Anyway, we can define our big audio manager type dude now that we've declared these helper structs!
struct SDL3Sounds {
sound_by_id: HashMap<SfxId, SoundData>,
music_by_id: HashMap<MusicId, SoundData>,
buckets: Vec<Bucket>,
poolsize: usize,
base_path: PathBuf,
context: Rc<RefCell<SDL3Context>>,
}
Just like the texture wrapper, we've got a reference counted shared cell with the overall SDL3 context in it. That's how we'll get a hook into the audio subsystem when we need it. The poolsize I figure we can just default to 8 for the time being since that's a nice number, and the rest of the data gets setup when we call new:
impl SDL3Sounds {
fn new(context: Rc<RefCell<SDL3Context>>, game_options: &GameOptions) -> Self {
let buckets = vec![];
let base_path = get_current_directory()
.expect("cant get base path for audio player")
.join(game_options.assets_path.clone());
Self {
buckets,
sound_by_id: HashMap::new(),
music_by_id: HashMap::new(),
poolsize: game_options.audio_pool_size, // <-- new!
base_path,
context,
}
}
...
}
Once more we're doing a lot of expects and we should probably be returning results to clean all of that up,
but that can come around in a future iteration of things I think. For now the focus is on getting things up
and operational. To that effect, let's implement a couple helpers for the SfxStream struct:
impl SfxStream {
fn is_free(&self, now: Instant) -> bool {
self.free_at.map_or(true, |t| now >= t)
}
fn claim(&mut self, entry: &SoundData, now: Instant) {
self.stream.clear();
self.stream.put_data(entry.spec.buffer());
self.stream.resume();
self.free_at = Some(now + entry.duration);
}
}
It might be obvious, but since we have a pool of streams, and we want to try to mostly only play one
sound at a time on it, we need a way to claim the stream as in use by us. That's what the claim
method is about. Similarly, one of the ways that we can determine if the stream is free, is based on
whether or not the current time is past what we calculated as the free time. There's some issues potentially
with this, but for the most part, it should work without issue. 21
Now we come the implementation parts. So, for impl Audio for SDL3Sounds we need to define
five functions. The four I've already mentioned, and then the preparation function to build the buckets
based on the loaded items so far. Let's tackle the loading function first:
fn load_sfx(&mut self, sound_id: SfxId) {
if !self.sound_by_id.get(&sound_id).is_none() {
return;
}
let path = self.base_path.join(sfx_id_to_relative_path(sound_id));
let spec = AudioSpecWAV::load_wav(path).expect("could not load spec from path");
// from https://github.com/vhspace/sdl3-rs/blob/master/examples/audio-wav.rs#L35
let bytes_per_sample = match spec.format {
AudioFormat::U8 | AudioFormat::S8 => 1,
AudioFormat::S16LE | AudioFormat::S16BE => 2,
AudioFormat::S32LE | AudioFormat::S32BE | AudioFormat::F32LE | AudioFormat::F32BE => 4,
_ => 2,
};
let total_samples = spec.buffer().len() / (bytes_per_sample * spec.channels as usize);
let seconds = (total_samples as f64) / spec.freq as f64;
let data = SoundData {
spec,
duration: Duration::from_secs_f64(seconds),
};
self.sound_by_id.insert(sound_id, data);
}
This is mostly what you expect. We check the hashmap for if we can early return, then calculate
the SoundData to be loaded for the given sound Id. Just like the textures, we've
got a helper function to get the path for each asset. And I'll expand it with more sounds as we
add them.
pub fn sfx_id_to_relative_path(id: SfxId) -> PathBuf {
match id {
SFX_ID_BLIP => PathBuf::new().join("audio").join("blipSelect.wav"),
_ => PathBuf::new(), // could panic or could maybe make a default sound guy
}
}
Probably the main callout of the load function is the calculation of the duration for the data. I wasn't having much luck with wikipedia and such, and I found a github project that was using sdl3 that had the calculation above. It seems accurate enough from what I could tell, so until proven otherwise, I'm happy to nod my head as the math does seem sensible. If you've got got u8s then there's only one byte per sample and if there's one per channel then cutting the length of the overall buffer down by that seems like it would match up.
Once a sound is loaded then we probably want to play it.
fn play_sfx(&mut self, id: SfxId) {
// TODO should we take this instant in from above?
let now = Instant::now();
let Some(sound_data) = self.sound_by_id.get(&id) else {
return;
};
// find the bucket
let bucket_key = to_hashable_spec(&sound_data.spec);
let Some(bucket) = self.buckets.iter_mut().find(|b| b.spec == bucket_key) else {
eprintln!("No bucket found for spec {:?}", bucket_key);
return;
};
let stream = if let Some(stream) = bucket.streams.iter_mut().find(|s| s.is_free(now)) {
stream
} else {
// All busy — steal the one that will free soonest
bucket.streams.iter_mut().min_by_key(|s| s.free_at).unwrap()
};
stream.claim(&sound_data, now);
}
There's the claim on the stream! Assuming we call the prepare method after the load method, we should
never run into the eprintln for not having a bucket ready to go. If we can't find a bucket
then we'll just ditch the function. We need to process the stream as mutable, since the claim will add
buffer data to the stream audio owner and all that fun stuff, so iter_mut is our friend here
that provides us with the mutable record we need. One thing of note is that we always do our best to play the sound here.
If we couldn't find a stream to play it on that's free, we just grab the minimal stream based on the
calendar case. There's not much else to say about the code. But it works, which important.
Putting aside the near-duplicative code for play_music and load_music, the last important thing to make this
all work is the prepare method. I thought about calling it "recalculate" or "rebuild" or something
like that, but it's hard to come up with a method name that implies it should come in-between load and play that
would feel like it's something you should use and pay attention to. "Prepare" sort of feels right, since you load
something, you prepare it, then you play it. I suppose doc strings on these functions would also go a long way,
but anyway, putting aside developer experience feelings here for our solo project 22,
the prepare method itself is mostly straightforward. First,
fn prepare(&mut self) {
let mut specs_to_prepare: HashSet<Spec> = self
.sound_by_id
.values()
.map(|v| to_hashable_spec(&v.spec))
.collect();
for spec in self.music_by_id.values().map(|v| to_hashable_spec(&v.spec)) {
specs_to_prepare.insert(spec);
}
I discovered while working on this that you can't do something like
hashset_a.union(&hashset_b).difference(hashset_c)
which I find really un-ergonomic and annoying, but that's why the above
code grabs out the values from one hash in one way, then inserts the
rest. Maybe I missed a method in the documentation for HashSet
but I don't think I did. Once we've got the specs though, the next step
is to drop anything we don't need anymore that we might have prepared
as part of another scene.
let mut already_exist = HashSet::new();
self.buckets.retain_mut(|bucket| {
let exists = specs_to_prepare.contains(&bucket.spec);
if exists {
already_exist.insert(bucket.spec.clone());
}
exists
});
While we clean it out, we can collect stuff that we already have a bucket for
which will allow us to skip the semi-expensive process to make the new bucket.
The interesting thing I discovered while writing this next block of code is that
the call to open_device_stream doesn't take &self
but just self. So it consumes the device in order to open
the stream. Maybe this should be expected because that return type is an
AudioStreamOwner but anyway. The code feels a
little gross, but at the very least I'm happy about my use of Sets here:
let ctx = &mut *self.context.borrow_mut();
for spec_needs_bucket in specs_to_prepare.difference(&already_exist) {
let mut streams = Vec::with_capacity(self.poolsize);
for _ in 0..self.poolsize {
let device = ctx.audio.default_playback_device();
let stream = SfxStream {
stream: device
.open_device_stream(
Some(AudioSpec {
freq: Some(spec_needs_bucket.freq),
channels: Some(spec_needs_bucket.channels),
format: Some(spec_needs_bucket.format),
})
.as_ref(),
)
.expect("could not open logical device for spec"),
free_at: None,
};
streams.push(stream);
}
self.buckets.push(Bucket {
spec: *spec_needs_bucket,
streams,
})
}
}
As per usual, I'm not that happy about my ubiquitous use of expect and friends rather
than a proper Result type, but as this is only our second rust game project, I'm cutting
myself some slack. Plus we could always have a follow up blog post to clean up the game engine code here
before we use it in the next game!
Anyway, with the prepare method done. We just need to actually use it. I don't want each scene to have to remember to call prepare, I'd prefer they just ask for things to be loaded. 23 So we can modify the game initialization code slightly:
impl BackendEventLoop for EventLoopSDL3 {
fn run(&mut self, game: &mut Game, game_context: &mut GameContext) {
let scene = game.scene.as_mut();
if let Some(scene) = scene {
scene.init(game_context);
}
// initialize the audio pool if the scene has queued things up
let audio = game_context.audio.as_mut();
if let Some(audio) = audio {
audio.prepare();
}
'running: loop {
...
and then we can update where we swap scenes to ensure that the audio is prepared before the scene tries to potentially use it:
...
game.update(game_context);
if let Some(mut next_scene) = game_context.next_scene.take() {
next_scene.init(game_context);
game.scene = Some(next_scene);
game.reset_for_next_scene();
let audio = game_context.audio.as_mut();
if let Some(audio) = audio {
audio.prepare();
}
}
game.draw(game_context);
if game_context.shutdown_flag {
break;
}
Now, we've enabled the scenes to run code like this during the initialization step:
fn init(&mut self, game_context: &mut GameContext) {
let Some(ref mut asset_loader) = game_context.asset_loader else {
return;
};
asset_loader.ensure_texture_spritesheet_loaded(TEXTURE_ID_TITLE_BG);
asset_loader.ensure_texture_spritesheet_loaded(TEXTURE_ID_LEEKSHEET);
asset_loader.ensure_texture_spritesheet_loaded(TEXTURE_ID_FONTSHEET);
let Some(ref mut audio) = game_context.audio else {
return;
};
audio.load_sfx(SFX_ID_BLIP);
}
Which, due to the prepare step, allows the update steps to do things like this:
fn update(&mut self, ticks: u32, game_context: &mut GameContext) {
...
if self.start_game_btn.clicked && game_context.next_scene.is_none() {
game_context.audio.as_mut().map(|audio| {
audio.play_sfx(SFX_ID_BLIP);
});
game_context.queue_level();
self.start_game_btn.clicked = false;
}
...
}
And then when we press the button, the blip noise happens, sort of like before, but without
the test code of play_sfx sitting at the window event processing level. So that's
great, but we need two more things before we're done with the audio related stuff.
- We need more than a blip noise.
- I'd like to load a entire folder for music playing purposes
The easy one is the first, let's take stock of what we should get some sounds for:
- The blip can be used for selection, like clicking a button or a turret
- We should have a cancel type noise for when you don't place a turret after selection
- We need a damage noise for when the base gets hit
- We need a damage noise for when the enemy gets hit
- We should have a distinct noise per turret shot type
- We need a sad noise for when we go to the game over scene
- We need a sad noise for when we quit
- We need a happy noise for when we continue after a game over
- I've got a funny idea for a song to play on game load
First. Let's get my funny idea going. I've got a couple of wavs to add in so the usual song and dance to define IDs happens.
pub const SFX_ID_MEME: SfxId = SfxId(1); pub const MUSIC_ID_PACHEBAL: MusicId = MusicId(0);
and I'll spare you the update to the two *_id_to_relative_path methods for brevity. The
tricky thing is that we can't just toss play_sfx in the update method willy nilly. If we
don't guard it a bit, we'll end up asking the game to play a sound multiple times within a single
frame and that'll be no good. Thankfully, we already have the ReadyState that we can
use as a simple timer for this sort of thing:
pub struct TitleScene {
...
played_intro: ReadyState,
play_music: ReadyState,
}
... in update ...
match self.play_music {
ReadyState::Ready => {
game_context.audio.as_mut().map(|audio| {
audio.play_music(MUSIC_ID_PACHEBAL);
});
self.play_music = ReadyState::Cooldown {
wait_for: 14 * 60, ticks_waited: 0,
};
}
_ => {}
}
// similar sort of thing for played_intro, but with a wait_for of u32::MAX
This is a teensy bit messy I suppose since I didn't expose an easy way to get the length of a particular sound. I should probably tweak the music related methods to do something like queue up the music to play one after the other or something later. For this particular case where I know what the length is explicitly, this will work just fine:
the audio might be a bit quietI just think it's funny.
Anyway, there is a slight problem that I noticed here. It looks like when I swap scenes, the music keeps playing unless I happened to swap before it ended and triggered another play. This implies that dropping the audio owner is either not happening when we swap scenes (the level scene does not load any audio yet!) or, that we simply never "unload" anything and so things hang around.
Tossing in a debug line to the retaining code:
self.buckets.retain_mut(|bucket| {
let exists = specs_to_prepare.contains(&bucket.spec);
eprintln!("retaining spec {} {:?}", exists, bucket.spec);
if exists {
already_exist.insert(bucket.spec.clone());
}
exists
});
I can see the log when I swap scenes happily spit out two logs.
Well that's all well and good. But I suppose I should pause any existing streams
when we run prepare because if the two scenes can share buckets that's
good, but we don't want to have one screens' music playing over the other.
self.buckets.retain_mut(|bucket| {
let exists = specs_to_prepare.contains(&bucket.spec);
if exists {
already_exist.insert(bucket.spec.clone());
}
for SfxStream { stream, ..} in &bucket.streams {
stream.pause();
}
exists
});
We can loop without having to check if a stream is playing anything because, as noted on the wiki pausing a paused stream is a no-op! Though, the wiki doesn't seem to say what happens if you pause a stream, then put more data on it and play. Will it mix it together? I suppose I don't need to worry about it though, our claiming system will prevent a channel that's still got data in it from playing unless it forces a grab due to too many things playing at once. We should only ever play 2 music tracks at most, and I've set 8 as the number of streams to open per bucket, so we should be fine.
Memes aside, I can use sfxr to make the rest of the effect sounds. A slightly lower frequency will give us a good deselect sound, and basically wherever in the code that we've consumed a right click, we can play it like so:
if game_context.mouse_context.right_clicked {
match &self.current_action {
Some(PlayerAction::PlaceTower(tower)) => {
self.money = self.money.saturating_add(tower.cost);
game_context.mouse_context.consume_right_click();
self.current_action = None;
game_context.audio.as_mut().map(|audio| {
audio.play_sfx(SFX_ID_DESELECT);
});
}
_ => {}
}
}
For the base and enemy hits, two new constants for the wav files:
pub const SFX_ID_ENEMY_HIT: SfxId = SfxId(3); pub const SFX_ID_BASE_HIT: SfxId = SfxId(4);
Then, we just update the update function where we loop over the list of
enemies to track whether or not they hit the base or we hit them. Rather than spam
a whole bunch of effects at once, I think we'll be kinder to the player's ears if we
just play it once per frame, rather than once per hit:
let mut base_hit = false;
for enemy in &mut self.enemies {
enemy.update(ticks);
enemy.walk(&self.path);
if let Some(damage) = enemy.attack(&self.path) {
self.base.health.damage(damage);
base_hit = true;
if self.base.health.is_dead() && game_context.next_scene.is_none() {
game_context.queue_game_over();
}
}
...
}
if base_hit {
game_context.audio.as_mut().map(|audio| {
audio.play_sfx(SFX_ID_BASE_HIT);
});
}
The only remaining sound effect we need are the turret noises. This one is slightly trickier, but not by much. We just need to make sure that each type of turret tracks which sound effect id it should play, that way we can easily have each one do the right thing if it's firing. Since our intentional is for the turrets to be a sort of light to heavy type thing, let's have the sound effects be named after that:
pub const SFX_ID_TURRET_HEAVY : SfxId = SfxId(5); pub const SFX_ID_TURRET_LIGHT : SfxId = SfxId(6); pub const SFX_ID_TURRET_MEDIUM : SfxId = SfxId(7);
Then it's just a matter of first updating the struct:
struct Tower {
...
sound: SfxId,
}
fn basic(position: Rect) -> Self {
Self {
...
sound: SFX_ID_TURRET_MEDIUM,
}
}
fn miku(position: Rect) -> Self {
...
base.sound = SFX_ID_TURRET_MEDIUM;
base
}
fn rin(position: Rect) -> Self {
...
base.sound = SFX_ID_TURRET_LIGHT;
base
}
fn luka(position: Rect) -> Self {
...
base.sound = SFX_ID_TURRET_HEAVY;
base
}
Even though the base turret and Miku share a sound id, I figure it's better to name be consistent with having the different turret type builders set the sound property. If we were to add in a new one and copy the miku function to get started, we'd have to remember to set the sound property and could end up not doing it. Which would result in a bug. Consistency is nice, even if it's a bit redundant. Besides, things like that feel like something that potentially a compiler could notice and optimize out.
Once each turret knows what audio it should play, then we just need to gather up any noises that would have triggered while we shot a bullet out and then play them:
let mut turret_sounds = HashSet::new();
for enemy in &mut self.enemies {
...
for tidx in tower_indices.iter() {
let tower = &mut self.towers[*tidx];
if tower.can_shoot() {
let target =
layout.cell_rect(enemy.position.y as usize, enemy.position.x as usize);
self.projectiles
.push(tower.projectile(&layout, target.center()));
tower.cooldown();
turret_sounds.insert(tower.sound);
}
}
...
}
if turret_sounds.len() > 0 {
for sound_id in turret_sounds {
game_context.audio.as_mut().map(|audio| {
audio.play_sfx(sound_id);
});
}
}
It's kind of amazing on how adding all these sounds in really makes things feel more lively and game-like. So now, things are quite lively:
I bumped up Teto's speed from 120 to 60 for her game tick countdown by the way. In case you're wondering why the Tetos are staggered. This is starting to feel like a real game now, almost sort of kind of. It's still tremendously unbalanced. But that's fine. Our focus is just on the sound right now, and the remaining things are the game over screen noises, and then background music when we're defending our base. These are going to be somewhat related, as I'm thinking about our pools we've made.
I glossed over the play_music method before, because it was basically the same as the sfx one.
But I'd like to change that. We're only ever going to play one song at a time, which means re-opening a
logic device probably isn't actually that much of a hit to things if we do it with say, a "track A and B"
approach. Specifically, I think we should have two streams, then crossfade between the two as needed to
play music one after the other. We can still load up all the sounds into the hashmap just we did before,
but actually playing them on a stream might not be too bad to do on the fly.
Let's put aside crossfading for now. I think we only need to change up a couple things to make simple
swapping possible. First, a couple additions to the SDL3Sounds struct
enum MusicTrack {
A,
B,
}
struct SDL3Sounds {
...
current_track: MusicTrack,
music_streams: [Option<SfxStream>; 2],
...
}
Then, if we tweak the play_music to ignore the buckets, and
instead, to just load a device and play the wav data on the current track…
fn play_music(&mut self, id: MusicId) {
let Some(sound_data) = self.music_by_id.get(&id) else {
return;
};
let (play_index, pause_index) = match self.current_track {
MusicTrack::A => (0,1),
MusicTrack::B => (1,0),
};
let now = Instant::now();
self.music_streams[play_index] = Some({
let ctx = &mut *self.context.borrow_mut();
let device = ctx.audio.default_playback_device();
let mut stream = SfxStream {
stream: device
.open_device_stream(
Some(AudioSpec {
freq: Some(sound_data.spec.freq),
channels: Some(sound_data.spec.channels.into()),
format: Some(sound_data.spec.format),
})
.as_ref(),
)
.expect("could not open logical device for spec"),
free_at: Some(now),
};
stream.claim(&sound_data, now);
stream
});
match &mut self.music_streams[pause_index] {
None => {},
Some(SfxStream {stream, ..}) => {
let _ = stream.pause();
}
}
self.current_track = match self.current_track {
MusicTrack::A => MusicTrack::B,
MusicTrack::B => MusicTrack::A,
};
}
Then we can do something kind of fun with the game over screen. I'm thinking it'd be fun to have the song being played change depending on which button you hovered over. This is pretty easy. First, we tweak the struct to track the music ID we want to play versus what we ARE playing:
pub struct GameOverScene {
...
desired_music: MusicId,
current_music: MusicId,
}
impl Default for GameOverScene {
fn default() -> GameOverScene {
...
GameOverScene {
...
desired_music: MUSIC_ID_TETO,
current_music: MUSIC_ID_MOON, // start off wrong to trigger it
}
}
}
Then, the scene just needs to queue the loads, and call the play as needed with whatever the desired track ID is:
impl Scene for GameOverScene {
fn init(&mut self, game_context: &mut GameContext) {
...
let Some(ref mut audio) = game_context.audio else {
return;
};
audio.load_sfx(SFX_ID_BLIP);
audio.load_music(MUSIC_ID_MOON);
audio.load_music(MUSIC_ID_TETO);
}
fn update(&mut self, ticks: u32, game_context: &mut GameContext) {
...
if self.give_up_btn.hovered {
self.miku.current_frame = 1;
self.desired_music = MUSIC_ID_TETO;
} else if self.try_again_btn.hovered {
self.miku.current_frame = 2;
self.desired_music = MUSIC_ID_MOON;
} else {
self.miku.current_frame = 0;
}
if self.desired_music != self.current_music {
game_context.audio.as_mut().map(|audio| {
audio.play_music(self.desired_music);
self.current_music = self.desired_music;
});
}
...
}
This works out surprisingly well I think (turn your sound on): 24
I'm banking on the fact that folks won't wait around too long, since neither of the songs are actually full, and I'm not going to bother looping them. You're supposed to get back to the game and leave! Though, when you leave, I think one last little goodbye song would be best:
pub struct ShuttingDownScene {
miku: SpriteInfo,
countdown: ReadyState::Cooldown {
ticks_waited: 0,
wait_for: 360,
},
music_started: bool,
}
impl Scene for ShuttingDownScene {
fn init(&mut self, game_context: &mut GameContext) {
...
let Some(ref mut audio) = game_context.audio else {
return;
};
audio.load_music(MUSIC_ID_QUIT);
}
fn update(&mut self, ticks: u32, game_context: &mut GameContext) {
if !self.music_started {
game_context.audio.as_mut().map(|audio| {
audio.play_music(MUSIC_ID_QUIT);
});
self.music_started = true;
}
...
}
And this, (note the tweak to wait_for) allows us to play a few seconds
of the silly song before the program exits:
We're nearly done with the audio related work now. The last thing that remains is the background music during gameplay. I don't think I've shown it yet, but just like the sound effects, I've also got a relative path loading function made:
#[derive(PartialEq, Copy, Debug, Clone, Hash, Eq)]
pub struct MusicId(pub usize);
pub const MUSIC_ID_PACHEBAL: MusicId = MusicId(0);
pub const MUSIC_ID_MOON: MusicId = MusicId(1000);
pub const MUSIC_ID_QUIT: MusicId = MusicId(1001);
pub const MUSIC_ID_TETO: MusicId = MusicId(1002);
// Enable loading arbitrary songs via ids above 1
pub fn music_id_to_relative_path(id: MusicId) -> PathBuf {
let base = PathBuf::new().join("audio");
let wavs = PathBuf::new().join("audio").join("cc-vocaloid");
match id {
MUSIC_ID_PACHEBAL => base.join("Miku Pachebal.wav"),
MUSIC_ID_MOON => base.join("miku fly to moon.wav"),
MUSIC_ID_QUIT => base.join("selectedQuit.wav"),
MUSIC_ID_TETO => base.join("tetowins.wav"),
_ => wavs.join(format!("{}.wav", id.0)),
}
}
And, as you can see, I'm thinking that we'll allow for arbitrary song
playing based on whatever might be in the cc-vocaloid folder. The main
trouble though is I'm unsure how to deal with not knowing how long each
track is. I suppose we can add a new method to the Audio interface
and expose a way to ask how long a given ID is, though I'm somewhat
reluctant to do so for some reason. But, let's put aside the excuse to
procrastinate about what "good interfaces" look like, and just make it work
so that I can setup a proper "next song" kind of countdown.
use std::time::Duration;
pub trait Audio {
...
fn music_duration_seconds(&self, id: MusicId) -> Duration;
}
The nice thing is that we already have all the pieces to make this super quickly:
impl Audio for SDL3Sounds {
fn music_duration_seconds(&self, id: MusicId) -> Duration {
let Some(sound_data) = self.music_by_id.get(&id) else {
return Duration::from_secs_f64(0.0);
};
spec_duration(&sound_data.spec)
}
...
and now we only really need to tweak the level struct a teensy bit to get the files loaded up on init and then kick start the audio playing and counting down. I suppose if someone dumps a ton of stuff into the folder then it might blow out their ram, but as long as they dont load more than their rams worth of wav files in for background music, it should be fine.
pub struct LevelScene {
...
bg_music_ids: Vec<MusicId>,
...
}
In order to handle these more dynamic ids though, we need to add a new method to the audio backend.
fn load_bg_music(&mut self) -> Vec<MusicId> {
let user_wav_folder = self.base_path.join("audio").join("cc-vocaloid");
let mut ids = Vec::new();
if let Ok(results) =
glob_directory(user_wav_folder, Some("*.wav"), GlobFlags::CASEINSENSITIVE)
{
for path in &results {
let filename = path.file_name();
if filename.is_none() {
continue;
}
let filename = filename.unwrap().to_str().unwrap();
let desired_id = filename[0..filename.len() - 4].parse::<usize>();
if desired_id.is_ok() {
let music_id = MusicId(desired_id.unwrap());
ids.push(music_id);
self.load_music(music_id);
}
}
}
ids
}
I suppose technically I don't have to restrict the filenames to numbers,
but I find it somewhat useful to do so. For one, it means I don't have to have a
stateful "next id" number going up in the background. Two, a user can pick the order
they want the songs to play in. It took a minute to figure out how to use the glob_directory
method, but the examples
in the sdl3-rs repo were helpful. Though I don't really understand why you would use
enumerate directory for anything, you can't append to a list or anything as you traverse
like we do above.
Anyway, calling this in init and assigning the result to the new vector makes all those
ids available to us to call one by one.
fn init(&mut self, game_context: &mut GameContext) {
...
self.bg_music_ids = audio.load_bg_music();
}
However, we need to track what's playing and the cooldown needed to trigger that in the level scene:
pub struct LevelScene {
...
bg_music_ids: Vec<MusicId>,
now_playing: Option<usize>,
time_to_play_next_song: Option<ReadyState>,
}
I think that it would probably be a good idea to wrap these up within the Audio interface itself,
or maybe as a sort of MusicPlayer struct at some point. I'll consider this out of
scope for this post though. As much fun as it would be to extend this section even further, I'd
like to publish this post within a reasonable time. Along that vein, I'm not particularly happy
with this code to advance to the next song. But it works, and we can always refactor it in the
future.
fn update_music(&mut self, ticks: u32, game_context: &mut GameContext) {
if self.bg_music_ids.len() <= 0 {
return;
}
match self.time_to_play_next_song {
None => {
// Initial load, just start playing.
let music_id = self.bg_music_ids[0];
self.time_to_play_next_song = game_context.audio.as_mut().map(|audio| {
// do this in the map so that if we cant load the audio we dont set the now playing
self.now_playing = Some(0);
let duration = audio.music_duration_seconds(music_id).as_secs();
audio.play_music(music_id);
ReadyState::Cooldown {
wait_for: duration as u32 * 60, // roughly 60 ticks per second.
ticks_waited: 0,
}
});
}
Some(ready_state) => {
let next_state = advance_ready_state(ready_state, ticks);
self.time_to_play_next_song = Some(next_state);
match (next_state, self.now_playing) {
(ReadyState::Ready, Some(bg_music_ids_idx)) => {
let next_idx = (bg_music_ids_idx + 1).rem_euclid(self.bg_music_ids.len());
let music_id = self.bg_music_ids[next_idx];
self.time_to_play_next_song = game_context.audio.as_mut().map(|audio| {
// do this in the map so that if we cant load the audio we dont set the now playing
self.now_playing = Some(next_idx);
let duration = audio.music_duration_seconds(music_id).as_secs();
audio.play_music(music_id);
ReadyState::Cooldown {
wait_for: duration as u32 * 60, // roughly 60 ticks per second.
ticks_waited: 0,
}
});
}
_ => {}
}
}
}
}
Calling this function from the regular update method of the scene fires up the music for us
and loops the available tracks as you'd expect. And we can happily say that we now have audio in a rust
game. Which was one of the main things I wanted to get out of this project. It's unfortunate that I ran
out of steam a bit, but I think we can revisit the audio interfaces with SDL3 and making a useful and
re-usable effects and background music manager in the future now that it's a bit demystified and less
scary than before. 25
So, what's left? Well, as lively as having the music in the game is, it also begs an important question. Do we make a configuration screen or an in-game audio slider to control the volume of everything? As much as I'd like to, no. I don't think we will. This game has stretched quite a bit, but I'm getting the itch to move onto the next thing, and the post is already almost a month late for my own internal deadline. So, no, there's only one more thing I feel is really really necessary in this project.

Game tuning↩
As noted multiple times, the game isn't really balanced well. Even though I tossed in a small amount of speed up of enemies, it doesn't really matter if towers hit hard and fast enough that they can always take the enemies out without trouble. I obviously don't want to make it really easy to lose either, but not having any threat of failure is boring.
So what's the right way to tune the game here? Let's take stock of the current situation first.
- Enemy movement Enemies move once every 60 ticks, the current path is 39 blocks long, which means it takes 2340 ticks to get to the base. Which, since there's about 60 ticks a second, means it takes 39 seconds for an enemy to get there. That's a long time.
- Enemy health Enemies have 10 HP to start, and with 39 seconds to go to the base, basically any turret is going to eradicate them before they get there given the current damage output of each.
- Light turret The weakest turret does 3 damage per shot, and fires every 15 ticks. So it's DPS is 12 (3 damage 4 times). The turret also costs 15, which means that at the start of the game the player can buy 3 and stack them up at the beginning of the path. So it takes less than a second to obliterate every enemy that spawns before they can even move. Thrilling gameplay.
- Money The player starts with 50, but every enemy kill provides 10 more bucks for the bank. Which means the economy of the game is all kinds of off. You toss one turret down for 15 and then kill off an entire wave with it for another 100? You can put more turrets down and never run out or have to worry.
The enemies dying too quickly seems like a simple fix, we can just increase their health. Multiplying it by three gives an enemy enough health to survive walking through a single light turret's DPS, meaning a player needs at least a couple turrets along the way or to place them where they can get in multiple shots as the enemy moves across the path.
Let's also tweak the scaling per round. Right now we're doing this:
fn start_next_round(&mut self) {
match self.ready_state {
ReadyState::Ready => {
self.round = self.round.saturating_add(1);
self.spawned = 0;
self.enemies_per_round = self
.enemies_per_round
.saturating_add(self.enemies_per_round / 3);
self.spawn_in_ticks = (self.spawn_in_ticks - 5).max(10);
// TODO maybe increase damage by 1 per every 5 or so rounds?
// TODO maybe increase speed by ? per every 5 rounds or so?
self.cooldown();
}
_ => {}
}
}
The enemy count moves up pretty slowly this way, while (eventually) the spawn rate is fast enough that you end up with just one big blob of enemies walking along. Let's tweak things a bit, we'll make the enemies slightly stronger each round, and every 5 waves we'll increase the spawn rate:
fn spawn(&mut self) -> Option<Enemy> {
if self.spawned >= self.enemies_per_round {
return None;
}
match self.ready_state {
ReadyState::Ready => {
let mut enemy = Enemy::teto(Rect::new(27, 9, 40, 40));
self.spawned = self.spawned.saturating_add(1);
enemy.health.increase(self.round * 2);
Some(enemy)
}
_ => None,
}
}
fn start_next_round(&mut self) {
match self.ready_state {
ReadyState::Ready => {
self.round = self.round.saturating_add(1);
self.spawned = 0;
self.enemies_per_round = self
.enemies_per_round
.saturating_add(2);
if self.round.rem_euclid(5) == 0 {
self.spawn_in_ticks = (self.spawn_in_ticks - 10).max(10);
}
self.cooldown();
}
_ => {}
}
}
A simple linear increase in enemies will probably work better than the bulk boost, and since they'll have a bit more health each time it will give the player something to soak damage into and maybe feel a bit of pressure. I'm not sure if the spawn rate is good or not, but I feel like if I go less than that it might still have that density problem too quickly. So I'll leave it here for now.
However, even with their new ability to survive a little longer, the rounds lasting nearly 40 seconds is way too long. It takes forever for the enemies to spawn and they move pretty slow. Since the path is pretty long, we can probably stand to bump that up, let's make them twice as fast.
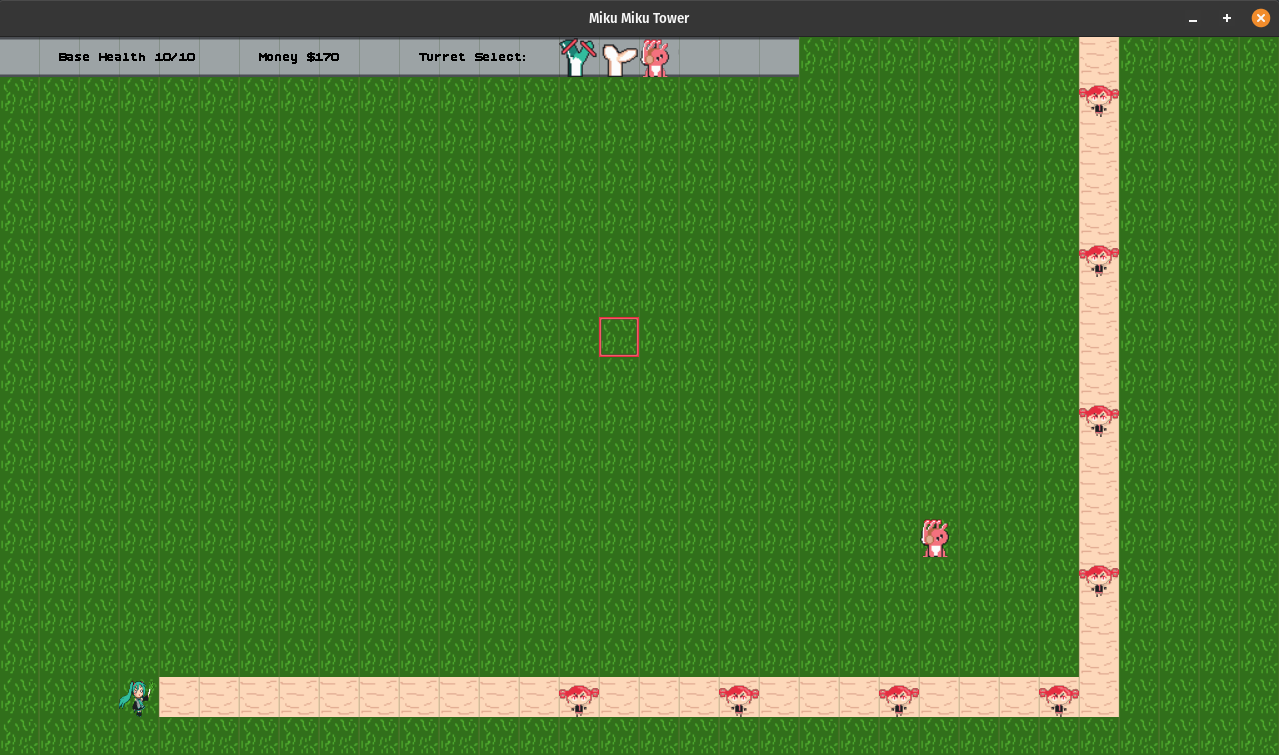
Doing this lets a single heavy turret win the first round, but after that they start to slip past. Which means that the enemy has a fair shot of killing your base unless you build more than a single turret. It also feels better, more pressure and "oh no they're coming!" kind of thoughts pop into your head.
Most of our changes have been to the enemies, let's tweak the player's options now. The light turret is too strong with its 12 damage per second, let's cut that in half to 6 DPS. This means that, unless your light turret is guarding your base, it won't be able to do enough damage to stop an enemy before its out of its current range. Maybe that's a bit harsh, but the smaller turrets are really meant to be there to soften an enemy up before a harder hit can take it out so this feels reasonable to me.
The medium turret, if you place it so it has a decent amount of coverage on the path, can take down 3 enemies fully by itself before it gets overwhelmed and lets the 4th slip through. So the combination of a light and a medium turret should let a player get through the first round easily enough. So this feels reasonably balanced right now, similarly, a heavy turret placed in the same way can handle round 1 all by itself.
Money-wise, we gain $10 every kill, which means you only have to kill 2 turrets before you can buy a light turret. With the new balancing you do have to place them properly to take advantage of that, with the first round passed, that's 6 more turrets which means 36 more DPS that potentially all gets hammered in on one spot. Considering round 2's enemies will each have 32 health, they'll all get smashed easily if you just dump everything in one place. It won't be for a few rounds before anything can get through that and by then you might have clustered more turrets in.
So let's try to cut that back by scaling the money down to $5 every kill. The player will only gain $50 per round, and with the costs of the turrets being 15, 20, and 30, they'll have to make at least a few choices to decide if they want to save up for 2 big ones or mix and match the smaller ones. Given that a single heavy turret can take on a round, we can tweak these costs a bit more! We can make the heavy turret cost 40 and the medium 25. This will mean that you can only buy one heavy turret at the start of the game and then will need to wait to kill a few before you can fix any mistakes you might have made with placement.
Before we get into adjusting the range of the turrets (which impacts how useful the overall grid is and what strategy goes into placement for the player), let's look at some example numbers for the current scaling. For each round where the spawn rate increases, the total HP pool is what we care about:
- 32 hp * 12 enemies = 384 HP
- 40 hp * 20 enemies = 800 HP
- 50 hp * 30 enemies = 1500 HP
- 60 hp * 40 enemies = 2400 HP
- 70 hp * 50 enemies = 3500 HP
If we write this out as an equation, it's basically 300 + 80r + 4r2, which is quadratic and is going to grow pretty fast. The question is how well do our turrets keep up? Incoming only increases with kills, and so its linear if we're tracking how much we can get per round:
- $60 total so far 110 (starting $50 included)
- $100 total $450
- $150 total $1100
- $200 total $2000
- $250 total $2940
Assuming the player only ever buys heavy turrets, then they've got 73 turrets which is 15 DPS, so that's ~1102 HP per second. That sounds like it might be reasonable compared against the rounds total HP pool, but consider this:
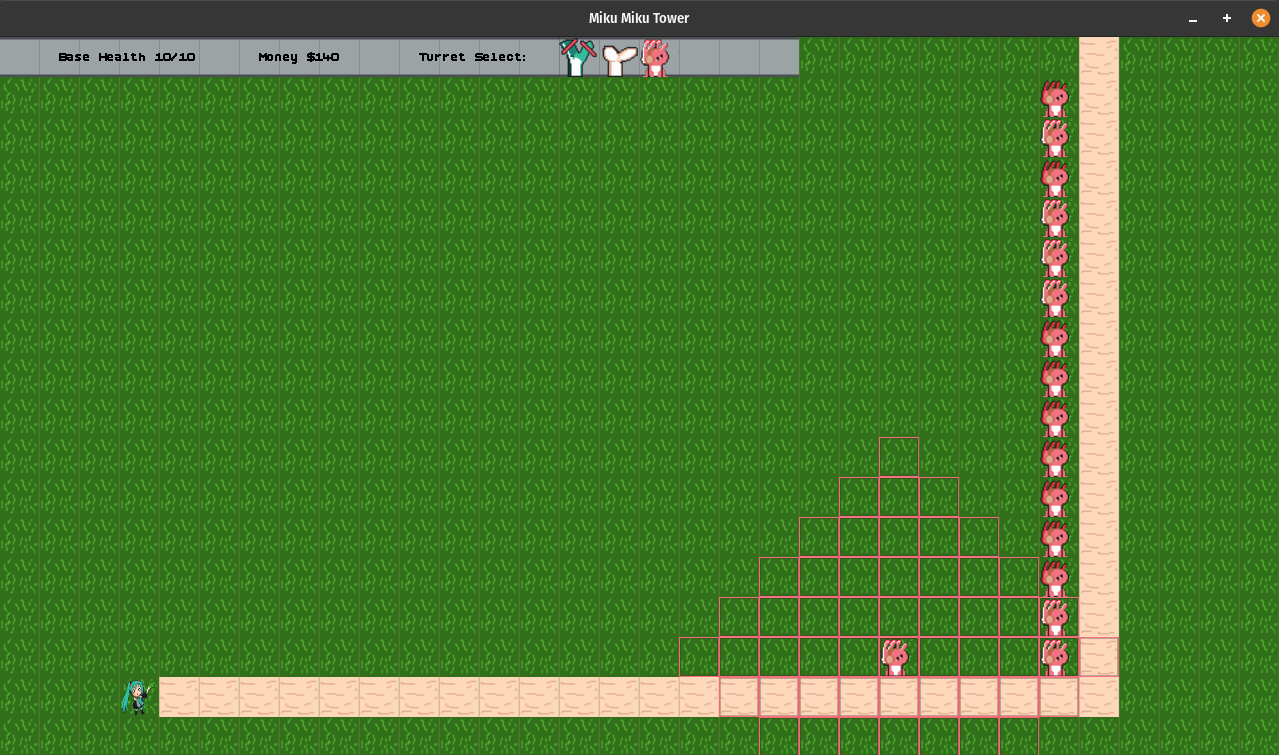
There are 15 spaces along the road where you can get the maximum extent of the turret's usage of 9 spaces. Technically, you can place the turret directly on the road (they don't block the enemies) for 10, but most players might not realize that for a while. So, you've got 1500 health that a turret can maximally chew through by itself if you've filled in all the spaces with turrets. That will last for a while, but not forever, and it requires optimal play and placement. No matter what you do though, quadratic grows more than linear and you will fail eventually.
Most importantly though, there's a huge swath of grass that you would never place a turret on because they'd never be in range of the enemies. So we really need to tweak the range of the turrets to provide some variety, not just for fun, but because if we don't then a player who puts down a bunch of small turrets will be upset that they lost sooner than if they had just invested in a larger stat stick. There's no removal of turrets once you place them down, so it feels unfair. (I'm too lazy to add in turret removal or upgrades right now).
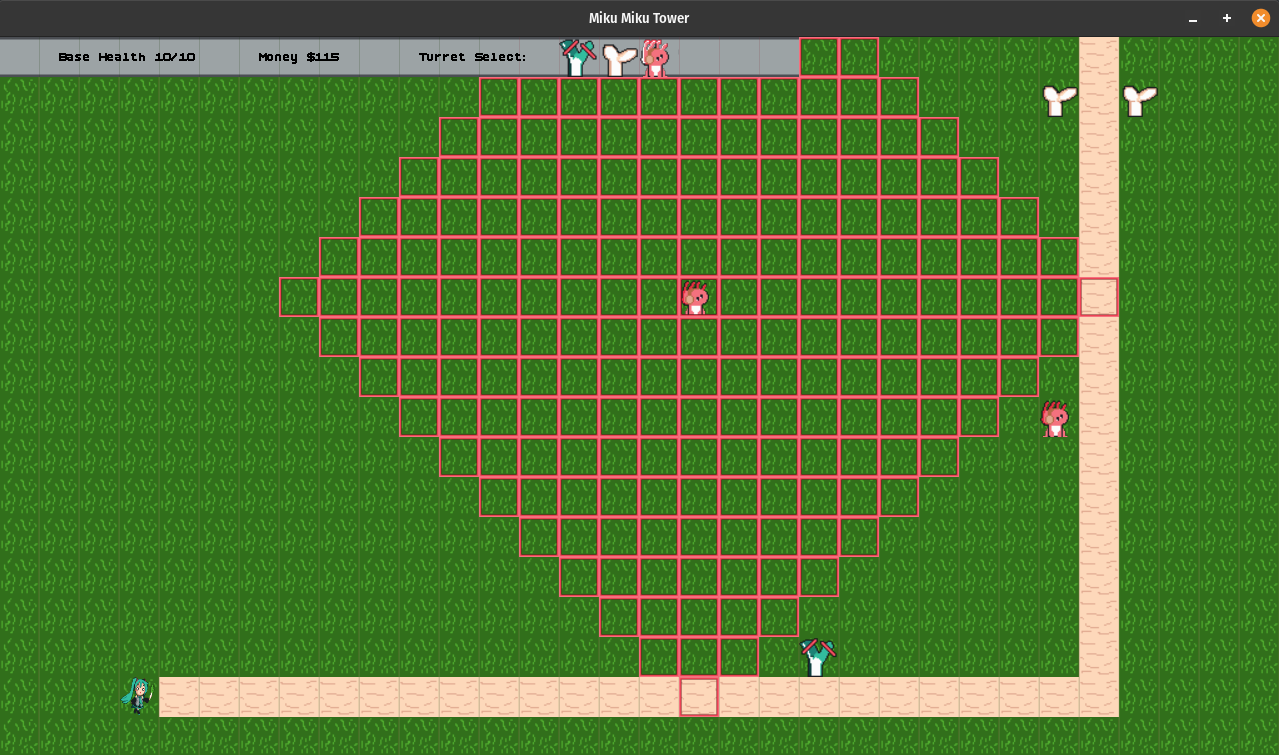
Making the Luka tower's range 10 doesn't quite allow for every space to be filled, but it does increase the overall amount quite a bit. Being able to hit something 10 tiles away makes it feel more like a heavy hitting sniper rifle or cannon kind of guy. Which is fun. Also, if we increase the Miku gun a little too, to 7, while keeping the Rin turret to 5, it means that it encourages putting the faster Rins up closer to the path so they can soften things up, then the mikus can launch, and then when the enemies start getting spongier the snipers can come in with the final blow.
Mind you, the game will collapse eventually, but that's okay. We're not trying to make the perfect game here, we're doing the 20 games challenge and the goal is to learn and that's exactly what we've been doing. To sum up our game balance tuning into a simple little table, this is what's up:
| Changed | Before | After |
| Enemy health | 10 | 30 + round * 2 |
| Reason: Enemy can survive at least one step past a turret, become sponges over time to keep up with turret output. | ||
| Enemies per round | (N + N/3) per round | N + round * 2 |
| Reason: Avoids getting too many enemies at once and having a blob of overlapping enemies early on | ||
| Enemy spawn rate | 120 - (round * 5), min 10 | 120 - ((round / 5) * 10) min 10 |
| Reason: Avoids the 'blob of enemies' issue for longer, but still provides challenge if the player lives long enough. | ||
| Enemy speed | one tile per second | 2 tiles per second |
| Reason: Applies pressure and allows an enemy to slip by turrets if they're not properly placed as rounds increase. | ||
| Enemy reward | $10 per kill | $5 per kill |
| Reason: Instead of being able to buy 6 small turrets and overwhelm the early game, force players to be more strategic since they'll only earn 50 bucks per round (+10 per round) | ||
| Light turret | 12 DPS | 6 DPS |
| Reason: Too strong at first, scaling it back means you use these to soften enemies quickly for larger hits to take them out | ||
| Costs per turret | $20 for medium, $30 for heavy | $25, $40 |
| Reason: Force the user to make harder choices when deciding between saving money or spending it per round. For the long term player, balancing where to place the heavy turrets with how long it takes to save up for them will be fun. | ||
| Turret ranges | All range 5 | Light 5, Medium 7, Heavy 10 |
| Reason: More playable area to place turrets along the path, and encourages placing the lighter turrets up close and personal, while allowing the heavier turrets to be further away which can lead to "oh damn that was close" feelings as the longer range slams an enemy from a distance that was about to kill your base off. | ||
Overall, I don't think this changes or "fixes" the game to actually be fun. But it does at least make it more interesting considering it has 0 upgrades for the turrets or anything like that. But it does make me feel a bit better, enough that I'm happy to move along with things. There's still some refactoring to do, moving the code around and the coding equivalent to pushing your peas around on the plate if you're a weirdo who doesn't like vegetables. 26
But playing with our food aside, we've hit all the major requirements of the game that I wanted to, and it's a Miku monday as I write this, so it feels fitting to publish this today. So let's call it good and let me enjoy my memorial day with some gaming.

Retrospective ↩
We've breached 9100 lines of HTML in this post so far, and hit 4 hours and 30 minutes on the estimated reading time for your average reader who totally understands every thing I say as they read and doesn't have to stop to think about it. So in other words, I've written yet another tome of a post. Comparing it to the other game so far, the nonogram game's two posts surpass it when combined, and the match 3 game blows past it by 2000 or so, but this is still very much on the longer side of things.
Which wasn't what I intended when I started out. I figured that a tower defense game was reasonably small that it wouldn't take up too much of my time and that it would be an easy weekend project over the course of a month. I didn't foresee me spelunking into the cave story rewrite in rust quite so hard, or in having quite so many personal issues over the course of things. The main excuse I can offer for why this took twice as long as expected, besides enjoying the journey of this, was that right before I started creating the level structs for the actual game (so section 6) I visited some family.
Unfortunately, when I returned from visiting my family my flight hit some wind shears which is a real cool thing when your plane starts to tilt unexpectedly and your captain rapidly ascends to get out of the bad area and then takes a second pass on the landing from a different angle. It's wonderful the captain didn't get us killed. It was unfortunate that during the second half of my visit the pollen kicked up and got me very congested. Which then, combined with ascent and descent and pressure changes in the cabin, resulted in me rupturing both middle ears!

Imagine someone blowing a balloon up inside of your head, but there's no where for the balloon to go. So it finds the little cranny known as your ear canal and decides to force itself through the thin membrane there in order to get some fresh air. The watery gurgle in my ear, combined with my own silent screaming as I tried not to bother the other passengers was quite unpleasant. But I was hoping it was just a bad case of plane-ear.
Sadly, 2 days later when my muffled hearing and headaches were bothering me enough that went to go clean my ears revealed the unpleasant amount of dried blood sitting in my ear that I had failed to notice. Head pain, dizziness, and nausea for a few days later and I finally found myself calling up the doctor and getting the good news that it wasn't permanent damage and that with some steroids and ear drops applied 3 times a day for 10 days I could be right as rain in approximately

4 to 6 weeks.
As you may note, my dear reader, today is the 25th of May, about 7 weeks since I was given that prognosis. Over the course of those weeks I have gone to bed early multiple times because of the tinnitus-like screeching in my ear being such a bother that it was quite hard to focus on getting work done on this game. So, the game was very much done in fits and starts of "my ear isn't hurting! time to code!" followed swiftly by "my ear hurts! I'll write about the new code tomorrow!" and then repeating in between the usual activities like work, eating, sleeping, and gaming.
Putting aside the massive pain in the head that was the whole ear situation, Tomodachi Life living the dream also came out. I made an island themed after Operating Systems and it's been a lot of fun to watch the simulations play mad libs with amusing words.
You can probably see why I got a little distracted. It's just fun. So, given my ears hurt, my head was in pain, and my motivation was quite low for around 6 weeks and I had a fun simulation game to laugh at to ease the burden. I hope you'll all forgive me for stretching ~20 days remaining for a project into something more like 40.
Now, as far as the actual project went, I think we did pretty good. While I am being lazy about the whole, not having a configuration to control audio, and that's something I really hate about picking up random indie games off the street myself, I'm going to take a mulligan for this one. I could probably add in a mute button or something with relative ease, but it's just not something that's on my list of TODOs right now. We are TODONE with this project for the time being, and I've already got a few ideas for what could come next.
I'd like to re-use the core mechanics of the game loop we've established here as my own framework, and some refactoring and tweaking to make music management easier would be nice too. I still feel like fonts get away from me, and so spending time to get that wrapped up into an easier thing to deal with would probably go a long way for future projects. But I'm decently happy with the fact that our second game made in rust had a lot of excellent learnings, silly sprites, and gave us an opportunity to dip our toe into the world of "balancing" 27 a game.
SDL3 was pretty easy to use, though there's definitely places I feel I could improve my handling of it. Places where the separation of concerns could be a bit cleaner, and I do feel like I need to figure out shaders or real 3d models at some point. Don't expect anything 3d next time though, we're going to stick to 2d for a while I'm sure. Mainly because I'm not an artist, as you saw, and while I'm proud of my game over sprite for invoking that "d'aww poor thing" feelings in me, the last time I modeled something in 3D was in 2015 for VRChat and it was pretty bad. Think 1990's era looking 3d polygons bad, and not the DK 3d show polygons, but more like, SNES starfox levels of triangular nonsense.
Compared to our previous use of egor, SDL3 feels a bit harder to use for a beginner like me. And I didn't even attempt to think about a level editor this time like we did for the nonogram game because making buttons and controls like sliders and that sort of thing is just harder when you have to do it all from scratch. This was especially keen while balancing the game, as if I had had the ability to just toss a mutable variable into a slider like we did then, it would have made the iteration loop a lot tighter.
I was pretty happy that I got to re-use GridLayout again, and that it's paying off quite a
bit. Though, I was less pleased when I realized I had accidentally made a dependency on the vec2
struct from egor while doing so. It wasn't hard to remove, but it did make me think "man, I should just grab
a generic vector library from somewhere and use that or something". I like being agnostic to libraries as
much as I can, but when it comes to math operations, I feel like other people have sort of solved those issues
well enough that I'm probably not doing myself any favors by not using their work. It's not like I'm
learning anything new when I have to reimplement vector addition for the 3rd or 4th time.
Probably the biggest shoutout here though has got to be to doukutsu-rs because I learned a ton from reading its source. I've read the game programming patterns book/website before that went over frame independent game loops before, but it's another thing entirely to see an actual real example of it. The nuances of catch up, or handling that monotonically increasing counter in a way that enables us to think in game ticks is great to study. Though their multiple backend pattern was even more interesting than that.
That they target different systems, but swap the "backend" was pretty inspirational. As they say, "imitation is the sincerest form of flattery", and I lifted and adapted heavily from their code to make my own. I think that there's still a lot of me to do on that front though, for example, having to "consume" an input from the scene isn't something that I'm sure they have to do, and their input handling it much more mature. It maps from the actual inputs over to controller code that speaks the domain of their game, and if I do something that requires more than just the mouse as input, I should probably study it further to do the same.
The other thing that came to mind is that I might want to look deeper into scripting. It's all well and good to have the whole game hardcoded up front like we did here, but it's certainly less entertaining than if we could load up different paths or levels like we did for the nonogram game. Beyond just having a level format to read in and display, doing something like being able to say "make X do Y" from a non-compiled asset could let us create bigger and better games that maybe have some story to them. I love puzzle games, and they make for fun projects, but an actual story game is more in line with what I actually enjoy playing day to day when I stream, so making something like that would be really cool.
But, this pie in the sky stuff will come along in the future for us, for now, we've got an amusing game themed after the worlds most adorable virtual idol and while it would need a lot of polish to be something I'd want to actually throw in front of my extended family as "hey look at this cool thing I made", I still feel happy enough with it to throw it in front of you! The journey was the point, we learned a lot, and I hope that you try to see how long you can last at least one to see how many rounds it takes before the powers of math crush us all.
Now if you'll excuse me, my ears hurt and one of my OS-tans just divorced the other, so I've got some miis to console:
As always you can play the game for yourself, available on Windows, Mac, and PC here on github